Love this? Save it for later!
Share the inspiration with your friends
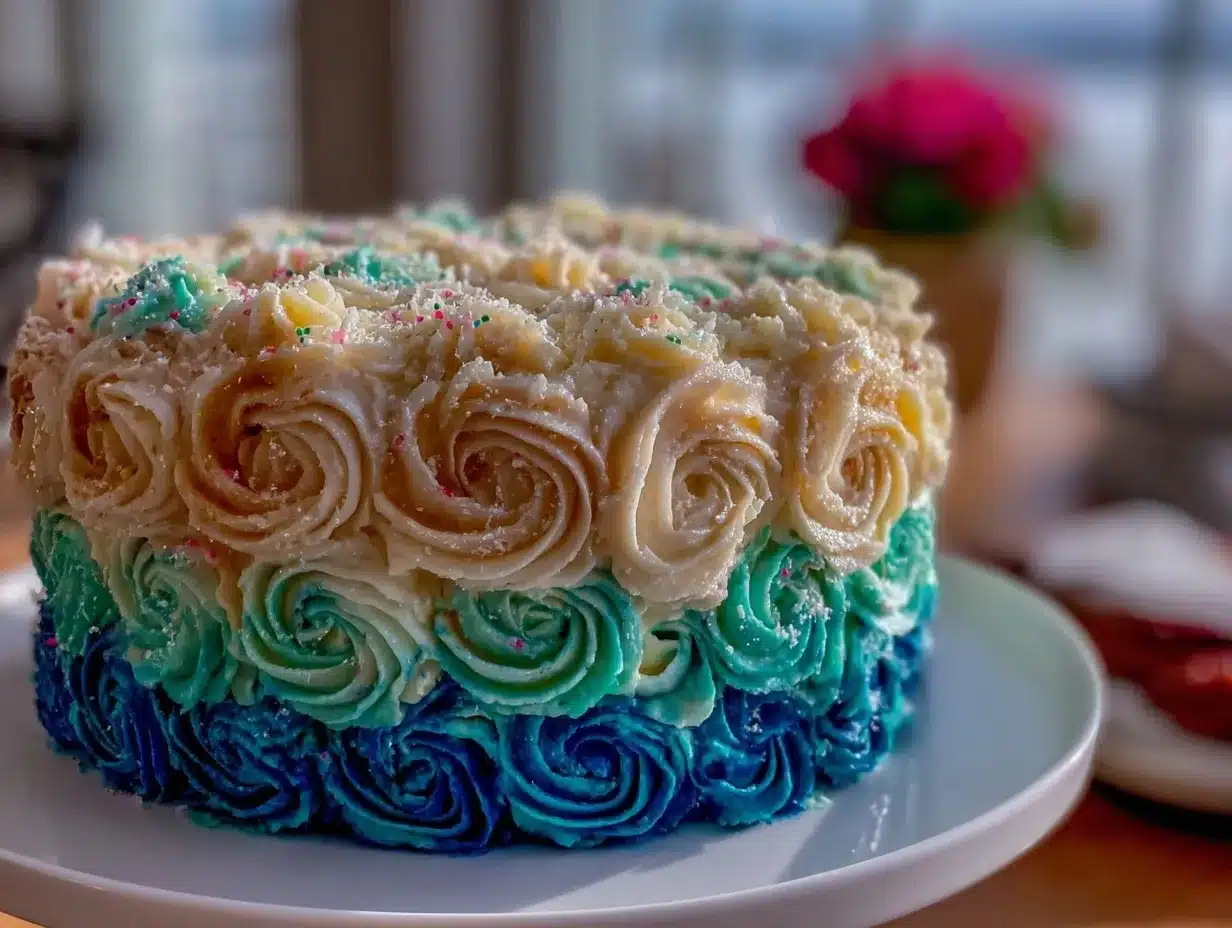
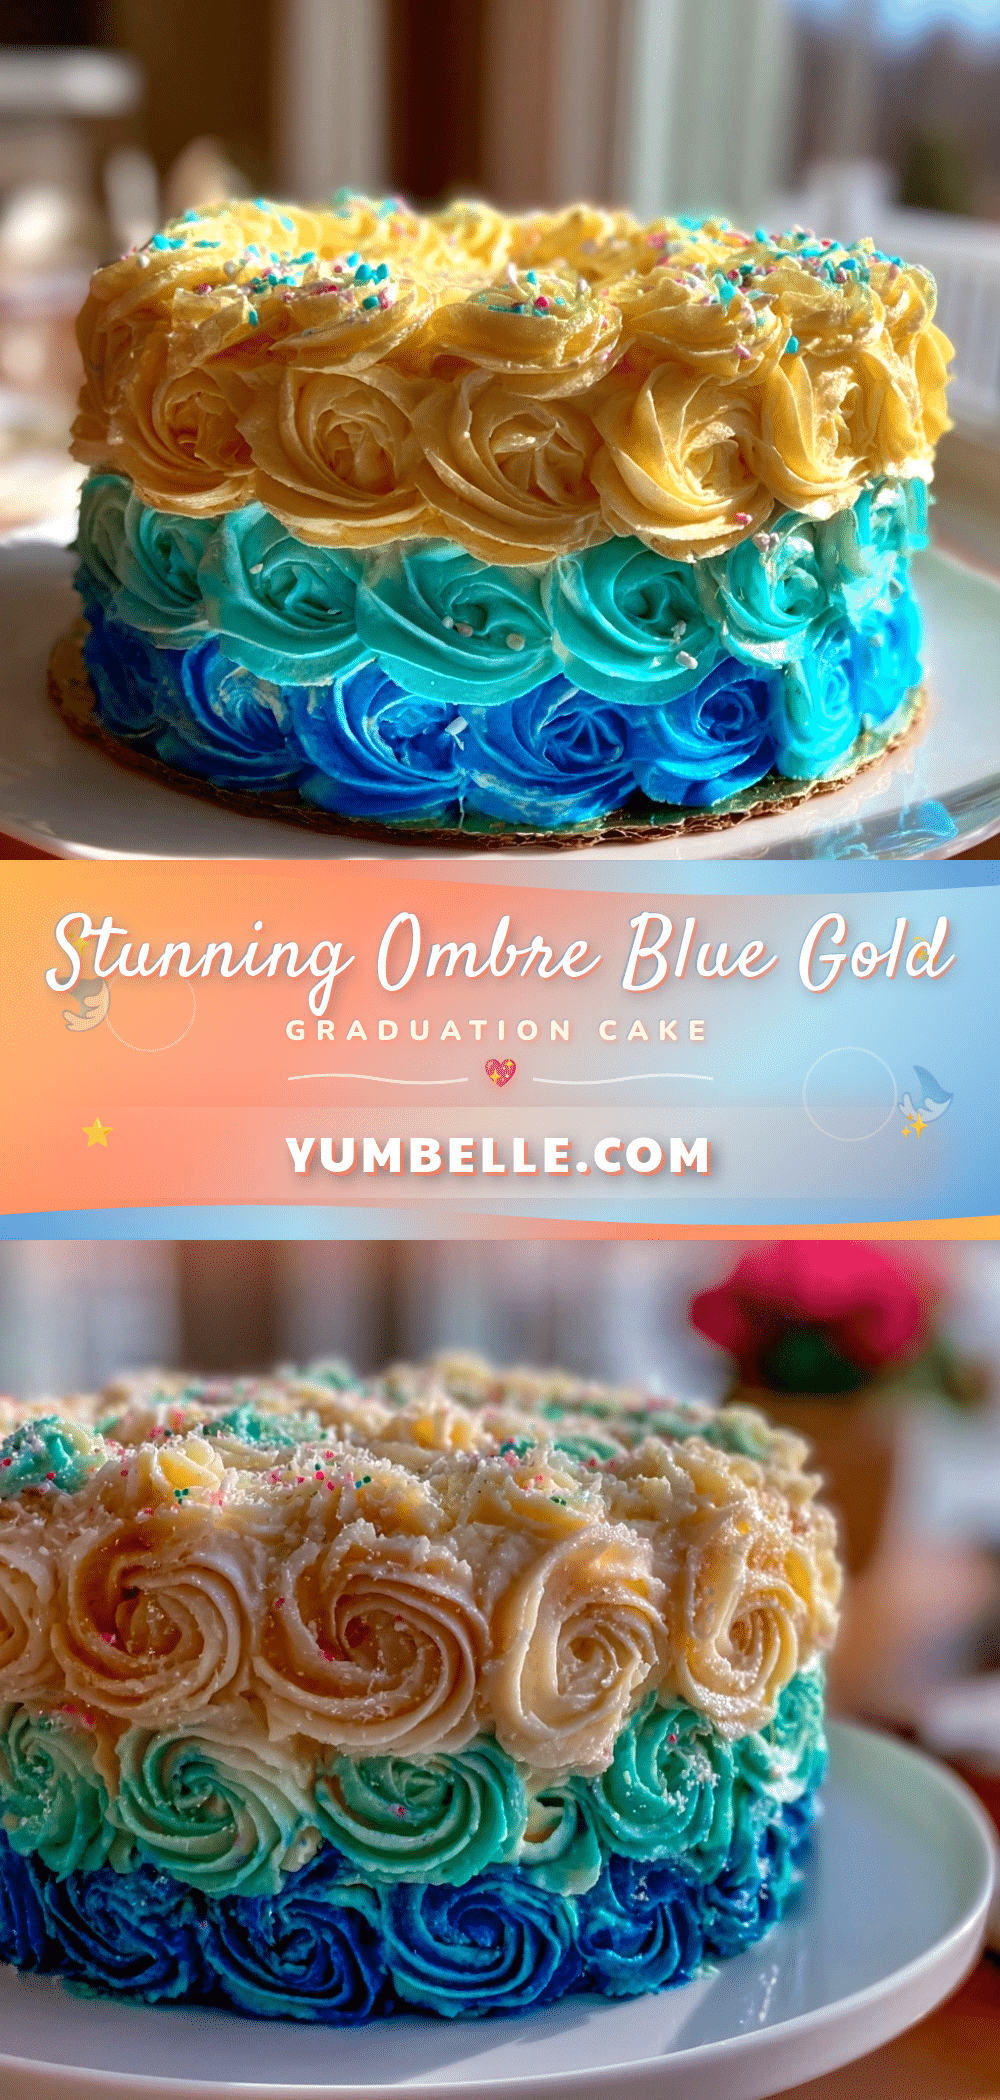
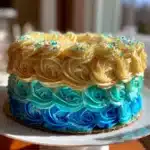
“I wasn’t expecting my Saturday afternoon baking session to turn into a full-blown cake experiment,” I confessed to my friend as I recounted the tale. It all started when my neighbor’s daughter announced her graduation party just days away. I wanted to bring something special, but honestly, I only had a vague idea of how to capture that perfect celebratory vibe. Then, inspired by the soft hues of her school colors—blue and gold—I embarked on creating what turned out to be the perfect ombre blue and gold graduation cake with buttercream rosettes.
The kitchen quickly became a whirlwind of mixing bowls, food coloring, and frosting tips, not to mention the inevitable flour dust on the floor—classic me, right? I remember pausing mid-whisk because I wasn’t sure if the gradient was smooth enough, and there was even a moment when I realized I forgot to set the oven timer. But, honestly, that little mishap didn’t ruin the cake; if anything, it made the final product feel more like a labor of love rather than a perfect procedure.
Maybe you’ve been there—wanting to create something stunning but feeling unsure where to start. This recipe stuck with me because it’s approachable yet impressive. It’s not just a cake; it’s a statement that you can bake something eye-catching and delicious without stress. So, whether you’re celebrating a graduation or just want to wow your friends, let me tell you why this ombre blue and gold cake with buttercream rosettes might just become your go-to party centerpiece.
Why You’ll Love This Recipe
After testing this recipe multiple times (and tweaking the frosting technique—more on that later), I’m confident this cake will quickly become a favorite for your celebrations. Here’s why:
- Quick & Easy: Comes together in under 2 hours, perfect for last-minute party plans or weekend baking sprees.
- Simple Ingredients: Uses pantry staples like all-purpose flour, sugar, and butter. No fancy ingredients needed.
- Perfect for Graduation Parties: The blue and gold ombre effect matches school colors beautifully, making it ideal for any graduation celebration.
- Crowd-Pleaser: Buttercream rosettes are not only pretty but loved by kids and adults alike—soft, creamy, and sweet without being overwhelming.
- Unbelievably Delicious: The cake stays moist and tender while the frosting offers a smooth, luscious texture that melts in your mouth.
This isn’t just another layered cake. The ombre effect requires a little patience, but the technique is straightforward—perfect for bakers wanting to impress without fuss. Plus, the buttercream rosettes add a charming, handcrafted touch that’s surprisingly simple to master if you follow my tips. Honestly, it’s the kind of cake that makes you pause and savor that first bite, closing your eyes because it’s just that satisfying.
So if you’re aiming for a centerpiece that looks professionally made but is stress-free to assemble, this recipe has your name on it.
What Ingredients You Will Need
This recipe relies on simple, wholesome ingredients that come together to create a cake that’s both flavorful and visually stunning. Most are pantry staples, and you can easily find them at any grocery store.
- For the Cake Batter:
- All-purpose flour – 2 ½ cups (315g), sifted for lighter texture
- Baking powder – 2 ½ teaspoons (10g), to give the cake a nice rise
- Salt – ½ teaspoon, balances flavors
- Unsalted butter – 1 cup (227g), softened (I like using Land O Lakes for richness)
- Granulated sugar – 1 ¾ cups (350g), for sweetness
- Large eggs – 4, room temperature (helps batter mix evenly)
- Whole milk – 1 cup (240ml), room temperature (for moist crumb)
- Pure vanilla extract – 2 teaspoons, for flavor depth
- Gel food coloring – shades of blue (light, medium, dark) and gold (I prefer AmeriColor gels for vibrant, stable color)
- For the Buttercream Rosettes:
- Unsalted butter – 1 cup (227g), softened
- Powdered sugar – 4 cups (480g), sifted to avoid lumps
- Whole milk – 2-3 tablespoons (30-45ml), adjust for desired consistency
- Pure vanilla extract – 1 teaspoon
- Gel food coloring – matching blue and gold shades (same brands as above)
If you prefer dairy-free options, you can swap butter with vegan margarine and use almond or oat milk instead of whole milk. For gluten-free, try substituting the all-purpose flour with a 1:1 gluten-free baking flour; just keep an eye on the batter consistency as it might need slight adjustments.
Freshness counts here—always use fresh eggs and butter for best results. And if you’re wondering about the gold color, a little patience mixing the gel into the frosting goes a long way toward getting that perfect metallic hue without overpowering the softness of the buttercream.
Equipment Needed
- Two 8-inch (20cm) round cake pans – I recommend non-stick or lightly greased and lined with parchment paper to avoid sticking.
- Electric mixer – stand or handheld, for smooth batter and fluffy buttercream.
- Mixing bowls – at least 3, to separate and color the batter layers.
- Offset spatula – essential for smooth frosting application and easier rosette piping.
- Piping bags and a large star piping tip (like Wilton 1M) – for creating the classic buttercream rosettes.
- Cooling rack – to let cakes cool evenly.
- Measuring cups and spoons – precise measurements make a big difference in baking!
If you don’t have two cake pans, baking the layers one at a time works fine, though it takes longer. For piping, if you’re new to it, disposable piping bags are budget-friendly and make cleanup easier. I’ve found that investing in a good offset spatula really helps with smooth frosting; mine’s been a kitchen MVP for years.
Preparation Method
- Preheat your oven to 350°F (175°C). Grease and line your cake pans with parchment paper. This step is crucial to avoid sticking and makes removing the cakes easier.
- Mix dry ingredients: In a medium bowl, sift together the all-purpose flour, baking powder, and salt. Set aside.
- Cream butter and sugar: Using your electric mixer, beat the softened butter and granulated sugar on medium speed for about 3-4 minutes, until light and fluffy. This aeration is key for a tender crumb.
- Add eggs: Crack in the eggs one at a time, beating well after each addition. This helps the batter emulsify and prevents curdling.
- Incorporate vanilla: Stir in the vanilla extract.
- Alternate adding dry ingredients and milk: Reduce the mixer speed to low. Add a third of the dry mixture, then half the milk, repeating until all is incorporated. Mix just until combined—overmixing can lead to a dense cake.
- Divide and color batter: Evenly divide the batter into four small bowls. Leave one plain, then tint the others with varying amounts of blue gel food coloring to create a light to dark gradient. Add gold gel to a small portion for accent layers or piping later.
- Layer the batter: Starting with the darkest blue at the bottom of each pan, spoon layers of batter gently, moving up to lighter shades. Use the plain batter for the top layer to achieve the ombre effect. A gentle tap on the counter helps smooth layers and release air bubbles.
- Bake: Place pans in the preheated oven. Bake for 28-32 minutes or until a toothpick inserted in the center comes out clean. Watch closely after 25 minutes as oven temperatures vary.
- Cool: Let cakes cool in pans for 10 minutes, then transfer to a cooling rack. Completely cool before frosting to avoid melting your buttercream.
- Prepare buttercream: Beat softened butter on medium speed until smooth and creamy (about 2 minutes). Gradually add powdered sugar, beating on low at first to avoid a sugar cloud. Add milk and vanilla, then increase speed to high for 3 minutes until fluffy. Split into bowls and tint with blue and gold gel colors matching your cake layers.
- Assemble: Place the darkest cake layer on your serving plate. Spread a thin layer of buttercream. Repeat layering, moving from dark to light. Finish with the lightest layer on top.
- Pipe rosettes: Fit a piping bag with a large star tip. Starting at the center of each rosette, pipe in a circular motion outward. Alternate blue and gold colors for a stunning finish. Don’t rush—practice on parchment paper if needed.
- Chill briefly: Refrigerate the cake for 15 minutes to set the buttercream before serving.
Remember, every oven behaves a little differently; if your cake looks too brown on top before the toothpick test passes, tent with foil. Also, if your buttercream feels too stiff for piping, add a teaspoon of milk at a time until it softens.
Cooking Tips & Techniques
One of the trickiest parts of this cake is achieving the perfect ombre gradient and smooth buttercream rosettes. Here’s what I’ve learned:
- Use gel food coloring: Unlike liquid dyes, gels won’t thin your batter or frosting, keeping the texture just right.
- Don’t overmix the batter: It’s tempting to mix well, but overmixing can cause a tough cake. Stop as soon as ingredients combine.
- Room temperature ingredients: Butter, eggs, and milk at room temperature blend more evenly, preventing lumps or curdling.
- Chill your buttercream: If your buttercream gets too soft while piping, pop it in the fridge for 10 minutes. Cold buttercream holds shape better.
- Practice rosette piping: Try piping a few practice rosettes on parchment before decorating the cake to build confidence.
- Multitask: While cakes bake, prepare your buttercream to save time. Just keep an eye on the oven!
One time, I accidentally added vanilla twice—ended up tasting a little stronger but was surprisingly delicious! Mistakes like that remind me it’s okay to improvise and keep things fun.
Variations & Adaptations
You can easily adapt this graceful ombre cake to suit different tastes or occasions:
- Flavor swaps: Add lemon zest to the batter for a bright twist or use almond extract instead of vanilla for a nuttier flavor.
- Color themes: Change the ombre palette to match any celebration—think pink and white for baby showers or autumn hues for fall birthdays.
- Gluten-free option: Use a 1:1 gluten-free baking blend in place of all-purpose flour. The texture stays moist with minimal adjustment.
- Vegan adaptation: Substitute eggs with flaxseed meal (1 tablespoon flaxseed + 3 tablespoons water per egg) and use plant-based butter and milk.
- Different shapes: Try baking in square pans or even a sheet cake for casual celebrations. The rosette technique still shines!
Personally, I once made a version with a hint of espresso powder in the batter—surprisingly fantastic for coffee lovers at a graduation brunch.
Serving & Storage Suggestions
This cake tastes best served at room temperature to let the buttercream soften slightly and the cake crumb shine. I usually slice it thin because those buttercream rosettes add richness.
Pair it with a light sparkling drink or classic iced tea to balance the sweetness. For a cozy vibe, a cup of hot coffee or cocoa works beautifully.
Store leftovers covered tightly in the refrigerator for up to 4 days. Before serving again, let slices sit out for 20-30 minutes to regain softness. You can also freeze the cake layers (unfrosted) for up to 3 months; thaw completely before frosting.
Flavors tend to mellow and blend overnight, so if you make the cake a day ahead, you’re in for an even tastier treat.
Nutritional Information & Benefits
Each slice of this cake (about 1/12th of the recipe) contains roughly 350 calories, 20g of fat, 40g of carbohydrates, and 3g of protein. The butter and sugar contribute most of the calories, but the cake offers a satisfying treat for special occasions.
Using real butter and whole milk gives the cake richness and a more natural flavor than substitutes. Plus, the eggs provide protein and nutrients like vitamin D. If you opt for gluten-free or vegan substitutions, the nutritional profile varies slightly.
For those mindful of allergens, this recipe contains dairy, eggs, and gluten (unless adapted). It’s perfect for celebratory indulgence, and the homemade nature means you control the ingredient quality.
Conclusion
This perfect ombre blue and gold graduation cake with buttercream rosettes is a winner for anyone wanting to bring a little magic to their party table. It’s approachable enough for bakers of all levels but impressive enough to make an occasion feel truly special. I love how the colors blend softly, and the rosettes add that extra handcrafted charm—plus, it tastes incredible.
Feel free to tweak the colors or flavors to suit your celebration. I’m pretty sure once you try this, you’ll find yourself making it for birthdays, anniversaries, or just because. So grab your mixing bowls, and let’s get baking!
If you give this recipe a go, I’d love to hear how it turned out or your own creative twists. Sharing your experience really makes my day!
FAQs
Can I make the cake layers ahead of time?
Yes! You can bake the layers up to 2 days in advance. Wrap them tightly in plastic wrap and store at room temperature. Refrigerate if your kitchen is warm, but bring to room temperature before frosting.
How do I get the perfect ombre effect with the batter?
Divide the batter evenly into portions and tint each with increasing amounts of food coloring, starting with the lightest shade. Layer gently in the pans from darkest to lightest for a smooth gradient.
What if I don’t have a piping bag or star tip?
No worries! You can spread the buttercream with an offset spatula for a rustic look or use a plastic sandwich bag with a small corner snipped off to pipe simple rosettes.
Can I freeze the frosted cake?
It’s best to freeze unfrosted layers. Frosted cakes can be frozen but may lose some buttercream texture. If frozen, thaw in the refrigerator overnight and bring to room temperature before serving.
How do I avoid my buttercream rosettes melting?
Make sure your buttercream isn’t too soft by chilling it briefly if needed. Keep the cake in a cool place until serving. Warm kitchens make buttercream tricky, so don’t hesitate to pop the cake in the fridge briefly after piping.
Pin This Recipe!
Perfect Ombre Blue and Gold Graduation Cake Recipe with Buttercream Rosettes for Easy Party Celebrations
A visually stunning and delicious ombre blue and gold layered cake decorated with buttercream rosettes, perfect for graduation parties and special celebrations. This recipe is approachable for bakers of all levels and uses simple pantry ingredients.
- Prep Time: 30 minutes
- Cook Time: 30 minutes
- Total Time: 1 hour
- Yield: 12 servings
- Category: Dessert
- Cuisine: American
Ingredients
- All-purpose flour – 2 ½ cups (315g), sifted
- Baking powder – 2 ½ teaspoons (10g)
- Salt – ½ teaspoon
- Unsalted butter – 1 cup (227g), softened
- Granulated sugar – 1 ¾ cups (350g)
- Large eggs – 4, room temperature
- Whole milk – 1 cup (240ml), room temperature
- Pure vanilla extract – 2 teaspoons
- Gel food coloring – shades of blue (light, medium, dark) and gold
- For Buttercream Rosettes:
- Unsalted butter – 1 cup (227g), softened
- Powdered sugar – 4 cups (480g), sifted
- Whole milk – 2-3 tablespoons (30-45ml)
- Pure vanilla extract – 1 teaspoon
- Gel food coloring – matching blue and gold shades
Instructions
- Preheat oven to 350°F (175°C). Grease and line two 8-inch round cake pans with parchment paper.
- Sift together all-purpose flour, baking powder, and salt in a medium bowl; set aside.
- Using an electric mixer, beat softened butter and granulated sugar on medium speed for 3-4 minutes until light and fluffy.
- Add eggs one at a time, beating well after each addition.
- Stir in vanilla extract.
- Reduce mixer speed to low; alternately add dry ingredients and milk in thirds and halves respectively, mixing just until combined.
- Divide batter evenly into four bowls. Leave one plain, tint others with increasing amounts of blue gel food coloring to create a gradient. Add gold gel to a small portion for accents.
- Layer batter in pans starting with darkest blue at bottom, moving to lighter shades, finishing with plain batter on top. Tap pans gently to smooth layers and release air bubbles.
- Bake for 28-32 minutes or until a toothpick inserted in the center comes out clean. Cool in pans for 10 minutes, then transfer to cooling racks to cool completely.
- Prepare buttercream by beating softened butter on medium speed until smooth (about 2 minutes). Gradually add powdered sugar on low speed, then add milk and vanilla. Beat on high for 3 minutes until fluffy.
- Divide buttercream into bowls and tint with blue and gold gel colors matching cake layers.
- Assemble cake by placing darkest layer on serving plate, spreading thin layer of buttercream. Repeat layering from dark to light, finishing with lightest layer on top.
- Fit piping bag with large star tip and pipe buttercream rosettes in alternating blue and gold colors over the cake.
- Refrigerate cake for 15 minutes to set buttercream before serving.
Notes
[‘Use gel food coloring for vibrant colors without thinning batter or frosting.’, ‘Do not overmix batter to avoid tough cake texture.’, ‘Use room temperature ingredients for even mixing and smooth batter.’, ‘Chill buttercream if too soft for piping to hold shape better.’, ‘Practice piping rosettes on parchment paper before decorating cake.’, ‘Tent cake with foil if browning too quickly before fully baked.’, ‘Add milk teaspoon by teaspoon if buttercream is too stiff for piping.’]
Nutrition
- Serving Size: 1 slice (1/12th of c
- Calories: 350
- Fat: 20
- Carbohydrates: 40
- Protein: 3
Keywords: ombre cake, graduation cake, buttercream rosettes, party cake, layered cake, blue and gold cake, easy cake recipe