Love this? Save it for later!
Share the inspiration with your friends
Three summers ago, I found myself rummaging through a cluttered drawer in a tiny beach rental kitchen, hunting for something sweet to satisfy a sudden craving. All I had were a few random berries, a box of store-bought pound cake, and some leftover whipped cream from breakfast. Honestly, I wasn’t expecting much, but I decided to throw together what I had—layering bits of cake, berries, and whipped cream into mismatched little cups. The result? A surprisingly fresh and irresistible dessert that felt like sunshine in a glass. I call it my Easy No-Bake Berry Trifle Cups, and it’s been a go-to ever since.
You know that feeling when a simple, last-minute idea turns into a signature dish? That’s exactly what happened here. No fancy equipment, no oven required, just fresh layers of flavor coming together effortlessly. Maybe you’ve been there—staring at the fridge, hoping something quick and delightful will come to life. This recipe is just that: fresh, layered dessert delight that’s perfect for any occasion.
It’s perfect for those days when you want something sweet but light, when the oven’s too hot to handle, or when unexpected guests drop by. Let me tell you, this recipe stayed with me because it combines ease with elegance. Plus, it’s a crowd-pleaser that looks fancy but takes minutes to assemble. So, whether you’re a dessert novice or a seasoned sweet tooth, these berry trifle cups are bound to charm your taste buds and brighten your kitchen routine.
Why You’ll Love This Recipe
After countless tests in my kitchen (and a few happy accidents), I’m confident this Easy No-Bake Berry Trifle Cups recipe will become a favorite in your dessert rotation. It’s been kitchen-tested with friends, family, and even a few picky eaters—and it always wins hearts. Here’s what makes it stand out:
- Quick & Easy: Comes together in under 20 minutes, ideal for busy weeknights or spontaneous dessert cravings.
- Simple Ingredients: Uses pantry staples and fresh berries—no need for specialty shopping trips.
- Perfect for Summer Gatherings: Light, refreshing, and visually stunning for backyard barbecues or casual brunches.
- Crowd-Pleaser: Kids and adults alike love the sweet, creamy layers paired with juicy berries.
- Unbelievably Delicious: The combination of soft pound cake, tangy berries, and fluffy whipped cream creates a texture and flavor harmony that’s hard to beat.
What sets this trifle apart is the balance of fresh ingredients and ease. I blend just enough whipped cream to keep it light and fluffy, and I always recommend using fresh or frozen berries (thawed) for the best pop of flavor. Honestly, this isn’t just another berry dessert—it’s the one that makes you close your eyes on the first bite and smile. It’s the kind of simple joy that turns an ordinary day into something a little sweeter.
What Ingredients You Will Need
This recipe uses simple, wholesome ingredients to deliver bold flavor and satisfying texture without the fuss. Most of these you probably have on hand, and the fresh berries bring a seasonal brightness that feels just right.
- Pound cake: About 8 ounces (225 g), store-bought or homemade, cut into 1-inch cubes. (I love using Sara Lee for consistent texture.)
- Mixed berries: 2 cups (300 g) fresh or frozen (thawed) strawberries, blueberries, and raspberries. (In summer, swap in fresh local berries!)
- Heavy whipping cream: 1 cup (240 ml), chilled, for homemade whipped cream.
- Powdered sugar: 2 tablespoons (15 g), to sweeten the whipped cream lightly.
- Vanilla extract: 1 teaspoon (5 ml), adds warmth and depth to the cream.
- Optional lemon zest: 1 teaspoon (adds a fresh zing to the layers).
If you want to make this dairy-free, swap out heavy cream for coconut cream and use dairy-free pound cake or even sponge cake alternatives. For a gluten-free version, almond flour pound cake or gluten-free store-bought cake cubes work wonderfully.
Equipment Needed
- Mixing bowl – for whipping the cream. A chilled metal bowl helps the cream whip faster.
- Electric mixer or hand whisk – I prefer an electric hand mixer for quick, fluffy whipped cream.
- Measuring cups and spoons – for precise ingredient amounts.
- Small cups or dessert glasses – any clear cups work great to show off the beautiful layers.
- Spatula – for folding and layering without deflating the whipped cream.
If you don’t have an electric mixer, a sturdy balloon whisk works, but expect some arm workout. For budget-friendly dessert presentation, repurposed mason jars or simple clear plastic cups do the trick and look charming too!
Preparation Method
- Prep the berries: Wash fresh berries and pat dry. If using strawberries, hull and slice them into bite-sized pieces. Set aside about 1/4 cup (40 g) for garnish. (5 minutes)
- Make the whipped cream: Chill your mixing bowl and beaters in the fridge for 10 minutes beforehand if possible. Pour the heavy cream into the bowl, add powdered sugar and vanilla extract. Beat on medium-high speed until soft peaks form—this means when you lift the beaters, the cream holds its shape but curls slightly. (5–7 minutes)
- Cut the pound cake: Cube the pound cake into roughly 1-inch (2.5 cm) pieces. This size works well for layering and ensures each bite has cake, cream, and berries. (3 minutes)
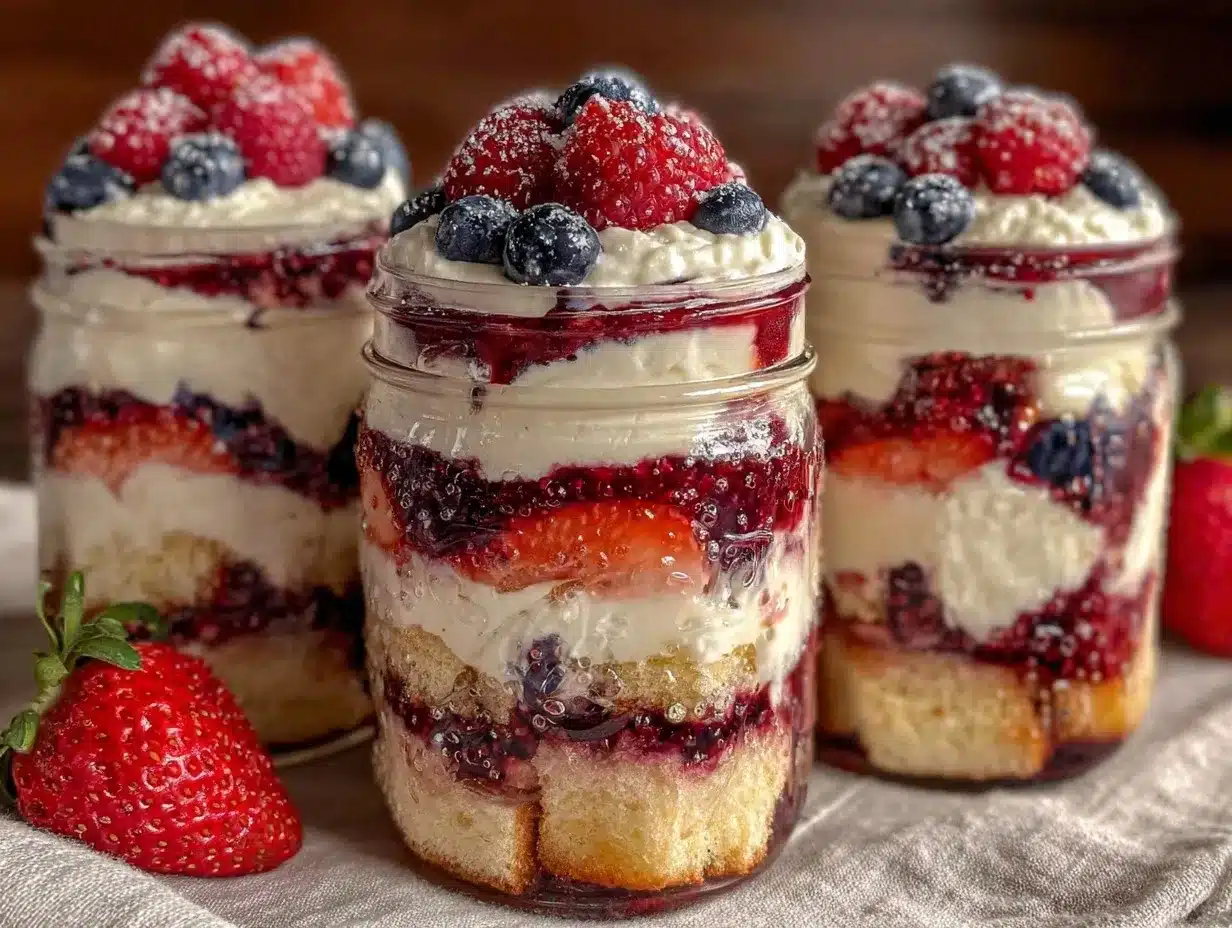
- Assemble the trifle cups: Start with a layer of pound cake cubes at the bottom—about 1/4 cup (30 g). Next, spoon a layer of whipped cream over the cake, about 2 tablespoons (30 ml). Then add a layer of mixed berries, roughly 2 tablespoons (30 g). Repeat the layers until the cup is nearly full, finishing with whipped cream on top. (10 minutes)
- Garnish and chill: Top each cup with the reserved berries and a sprinkle of lemon zest if using. Cover with plastic wrap and refrigerate for at least 1 hour to let flavors meld and the cake soften slightly. (Chill time: 1 hour minimum)
If your whipped cream starts to separate or looks too runny, a quick whisk fixes it. Also, if you prefer a sweeter berry layer, toss berries with a teaspoon of sugar before layering. The visual cue of vibrant berries against white cream is as important as taste, so take your time to layer nicely — it’s totally worth it!
Cooking Tips & Techniques
- Whipping cream perfectly: Keep everything cold—chill your bowl and beaters, and use heavy cream fresh from the fridge. Stop whipping as soon as soft peaks form to avoid turning the cream into butter.
- Choosing the right cake: Pound cake or sponge cake works best because they soak up cream but don’t get soggy too fast. If your cake feels dry, sprinkle a little milk or berry juice before layering.
- Layering like a pro: Use a spoon or small offset spatula to spread cream evenly without mushing the cake. This keeps those layers distinct and pretty.
- Handling frozen berries: Thaw completely and drain any excess juice to avoid watery layers, unless you like a juicy trifle (which is fine!).
- Timing matters: Assemble close to serving time if possible, but letting it chill for an hour improves texture and melds flavors beautifully.
Honestly, the first time I rushed this and served immediately, the cake was a bit dry, so chilling is key. Also, if you find your layers blending too much, try adding a thin layer of whipped cream between berries and cake to keep them separate.
Variations & Adaptations
- Chocolate Lover’s Twist: Add a drizzle of chocolate sauce between layers or sprinkle mini chocolate chips for a rich surprise.
- Vegan Version: Swap heavy cream for coconut cream whipped with a bit of maple syrup, and use dairy-free pound cake or a vegan sponge cake alternative.
- Seasonal Swaps: In fall or winter, swap berries for diced apples or pears sautéed lightly with cinnamon and a touch of honey.
Once, I experimented with adding a layer of mascarpone mixed with a little honey instead of whipped cream—it turned out decadently creamy and made the dessert feel more luxurious without fuss. Feel free to customize based on what you love or what’s in season!
Serving & Storage Suggestions
Serve these trifle cups chilled for the freshest taste and texture. They look delightful on a summer buffet or as a light finish to a dinner party. Pair with a crisp white wine or a sparkling lemonade for a refreshing combo.
Store leftovers covered in the refrigerator for up to 2 days. The cake will continue to soak up cream and berry juices, becoming more tender and flavorful over time. When reheating, well… honestly, these are best cold, but if you want warm cake with cold cream, you can separate and warm just the cake cubes briefly.
For portability, these cups travel well to potlucks or picnics—just keep them chilled and assemble the final layer of berries right before serving to keep things fresh.
Nutritional Information & Benefits
Each serving of Easy No-Bake Berry Trifle Cups contains approximately 250 calories, 10 grams of fat, 35 grams of carbohydrates, and 4 grams of protein. The berries provide antioxidants and vitamin C, while the whipped cream adds a creamy source of calcium and healthy fats.
This dessert balances indulgence with fresh fruit nutrition, making it a lighter sweet option compared to heavy cakes or pies. Gluten-free and dairy-free variations make it accessible for many dietary needs, too. I appreciate how it satisfies a sweet tooth without feeling overly heavy or complicated.
Conclusion
So, if you’re looking for a dessert that’s simple, fresh, and looks like you spent hours in the kitchen, these Easy No-Bake Berry Trifle Cups are just the ticket. They’re flexible enough to suit your taste and schedule, and honestly, they bring a little joy with every spoonful. I love this recipe because it’s approachable yet special—perfect for everyday treats or when you want to impress without stress.
Give it a try, play with your favorite berries or cake types, and make it your own. And hey, if you whip up a batch, I’d love to hear how you customized it or if it became a hit at your next gathering!
Happy layering and eating!
Frequently Asked Questions
Can I use frozen berries instead of fresh?
Yes! Just thaw them completely and drain any excess juice to avoid watery layers. Frozen berries work well year-round.
What if I don’t have heavy cream for whipped cream?
You can substitute with coconut cream for a dairy-free option or use store-bought whipped topping if you’re in a pinch.
How long can I store these trifle cups?
They keep well covered in the refrigerator for up to 2 days. The flavors meld nicely, but the cake may get softer over time.
Can I prepare these trifle cups in advance?
Absolutely! Assemble them a few hours ahead, but for the freshest look, add the final berry garnish just before serving.
What can I use instead of pound cake?
Sponge cake, angel food cake, or even ladyfingers make great substitutes. Just cut into similar-sized cubes for layering.
Pin This Recipe!
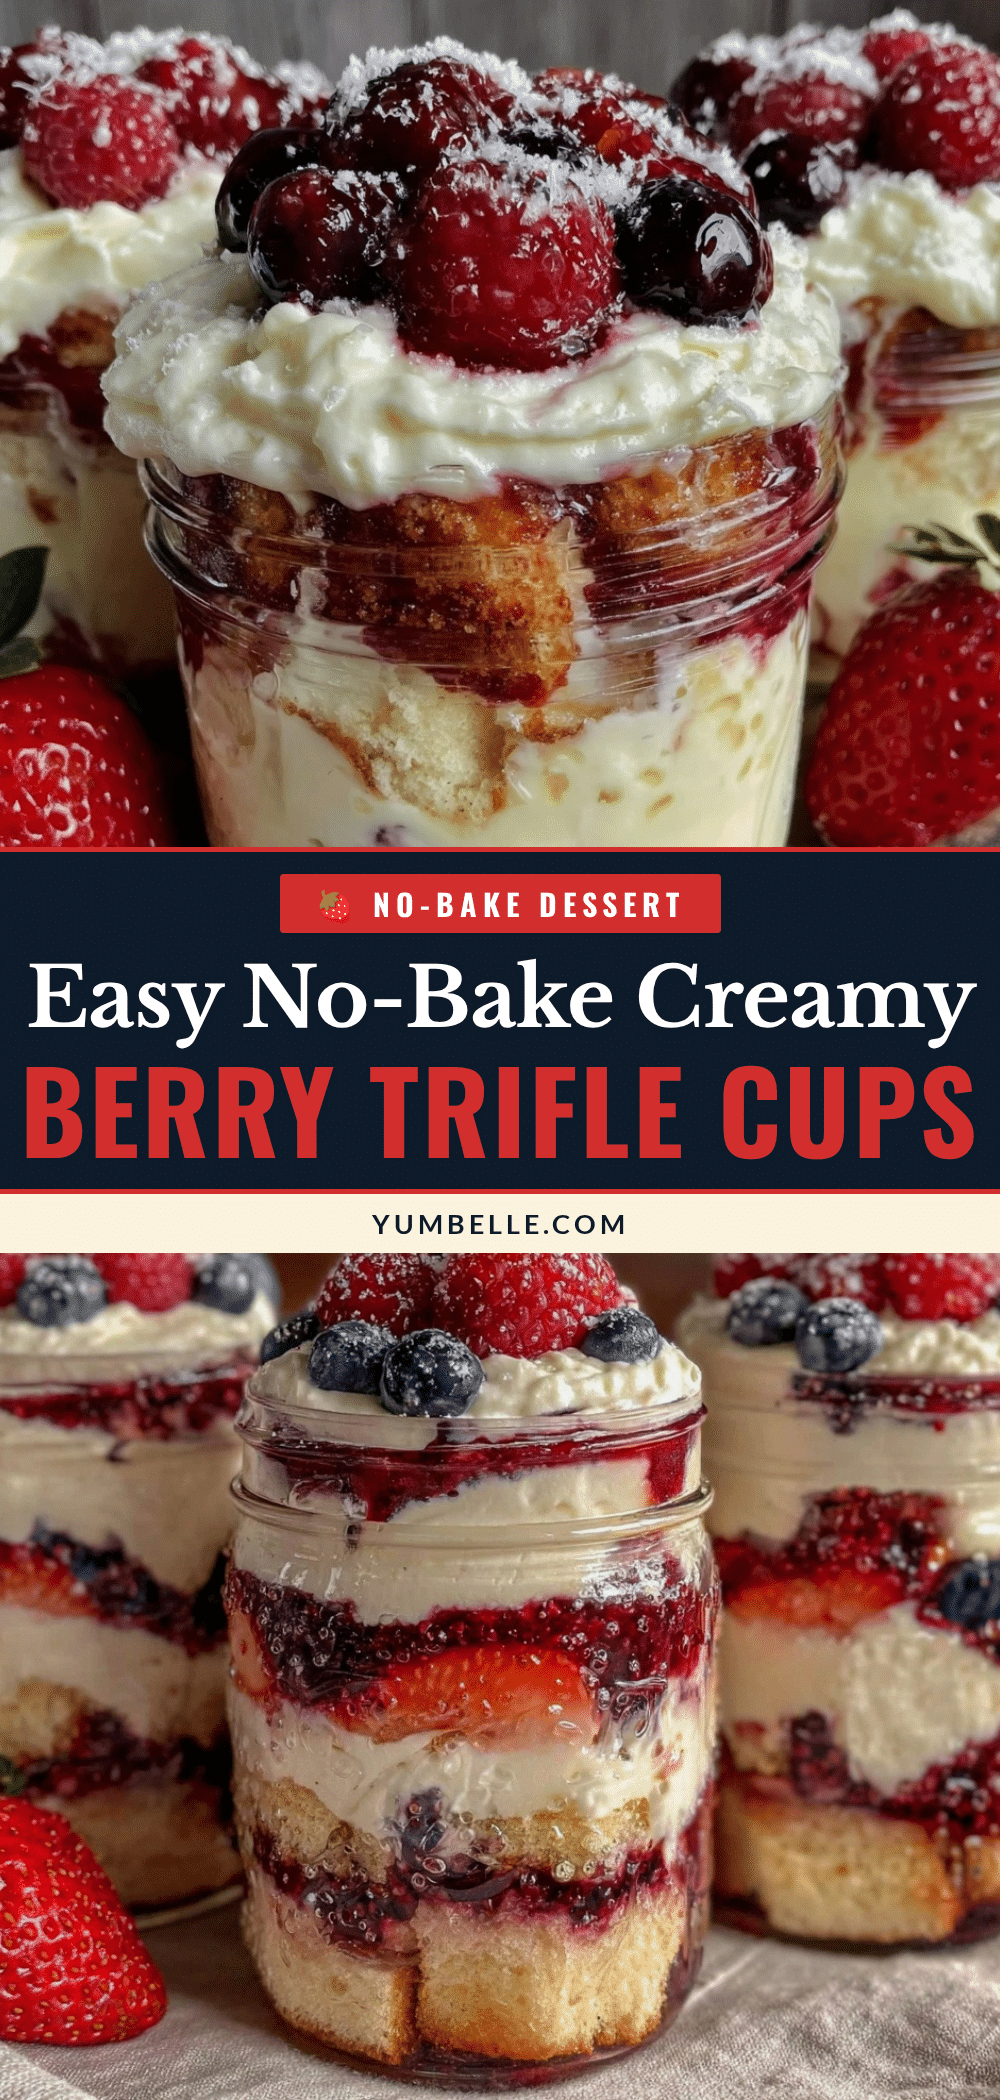
Easy No-Bake Berry Trifle Cups
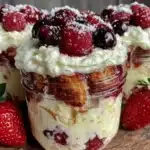
A quick and easy no-bake dessert featuring layers of pound cake, mixed berries, and whipped cream, perfect for summer gatherings and last-minute treats.
- Prep Time: 15 minutes
- Cook Time: 0 minutes
- Total Time: 1 hour 15 minutes
- Yield: 6 servings 1x
- Category: Dessert
- Cuisine: American
Ingredients
- 8 ounces (225 g) pound cake, store-bought or homemade, cut into 1-inch cubes
- 2 cups (300 g) mixed berries (strawberries, blueberries, raspberries), fresh or frozen (thawed)
- 1 cup (240 ml) heavy whipping cream, chilled
- 2 tablespoons (15 g) powdered sugar
- 1 teaspoon (5 ml) vanilla extract
- 1 teaspoon lemon zest (optional)
Instructions
- Wash fresh berries and pat dry. Hull and slice strawberries into bite-sized pieces. Set aside about 1/4 cup (40 g) for garnish.
- Chill mixing bowl and beaters in the fridge for 10 minutes if possible. Pour heavy cream into the bowl, add powdered sugar and vanilla extract. Beat on medium-high speed until soft peaks form (about 5–7 minutes).
- Cube the pound cake into roughly 1-inch pieces.
- Assemble the trifle cups by layering 1/4 cup (30 g) pound cake cubes at the bottom, followed by 2 tablespoons (30 ml) whipped cream, then 2 tablespoons (30 g) mixed berries. Repeat layers until the cup is nearly full, finishing with whipped cream on top.
- Top each cup with reserved berries and a sprinkle of lemon zest if using. Cover with plastic wrap and refrigerate for at least 1 hour before serving.
Notes
Chill bowl and beaters before whipping cream for best results. Use fresh or thawed frozen berries and drain excess juice to avoid watery layers. Assemble close to serving time or chill for at least 1 hour to meld flavors. For dairy-free, substitute heavy cream with coconut cream and use dairy-free pound cake. For gluten-free, use gluten-free pound cake or sponge cake alternatives.
Nutrition
- Serving Size: 1 trifle cup
- Calories: 250
- Fat: 10
- Carbohydrates: 35
- Protein: 4
Keywords: no-bake dessert, berry trifle, easy dessert, summer dessert, layered dessert, pound cake dessert, whipped cream dessert