Love this? Save it for later!
Share the inspiration with your friends
Introduction
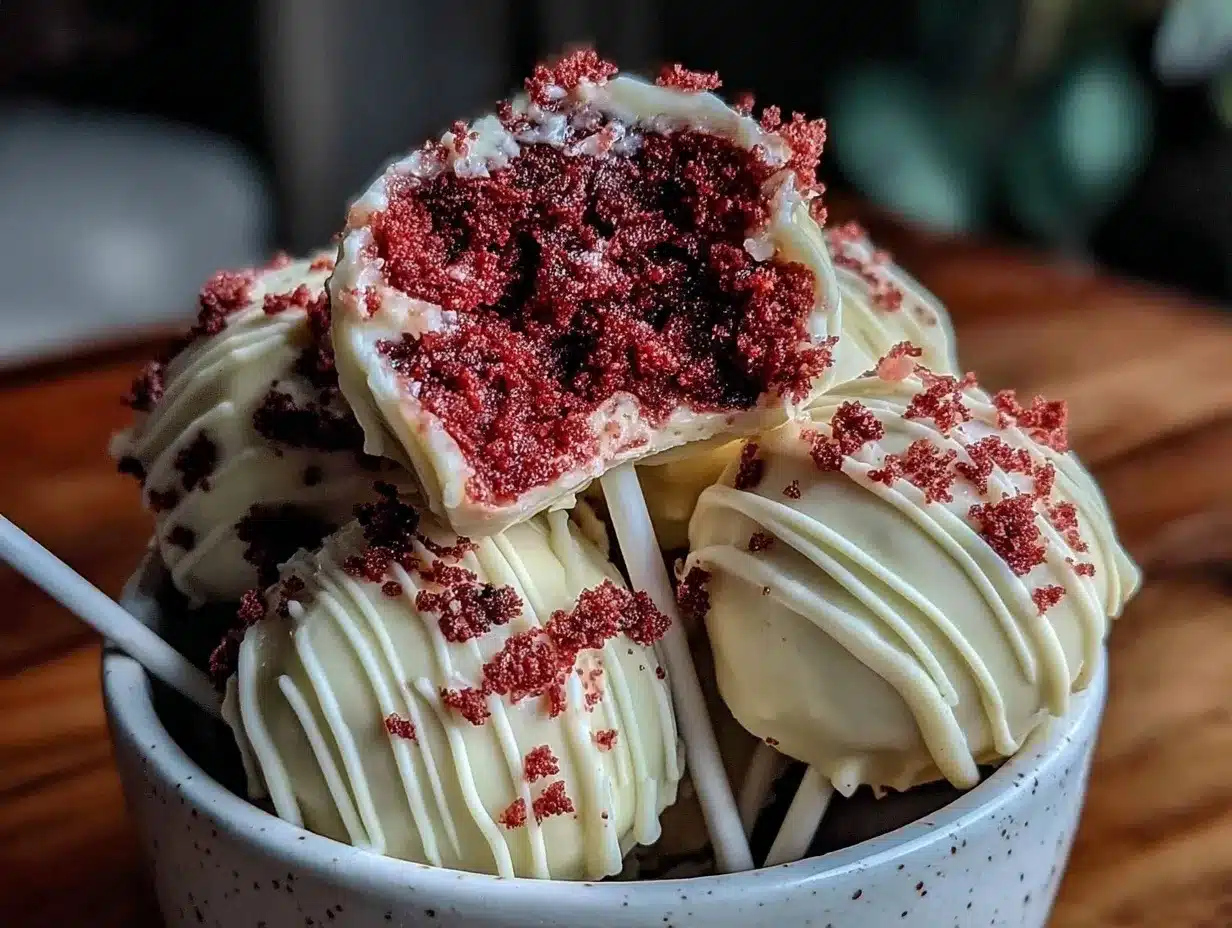
Three winters ago, I found myself staring at a half-baked red velvet cake that had somehow collapsed in the middle—classic kitchen disaster, right? Honestly, I was about to toss it when my roommate, who rarely ventures beyond instant noodles, suggested, “Why don’t you turn that mess into cake pops?” I hadn’t considered it, but the idea stuck. The next day, amidst a cracked mixing bowl and a small avalanche of powdered sugar on the counter, I whipped up these creamy red velvet cake pops coated in a luscious white chocolate glaze.
That first bite was a revelation—soft, velvety, with just the right hint of tang from the cream cheese mixing effortlessly with the cake crumbs. The white chocolate added a smooth sweetness that balanced everything perfectly. Maybe you’ve been there too: a recipe flop that somehow becomes your go-to. These cake pops were exactly that for me, transforming what could have been kitchen trash into a white chocolate delight that friends now beg me to bring to every gathering. Let me tell you, it’s one of those treats that makes you close your eyes and smile after the first bite.
So here I am, sharing my creamy red velvet cake pops recipe that’s easy to whip up even on a rushed afternoon. It’s comfort food in bite-sized form, combining the charm of classic red velvet with that irresistible white chocolate coating. If you’ve ever wanted a homemade sweet treat that feels fancy but is surprisingly simple, you’re in the right place.
Why You’ll Love This Recipe
Having tested this creamy red velvet cake pops recipe countless times (with varying success at first), I can confidently say it’s a winner for many reasons. My friends, family, and even picky eaters have given it thumbs up, and I’ve learned a few tricks along the way to get that perfect creamy texture and smooth white chocolate finish.
- Quick & Easy: From crumb to pop, it comes together in less than an hour. Great for last-minute celebrations or when you just want a sweet fix.
- Simple Ingredients: No hunting for obscure items—most are pantry staples or easy to find at any grocery store.
- Perfect for Parties: Ideal for birthday bashes, holiday treat tables, or cozy winter get-togethers where bite-sized sweets rule.
- Crowd-Pleaser: Kids adore them, and adults keep sneaking seconds. The creamy inside and white chocolate shell just work.
- Unbelievably Delicious: The creamy cake mixture paired with silky white chocolate makes every pop a little moment of joy.
This isn’t just another red velvet cake recipe rolled into a ball. The secret lies in blending cream cheese into the cake crumbs before shaping, which keeps the texture moist and rich without being overly dense. The white chocolate coating adds that classic sweet finish but with a glossy, professional look you’ll want to show off. Honestly, it’s easy enough for beginners but impressive enough for seasoned bakers.
What Ingredients You Will Need
This creamy red velvet cake pops recipe uses straightforward, wholesome ingredients to deliver bold flavors and a satisfyingly smooth texture. You might already have most of these in your kitchen, which makes it a no-brainer to try anytime the craving hits.
- For the Cake:
- All-purpose flour – 2 ½ cups (315g)
- Granulated sugar – 1 ½ cups (300g)
- Cocoa powder (unsweetened) – 2 tbsp
- Baking soda – 1 tsp
- Salt – ½ tsp
- Buttermilk – 1 cup (240ml) (or milk with 1 tbsp vinegar)
- Vegetable oil – 1 cup (240ml)
- Eggs – 2 large, room temperature
- Red food coloring – 2 tbsp (adjust to preference)
- Vanilla extract – 1 tsp
- White vinegar – 1 tsp
- For the Creamy Filling:
- Cream cheese – 8 oz (225g), softened (I recommend Philadelphia for smooth texture)
- Powdered sugar – 1 cup (120g), sifted
- Unsalted butter – 2 tbsp, softened (adds richness)
- For the White Chocolate Coating:
- White chocolate chips or melting wafers – 12 oz (340g) (Ghirardelli or Wilton are great picks)
- Vegetable shortening – 1 tbsp (optional, helps smooth coating)
- Sprinkles or edible glitter (optional, for decoration)
For substitutions, you can swap all-purpose flour with gluten-free flour blends if needed. If you prefer dairy-free, try using coconut cream cheese and a plant-based milk alternative for buttermilk. In summer, fresh raspberries stirred into the cream cheese filling add a delightful twist, but honestly, the classic version is hard to beat.
Equipment Needed
- Mixing bowls – at least two (one for cake, one for filling)
- Electric mixer or stand mixer (makes cream cheese filling a breeze)
- 9×13-inch baking pan for the cake
- Spatula and wooden spoon
- Cooling rack for cake
- Food processor or large fork (to crumble the cake)
- Cake pop sticks (available online or at baking stores)
- Microwave-safe bowl or double boiler for melting white chocolate
- Styrofoam block or cake pop stand to hold pops while drying
If you don’t have a stand mixer, a sturdy hand mixer or even beating by hand with a whisk works, though it takes more elbow grease. For melting chocolate, a double boiler is gentler and prevents burning, but the microwave method is quicker—just heat in short bursts and stir frequently.
Preparation Method
- Prepare the Red Velvet Cake Batter (15 min prep + 25-30 min baking): Preheat your oven to 350°F (175°C). Grease and flour your 9×13-inch pan. In a large bowl, sift together flour, cocoa powder, baking soda, and salt. In another bowl, whisk together sugar, vegetable oil, eggs, buttermilk, red food coloring, vanilla, and vinegar until smooth. Gradually mix the dry ingredients into the wet, stirring just until combined. Pour the batter into the pan and bake for 25-30 minutes or until a toothpick comes out clean. Let cool completely on a wire rack.
- Make the Cream Cheese Filling (10 min): In a mixing bowl, beat the softened cream cheese, butter, and powdered sugar together until creamy and smooth. Scrape down the sides occasionally. This filling will keep the cake pops moist and rich.
- Crumble the Cake (5 min): Once the cake is cooled, crumble it into fine pieces using your hands or a food processor. The texture should be fine enough to hold together but not mushy.
- Combine Cake and Cream Cheese (5 min): Add the cream cheese filling to the crumbled cake. Mix gently but thoroughly with a spatula or your hands until the mixture holds together when pressed. If it’s too crumbly, add a little more cream cheese; too wet, add more cake crumbs.
- Form Cake Pops (15 min): Scoop tablespoon-sized portions and roll into balls. Place on a parchment-lined baking sheet. Chill in the refrigerator for at least 30 minutes to firm up.
- Melt White Chocolate (10 min): In a microwave-safe bowl, heat the white chocolate chips in 30-second intervals, stirring in between until smooth. Stir in vegetable shortening if using for a shinier finish.
- Dip Cake Pops (10 min): Dip each chilled cake pop into the melted white chocolate, gently tapping off excess. Insert sticks if you haven’t already. Place upright in a styrofoam block or cake pop stand to set. Decorate with sprinkles or edible glitter while the coating is still wet.
- Set and Serve: Let the cake pops set completely at room temperature or refrigerate for quicker firming (about 20 minutes). Serve chilled or at room temp for the creamiest experience.
Quick tip: if your chocolate thickens, reheat gently with a bit of shortening to smooth it out again. If the cake pops feel too soft when rolling, pop them back in the fridge a bit longer.
Cooking Tips & Techniques
Making creamy red velvet cake pops might sound tricky, but once you get the hang of it, it’s pretty straightforward. Here are some tips I learned the hard way:
- Don’t skip chilling: The cake balls need to firm up before dipping, or they’ll fall apart. Trust me, I learned this after a messy first attempt!
- Use room temperature ingredients: Cream cheese and eggs blend better when not cold, leading to smoother filling and batter.
- Handle cake crumbs gently: Overmixing the cake and cream cheese can make the pops dense. Fold just enough to combine.
- Work quickly when dipping: White chocolate hardens fast. Dip and decorate swiftly but carefully.
- Multitask by melting chocolate in short bursts: This prevents scorching and keeps the coating glossy.
- Practice makes perfect: Don’t worry if your first few cake pops look a little uneven. Homemade charm counts!
Variations & Adaptations
If you want to switch things up or accommodate dietary needs, here are some ideas to play with:
- Flavor twists: Mix a teaspoon of espresso powder into the cake batter for a mocha-red velvet combo that’s surprisingly addictive.
- Dairy-free option: Use coconut cream cheese and dairy-free white chocolate for vegan-friendly cake pops.
- Seasonal flair: Swap red food coloring with natural beet powder or use fresh pomegranate seeds mixed into the filling during fall and winter.
- Alternative coatings: Instead of white chocolate, try a dark or milk chocolate coating sprinkled with crushed nuts or freeze-dried raspberry powder.
- Personal favorite: I once added a pinch of cinnamon to the cream cheese filling—a little unexpected warmth that made these pops even more cozy on a chilly evening.
Serving & Storage Suggestions
These creamy red velvet cake pops are best served slightly chilled or at room temperature for that perfect melt-in-your-mouth feel. They look fabulous arranged on a cake pop stand or presented in a decorative jar with some festive ribbons.
Pair them with a cup of rich hot cocoa or a glass of cold milk to complement the sweetness. They also make a charming addition to dessert tables for holidays or birthdays.
To store, keep the cake pops in an airtight container in the refrigerator for up to 5 days. For longer storage, freeze them wrapped individually on a baking sheet, then transfer to a freezer-safe box for up to a month. When ready to enjoy, thaw in the fridge for a few hours—flavors actually develop and become richer after resting!
Reheating isn’t really necessary, but if you want that freshly dipped feel, you can briefly microwave one pop for 5-7 seconds (watch closely!) to soften the chocolate.
Nutritional Information & Benefits
Each creamy red velvet cake pop provides a delightful treat with an estimated 150-180 calories, depending on size and toppings. The cream cheese adds a modest amount of protein and calcium, while the white chocolate coating delivers a sweet finish that’s rich but portion-controlled thanks to the bite-sized format.
For those mindful of dietary needs, the recipe is adaptable for gluten-free and dairy-free versions as mentioned earlier. The use of beet powder in place of artificial coloring can add an antioxidant boost.
While these cake pops are definitely a treat, making them at home means you control the ingredients—no preservatives or artificial additives, just honest sweetness and creamy texture.
Conclusion
If you’re looking for a dessert that’s charming, creamy, and fun to eat, these creamy red velvet cake pops with white chocolate delight are worth your time. They bring together the nostalgic flavors of classic red velvet cake with a smooth, tangy cream cheese filling and the elegant touch of white chocolate coating.
What I love most is how adaptable they are—you can tweak flavors, dietary options, and decorations to make them your own. I hope this recipe inspires you to try your hand at homemade cake pops and maybe even create your signature version.
Give it a shot, and let me know how your batch turns out! Share your tweaks, photos, or questions in the comments—I’m always excited to hear from fellow baking enthusiasts. Happy popping!
FAQs About Creamy Red Velvet Cake Pops
How long do cake pops last once made?
Stored in an airtight container in the fridge, they last about 5 days. For longer storage, freezing is a great option.
Can I make the cake pops ahead of time?
Yes! You can prepare the cake balls and freeze them before dipping. Just thaw in the fridge before coating with chocolate.
What’s the best way to melt white chocolate without burning it?
Use short 20-30 second bursts in the microwave, stirring in between. Alternatively, a double boiler works well to melt gently.
Can I use store-bought red velvet cake instead of baking from scratch?
Absolutely! Just crumble the cake finely and mix with the cream cheese filling as directed.
How do I keep cake pops from falling off the sticks?
Dip the tip of each stick in melted chocolate before inserting into the cake ball, then chill to set. This acts like glue and helps hold everything together.
For more sweet treats with a homemade touch, you might enjoy my crispy garlic chicken recipe or the easy-to-make classic chocolate chip cookies that always disappear fast around here.
Pin This Recipe!

Creamy Red Velvet Cake Pops

These creamy red velvet cake pops combine classic red velvet cake crumbs blended with a smooth cream cheese filling, coated in luscious white chocolate for a bite-sized homemade delight.
- Prep Time: 30 minutes
- Cook Time: 25-30 minutes
- Total Time: 1 hour
- Yield: 24 servings 1x
- Category: Dessert
- Cuisine: American
Ingredients
- 2 ½ cups all-purpose flour (315g)
- 1 ½ cups granulated sugar (300g)
- 2 tbsp unsweetened cocoa powder
- 1 tsp baking soda
- ½ tsp salt
- 1 cup buttermilk (240ml) or milk with 1 tbsp vinegar
- 1 cup vegetable oil (240ml)
- 2 large eggs, room temperature
- 2 tbsp red food coloring (adjust to preference)
- 1 tsp vanilla extract
- 1 tsp white vinegar
- 8 oz cream cheese, softened (225g)
- 1 cup powdered sugar, sifted (120g)
- 2 tbsp unsalted butter, softened
- 12 oz white chocolate chips or melting wafers (340g)
- 1 tbsp vegetable shortening (optional)
- Sprinkles or edible glitter (optional)
Instructions
- Preheat oven to 350°F (175°C). Grease and flour a 9×13-inch baking pan.
- In a large bowl, sift together flour, cocoa powder, baking soda, and salt.
- In another bowl, whisk together sugar, vegetable oil, eggs, buttermilk, red food coloring, vanilla extract, and white vinegar until smooth.
- Gradually mix dry ingredients into wet ingredients until just combined.
- Pour batter into prepared pan and bake for 25-30 minutes or until a toothpick inserted comes out clean. Let cool completely on a wire rack.
- In a mixing bowl, beat softened cream cheese, butter, and powdered sugar until creamy and smooth.
- Crumble the cooled cake into fine pieces using hands or a food processor.
- Add cream cheese filling to crumbled cake and mix gently until the mixture holds together when pressed. Adjust with more cream cheese or cake crumbs if needed.
- Scoop tablespoon-sized portions and roll into balls. Place on a parchment-lined baking sheet and chill in the refrigerator for at least 30 minutes.
- Melt white chocolate chips in a microwave-safe bowl in 30-second intervals, stirring between each until smooth. Stir in vegetable shortening if using.
- Dip each chilled cake pop into melted white chocolate, tapping off excess. Insert sticks if not already done.
- Place dipped cake pops upright in a styrofoam block or cake pop stand. Decorate with sprinkles or edible glitter while coating is wet.
- Let cake pops set completely at room temperature or refrigerate for about 20 minutes before serving.
Notes
Use room temperature ingredients for smoother batter and filling. Chill cake balls before dipping to prevent falling apart. Melt white chocolate in short bursts to avoid burning. If chocolate thickens, reheat gently with a bit of shortening. For firmer cake pops, chill longer before dipping.
Nutrition
- Serving Size: 1 cake pop
- Calories: 165
- Sugar: 15
- Sodium: 110
- Fat: 9
- Saturated Fat: 5
- Carbohydrates: 20
- Fiber: 1
- Protein: 2
Keywords: red velvet cake pops, creamy cake pops, white chocolate cake pops, homemade cake pops, easy dessert, party treats