Love this? Save it for later!
Share the inspiration with your friends
Introduction
There used to be a tiny café tucked away near my daughter’s elementary school that made these incredible little veggie quesadilla pinwheels. When they suddenly closed one chilly November morning, I honestly felt like a small piece of my week had disappeared. The way those pinwheels combined gooey cheese, crisp veggies, and a hint of spice wrapped in a soft tortilla was unforgettable. I remember juggling my toddler and the lunchbox while sneaking a bite—sticky fingers, a cracked plate, and all.
After about a dozen tries—burnt edges, soggy centers, and a few too many kitchen messes—I finally nailed the perfect combination. These Easy Veggie-Packed Kindergarten Lunch Box Quesadilla Pinwheels are just like the ones I used to buy, only better because I know exactly what’s inside. You know that feeling when you discover your kid’s school snack is both healthy and actually loved? Yeah, this recipe nails it every time.
Maybe you’ve been there: hunting for a simple, veggie-filled lunchbox idea that’s not just tossed together but actually tastes great. That’s exactly why I keep making these pinwheels—they’re the hands-down favorite at our house and make mornings way less hectic.
Why You’ll Love This Recipe
After testing these pinwheels countless times in my kitchen (and through many picky little taste testers), I can say this recipe truly delivers. Here’s why it stands out:
- Quick & Easy: Ready in under 20 minutes, perfect for busy school mornings or last-minute snack prep.
- Simple Ingredients: Uses common pantry staples and fresh veggies you likely have on hand—no trips to specialty stores required.
- Perfect for School Lunches: Portable and mess-free, these pinwheels hold up well in lunchboxes without getting soggy.
- Crowd-Pleaser: Kids love the cheesy, savory flavor, and parents appreciate the hidden vegetables.
- Unbelievably Delicious: The mix of melted cheese, crunchy veggies, and warm tortillas is comfort food made kid-friendly.
This isn’t just another quesadilla recipe. The secret is in finely chopping the veggies so they blend seamlessly with the cheese, plus a touch of seasoning that’s just enough to excite the taste buds without overwhelming sensitive palates. Honestly, once I got the balance right, these pinwheels became my go-to snack solution for school days and after-school munchies.
They’re not just tasty—they’re a little moment of joy packed into every bite, making lunchboxes something kids actually look forward to.
What Ingredients You Will Need
This recipe uses simple, wholesome ingredients to deliver bold flavor and satisfying texture without fuss. Most of these are pantry staples, while the veggies add fresh crunch and nutrition. Here’s what you’ll gather:
- Flour tortillas: Large, soft tortillas work best for rolling (I like Mission brand for their pliability).
- Shredded cheddar cheese: Sharp or mild, depending on your kid’s preference (freshly shredded melts better than pre-shredded).
- Finely chopped bell peppers: Red, yellow, or orange for sweetness and vibrant color.
- Grated carrot: Adds natural sweetness and moisture without overpowering.
- Sweet corn kernels: Fresh or frozen (thawed) for little bursts of sweetness.
- Chopped spinach or kale: Mild greens that blend easily when finely chopped.
- Black beans (optional): Drained and rinsed, adds protein and creaminess.
- Mild taco seasoning: Just a pinch to add subtle flavor without heat (homemade or store-bought).
- Olive oil or butter: For lightly toasting the quesadillas to golden perfection.
- Sour cream or Greek yogurt (optional): For dipping or spreading inside for extra creaminess.
Feel free to swap out any veggies based on what’s fresh or your child’s favorites—zucchini or finely chopped mushrooms work beautifully too. For gluten-free options, use corn or gluten-free tortillas. If dairy is a concern, dairy-free cheese alternatives melt well without losing that creamy texture.
Equipment Needed
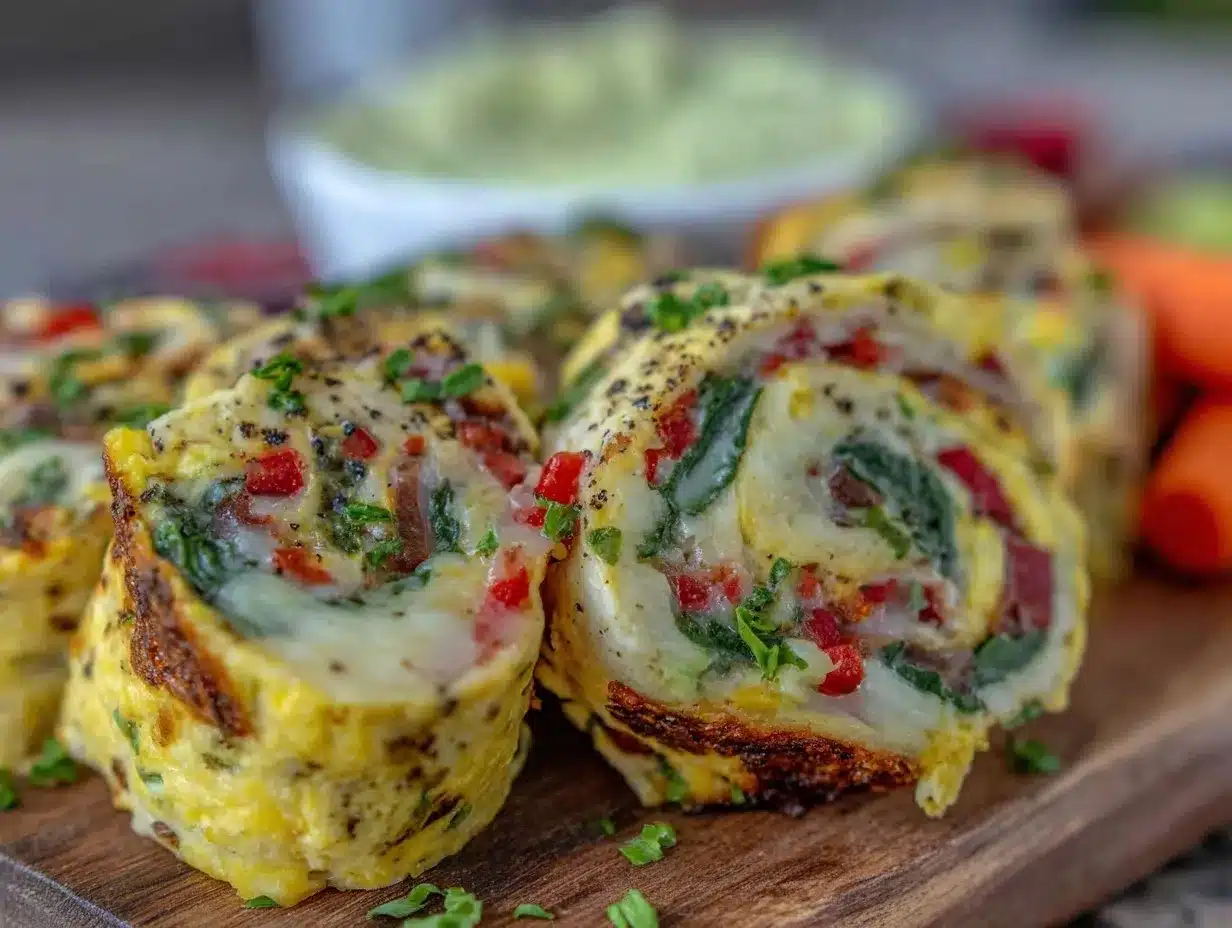
To make these veggie-packed quesadilla pinwheels, you’ll need some basic kitchen tools that most home cooks already have:
- Cutting board and sharp knife: For finely chopping the veggies—trust me, the smaller the better for easy rolling.
- Grater: For shredding cheese and carrots.
- Large skillet or non-stick pan: To toast the rolled pinwheels evenly without sticking.
- Spatula: A flexible one helps flip the pinwheels gently.
- Mixing bowl: To toss the veggies with cheese and seasoning before assembling.
- Plastic wrap or parchment paper: For wrapping the pinwheels tightly before slicing.
If you’ve got a food processor, it can speed up chopping, but it’s not necessary. I often find chopping by hand helps me control texture better—plus, it’s a nice little mindfulness moment. If you don’t have a non-stick pan, a well-seasoned cast iron skillet or a griddle works great too.
Preparation Method
- Prep the veggies: Finely chop the bell peppers, spinach (or kale), and black beans (if using). Grate the carrots and cheese. This should take about 10 minutes.
- Mix the filling: In a large bowl, combine shredded cheese, chopped veggies, corn kernels, and a pinch of mild taco seasoning. Toss gently to mix everything evenly.
- Assemble the quesadillas: Lay a tortilla flat on a clean surface. Spread an even layer of the veggie-cheese mixture over the entire surface, leaving about a half-inch border around the edges.
- Roll tightly: Starting from one edge, carefully roll the tortilla into a tight log. Use plastic wrap to wrap the rolled tortilla snugly, which helps it keep its shape for slicing. Refrigerate wrapped rolls for at least 10 minutes if you have the time—this makes slicing cleaner.
- Slice into pinwheels: Using a sharp knife, cut the rolled tortilla into 1-inch (2.5 cm) thick slices. You should get about 8-10 pinwheels per tortilla.
- Toast the pinwheels: Heat a non-stick skillet over medium heat and add a little olive oil or butter. Place the pinwheels cut side down and cook for 2-3 minutes until golden and crispy. Flip and cook the other side for another 2 minutes. The cheese should be melted and the veggies warmed through.
- Cool and pack: Let pinwheels cool slightly before packing into lunchboxes or serving warm with a side of sour cream or Greek yogurt for dipping.
Pro tip: If your pinwheels feel too soft or soggy, chilling the rolled tortillas before slicing makes a huge difference. Also, don’t overload with veggies—balance is key to keeping them easy to roll and crisp when toasted.
Cooking Tips & Techniques
Getting these quesadilla pinwheels just right took a few kitchen experiments. Here’s what I learned:
- Chop veggies finely: Big chunks make rolling tricky and can cause the pinwheels to fall apart.
- Don’t overfill: A thin, even layer of filling rolls better and cooks evenly.
- Use fresh cheese: Freshly shredded melts smoother and tastes better than pre-packaged shredded cheese with anti-caking agents.
- Medium heat is your friend: Too hot and the tortilla burns before the cheese melts; too low and it gets soggy. Aim for a golden, crispy exterior.
- Wrap and chill: Wrapping the roll tightly and chilling it helps maintain shape and makes slicing clean, avoiding a mess.
- Multitasking tip: While pinwheels chill, prep a quick fruit salad or pack a drink for the lunchbox to save time.
Honestly, the first time I tried to cook them straight after rolling, the filling spilled every which way. Lesson learned—patience pays off!
Variations & Adaptations
One of the best parts about this recipe is how easy it is to tweak:
- Gluten-Free Version: Use gluten-free tortillas—corn or cassava flour tortillas work great.
- Dairy-Free Option: Swap cheddar cheese for a plant-based cheese alternative and use dairy-free yogurt for dipping.
- Seasonal Veggies: Swap in finely diced zucchini, shredded beet, or even cooked sweet potato for a fall twist.
- Protein Boost: Add cooked, shredded chicken or turkey for a more filling lunchbox option.
- Spicy Kick: Mix in a pinch of smoked paprika or mild chili powder if your kid likes a little heat.
Personally, I once made a batch with leftover roasted sweet potatoes and kale—it was a hit and felt extra cozy on a cold school day. Feel free to get creative based on what you have in the fridge!
Serving & Storage Suggestions
These quesadilla pinwheels are best served warm but also hold up well at room temperature, making them perfect for lunchboxes. I like to pack them with a small container of sour cream or Greek yogurt for dipping, and a side of fresh fruit or crunchy veggie sticks.
Store any leftovers tightly wrapped in the refrigerator for up to 3 days. For longer storage, you can freeze the rolled tortillas before slicing, then toast pinwheels straight from the freezer (adding a few extra minutes to cooking time). Reheat in a skillet or toaster oven to keep that crispy exterior.
Over time, the flavors meld nicely, so sometimes I make these pinwheels the night before. The next day, they taste just as good, and my mornings feel much calmer.
Nutritional Information & Benefits
Each pinwheel packs a balance of protein, fiber, and vitamins, making it a nourishing school snack. The cheese offers calcium and protein, while the veggies provide fiber, antioxidants, and essential nutrients like vitamin A and C. Using whole-grain or gluten-free tortillas can add extra fiber or accommodate dietary needs.
This recipe is naturally low in added sugars and can easily be adjusted for dairy-free or gluten-free diets. It’s a wholesome way to sneak in veggies for little ones who might otherwise turn their noses up at greens.
Conclusion
If you’re looking for a simple, tasty, and kid-approved snack or lunchbox idea, these Easy Veggie-Packed Kindergarten Lunch Box Quesadilla Pinwheels are a winner. They bring together the best of quick prep, wholesome ingredients, and that irresistible cheesy goodness.
Feel free to swap in your family’s favorite veggies or add a sprinkle of herbs for a personal touch. Honestly, it’s the kind of recipe that grows with your child’s tastes and keeps lunch exciting.
Give this recipe a try, and let me know how your little ones react—I’d love to hear your twists and success stories. Here’s to stress-free mornings and happy, healthy lunches!
Frequently Asked Questions
- Can I make these pinwheels ahead of time? Yes! You can assemble and chill the rolled tortillas overnight, then slice and toast them fresh in the morning.
- What’s the best way to keep the pinwheels from getting soggy? Wrapping the rolls tightly in plastic wrap and chilling before slicing helps maintain shape and texture.
- Can I use other types of cheese? Absolutely! Monterey Jack, mozzarella, or a mild pepper jack work well.
- Are these suitable for toddlers? Yes, but make sure the veggies are finely chopped to avoid choking hazards and cut pinwheels into smaller pieces.
- How do I make this recipe vegan? Use dairy-free cheese and substitute sour cream with plant-based yogurt or avocado dip.
Pin This Recipe!

Easy Veggie-Packed Kindergarten Lunch Box Quesadilla Pinwheels

These quesadilla pinwheels combine gooey cheese, crisp veggies, and a hint of spice wrapped in a soft tortilla, making a healthy, kid-approved snack perfect for school lunches.
- Prep Time: 10 minutes
- Cook Time: 5 minutes
- Total Time: 15 minutes
- Yield: 8-10 pinwheels per tortilla (about 4 servings)
- Category: Snack
- Cuisine: American
Ingredients
- Large flour tortillas
- Shredded cheddar cheese (sharp or mild)
- Finely chopped bell peppers (red, yellow, or orange)
- Grated carrot
- Sweet corn kernels (fresh or thawed frozen)
- Chopped spinach or kale
- Black beans (optional, drained and rinsed)
- Mild taco seasoning (a pinch)
- Olive oil or butter (for toasting)
- Sour cream or Greek yogurt (optional, for dipping or spreading)
Instructions
- Finely chop the bell peppers, spinach (or kale), and black beans (if using). Grate the carrots and cheese. This should take about 10 minutes.
- In a large bowl, combine shredded cheese, chopped veggies, corn kernels, and a pinch of mild taco seasoning. Toss gently to mix everything evenly.
- Lay a tortilla flat on a clean surface. Spread an even layer of the veggie-cheese mixture over the entire surface, leaving about a half-inch border around the edges.
- Starting from one edge, carefully roll the tortilla into a tight log. Use plastic wrap to wrap the rolled tortilla snugly, which helps it keep its shape for slicing. Refrigerate wrapped rolls for at least 10 minutes if you have the time.
- Using a sharp knife, cut the rolled tortilla into 1-inch thick slices. You should get about 8-10 pinwheels per tortilla.
- Heat a non-stick skillet over medium heat and add a little olive oil or butter. Place the pinwheels cut side down and cook for 2-3 minutes until golden and crispy. Flip and cook the other side for another 2 minutes until cheese is melted and veggies warmed through.
- Let pinwheels cool slightly before packing into lunchboxes or serving warm with a side of sour cream or Greek yogurt for dipping.
Notes
Chop veggies finely to make rolling easier and prevent pinwheels from falling apart. Don’t overfill the tortillas to keep them easy to roll and crisp when toasted. Wrapping and chilling the rolled tortillas before slicing helps maintain shape and makes slicing cleaner. Use medium heat to avoid burning the tortilla while melting the cheese.
Nutrition
- Serving Size: 2-3 pinwheels
- Calories: 180
- Sugar: 3
- Sodium: 320
- Fat: 9
- Saturated Fat: 4
- Carbohydrates: 18
- Fiber: 3
- Protein: 7
Keywords: quesadilla pinwheels, veggie quesadilla, school lunch, kid-friendly snack, easy lunchbox recipe, healthy snacks, cheesy pinwheels


