Love this? Save it for later!
Share the inspiration with your friends
This was supposed to be a creamy chicken and rice casserole. The kind you bake in the oven for an hour, with a golden, bubbly top and that distinct crust around the edges that everyone fights over. I had the recipe memorized, the dish buttered, and the chicken seared. Then my oven decided to go on strike. The heating element just… stopped. No warning, no dramatic spark—just a cold, dark cavity where my dinner was supposed to cook. I stood there staring at it, honestly, for a solid thirty seconds, holding my hot skillet of chicken like an idiot.
I had maybe forty minutes before the hangry monsters in my house started circling. So I did what any reasonable person would do: I threw everything into one pot on the stovetop and prayed. I tossed in the rice, dumped in the broth, stirred in some cheese I had leftover from taco night, and just covered it. I was already planning the apology text to my family about ordering pizza. But you know that feeling when you lift the lid and something smells way too good to be true? That was this moment. The rice was tender, the chicken was fall-apart, and the cheese had melted into this silky, savory sauce that coated every single grain.
I didn’t just save dinner that night—I accidentally made the recipe I now make at least twice a month. It’s faster, easier, and honestly, I think I like it more than the original casserole. One pot, no fuss, and no oven required. That’s the kind of win I’ll take any day of the week.
Why You’ll Love This Recipe
Let me tell you, this Easy One-Pot Cheesy Chicken and Rice isn’t just another weeknight dinner—it’s the one that saves your sanity. I’ve tested this more times than I care to admit, and every time, it delivers the same comforting, cheesy goodness without the headache of a million dirty dishes. Here’s why you’re going to fall hard for this one:
- Quick & Easy: From start to finish, this meal comes together in about 35 minutes. No oven preheating, no complicated steps—just one pot and a stove.
- Simple Ingredients: You probably have most of this in your pantry right now. Chicken, rice, broth, cheese, and a few seasonings. That’s it. No fancy grocery runs required.
- Perfect for Busy Weeknights: This is the dinner you make when you’re tired, the kids are hungry, and you need something on the table fast. It’s also great for meal prep—the leftovers reheat beautifully.
- Crowd-Pleaser: I’ve served this to picky eaters, cheese lovers, and even my neighbor who “doesn’t really like rice.” Every single person went back for seconds.
- Unbelievably Delicious: The cheese melts into the rice and creates this creamy, savory sauce that coats everything perfectly. It’s comfort food at its finest, but without the heavy feeling afterward.
What makes this recipe different from all the other cheesy chicken and rice recipes out there? It’s the technique. Instead of baking it in the oven or using canned cream soups, we’re building flavor right in the pot. The rice absorbs the chicken broth and the rendered fat from the chicken, so every bite is packed with savory goodness. And the cheese? We’re using a combination that melts like a dream—no grainy, separated sauce here. This is the version I’ve perfected after a dozen trials, and I promise, it’s worth every single cheesy, comforting bite.
This is the kind of meal that makes you close your eyes after the first forkful. It’s simple, it’s satisfying, and it’s exactly what you need after a long day.
What Ingredients You Will Need
This recipe uses simple, wholesome ingredients to deliver bold flavor and satisfying texture without the fuss. Most of these are pantry staples, so you’re likely already set. Let’s break down what you need and why each ingredient matters.
- Chicken Thighs (1.5 lbs or 680g), boneless and skinless: I prefer thighs over breasts here because they stay juicier and more flavorful during the simmering process. The extra fat renders into the rice and adds richness. If you only have breasts, that’s fine—just watch the cooking time so they don’t dry out.
- Long-Grain White Rice (1 cup or 200g), uncooked: Long-grain rice gives you those separate, fluffy grains that don’t turn into a sticky mess. Basmati or jasmine work beautifully. Avoid short-grain or sushi rice here—they’ll get too gummy. I’ve tried both, and trust me, long-grain is the way to go.
- Chicken Broth (2 cups or 480ml): Use a good-quality broth here—it’s the backbone of the flavor. I recommend Swanson or Kitchen Basics for store-bought options. If you have homemade broth, even better. The rice absorbs this liquid, so you want it to taste great.
- Shredded Cheddar Cheese (1 cup or 120g), sharp: Sharp cheddar gives you that bold, tangy cheese flavor without needing a ton of it. Pre-shredded cheese works in a pinch, but freshly shredded melts much smoother. The anti-caking agents in pre-shredded cheese can make the sauce slightly grainy.
- Shredded Mozzarella Cheese (½ cup or 60g): This is my secret for that perfect, stretchy, gooey texture. Mozzarella melts like a dream and balances out the sharpness of the cheddar. It’s the combo that makes this dish irresistible.
- Onion (1 medium), diced: Onion adds a savory base note that you can’t skip. Yellow or white onions work best. Dice them small so they cook down and almost disappear into the sauce.
- Garlic (3 cloves), minced: Fresh garlic is non-negotiable here. The jarred stuff just doesn’t have the same punch. Add it after the onion has softened so it doesn’t burn.
- Butter (2 tablespoons or 30g), unsalted: We’re using butter to sauté the aromatics and add a touch of richness. If you’re using salted butter, adjust your added salt accordingly.
- Paprika (1 teaspoon): This adds a subtle smokiness and a beautiful warm color to the dish. Smoked paprika is even better if you have it.
- Garlic Powder (½ teaspoon): Double the garlic flavor without worrying about burning fresh garlic. It blends into the rice beautifully.
- Onion Powder (½ teaspoon): This reinforces the savory onion flavor throughout the dish, not just at the beginning.
- Salt and Black Pepper (to taste): Season in layers—a pinch at the beginning and more at the end. The cheese adds some saltiness, so taste before adding too much.
- Fresh Parsley (for garnish), optional: A sprinkle of fresh parsley adds a pop of color and a fresh note that cuts through the richness. Totally optional, but highly recommended for presentation.
Substitution Guidance: If you’re dairy-sensitive, you can use a dairy-free cheddar-style shred and a splash of unsweetened oat milk to keep it creamy. For a gluten-free option, this recipe is naturally gluten-free as long as your broth is certified gluten-free. Want to add veggies? Toss in a cup of frozen peas and carrots during the last 5 minutes of cooking—they’ll warm through perfectly without getting mushy.
Equipment Needed
One of the best things about this recipe is how little equipment it requires. You don’t need a stand mixer, a food processor, or any fancy gadgets. Here’s what you’ll need:
- Large Dutch Oven or Heavy-Bottomed Pot (5-6 quart): This is your workhorse. A heavy pot distributes heat evenly and prevents the rice from scorching on the bottom. I use my trusty Le Creuset, but any heavy pot with a tight-fitting lid will work. If you don’t have a Dutch oven, a deep skillet with a lid is a good alternative—just make sure it’s at least 3 inches deep to hold everything.
- Sharp Chef’s Knife: For dicing the onion and mincing the garlic. A dull knife makes prep frustrating and dangerous. Trust me, I learned that the hard way.
- Cutting Board: Any sturdy board will do. I prefer wood or bamboo, but plastic is fine too.
- Wooden Spoon or Silicone Spatula: For stirring the rice and scraping up any browned bits from the bottom of the pot. A metal spoon can scratch your enameled cookware.
- Measuring Cups and Spoons: Accurate measurements matter here, especially for the rice and broth. Too much liquid and you’ll have mushy rice; too little and it’ll be crunchy.
- Box Grater or Food Processor (for shredding cheese): If you’re shredding your own cheese (which I highly recommend), a box grater is simple and effective. A food processor with a shredding disc makes quick work of it.
- Lid: This is crucial. The pot needs a tight-fitting lid to trap the steam and cook the rice properly. If your pot doesn’t have a lid, use a piece of aluminum foil tightly sealed around the edges.
That’s it! No blender, no mixer, no special gadgets. Just good old-fashioned cookware and a little patience.
Preparation Method
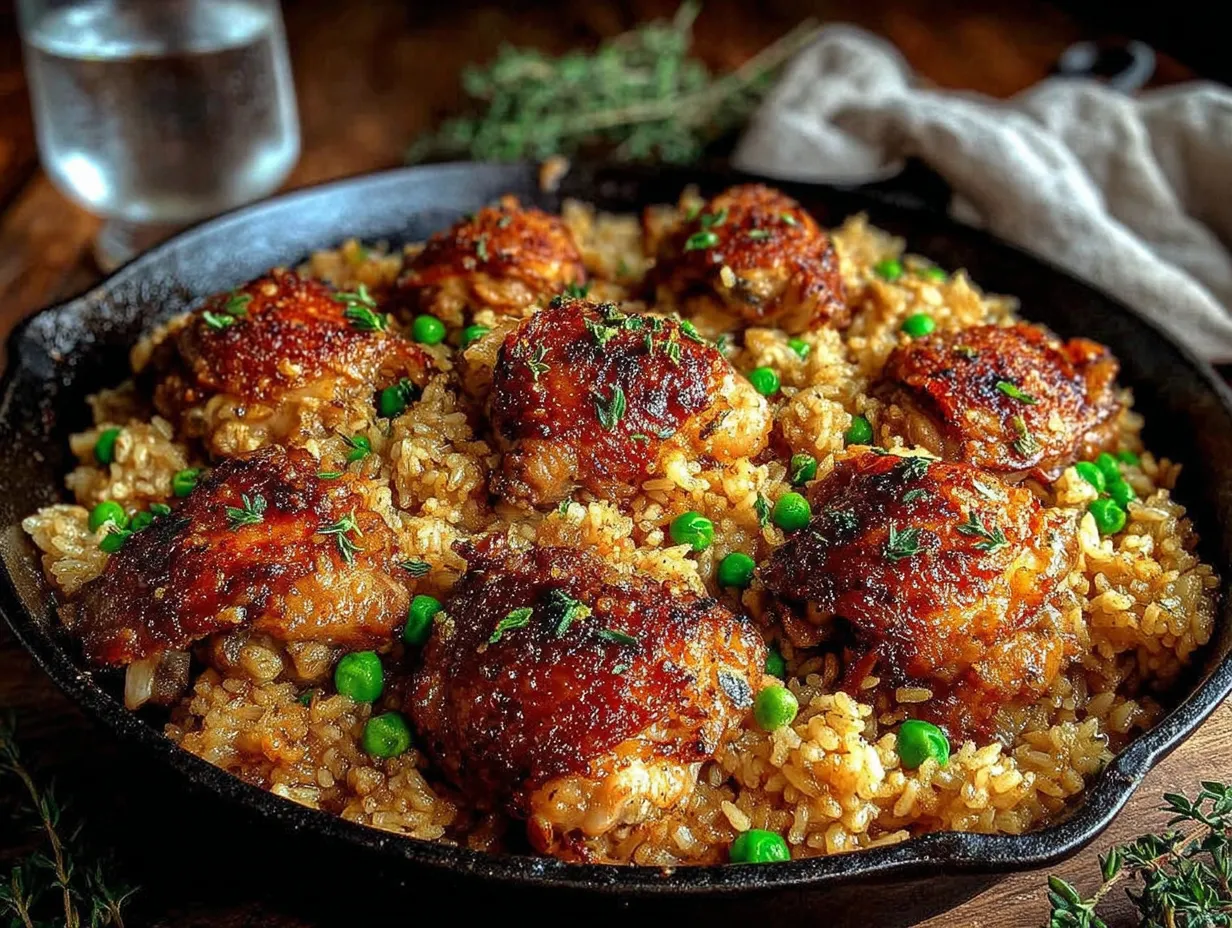
Alright, let’s get cooking. This recipe moves quickly, so have all your ingredients prepped and ready before you start. Trust me, you don’t want to be chopping an onion while your chicken is burning. Here’s the step-by-step breakdown:
- Prep your ingredients (5 minutes): Dice the onion, mince the garlic, and shred your cheeses if you’re doing it fresh. Pat the chicken thighs dry with a paper towel and season both sides with a pinch of salt, pepper, and paprika. This helps the chicken brown better.
- Sear the chicken (8-10 minutes): Heat your Dutch oven over medium-high heat and add 1 tablespoon of butter. Once it’s sizzling, place the chicken thighs in the pot in a single layer. Don’t crowd them—if your pot is small, work in batches. Let them cook for 4-5 minutes per side until they’re golden brown and crispy on the outside. They don’t need to be cooked through yet; they’ll finish in the rice. Transfer the chicken to a plate and set aside.
- Sauté the aromatics (3-4 minutes): Reduce the heat to medium. Add the remaining 1 tablespoon of butter to the pot. Toss in the diced onion and cook, stirring occasionally, until it’s soft and translucent—about 3 minutes. Add the minced garlic and cook for another 30 seconds until fragrant. Stir constantly so the garlic doesn’t burn.
- Toast the rice (2 minutes): Add the uncooked rice to the pot and stir it into the onion mixture. Let it toast for about 2 minutes, stirring frequently. You’ll notice the rice starts to smell nutty and some grains turn slightly golden. This step adds depth of flavor and helps the rice stay fluffy.
- Add the liquid and seasonings (1 minute): Pour in the chicken broth and scrape the bottom of the pot with your wooden spoon to release any browned bits (that’s pure flavor). Stir in the garlic powder, onion powder, and the remaining paprika. Bring the mixture to a gentle boil.
- Return the chicken and simmer (20-25 minutes): Nestle the seared chicken thighs back into the pot, pushing them down into the liquid. Reduce the heat to low, cover the pot with a tight-fitting lid, and let it simmer gently. Do not lift the lid during this time—the steam is what cooks the rice. Set a timer for 20 minutes.
- Check the rice (after 20 minutes): After 20 minutes, remove the lid carefully (watch out for steam). The rice should be tender and most of the liquid should be absorbed. If the rice is still a little firm, add 2-3 tablespoons of broth or water, cover, and cook for another 5 minutes. If the rice is done but there’s excess liquid, uncover and let it simmer for 2-3 minutes to evaporate.
- Add the cheese (2 minutes): Turn off the heat. Remove the chicken thighs to the plate again (just temporarily). Sprinkle the shredded cheddar and mozzarella over the rice and stir gently until the cheese is fully melted and the rice is creamy. Taste and adjust salt and pepper if needed.
- Serve and garnish: Return the chicken thighs to the pot or serve them on top of the cheesy rice. Sprinkle with fresh parsley for a pop of color. Serve hot and watch it disappear.
Sensory Cues: When you’re searing the chicken, listen for that satisfying sizzle—if it’s quiet, the pan isn’t hot enough. The rice should look slightly translucent before you add the broth, and when you lift the lid after simmering, you should see steam rising and the rice grains should be plump and separate. The cheese should melt into a smooth, glossy sauce—if it looks clumpy, you might have used pre-shredded cheese or the heat was too high.
Cooking Tips & Techniques
After making this recipe more times than I can count, I’ve collected a few hard-earned lessons. Here are the tips that will make your one-pot cheesy chicken and rice turn out perfect every single time:
- Don’t skip the searing step. I know it adds a few minutes, but that golden crust on the chicken is pure flavor. It also renders some fat into the pot, which the rice absorbs. I once tried skipping this step when I was in a hurry, and the dish was noticeably less flavorful. Never again.
- Resist the urge to lift the lid. I cannot stress this enough. Every time you lift that lid, you release steam, and that steam is what cooks the rice. Set a timer and walk away. I’ve had friends tell me their rice was crunchy, and every single time, they admitted they peeked. Don’t be a peeker.
- Use room temperature chicken. Cold chicken straight from the fridge will lower the temperature of your pot and mess up the cooking time. Let the chicken sit on the counter for 15-20 minutes before you start cooking.
- Shred your own cheese. I know it’s tempting to buy the pre-shredded bags, but they’re coated with anti-caking agents that prevent smooth melting. Freshly shredded cheese melts into a silky sauce. It takes an extra 2 minutes, and it’s worth it.
- Toast the rice properly. This isn’t just for flavor—toasting the rice helps the grains stay separate and fluffy. If you skip this step, you’re more likely to end up with sticky, clumpy rice.
- Adjust the heat as needed. Every stove is different. If your simmer is too high, the liquid will evaporate before the rice is cooked. If it’s too low, the rice won’t cook through. You want a gentle simmer—small bubbles breaking the surface, not a rolling boil.
- Let it rest before serving. After you add the cheese and turn off the heat, let the pot sit covered for 2-3 minutes. This allows the rice to absorb any remaining moisture and the flavors to meld together. Patience pays off.
I once made this for a dinner party and forgot to add the cheese until the very end. I stirred it in, but the rice had already cooled down too much, and the cheese just clumped instead of melting. Lesson learned: add the cheese while the rice is still piping hot, and stir gently but thoroughly.
Variations & Adaptations
This recipe is incredibly forgiving and adaptable. Here are some of my favorite ways to change it up depending on what I have on hand or who I’m feeding:
- Cheesy Broccoli Chicken and Rice: Add 2 cups of frozen broccoli florets during the last 5 minutes of cooking. The broccoli steams perfectly and adds a pop of green. My kids actually eat broccoli this way—it’s a miracle.
- Spicy Southwest Version: Swap the cheddar for pepper jack cheese, add 1 can of drained black beans and 1 cup of frozen corn, and stir in ½ teaspoon of cumin and a pinch of cayenne. Top with sliced jalapeños and a squeeze of lime. This version is a hit on taco nights.
- Creamy Mushroom and Chicken: Sauté 8 ounces of sliced mushrooms with the onion. Use a mix of Swiss and mozzarella cheese instead of cheddar. The mushrooms add an earthy, savory depth that’s absolutely delicious.
- Lightened-Up Version: Use chicken breast instead of thighs, reduce the butter to 1 tablespoon, and use low-fat cheese. You can also swap half the rice for cauliflower rice—add the cauliflower rice during the last 10 minutes of cooking so it doesn’t get mushy.
- Herb and Lemon Twist: Add the zest of one lemon and 2 tablespoons of fresh dill or thyme when you add the cheese. The brightness cuts through the richness beautifully. This is my go-to spring version.
I once tried a version with leftover rotisserie chicken and it worked perfectly—just skip the searing step and add the shredded chicken after the rice is cooked, then stir in the cheese. It cut the total time down to about 20 minutes. Perfect for those nights when you forgot to thaw the chicken.
Serving & Storage Suggestions
This dish is incredibly versatile when it comes to serving. Here’s how I like to enjoy it and how to keep it fresh for later:
Serving Temperature and Presentation: Serve this cheesy chicken and rice piping hot, straight from the pot. I like to spoon the rice onto a plate, place a chicken thigh on top, and sprinkle with fresh parsley and a crack of black pepper. A side of steamed green beans or a simple garden salad with a lemon vinaigrette balances out the richness perfectly. For a cozy winter meal, pair it with roasted carrots or a crusty baguette to soak up any extra cheesy sauce.
Complementary Dishes: This dish is a meal in itself, but if you’re feeding a crowd, it pairs beautifully with roasted asparagus, sautéed spinach, or a simple cucumber tomato salad. For a heartier spread, serve it alongside roasted sweet potatoes or a bowl of black bean soup.
Storage Instructions: Store leftovers in an airtight container in the refrigerator for up to 4 days. The flavors actually meld and deepen overnight, so this is one of those rare dishes that tastes even better the next day. To reheat, add a splash of chicken broth or water to the rice and warm it in a skillet over medium-low heat, stirring occasionally. You can also microwave it in 30-second bursts, stirring in between, until heated through.
Freezer Instructions: This recipe freezes beautifully. Let it cool completely, then transfer it to a freezer-safe container. It will keep for up to 3 months. To thaw, place it in the refrigerator overnight. Reheat in a skillet with a splash of broth to restore the creamy texture. I like to freeze individual portions for quick lunches—just grab one from the freezer and you’re set.
Flavor Development: Here’s a little secret: this dish is actually better on day two. The rice continues to absorb the flavors from the broth and cheese, and the chicken becomes even more tender. If you can resist eating it all the first night, you’re in for a treat the next day.
Nutritional Information & Benefits
This Easy One-Pot Cheesy Chicken and Rice isn’t just delicious—it also offers some solid nutritional benefits. Here’s a rough estimate per serving (based on 4 servings, using chicken thighs, cheddar, and mozzarella):
- Calories: Approximately 580-620 per serving
- Protein: 38-42g (great for muscle repair and keeping you full)
- Carbohydrates: 45-50g (mostly from the rice, providing steady energy)
- Fat: 24-28g (from the chicken and cheese, including some saturated fat)
- Fiber: 1-2g (add veggies to boost this)
- Calcium: 25-30% of the daily value (from the cheese, great for bone health)
- Iron: 10-15% of the daily value (from the chicken and fortified rice)
Health Benefits of Key Ingredients: Chicken thighs are a great source of high-quality protein, B vitamins (especially B6 and B12), and selenium, which supports immune function. The cheese provides calcium and protein, while the garlic and onion offer anti-inflammatory properties and support gut health. If you use brown rice instead of white, you’ll add fiber, magnesium, and more B vitamins.
Dietary Considerations: This recipe is naturally gluten-free (double-check your broth label to be sure). For a lower-carb option, swap the rice for cauliflower rice or use half the amount of rice and add extra veggies. If you’re watching your sodium, use low-sodium broth and reduce the added salt—the cheese provides plenty of flavor on its own.
Potential Allergens: This recipe contains dairy (butter and cheese). For a dairy-free version, use a dairy-free butter substitute and plant-based cheese shreds. It also contains no common allergens like nuts, soy, or eggs, making it a safe choice for most households.
I love that this dish feels indulgent but is actually a balanced meal in one pot. It’s comfort food that doesn’t leave you feeling heavy or guilty—just satisfied and happy.
Conclusion
This Easy One-Pot Cheesy Chicken and Rice has become a staple in my kitchen for a reason. It’s the recipe I turn to when I need a guaranteed win—when I’m tired, when I’m short on time, when I need something that will make everyone at the table happy. It started as an accident, a desperate improvisation when my oven failed me, but it’s become the dish I’m genuinely proud to share.
What I love most about this recipe is how forgiving it is. You can swap the cheese, add veggies, use different cuts of chicken, and it still turns out delicious. It’s the kind of recipe that builds confidence in the kitchen because it’s nearly impossible to mess up. And honestly? That’s the best kind of recipe to have in your back pocket.
I’d love to hear how this turns out for you. Did you add your own twist? Did your kids ask for seconds? Did you discover a new favorite variation? Drop a comment below and let me know—I read every single one and I love hearing about your kitchen victories. And if you loved this recipe, share it with a friend who needs an easy weeknight win. Happy cooking, friends!
Frequently Asked Questions
Can I use chicken breasts instead of thighs?
Absolutely! Chicken breasts will work, but they can dry out more easily since they have less fat. To prevent this, reduce the simmering time by about 5 minutes and check the internal temperature—it should reach 165°F (74°C). You can also slice the breasts in half horizontally so they cook faster and more evenly.
Why is my rice still crunchy after 20 minutes?
This usually happens for one of three reasons: you lifted the lid during cooking (releasing steam), your heat was too low, or your rice is old. If your rice is crunchy, add 2-3 tablespoons of broth or water, cover tightly, and cook for another 5 minutes on low heat. Next time, make sure your simmer is gentle but steady, and resist the urge to peek!
Can I make this in a slow cooker or Instant Pot?
Yes! For the Instant Pot, use the sauté function for steps 2-4, then pressure cook on high for 6 minutes with a natural release. For a slow cooker, sear the chicken and sauté the aromatics on the stovetop first, then transfer everything to the slow cooker and cook on low for 4-5 hours. Add the cheese in the last 15 minutes.
How do I prevent the cheese from getting clumpy or grainy?
The key is to shred your own cheese from a block—pre-shredded cheese has anti-caking agents that prevent smooth melting. Also, make sure the rice is still very hot when you add the cheese, and stir gently but thoroughly. If the cheese clumps, try adding a splash of warm broth and stirring vigorously over low heat.
Can I freeze this dish?
Yes, it freezes beautifully! Let it cool completely, then transfer to a freezer-safe container. It will keep for up to 3 months. To reheat, thaw in the refrigerator overnight and warm in a skillet with a splash of broth to restore the creamy texture. I like to freeze individual portions for quick lunches.
Pin This Recipe!

Easy One-Pot Cheesy Chicken and Rice: Best Weeknight Dinner

This one-pot cheesy chicken and rice is a quick, easy, and delicious weeknight dinner that comes together in about 35 minutes. With simple ingredients and no oven required, it’s a comforting, crowd-pleasing meal that saves your sanity on busy nights.
- Prep Time: 10 minutes
- Cook Time: 25 minutes
- Total Time: 35 minutes
- Yield: 4 servings 1x
- Category: Main Course
- Cuisine: American
Ingredients
- 1.5 lbs (680g) boneless, skinless chicken thighs
- 1 cup (200g) uncooked long-grain white rice
- 2 cups (480ml) chicken broth
- 1 cup (120g) shredded sharp cheddar cheese
- ½ cup (60g) shredded mozzarella cheese
- 1 medium onion, diced
- 3 cloves garlic, minced
- 2 tablespoons (30g) unsalted butter
- 1 teaspoon paprika
- ½ teaspoon garlic powder
- ½ teaspoon onion powder
- Salt and black pepper to taste
- Fresh parsley for garnish (optional)
Instructions
- Prep your ingredients: Dice the onion, mince the garlic, and shred your cheeses. Pat the chicken thighs dry and season both sides with a pinch of salt, pepper, and paprika.
- Sear the chicken: Heat a large Dutch oven over medium-high heat and add 1 tablespoon of butter. Once sizzling, place the chicken thighs in a single layer and cook for 4-5 minutes per side until golden brown. Transfer to a plate and set aside.
- Sauté the aromatics: Reduce heat to medium. Add the remaining 1 tablespoon of butter. Cook the diced onion for about 3 minutes until soft and translucent. Add the minced garlic and cook for 30 seconds until fragrant.
- Toast the rice: Add the uncooked rice and stir for about 2 minutes until it smells nutty and some grains turn golden.
- Add liquid and seasonings: Pour in the chicken broth and scrape the bottom of the pot to release browned bits. Stir in garlic powder, onion powder, and remaining paprika. Bring to a gentle boil.
- Return the chicken and simmer: Nestle the chicken thighs back into the pot. Reduce heat to low, cover tightly, and simmer for 20-25 minutes. Do not lift the lid.
- Check the rice: After 20 minutes, remove the lid. The rice should be tender and most liquid absorbed. If still firm, add 2-3 tablespoons broth or water, cover, and cook 5 more minutes. If excess liquid remains, uncover and simmer 2-3 minutes.
- Add the cheese: Turn off heat. Remove chicken temporarily. Sprinkle cheddar and mozzarella over the rice and stir gently until fully melted and creamy. Season with salt and pepper to taste.
- Serve and garnish: Return chicken to the pot or serve on top of the rice. Sprinkle with fresh parsley and serve hot.
Notes
Don’t skip searing the chicken—it adds flavor. Resist lifting the lid during simmering to ensure rice cooks properly. Shred your own cheese for smooth melting. Let the dish rest 2-3 minutes after adding cheese for best texture.
Nutrition
- Serving Size: 1 serving (about 1.5
- Calories: 600
- Sugar: 3
- Sodium: 800
- Fat: 26
- Saturated Fat: 12
- Carbohydrates: 48
- Fiber: 1
- Protein: 40
Keywords: one-pot, cheesy chicken and rice, weeknight dinner, easy dinner, chicken and rice, comfort food, stovetop dinner


