Love this? Save it for later!
Share the inspiration with your friends
It was 11:47 PM on a random Thursday in late August, and I was staring down a cardboard box of Roma tomatoes that I had absolutely no business buying. My neighbor, a sweet older woman named Carol, had practically forced them into my arms at the farmers market. “You’ll figure it out,” she said with a wink. I didn’t figure it out that night. I just washed them, left them on the counter, and went to bed. The next morning, the smell of ripe tomatoes hit me like a wall. I had maybe three hours before they went from perfect to past-it. That’s when the idea arrived—what if I didn’t just boil them down into a sad, watery sauce? What if I roasted them first?
Honestly, I’d been canning for a few years by then, but I always followed the same tired routine. Blanch, peel, simmer, jar. It worked, but it was boring. I wanted something with depth, something that tasted like it had been cooking all day even when it hadn’t. So I cranked the oven to 400°F, tossed those tomatoes with olive oil and garlic, and took a chance. The result was this homemade roasted tomato sauce for canning—a recipe that completely changed how I approach preserving season.
Maybe you’ve been there, staring down a mountain of produce that you bought with good intentions and zero plan. Let me tell you, this sauce is the plan you didn’t know you needed. It’s rich, it’s smoky, and it tastes like summer in a jar. I’ve been making it every year since, and I keep tweaking it—adding a little more basil here, a little less salt there. But the core? That late-night impulse to roast instead of boil? That’s what stuck.
Why You’ll Love This Recipe
This isn’t just another tomato sauce recipe. It’s the one that makes you question why you ever bought the jarred stuff. I’ve tested this version over five canning seasons, tweaked the roasting time, adjusted the acidity levels, and even had a nutritionist friend look over the salt content. It’s been through the wringer, and it came out better every single time.
- Quick & Easy: From counter to canner in about two hours. Most of that time is hands-off roasting.
- Simple Ingredients: You need tomatoes, garlic, onions, olive oil, and herbs. That’s it. No weird preservatives or sugar bombs.
- Perfect for Meal Prep: Make a double batch in the fall and you’ll have pasta sauce, pizza base, and soup starter all winter long.
- Crowd-Pleaser: I’ve served this to picky kids, Italian grandmothers, and vegan friends. Everyone asks for the recipe.
- Unbelievably Delicious: The roasting process caramelizes the natural sugars in the tomatoes, creating a depth of flavor that stovetop sauces just can’t match.
What makes this recipe different from the rest is the two-step roasting method. You roast the tomatoes and aromatics first, then you blend and simmer. It sounds simple, but that extra step concentrates the flavor in a way that feels almost unfair. This isn’t just another version of roasted tomato sauce—it’s your best version. The one that makes you close your eyes after the first bite.
What Ingredients You Will Need
This recipe uses simple, wholesome ingredients to deliver bold flavor and satisfying texture without the fuss. Most of these are pantry staples or farmers market finds, and they’re easy to substitute if you need to.
- Roma tomatoes (10 pounds, halved lengthwise) — These are my go-to for canning because they have fewer seeds and thicker walls, which means less watery sauce. Look for deep red, firm tomatoes with no soft spots.
- Yellow onions (2 large, quartered) — Adds sweetness and body. I prefer yellow over white or red for a milder flavor that won’t overpower the tomatoes.
- Garlic cloves (8-10, peeled) — Use fresh garlic, not the pre-minced stuff. The roasting mellows it out beautifully.
- Extra-virgin olive oil (1/4 cup) — Go for a good quality oil here—it’s a major flavor player. I like California Olive Ranch for everyday use.
- Fresh basil leaves (1 cup, packed) — Adds that classic Italian note. If you can’t find fresh, use 2 tablespoons of dried basil.
- Fresh oregano (2 tablespoons, chopped) or 1 teaspoon dried — Optional but highly recommended for a more complex herb profile.
- Kosher salt (2 teaspoons, plus more to taste) — I use Diamond Crystal. It’s less salty by volume, so adjust if you’re using a different brand.
- Black pepper (1 teaspoon, freshly ground) — Adds a subtle warmth that plays well with the roasted flavors.
- Balsamic vinegar (2 tablespoons) — This is my secret ingredient. It brightens the sauce without making it taste vinegary. (Adds richness)
- Lemon juice (bottled, 2 tablespoons per pint jar) — Essential for safe canning. Use bottled lemon juice for consistent acidity levels. (Use fresh-squeezed if you’re freezing instead of canning)
Ingredient Selection Tips: For the best texture, avoid overripe or bruised tomatoes. They’ll make your sauce taste flat. If you’re using a mix of tomato varieties, that’s fine—just know that heirlooms will give a sweeter, more complex flavor while paste tomatoes like Romas will yield a thicker sauce.
Substitution Guidance: Need a gluten-free option? This recipe is naturally gluten-free. For a low-sodium version, skip the added salt and rely on the herbs and balsamic for flavor. If you’re allergic to nightshades, I’m sorry—this one isn’t for you.
Equipment Needed
You don’t need a professional kitchen to make this sauce, but having the right tools makes the process smoother. Here’s what you’ll need:
- Large roasting pans (2 half-sheet pans or 1 large roasting pan) — Rimmed is key to catch all the juices. I’ve used everything from high-end Nordic Ware to dollar-store pans, and they all work fine.
- Food mill or immersion blender — A food mill gives you the smoothest texture and removes seeds and skins. An immersion blender is faster but leaves some texture. I prefer the food mill for canning because it creates a uniform sauce.
- Large stockpot (8-quart or larger) — For simmering the sauce after blending. A heavy-bottomed pot prevents scorching.
- Canning jars (pint or quart size) — Standard Mason jars work best. Check for cracks or chips before using.
- Water bath canner — A large pot with a rack. If you don’t have one, a deep stockpot with a folded kitchen towel at the bottom works in a pinch.
- Canning tools — Jar lifter, wide-mouth funnel, and magnetic lid wand. These are cheap and save you from burned fingers.
- Kitchen towels — Clean, lint-free towels for handling hot jars. I keep a stack dedicated just to canning.
Budget-Friendly Options: Skip the food mill and use a potato masher for a chunkier sauce. You can also borrow canning tools from a friend or check your local Buy Nothing group—people often give away equipment they no longer use.
Preparation Method
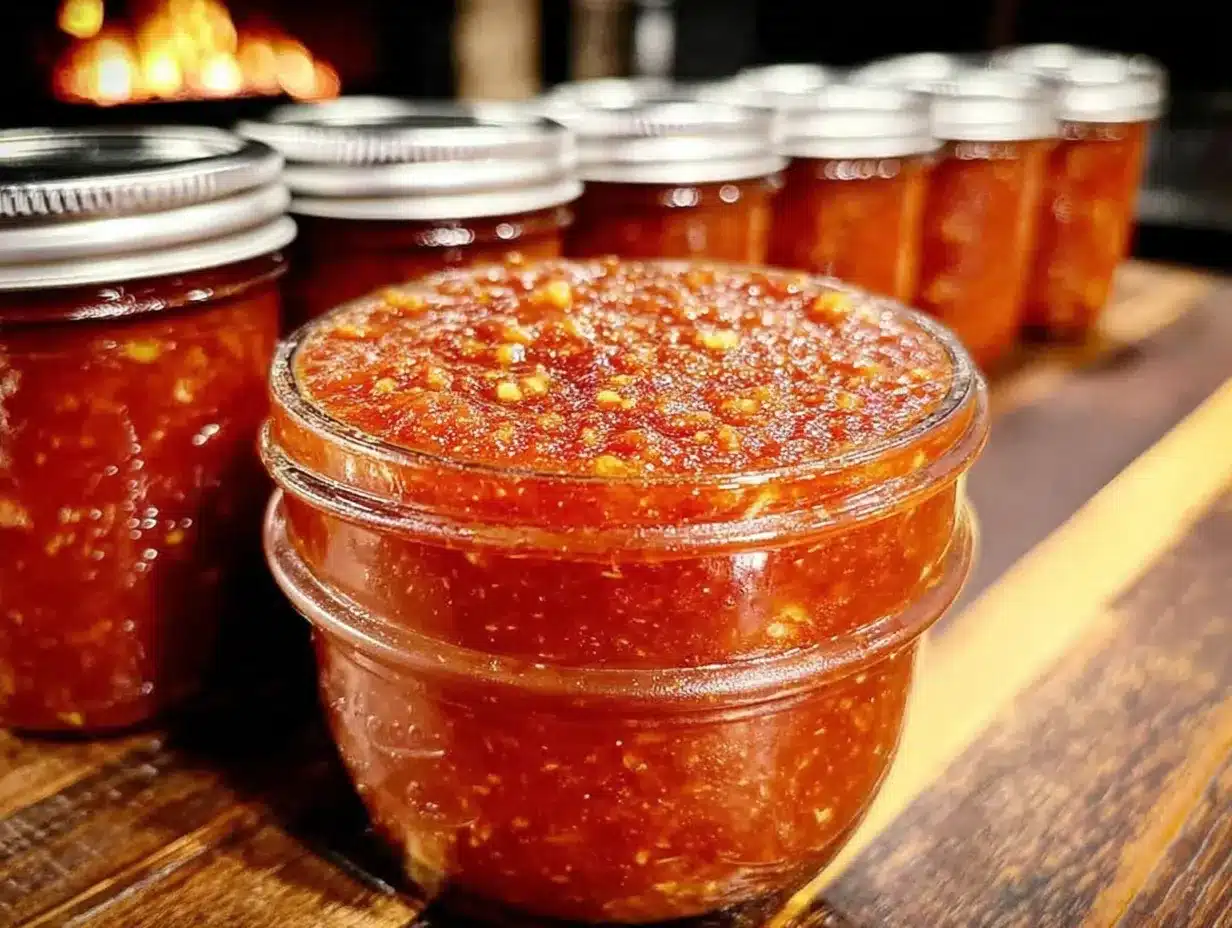
This method breaks down into three main stages: roasting, blending, and canning. Take your time with each step, and don’t rush the roasting—that’s where the magic happens.
- Preheat the oven to 400°F (200°C). While it’s heating, wash all your tomatoes thoroughly and cut them in half lengthwise. Remove the tough stem cores but leave the seeds and skins—they’ll break down during roasting and get removed later.
- Arrange the tomatoes cut-side up on your roasting pans. Tuck the quartered onions and garlic cloves in between the tomatoes. Drizzle everything with olive oil, then sprinkle with salt and pepper. Use your hands to toss gently, making sure everything is coated. Pro tip: Don’t overcrowd the pans. If the tomatoes are stacked, they’ll steam instead of roast. Use two pans if needed.
- Roast for 45-60 minutes, rotating the pans halfway through. The tomatoes should look wrinkled, slightly charred on the edges, and the onions should be soft and translucent. The garlic will be golden and smell incredibly sweet. Let everything cool on the pans for about 10 minutes—long enough to handle but still warm.
- Set up your food mill over a large bowl or pot. Work in batches, feeding the roasted vegetables through the mill. This will separate the skins and seeds from the smooth pulp. If you’re using an immersion blender, transfer everything to a pot and blend until smooth. Sensory cue: The sauce should look like a deep orange-red, almost velvety. If it’s too thick, add a little water.
- Transfer the blended sauce to your stockpot and place it over medium heat. Add the fresh basil, oregano, and balsamic vinegar. Bring the sauce to a gentle simmer—not a rolling boil—and cook for 20-30 minutes, stirring occasionally. The sauce will reduce slightly and deepen in color. Taste test: Dip a spoon in and let it cool. The flavor should be rich, slightly sweet, and well-balanced. Adjust salt if needed.
- While the sauce simmers, prepare your canning equipment. Wash your jars, lids, and bands in hot soapy water. Place the jars in your water bath canner and fill with enough water to cover them by at least an inch. Bring to a simmer (180°F/82°C) but not a boil. Keep the lids in a small saucepan of hot water—not boiling—to soften the sealing compound.
- Add the bottled lemon juice to each jar: 2 tablespoons per pint, 4 tablespoons per quart. This ensures the sauce is acidic enough for safe water bath canning. Warning: Do not skip this step, even if you’re using naturally acidic tomatoes. Acidity levels vary, and botulism is not a risk worth taking.
- Ladle the hot sauce into the jars using your wide-mouth funnel, leaving 1/2 inch of headspace. Run a clean spatula or bubble remover tool around the inside of each jar to release any trapped air. Wipe the rims with a clean, damp towel—any residue can prevent a proper seal.
- Center the lids on the jars and screw on the bands until they’re fingertip-tight. Don’t overtighten—air needs to escape during processing. Place the jars in the canner rack and lower them into the boiling water. Process pints for 35 minutes and quarts for 40 minutes at altitudes under 1,000 feet. Adjust processing time for higher altitudes (add 5 minutes for every 1,000 feet above sea level).
- After processing, turn off the heat and let the jars sit in the canner for 5 minutes. Use your jar lifter to transfer them to a towel-lined counter, leaving at least an inch of space between each jar. Let them cool undisturbed for 12-24 hours. You’ll hear the satisfying “ping” of lids sealing as they cool.
Troubleshooting Tip: If a jar doesn’t seal (the lid flexes when pressed), just refrigerate it and use within a week. It’s still perfectly good sauce—it just won’t be shelf-stable.
Cooking Tips & Techniques
I’ve made this sauce at least a dozen times, and I’ve messed it up in almost every way possible. Here’s what I’ve learned:
Don’t skip the roasting step. I tried rushing once by boiling the tomatoes instead of roasting them. The sauce was thin, bland, and honestly depressing. Roasting concentrates the flavor and caramelizes the sugars in a way that stovetop methods just can’t replicate. It’s the single most important technique in this recipe.
Watch your oven temperature. Every oven runs differently. If your tomatoes are browning too quickly on the edges but aren’t soft in the center, lower the temperature to 375°F (190°C) and extend the roasting time. You want even caramelization, not burnt edges.
Timing is everything. Start your sauce in the morning so you have plenty of time for cooling and processing. I once started at 4 PM and was still canning at midnight—not fun. Give yourself a buffer of at least 4 hours from start to finish.
Multitask wisely. While the tomatoes roast, wash your jars and set up your canner. While the sauce simmers, clean up your workspace. The more you do in parallel, the less overwhelmed you’ll feel at the end.
Consistency check. If your sauce is too thin after simmering, let it cook longer uncovered. If it’s too thick, add a splash of water or vegetable broth. The sauce should coat the back of a spoon without being pasty.
My biggest failure? I once forgot to add the lemon juice to half my jars. I realized it two days later when I saw the lids hadn’t sealed. I had to dump the sauce, re-can it with lemon juice, and process again. Now I add the lemon juice to each jar before I even start ladling the sauce. Lesson learned.
Variations & Adaptations
This recipe is a fantastic base, but don’t be afraid to make it your own. Here are some variations I’ve tried and loved:
- Smoky Chipotle Version: Add 2-3 chipotle peppers in adobo sauce to the roasting pan. The smoky heat pairs beautifully with the roasted tomatoes. I made this for a taco night and it was a game-changer.
- Herb Garden Blend: Swap the basil and oregano for a mix of thyme, rosemary, and marjoram. This version is earthier and works better with roasted vegetables or meats.
- Low-Acid Alternative: If you’re sensitive to acidity, add a pinch of baking soda to the sauce after blending. It neutralizes some of the acid without affecting the flavor. Note: If you do this, you must pressure can the sauce instead of water bath canning, since the acidity level changes.
- Freezer-Friendly Option: Don’t want to can? Let the sauce cool completely, then pour it into freezer-safe bags or containers. Lay the bags flat to freeze for easy stacking. It’ll keep for up to 6 months.
- Spicy Arrabbiata Style: Add 1-2 teaspoons of red pepper flakes along with the herbs. This is my husband’s favorite version—he puts it on everything from pasta to eggs.
Personal Variation: One year, I had a surplus of yellow tomatoes and decided to roast them with a few peaches I needed to use up. The result was a sweet, fruity sauce that was incredible on grilled chicken. It wasn’t great for canning (the peaches threw off the acidity), but it was a delicious experiment.
Serving & Storage Suggestions
This sauce is incredibly versatile. Here’s how to get the most out of it:
Serving Temperature: Serve the sauce hot, straight from the jar. It’s perfect over al dente pasta, spread on homemade pizza dough, or as a dipping sauce for crusty bread. I also love using it as a base for shakshuka—just crack a few eggs into the simmering sauce and cook until set.
Complementary Dishes: Pair this sauce with a simple green salad dressed with lemon vinaigrette, or serve it alongside garlic bread for dipping. For a heartier meal, add cooked Italian sausage or meatballs to the sauce and simmer for 15 minutes before serving.
Storage Instructions: Sealed jars can be stored in a cool, dark place (like a pantry or basement) for up to 18 months. Once opened, refrigerate and use within 5-7 days. If you see any signs of mold, bulging lids, or off odors, discard the jar immediately—don’t taste it.
Reheating Methods: Pour the sauce into a saucepan and warm over medium-low heat, stirring occasionally. If the sauce has thickened in the jar, add a splash of water or pasta cooking water to loosen it up. You can also microwave individual portions in 30-second intervals, stirring between each.
Flavor Development: Like many tomato-based sauces, this one actually tastes better after a few weeks. The flavors meld and mellow, creating a more harmonious taste. I always try to save at least one jar for three months out—it’s a treat.
Nutritional Information & Benefits
This sauce is not only delicious but also packed with nutritional benefits. Here’s a rough estimate per 1/2 cup serving (based on the recipe as written):
- Calories: 85
- Total Fat: 5g
- Sodium: 290mg
- Total Carbohydrates: 10g
- Dietary Fiber: 3g
- Sugars: 6g
- Protein: 2g
Health Benefits: Tomatoes are rich in lycopene, a powerful antioxidant linked to reduced risk of heart disease and certain cancers. Cooking tomatoes actually increases the bioavailability of lycopene, making this sauce even more beneficial. The olive oil adds healthy monounsaturated fats, which help your body absorb the fat-soluble vitamins in the tomatoes. Garlic and onions provide anti-inflammatory compounds and support immune health.
Dietary Considerations: This recipe is naturally gluten-free, dairy-free, vegan, and Whole30-compliant (if you skip the balsamic vinegar or use a compliant version). It’s also low in added sugars—the sweetness comes entirely from the roasted vegetables.
Potential Allergens: None of the common allergens (dairy, eggs, nuts, soy, wheat) are present in this recipe. However, if you’re sensitive to nightshades (tomatoes, peppers, eggplant), this sauce isn’t suitable.
Personal Wellness Perspective: I love knowing exactly what’s in my food. When I open a jar of this sauce in February, I’m not just eating tomatoes—I’m eating summer. It’s a small act of resistance against processed foods, and it makes me feel connected to the seasons.
Frequently Asked Questions
Can I use canned tomatoes instead of fresh?
Technically, yes, but the flavor won’t be the same. The roasting step is what gives this sauce its depth, and canned tomatoes are already cooked. If you’re in a pinch, use whole peeled San Marzano tomatoes and roast them with the aromatics for a shorter time (about 20 minutes).
Do I have to peel the tomatoes before roasting?
Nope! The food mill takes care of that. If you’re using an immersion blender and want a smoother sauce, you can peel the tomatoes after roasting—they’ll slip right off—but it’s an extra step that isn’t necessary.
How long will this sauce last in the pantry?
Properly sealed and stored jars will last 12-18 months. I always label mine with the date and use the oldest jars first. After 18 months, the quality starts to decline, but the sauce is still safe to eat as long as the seal is intact.
Can I double this recipe?
Absolutely. I regularly make double batches using 20 pounds of tomatoes. Just make sure you have enough roasting pans and a large enough stockpot. You may need to process the jars in batches if your canner isn’t big enough.
Why did my sauce turn out bitter?
Bitterness usually comes from over-roasted garlic or burnt tomato skins. If your garlic cloves are dark brown or black, they’ll add a bitter note. Next time, check the garlic after 30 minutes of roasting and remove it if it’s done before the tomatoes. Also, make sure your food mill is removing all the skins—leftover bits can add bitterness.
Conclusion
This homemade roasted tomato sauce for canning is more than just a recipe—it’s a way to capture a season and hold onto it. Every time I open a jar in the dead of winter, I’m transported back to that late-August morning when I took a chance on roasting instead of boiling. The smell alone is enough to make me smile.
I hope you give this recipe a try, whether you’re a seasoned canner or a total beginner. Don’t be afraid to make it your own—add more garlic, throw in some herbs from your garden, or spice it up with red pepper flakes. The best recipes are the ones that evolve with you.
If you make this sauce, I’d love to hear about it. Drop a comment below and let me know how it turned out, what variations you tried, or any questions you have. And if you’re looking for more preserving inspiration, check out my easy homemade strawberry jam or this classic dill pickle recipe for more ways to stock your pantry. Happy canning, friends!
Pin This Recipe!
Easy Homemade Roasted Tomato Sauce for Canning
This rich, smoky roasted tomato sauce is perfect for canning and captures the taste of summer in a jar. With a simple two-step roasting method, it delivers deep, caramelized flavor that stovetop sauces can’t match.
- Prep Time: 30 minutes
- Cook Time: 1 hour 30 minutes
- Total Time: 2 hours
- Yield: 6-8 pints 1x
- Category: Sauce
- Cuisine: Italian-American
Ingredients
- 10 pounds Roma tomatoes, halved lengthwise
- 2 large yellow onions, quartered
- 8–10 garlic cloves, peeled
- 1/4 cup extra-virgin olive oil
- 1 cup packed fresh basil leaves (or 2 tablespoons dried basil)
- 2 tablespoons fresh oregano, chopped (or 1 teaspoon dried oregano)
- 2 teaspoons kosher salt (Diamond Crystal recommended), plus more to taste
- 1 teaspoon freshly ground black pepper
- 2 tablespoons balsamic vinegar
- Bottled lemon juice (2 tablespoons per pint jar, 4 tablespoons per quart jar)
Instructions
- Preheat the oven to 400°F (200°C). Wash all tomatoes thoroughly and cut them in half lengthwise. Remove the tough stem cores but leave the seeds and skins.
- Arrange the tomatoes cut-side up on two half-sheet pans or one large roasting pan. Tuck the quartered onions and garlic cloves in between the tomatoes. Drizzle everything with olive oil, then sprinkle with salt and pepper. Toss gently to coat.
- Roast for 45-60 minutes, rotating the pans halfway through. The tomatoes should look wrinkled and slightly charred on the edges, and the onions should be soft and translucent. Let cool on the pans for about 10 minutes.
- Set up a food mill over a large bowl or pot. Work in batches, feeding the roasted vegetables through the mill to separate skins and seeds from the smooth pulp. Alternatively, use an immersion blender to blend until smooth.
- Transfer the blended sauce to a large stockpot (8-quart or larger) over medium heat. Add the fresh basil, oregano, and balsamic vinegar. Bring to a gentle simmer and cook for 20-30 minutes, stirring occasionally. Adjust salt to taste.
- While the sauce simmers, prepare canning equipment. Wash jars, lids, and bands in hot soapy water. Place jars in a water bath canner and fill with enough water to cover by at least 1 inch. Bring to a simmer (180°F/82°C). Keep lids in a small saucepan of hot water.
- Add bottled lemon juice to each jar: 2 tablespoons per pint, 4 tablespoons per quart.
- Ladle the hot sauce into jars using a wide-mouth funnel, leaving 1/2 inch headspace. Run a clean spatula around the inside of each jar to release trapped air. Wipe rims with a clean, damp towel.
- Center lids on jars and screw on bands until fingertip-tight. Place jars in the canner rack and lower into boiling water. Process pints for 35 minutes and quarts for 40 minutes at altitudes under 1,000 feet. Adjust for higher altitudes (add 5 minutes per 1,000 feet).
- After processing, turn off heat and let jars sit in canner for 5 minutes. Use a jar lifter to transfer to a towel-lined counter, leaving space between jars. Cool undisturbed for 12-24 hours. Listen for the ‘ping’ of lids sealing.
Notes
Don’t skip the roasting step—it concentrates flavor and caramelizes sugars. For even roasting, avoid overcrowding pans. If a jar doesn’t seal, refrigerate and use within a week. For low-acid alternative, add a pinch of baking soda and pressure can instead of water bath canning. Sauce tastes better after a few weeks as flavors meld.
Nutrition
- Serving Size: 1/2 cup
- Calories: 85
- Sugar: 6
- Sodium: 290
- Fat: 5
- Saturated Fat: 0.5
- Carbohydrates: 10
- Fiber: 3
- Protein: 2
Keywords: roasted tomato sauce, canning recipe, homemade tomato sauce, preserving tomatoes, summer recipe, pantry staple


