Love this? Save it for later!
Share the inspiration with your friends
I was standing in the baking aisle of our local grocery store last October, staring at a can of pumpkin puree like it held the secrets to the universe. The thing is, I’d already grabbed one, put it in my cart, then put it back. Then grabbed it again. My husband texted me asking if everything was okay, and I had to admit I was having a full-blown internal debate over canned pumpkin. You know that feeling when you want something so badly but you’re terrified you’ll mess it up?
That moment—the fluorescent lights, the slightly sticky floor, the woman next to me reaching for evaporated milk—it all triggered this memory I hadn’t thought about in years. I was maybe eight years old, sitting on a counter stool at my aunt Carol’s house. She wasn’t really my aunt, just my mom’s best friend, but she was the one who made cookies that actually tasted like fall. Not those dry, crumbly pumpkin cookies that leave you reaching for a glass of milk after two bites. Hers were soft in the middle, chewy at the edges, and had this warmth that made you slow down while eating them. I honestly haven’t thought about those cookies in probably fifteen years, but standing there in the baking aisle, I could almost feel the texture on my tongue.
I bought the pumpkin. And then I spent the next three afternoons trying to recreate that memory. The first batch was a disaster—flat, greasy, and honestly kind of sad. The second was better but still not right. The third? Let me tell you, when I pulled that tray out of the oven and saw the edges just starting to brown while the centers stayed puffy and soft, I knew I’d cracked it. These chewy pumpkin chocolate chip cookies aren’t just another fall recipe. They’re the ones that make you close your eyes after the first bite, and maybe you’ve been there, chasing a taste from your past that you can’t quite describe but you know the second you find it.
Why You’ll Love This Recipe
Look, I’ve made a lot of pumpkin cookies in my time. Some were cakey and dry. Others spread into flat, oily disks that looked more like pumpkin pancakes. These chewy pumpkin chocolate chip cookies are different, and here’s why they’ll become your go-to:
- Perfectly Chewy Texture : Most pumpkin cookies turn out fluffy and bread-like because of all the moisture in the pumpkin. I figured out the trick to getting that dense, chewy center with slightly crisp edges that actually reminds you of a chocolate chip cookie.
- Real Pumpkin Flavor : Not that faint, “is there pumpkin in here?” taste. These cookies actually taste like pumpkin, with warm spices that complement rather than overpower it.
- Simple Pantry Ingredients : You probably have everything except the pumpkin and maybe the chocolate chips. No weird specialty flours or hard-to-find extracts.
- No Chilling Required : I tested these with and without chilling the dough, and honestly? They work fine either way. If you’re impatient like me, you can scoop and bake immediately.
- Freezes Beautifully : The dough freezes perfectly for months, and the baked cookies thaw like they’re fresh from the oven.
- Crowd-Pleaser Guaranteed : I brought these to a potluck last month, and three different people asked for the recipe before the party was over. Kids love them, adults love them, and they disappear fast.
What makes these different from the hundreds of pumpkin cookie recipes out there is the technique. I spent a lot of time figuring out how to remove excess moisture from the pumpkin without making it a complicated process. The result is a cookie that actually holds its shape, has that satisfying chew, and doesn’t leave you wondering where the pumpkin went.
What Ingredients You Will Need
This recipe uses straightforward ingredients, but a few details matter more than you might think. Here’s what you’ll need and why each one plays an important role in creating that perfect chewy pumpkin chocolate chip cookie.
For the Cookies
- 1 cup (226g) unsalted butter, softened — Make sure it’s actually softened to room temperature, not melted. Melted butter will make these cookies spread too much and lose their chewy texture. I prefer using Land O’Lakes or Kerrygold for the best flavor.
- 1 cup (200g) granulated sugar — White sugar helps with spreading and gives the edges that slight crispiness.
- ½ cup (100g) packed light brown sugar — Brown sugar adds moisture and that deep, almost caramel-like flavor that pairs so well with pumpkin. Pack it firmly into your measuring cup.
- ¾ cup (170g) pumpkin puree — Not pumpkin pie filling! Make sure you grab 100% pure pumpkin. I recommend Libby’s for consistent results. Here’s the trick: after measuring, press the pumpkin between paper towels to remove excess moisture. This is the secret to chewy cookies instead of cakey ones.
- 1 large egg, room temperature — Room temperature egg incorporates more evenly into the butter mixture. If you forgot to take it out ahead of time, place the egg in a bowl of warm water for five minutes.
- 1 teaspoon vanilla extract — Pure vanilla extract makes a difference here. The artificial stuff has a chemical aftertaste that doesn’t play nicely with pumpkin.
- 2 cups (250g) all-purpose flour — Spoon and level your flour. Scooping directly from the bag can pack in too much flour and make the cookies dry.
- 1 teaspoon baking soda — This helps the cookies spread just enough while giving them lift.
- ½ teaspoon baking powder — Adds a tiny bit more lift and helps with that soft center.
- ½ teaspoon salt — Don’t skip this. Salt balances the sweetness and makes the pumpkin flavor pop.
- 2 teaspoons pumpkin pie spice — You can use store-bought or make your own with 1 teaspoon cinnamon, ½ teaspoon ginger, ¼ teaspoon nutmeg, ¼ teaspoon cloves, and a pinch of allspice.
- 1 teaspoon ground cinnamon — Extra cinnamon because pumpkin and cinnamon are best friends.
- 1½ cups (270g) semi-sweet chocolate chips — I like Ghirardelli or Guittard for chocolate that melts beautifully and doesn’t taste waxy. You can also use dark chocolate chips if you prefer less sweetness.
Ingredient Selection Tips
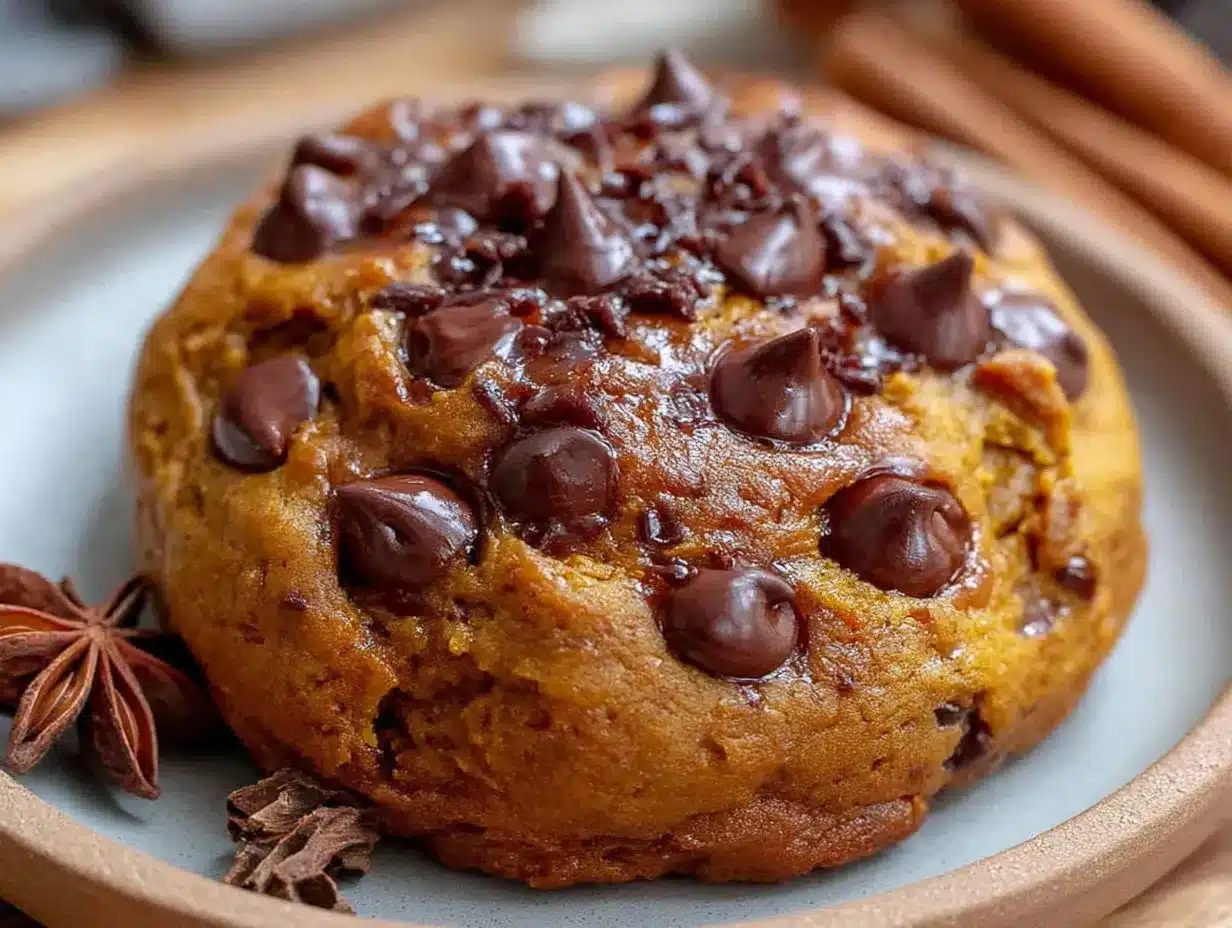
When choosing your pumpkin puree, look for cans that aren’t dented or damaged. If you’re using homemade pumpkin puree, make sure you’ve strained it overnight through cheesecloth to remove as much water as possible. Homemade pumpkin has significantly more water than canned, and that will affect your cookie texture.
For the chocolate chips, I honestly prefer using the larger “chunks” or “chips” rather than the tiny standard chips. They create better pockets of melted chocolate throughout the cookie. But regular chips work perfectly fine too—I’ve made these with whatever I had in the pantry, and they always turn out great.
If you’re out of pumpkin pie spice, don’t run to the store. Just mix cinnamon, ginger, nutmeg, and a tiny pinch of cloves. It’ll taste even better because you can adjust the ratios to your preference. I actually prefer my blend with extra cinnamon and less clove because clove can get overpowering.
Equipment Needed
You don’t need fancy equipment for these chewy pumpkin chocolate chip cookies, but having the right tools makes the process smoother. Here’s what I use:
- Large mixing bowl and medium mixing bowl — One for wet ingredients, one for dry. I use glass or stainless steel bowls because they don’t retain smells.
- Electric hand mixer or stand mixer — A hand mixer works great. You can cream the butter and sugar by hand, but your arm will get tired, and you might not get the right texture. I’ve done it both ways, and the mixer gives better results.
- Rubber spatula — For folding in the chocolate chips and scraping down the sides of the bowl. Get a good one that won’t melt or bend.
- Cookie scoop or tablespoon — A 1.5-tablespoon cookie scoop gives you consistent cookies that bake evenly. If you don’t have one, use two spoons to portion the dough.
- Baking sheets — I recommend light-colored baking sheets. Dark sheets absorb more heat and can cause the bottoms of your cookies to burn before the centers are done.
- Parchment paper or silicone baking mat — Parchment paper is cheaper and disposable. Silicone mats are reusable and work great. Either one prevents sticking and helps with even baking.
- Wire cooling rack — Essential for cooling cookies properly. If you leave them on the hot baking sheet, they’ll continue cooking and can become overdone.
- Paper towels — For pressing the moisture out of the pumpkin puree. This step matters more than you’d think.
If you don’t have a mixer, you can cream the butter and sugar with a wooden spoon. It’ll take about five minutes of vigorous stirring, and you’ll get a good arm workout. Just make sure the butter is very soft before you start.
Preparation Method
Let me walk you through this step by step. I’ve tested this method multiple times, and following these details will give you the best results.
- Preheat your oven to 350°F (175°C) and line two baking sheets with parchment paper or silicone mats. I always preheat for at least 15 minutes to make sure the oven is fully at temperature. An oven thermometer is worth buying if you don’t have one—my oven runs 25 degrees hot, and I never would have known without it.
- Prepare the pumpkin puree. Measure out ¾ cup of pumpkin puree and place it on a plate lined with a few layers of paper towels. Spread it out slightly and press another paper towel on top to absorb excess moisture. Let it sit while you prepare the other ingredients. This step removes about 2-3 tablespoons of water, which is what makes these cookies chewy instead of cakey. I forgot to do this on my first batch, and the cookies spread into flat, puffy disks that were more like pancakes. Learn from my mistake.
- Cream the butter and sugars. In a large mixing bowl, beat the softened butter, granulated sugar, and brown sugar together until light and fluffy, about 3-4 minutes with an electric mixer on medium speed. Scrape down the sides and bottom of the bowl halfway through. The mixture should look pale and slightly increased in volume. If it looks greasy or separated, your butter was too soft or you overmixed it.
- Add the pumpkin, egg, and vanilla. Add the prepared pumpkin puree, room temperature egg, and vanilla extract to the butter mixture. Beat on medium speed until just combined, about 30 seconds. The mixture might look slightly curdled at this point—that’s normal because of the moisture in the pumpkin. Don’t panic and don’t overmix.
- Whisk the dry ingredients. In a separate medium bowl, whisk together the all-purpose flour, baking soda, baking powder, salt, pumpkin pie spice, and ground cinnamon. Whisking ensures everything is evenly distributed. I use a whisk instead of a spoon because it breaks up any clumps in the flour or spices.
- Combine wet and dry ingredients. Gradually add the dry ingredients to the wet mixture, mixing on low speed or folding with a spatula. Mix just until no streaks of flour remain. Overmixing at this stage develops gluten and will make your cookies tough instead of tender. Stop as soon as the flour disappears.
- Fold in the chocolate chips. Using a rubber spatula, gently fold the chocolate chips into the dough until they’re evenly distributed. Reserve about ¼ cup of chocolate chips to press onto the tops of the cookies after scooping—this makes them look bakery-style and pretty.
- Scoop the dough. Use a 1.5-tablespoon cookie scoop to portion the dough into balls. Place them on the prepared baking sheets about 2 inches apart. These cookies spread moderately, so don’t crowd them. If you don’t have a scoop, use two spoons to shape rough balls—they don’t need to be perfect.
- Press extra chocolate chips on top. Take those reserved chocolate chips and press 3-4 chips onto the top of each dough ball. This step is optional but makes the cookies look more appealing and ensures every bite has visible chocolate.
- Bake for 10-12 minutes. Bake one sheet at a time in the center of the oven. The cookies are done when the edges are set and lightly golden, but the centers still look slightly underdone and puffy. They’ll continue baking on the hot sheet after you remove them from the oven. For softer, chewier cookies, bake for 10 minutes. For slightly crispier edges, go for 12 minutes. My sweet spot is 11 minutes.
- Cool on the baking sheet. Let the cookies rest on the baking sheet for 5 minutes. This allows them to set up properly. If you try to move them immediately, they’ll fall apart. After 5 minutes, transfer them to a wire cooling rack to cool completely. The centers will sink slightly as they cool, creating that perfect chewy texture.
- Repeat with remaining dough. If you’re reusing the same baking sheet, let it cool completely between batches. A hot sheet will cause the dough to spread too quickly and you’ll end up with flat cookies. I keep two sheets in rotation to speed things up.
Your kitchen will smell incredible at this point. Like fall in cookie form. Try not to eat all of them before they’ve cooled completely—I say this from personal experience, and warm cookies are delicious, but they really shine once they’ve set.
Cooking Tips & Techniques
After making these chewy pumpkin chocolate chip cookies more times than I care to count, I’ve picked up a few tricks that make a real difference. Here’s what I wish someone had told me before my first attempt.
Don’t skip the pumpkin blotting step. I cannot emphasize this enough. Pumpkin puree contains a surprising amount of water, and that water is what turns your cookies into cakey muffins instead of chewy cookies. Blotting with paper towels removes enough moisture to change the texture completely. My first batch without blotting spread into thin, greasy disks. My second batch with blotting produced perfectly puffy, chewy cookies. Night and day difference.
Measure your flour correctly. The most common mistake in cookie baking is using too much flour. When you scoop directly from the bag with your measuring cup, you can pack in up to 25% more flour than the recipe calls for. Instead, spoon the flour into your measuring cup and level it off with a knife. This gives you the accurate amount every time.
Watch your oven temperature. Ovens lie. I’m serious. My last apartment had an oven that ran 50 degrees too hot, and I ruined three batches of cookies before I figured it out. An oven thermometer costs about $7 and will save you from burnt bottoms and raw centers. Place it in the center of your oven and adjust your temperature setting accordingly.
Let the cookies cool on the sheet. I know it’s tempting to move them immediately, especially when you’re baking multiple batches and want to reuse the sheet. But those 5 minutes of resting time are crucial. The cookies are still setting up internally, and moving them too soon will cause them to break or deflate. Trust the process.
Use room temperature ingredients. Cold egg straight from the fridge can seize up your butter mixture and create lumps. Room temperature egg incorporates smoothly and creates a more uniform dough. If you forgot to take it out early, place the egg in a bowl of warm water for 5 minutes—it works every time.
One batch I learned this the hard way: I was rushing to make cookies for a bake sale and used cold egg, forgot to blot the pumpkin, and overmixed the dough trying to get the flour incorporated. The cookies were tough, flat, and honestly embarrassing. I had to start over, and I was late to the sale. That experience taught me that shortcuts in baking usually backfire, and taking the extra 5 minutes to do things right is always worth it.
Variations & Adaptations
One of the best things about this recipe is how adaptable it is. I’ve experimented with quite a few variations, and here are some of my favorites that still deliver that chewy texture.
Gluten-Free Version: Substitute the all-purpose flour with a 1:1 gluten-free baking flour blend that contains xanthan gum. I’ve tested this with Bob’s Red Mill 1:1 Baking Flour, and the cookies turned out almost identical to the original. Don’t use almond flour or coconut flour alone—they don’t have the right structure for chewy cookies.
Dairy-Free Version: Replace the butter with vegan butter sticks (not spreadable margarine). I like Miyoko’s or Country Crock Plant Butter. The texture will be slightly different—a bit less chewy and more tender—but they’re still delicious. Use dairy-free chocolate chips like Enjoy Life or Pascha.
White Chocolate Cranberry: Swap the semi-sweet chocolate chips for white chocolate chips and add ½ cup dried cranberries. The combination of sweet white chocolate and tart cranberries with the pumpkin spice is absolutely lovely. I made these for Thanksgiving last year, and they were gone before the turkey was carved.
Spiced Nut Version: Replace half the chocolate chips with ¾ cup toasted pecans or walnuts. Toast the nuts in a dry skillet over medium heat for 3-4 minutes until fragrant, then chop them roughly. The nuts add crunch and the toasting brings out their natural oils.
Extra Pumpkin Spice: If you’re a pumpkin spice fanatic (no judgment here), increase the pumpkin pie spice to 1 tablespoon and add an extra ½ teaspoon of cinnamon. This version is aggressively spiced in the best way possible.
Lower Sugar Option: Reduce the granulated sugar to ¾ cup and the brown sugar to ⅓ cup. The cookies will be less sweet but still have enough structure to stay chewy. You might want to use dark chocolate chips, which are less sweet than semi-sweet, to balance the flavors.
I personally love the white chocolate cranberry version for holiday gatherings. The red and white flecks against the orange cookie look festive, and the flavor combination is unexpected but perfect. Just make sure you blot the pumpkin well because dried cranberries add their own moisture, and you don’t want the cookies to get soggy.
Serving & Storage Suggestions
These chewy pumpkin chocolate chip cookies are wonderful fresh from the oven, but they also keep well if you manage to have any leftovers. Here’s how to enjoy them at their best.
Serving Temperature: I prefer these cookies at room temperature or slightly warm. If you’re serving them to guests, let them cool completely on a wire rack, then arrange them on a pretty plate or cake stand. A light dusting of powdered sugar or a drizzle of melted white chocolate makes them look extra special for parties.
Pairing Suggestions: These cookies are fantastic with a hot cup of coffee or spiced chai latte. For a dessert board, arrange them alongside apple slices, caramel dip, and a few squares of dark chocolate. They also make incredible ice cream sandwiches—just sandwich a scoop of vanilla or cinnamon ice cream between two cookies and freeze for 30 minutes.
Room Temperature Storage: Store baked cookies in an airtight container at room temperature for up to 5 days. Place a slice of bread in the container to keep them soft—the cookies will absorb moisture from the bread, keeping them chewy. Replace the bread slice every other day. I learned this trick from my grandmother, and it works like magic.
Freezer Storage for Baked Cookies: Place cooled cookies in a single layer on a baking sheet and freeze for 1 hour. Transfer the frozen cookies to a freezer-safe bag or container, separating layers with parchment paper. They’ll keep for up to 3 months. Thaw at room temperature for about 15 minutes before serving, or microwave for 10-15 seconds for that fresh-from-the-oven warmth.
Freezer Storage for Cookie Dough: Scoop the dough into balls and place them on a baking sheet. Freeze for 1 hour until solid, then transfer to a freezer bag. You can bake them directly from frozen—just add 2-3 minutes to the baking time. This is perfect for when you want fresh cookies but don’t want to make a full batch. I always keep a bag of these in my freezer for unexpected guests or late-night cravings.
Reheating Tips: To revive day-old cookies, microwave them for 8-10 seconds. For a larger batch, place them on a baking sheet in a 300°F oven for 3-4 minutes. The flavors actually develop more after a day or two, so these cookies taste even better on day two or three.
Nutritional Information & Benefits
Let’s be real—cookies are a treat, and I’m not going to pretend they’re health food. But these chewy pumpkin chocolate chip cookies do have some redeeming qualities compared to standard chocolate chip cookies.
| Nutritional Value | Per Cookie (based on 36 cookies) |
|---|---|
| Calories | 145 |
| Total Fat | 7g |
| Saturated Fat | 4g |
| Cholesterol | 20mg |
| Sodium | 95mg |
| Total Carbohydrates | 20g |
| Dietary Fiber | 1g |
| Sugars | 13g |
| Protein | 2g |
| Vitamin A | 35% DV |
Pumpkin is actually a nutritional powerhouse. It’s packed with vitamin A in the form of beta-carotene, which supports eye health and immune function. It also provides fiber, vitamin C, and potassium. The pumpkin puree adds moisture and nutrients without adding much fat or calories, which is why these cookies are slightly lower in calories than traditional chocolate chip cookies.
These cookies contain gluten (from the all-purpose flour), dairy (from the butter), and eggs. If you have allergies, check the variations section above for suitable substitutions. The chocolate chips may contain traces of milk and soy depending on the brand, so read labels carefully if you have severe allergies.
From a wellness perspective, I believe in balance. These cookies are a wonderful seasonal treat that brings joy and comfort. Enjoy them mindfully, savor each bite, and don’t feel guilty about having a second one. Life is too short for sad desserts.
Conclusion
These chewy pumpkin chocolate chip cookies are everything I hoped they would be when I stood in that grocery store aisle, chasing a memory I couldn’t quite name. They’re soft and chewy with just the right amount of crisp at the edges. The pumpkin flavor is present but not overwhelming, the spices are warm and inviting, and the chocolate chips add little pockets of richness in every bite.
What I love most about this recipe is how forgiving it is. You can make it with your kids on a rainy afternoon, bring it to a potluck and watch people’s faces light up, or keep a batch in the freezer for those days when you need a little comfort. It’s the kind of recipe that becomes part of your fall rotation, the one people start asking about in September.
I’d love to hear how these turn out for you. Did you try any of the variations? Did you discover your own twist? Drop a comment below and let me know—I read every single one, and your feedback helps me create better recipes for all of us. And if you share these on social media, tag me so I can see your beautiful cookies!
Happy baking, friends. May your cookies be chewy, your chocolate be melty, and your kitchen smell like autumn.
Frequently Asked Questions
Why are my pumpkin cookies cakey instead of chewy?
The most common reason is too much moisture in the pumpkin puree. Make sure you blot the pumpkin with paper towels before adding it to the dough. Also, check that you measured your flour correctly using the spoon-and-level method. Too much flour can also create a cakey texture.
Can I use pumpkin pie filling instead of pumpkin puree?
No, please don’t. Pumpkin pie filling contains added sugar, spices, and thickeners that will completely change the texture and sweetness of your cookies. Always use 100% pure pumpkin puree for baking.
Do I have to chill the dough before baking?
Not for this recipe. I tested these with and without chilling, and the results were very similar. Chilling for 30 minutes can help prevent spreading if your kitchen is very warm, but it’s not necessary for the chewy texture.
How do I make these cookies softer?
For softer cookies, bake them for 10 minutes instead of 12, and remove them from the oven while the centers still look slightly underdone. Also, store them with a slice of bread in the container to maintain moisture.
Can I make these cookies vegan?
Yes, with some adjustments. Substitute the butter with vegan butter sticks, use a flax egg (1 tablespoon ground flaxseed mixed with 3 tablespoons water, let sit for 5 minutes) instead of the regular egg, and use dairy-free chocolate chips. The texture will be slightly different but still delicious.
Pin This Recipe!
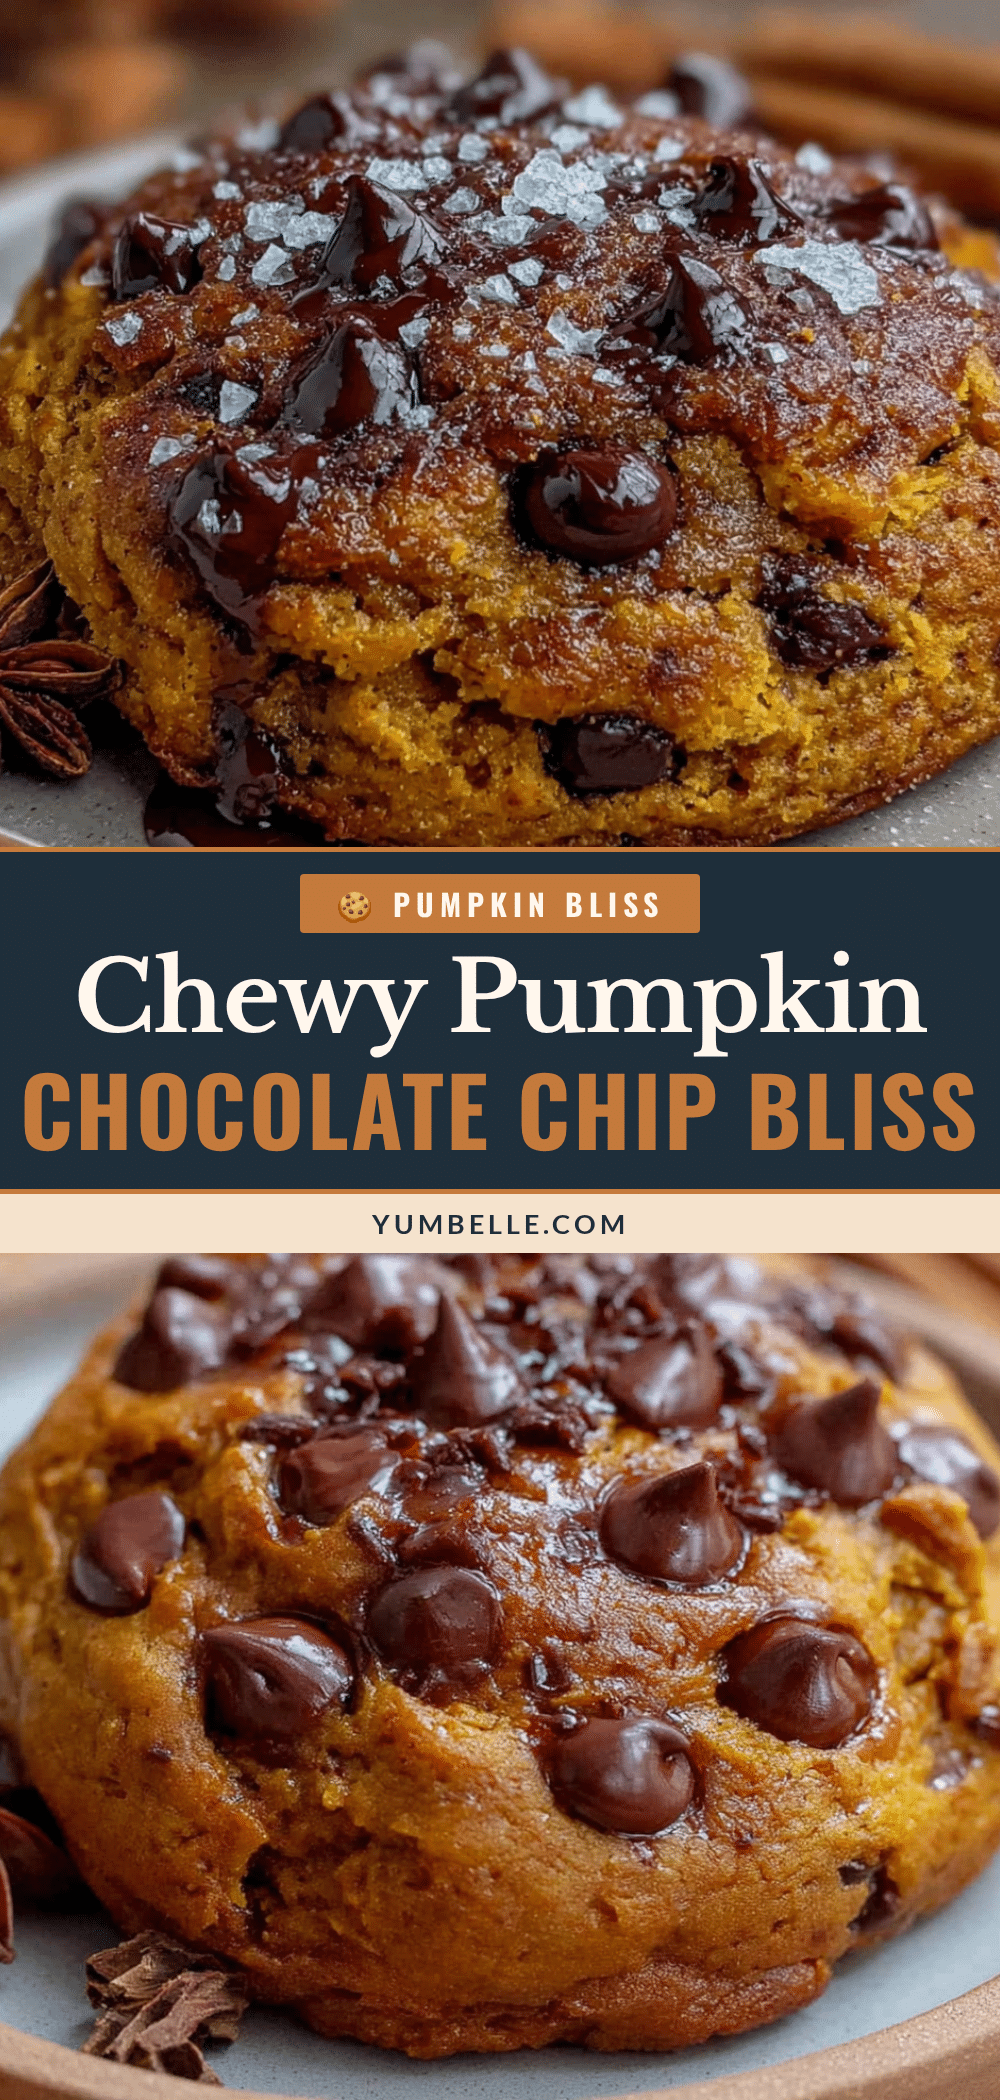
Easy Chewy Pumpkin Chocolate Chip Cookies Recipe
These chewy pumpkin chocolate chip cookies are soft in the middle, chewy at the edges, and have a warm pumpkin spice flavor with pockets of melted chocolate. No chilling required, and they freeze beautifully.
- Prep Time: 15 minutes
- Cook Time: 11 minutes
- Total Time: 26 minutes
- Yield: 36 cookies 1x
- Category: Dessert
- Cuisine: American
Ingredients
- 1 cup (226g) unsalted butter, softened
- 1 cup (200g) granulated sugar
- ½ cup (100g) packed light brown sugar
- ¾ cup (170g) pumpkin puree (not pumpkin pie filling)
- 1 large egg, room temperature
- 1 teaspoon vanilla extract
- 2 cups (250g) all-purpose flour
- 1 teaspoon baking soda
- ½ teaspoon baking powder
- ½ teaspoon salt
- 2 teaspoons pumpkin pie spice
- 1 teaspoon ground cinnamon
- 1½ cups (270g) semi-sweet chocolate chips
Instructions
- Preheat your oven to 350°F (175°C) and line two baking sheets with parchment paper or silicone mats.
- Prepare the pumpkin puree: Measure out ¾ cup of pumpkin puree and place it on a plate lined with a few layers of paper towels. Spread it out slightly and press another paper towel on top to absorb excess moisture. Let it sit while you prepare the other ingredients.
- Cream the butter and sugars: In a large mixing bowl, beat the softened butter, granulated sugar, and brown sugar together until light and fluffy, about 3-4 minutes with an electric mixer on medium speed. Scrape down the sides and bottom of the bowl halfway through.
- Add the pumpkin, egg, and vanilla: Add the prepared pumpkin puree, room temperature egg, and vanilla extract to the butter mixture. Beat on medium speed until just combined, about 30 seconds.
- Whisk the dry ingredients: In a separate medium bowl, whisk together the all-purpose flour, baking soda, baking powder, salt, pumpkin pie spice, and ground cinnamon.
- Combine wet and dry ingredients: Gradually add the dry ingredients to the wet mixture, mixing on low speed or folding with a spatula. Mix just until no streaks of flour remain.
- Fold in the chocolate chips: Using a rubber spatula, gently fold the chocolate chips into the dough until they’re evenly distributed. Reserve about ¼ cup of chocolate chips to press onto the tops of the cookies after scooping.
- Scoop the dough: Use a 1.5-tablespoon cookie scoop to portion the dough into balls. Place them on the prepared baking sheets about 2 inches apart.
- Press extra chocolate chips on top: Take those reserved chocolate chips and press 3-4 chips onto the top of each dough ball.
- Bake for 10-12 minutes: Bake one sheet at a time in the center of the oven. The cookies are done when the edges are set and lightly golden, but the centers still look slightly underdone and puffy.
- Cool on the baking sheet: Let the cookies rest on the baking sheet for 5 minutes. After 5 minutes, transfer them to a wire cooling rack to cool completely.
- Repeat with remaining dough: If you’re reusing the same baking sheet, let it cool completely between batches.
Notes
Don’t skip blotting the pumpkin puree with paper towels to remove excess moisture—this is the secret to chewy cookies instead of cakey ones. Measure flour using the spoon-and-level method. For softer cookies, bake for 10 minutes; for crispier edges, bake for 12 minutes. Store with a slice of bread in the container to keep cookies soft.
Nutrition
- Serving Size: 1 cookie
- Calories: 145
- Sugar: 13
- Sodium: 95
- Fat: 7
- Saturated Fat: 4
- Carbohydrates: 20
- Fiber: 1
- Protein: 2
Keywords: pumpkin chocolate chip cookies, chewy pumpkin cookies, fall cookies, pumpkin spice cookies, easy pumpkin cookies


