Love this? Save it for later!
Share the inspiration with your friends
I was standing in the checkout line at a hardware store, of all places, holding a new garden hose and a bag of potting soil, when the woman behind me—a complete stranger—started talking about a Fourth of July party she was planning. She had this frazzled, happy energy, the kind you get when you have a dozen things to do and zero time to do them. “I’m not even cooking for the big day,” she said, nodding at my gardening supplies like we were old friends. “I’m making that icebox cake again. You know, the one with the berries and the cream? It takes ten minutes and everyone loses their minds.”
I did not know the one. Honestly, I had never even made an icebox cake before. The concept felt like a beautiful lie—layers of cookies and cream that magically turn into a cake in the fridge? It sounded too good to be true. But there, in the hardware store, this stranger sold me on it with nothing but her enthusiasm. She described the way the graham crackers soften overnight, the way the whipped cream soaks into every layer, and the burst of fresh berries cutting through all that richness. I grabbed a box of graham crackers on my way out (the hardware store had them, of course, because hardware stores have everything).
I made that first No-Bake Red White and Blueberry Icebox Cake for a small cookout, and let me tell you—I was not prepared for how it turned out. It was a mess of beautiful, creamy, berry-stained layers that looked like a flag that had been through a food processor. But people ate it in silence, which is the highest compliment a cook can get. The whole pan disappeared in under twenty minutes. Since then, this no-bake red white and blueberry icebox cake has become my go-to for every summer celebration, from Memorial Day to Labor Day. It is the kind of dessert that makes you look like you planned ahead when you really just threw it together in a panic. And maybe you have been there too—staring at a grocery list a mile long, wondering how you will pull off a holiday meal without losing your mind. This cake is the answer.
Why You Will Love This Recipe
This is not just another summer dessert. This is the dessert that saves your holiday. I have tested this recipe more times than I can count, tweaking the cream consistency, the berry distribution, and the chilling time. What I landed on is a foolproof, crowd-pleasing masterpiece that requires no oven, no mixer (if you are strong-willed), and no special skills.
- Quick & Easy: This comes together in about 15 minutes of active work. No baking, no boiling, no fuss. Perfect for when you are already juggling burgers, hot dogs, and a million other things.
- Simple Ingredients: You need graham crackers, heavy cream, powdered sugar, cream cheese, vanilla, and fresh berries. That is it. No obscure extracts or hard-to-find items.
- Perfect for Patriotic Holidays: The red, white, and blue layers make it a showstopper for Fourth of July, Memorial Day, or any summer gathering. It screams celebration without screaming for attention.
- Crowd-Pleaser: I have served this to kids, grandparents, picky eaters, and dessert snobs. Every single person has asked for the recipe. It is that good.
- Unbelievably Delicious: The texture is what gets everyone. The graham crackers soften into a cake-like layer, the cream cheese filling stays light and fluffy, and the berries burst with freshness. It is comfort food disguised as something fancy.
What makes this recipe different from the dozens of other icebox cakes out there? It is the balance. The cream cheese in the filling adds a tangy richness that keeps the sweetness in check. The berries are layered generously, not just sprinkled on top. And the chilling time is optimized so the cake sets perfectly without becoming mushy. This is not just another version—it is the version I would serve to anyone who thinks no-bake desserts are a cop-out.
This cake makes you close your eyes after the first bite. It is the kind of dessert that turns a regular Tuesday cookout into a memorable one. And honestly, it is the only dessert I trust to impress guests without making me sweat.
What Ingredients You Will Need
This recipe uses simple, wholesome ingredients to deliver bold flavor and satisfying texture without the fuss. Most of these are pantry staples or easy to find at any grocery store. Here is what you need and why each ingredient matters.
- Graham crackers (about 2 full boxes or 24-30 full sheets): These form the base of the cake. They soften as they sit in the fridge, creating a tender, cake-like texture. I recommend using the classic honey-flavored graham crackers for the best flavor. Avoid the chocolate or cinnamon varieties—they compete with the berries.
- Heavy cream (2 cups, cold): This is whipped into stiff peaks to give the filling its light, airy structure. Cold cream whips much better, so keep it in the fridge until the last minute. If you are in a hurry, you can use a can of cold whipped cream, but homemade is noticeably better.
- Cream cheese (8 ounces, softened): This adds a tangy richness that balances the sweetness of the graham crackers and powdered sugar. Let it sit on the counter for 30 minutes before starting. Cold cream cheese will leave you with lumpy filling.
- Powdered sugar (1 cup): This sweetens the cream cheese mixture without making it grainy. Do not substitute granulated sugar—it will not dissolve properly and will ruin the smooth texture.
- Vanilla extract (1 teaspoon): Pure vanilla extract adds warmth and depth. Imitation vanilla works in a pinch, but pure vanilla is worth the splurge here.
- Fresh strawberries (2 cups, hulled and sliced): These provide the red layer. Look for bright red, fragrant strawberries that are firm but not rock hard. In the winter, you can use frozen strawberries (thawed and drained), but fresh is best for texture.
- Fresh blueberries (2 cups): These provide the blue layer. Small to medium blueberries work best—they distribute more evenly. Avoid giant blueberries that will create uneven layers.
- Fresh raspberries (1 cup, optional but recommended): These add an extra pop of red and a slightly tart flavor that cuts through the cream. If you cannot find good raspberries, just use extra strawberries.
Ingredient Selection Tips: For the graham crackers, I prefer the Nabisco brand because they hold their structure better than store brands. For the cream cheese, Philadelphia is my go-to—it has the right balance of tang and creaminess. When choosing berries, buy them a day or two before you plan to make the cake so they are perfectly ripe. And please, do not skip the cream cheese. I tried a version with just whipped cream and it was too sweet and one-dimensional. The cream cheese is the secret weapon.
Substitution Guidance: Need a dairy-free option? Use full-fat coconut cream (chilled and whipped) and a dairy-free cream cheese alternative. For a gluten-free version, use gluten-free graham crackers or shortbread cookies. If you cannot find fresh berries, thawed frozen berries work, but drain them well first to avoid a watery cake.
Equipment Needed
You do not need a fancy kitchen to make this cake. Here is what you will need:
- 9×13-inch baking dish or casserole dish: This is the perfect size for creating four layers of graham crackers and three layers of filling. A glass dish lets you see the beautiful layers, which is half the fun.
- Electric hand mixer or stand mixer: Whipping cream by hand is possible but exhausting. A mixer makes the job quick and easy. If you are using a stand mixer, use the whisk attachment.
- Large mixing bowl: For whipping the cream and mixing the cream cheese filling. Make sure it is clean and dry—any grease will prevent the cream from whipping.
- Spatula: A rubber spatula is perfect for spreading the cream cheese mixture evenly over the graham crackers.
- Sharp knife and cutting board: For hulling and slicing the strawberries.
- Measuring cups and spoons: For accurate measurements. Baking is a science, even for no-bake desserts.
Budget-Friendly Options: If you do not own a mixer, a whisk and some elbow grease will work. Just make sure the cream is very cold and whisk in a cool room. It will take about 8-10 minutes of continuous whisking. I have done it before when my mixer broke mid-recipe, and honestly, the arm workout is worth it. For the dish, any 9×13-inch pan works—metal, glass, or ceramic. Just avoid disposable aluminum pans, as they can bend and spill the layers.
Maintenance Tip: After making this cake, wash your mixing bowl and beaters immediately. Cream cheese filling can be stubborn if it dries on. A quick soak in hot, soapy water makes cleanup a breeze.
Preparation Method
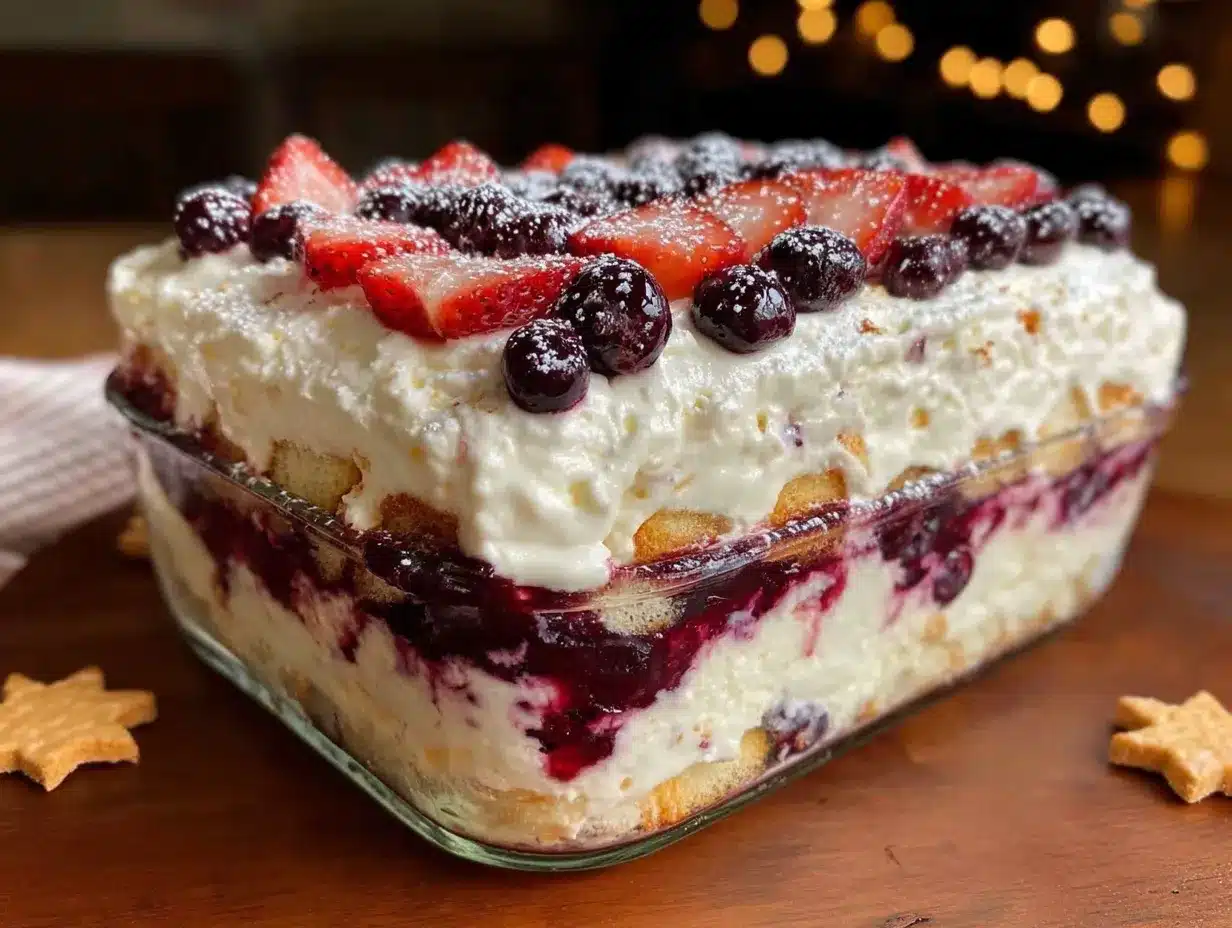
Follow these steps carefully, and you will have a stunning no-bake red white and blueberry icebox cake that looks like you spent hours on it. Spoiler: you did not.
- Prepare the berries (5 minutes): Wash and dry the strawberries, blueberries, and raspberries. Hull the strawberries and slice them into thin, even slices (about 1/4-inch thick). Set the berries aside in separate bowls. If your strawberries are very juicy, pat them dry with a paper towel to prevent excess moisture in the cake.
- Make the cream cheese base (5 minutes): In a large mixing bowl, beat the softened cream cheese with an electric mixer on medium speed until smooth and fluffy, about 2 minutes. Scrape down the sides of the bowl with a spatula. Add the powdered sugar and vanilla extract, then beat on low speed until combined. Increase to medium speed and beat for another minute until the mixture is light and creamy.
- Whip the cream (3-4 minutes): In a separate large bowl (or the same bowl if you transfer the cream cheese mixture), pour the cold heavy cream. Using clean beaters, whip the cream on medium-high speed until stiff peaks form. You will know it is ready when you lift the beaters and the cream holds a peak that does not flop over. Be careful not to over-whip, or you will end up with butter.
- Combine the fillings (2 minutes): Gently fold the whipped cream into the cream cheese mixture using a spatula. Start with about one-third of the whipped cream, folding until just combined, then add the rest. Fold gently—you want to keep the mixture light and airy. Do not stir vigorously or you will deflate the cream.
- Layer the graham crackers (2 minutes): Arrange a single layer of graham crackers in the bottom of your 9×13-inch dish. You will need to break some crackers to fit the edges. Do not overlap them—they should sit flat in a single layer. It is okay if there are small gaps; the filling will fill them in.
- Add the first filling layer (3 minutes): Spread about one-third of the cream mixture evenly over the graham crackers. Use a spatula to smooth it out to the edges. Do not press too hard or you will crush the crackers.
- Add the strawberry layer (3 minutes): Arrange the sliced strawberries evenly over the cream layer. Press them gently into the cream so they stay in place. If you are using raspberries, scatter them over the strawberries now.
- Repeat the layers (5 minutes): Add another layer of graham crackers on top of the strawberries. Spread another third of the cream mixture over them. Top with the blueberries, spreading them evenly across the surface.
- Final layers (5 minutes): Add a third layer of graham crackers. Spread the remaining cream mixture over the top, smoothing it out to the edges. This top layer should be thick and even. If you have any leftover berries, arrange them on top for decoration. I like to create a pattern with alternating strawberries and blueberries for a festive look.
- Chill the cake (at least 6 hours, preferably overnight): Cover the dish tightly with plastic wrap or aluminum foil. Refrigerate for at least 6 hours, but overnight is best. The graham crackers need time to soften and absorb the cream. If you rush this step, the cake will be crunchy and dry instead of tender and luscious.
- Serve (5 minutes): Remove the cake from the fridge about 10 minutes before serving. Slice into squares using a sharp knife, wiping the blade clean between cuts for neat edges. Serve cold.
Sensory Cues: When you fold the whipped cream into the cream cheese, look for a uniform, pale white mixture with no streaks. When spreading the cream over the graham crackers, it should glide smoothly without pulling up crumbs. After chilling, the cake should feel firm to the touch but yield slightly when pressed. The graham crackers will have softened into a cake-like texture that slices cleanly.
Troubleshooting: If your cream is not whipping, it might be too warm. Pop it in the freezer for 10 minutes and try again. If your cream cheese mixture is lumpy, your cream cheese was not soft enough. Next time, let it sit out longer. For now, beat it a little longer on high speed—it might smooth out.
Cooking Tips & Techniques
I have made this no-bake red white and blueberry icebox cake at least a dozen times, and I have learned a few things the hard way. Here are my best tips for perfect results every time.
Use Room Temperature Cream Cheese: This is non-negotiable. Cold cream cheese will not blend smoothly, and you will end up with tiny white lumps in your filling. Take it out of the fridge 30-45 minutes before you start. If you forget, cut it into small cubes and microwave it in 10-second bursts until softened but not melted.
Chill Your Bowl and Beat for Whipped Cream: For the fluffiest whipped cream, put your mixing bowl and beaters in the freezer for 10-15 minutes before whipping. The cold helps the cream whip faster and hold its shape longer. I learned this trick from a pastry chef, and it has never failed me.
Do Not Skimp on the Chilling Time: I made the mistake of serving this cake after only 4 hours once. It was a mess—the crackers were still crunchy, the layers slid apart, and it looked like a disaster. Six hours is the minimum, but overnight is where the magic happens. The graham crackers fully soften, the flavors meld, and the cake becomes a cohesive, sliceable dessert.
Pat the Berries Dry: Wet berries release juice that can make the filling watery and cause the cake to slide apart. After washing, lay the berries on a clean kitchen towel or paper towels and pat them dry. This small step makes a huge difference in the final texture.
Use a Sharp Knife for Slicing: A dull knife will drag through the layers and create a ragged mess. Use a sharp chef’s knife or a serrated knife, and wipe it clean between each cut. This gives you those beautiful, Instagram-worthy slices.
Variations & Adaptations
This recipe is incredibly versatile. Here are some ways to make it your own.
Dairy-Free Version: Use full-fat coconut cream (chilled and whipped) instead of heavy cream. For the cream cheese, use a dairy-free alternative like Kite Hill or Tofutti. The coconut cream adds a subtle tropical flavor that pairs surprisingly well with the berries. I tried this version for a friend with dairy allergies, and it was a hit.
Gluten-Free Version: Swap the graham crackers for gluten-free graham crackers or gluten-free shortbread cookies. I recommend the Schar brand or Simple Mills almond flour crackers. They soften just as well and taste delicious.
Seasonal Berry Swap: In the summer, use the classic red and blue combo. In the fall, try blackberries and sliced apples. In the winter, use thawed frozen raspberries and blueberries. For spring, use sliced peaches and raspberries. The cream cheese filling works with any fruit.
Chocolate Lover’s Twist: Add a layer of chocolate shavings or mini chocolate chips between the cream layers. You can also use chocolate graham crackers for a richer flavor. I made this version for a birthday party, and the chocolate-berry combination was incredible.
Lemon-Berry Version: Add 1 tablespoon of lemon zest to the cream cheese mixture. The lemon brightens the flavor and complements the berries beautifully. Top with a few thin lemon slices for decoration.
Serving & Storage Suggestions
This no-bake red white and blueberry icebox cake is best served cold, straight from the refrigerator. The texture is perfect when it is chilled—firm enough to slice but soft and creamy in the mouth.
Serving Temperature: Remove the cake from the fridge about 10-15 minutes before serving. This takes the chill off slightly and allows the flavors to open up. Do not let it sit out longer than 30 minutes, or the cream will start to soften too much.
Presentation: For a festive look, garnish the top with extra fresh berries and a few mint leaves. You can also dust the top with powdered sugar just before serving for a snowy effect. Serve on a white platter to make the red, white, and blue colors pop.
Complementary Dishes: This cake pairs beautifully with grilled meats, especially burgers, hot dogs, and barbecue chicken. For drinks, serve it with lemonade, iced tea, or a crisp white wine like Sauvignon Blanc. It also works as a standalone dessert at a potluck or picnic.
Storage Instructions: Cover the dish tightly with plastic wrap or aluminum foil and store in the refrigerator for up to 3 days. The cake actually improves after 24 hours as the flavors meld. Do not freeze this cake—the cream will become watery and the texture will be ruined.
Reheating: This is a no-bake dessert, so there is no reheating involved. If you prefer a slightly softer texture, let it sit at room temperature for 20 minutes before serving.
Flavor Development: The flavors deepen over time. On day two, the berry juices have soaked into the graham crackers, and the cream cheese filling has set perfectly. It is even better the next day, so do not be afraid to make it a day ahead.
Nutritional Information & Benefits
This no-bake red white and blueberry icebox cake is a treat, but it also has some redeeming qualities. Here is the estimated nutritional breakdown per serving (based on 12 servings):
- Calories: Approximately 380
- Fat: 24g
- Saturated Fat: 14g
- Carbohydrates: 38g
- Sugar: 24g
- Protein: 5g
- Fiber: 2g
Health Benefits of Key Ingredients: Blueberries and strawberries are packed with antioxidants, vitamin C, and fiber. They support heart health and reduce inflammation. The cream cheese provides calcium and protein, while the graham crackers offer a small amount of whole grains. This dessert is not health food, but it is made with real ingredients you can feel good about serving.
Dietary Considerations: This recipe is vegetarian and can be made gluten-free or dairy-free with the substitutions listed above. It contains dairy and gluten in its standard form. The sugar content is moderate for a dessert, but you can reduce the powdered sugar to 3/4 cup if you prefer a less sweet filling.
Personal Wellness Perspective: I believe in balance. This cake is a celebration dessert, meant for holidays and special occasions. It is rich, indulgent, and absolutely worth the calories. I serve it alongside fresh fruit and grilled vegetables to round out the meal. Enjoy it without guilt—that is what summer is for.
Conclusion
This no-bake red white and blueberry icebox cake is the dessert you have been looking for. It is easy enough for a beginner baker, impressive enough for a holiday party, and delicious enough to become a family tradition. The layers of creamy filling, soft graham crackers, and fresh berries create a texture and flavor that is simply unforgettable.
I love this recipe because it reminds me that cooking does not have to be complicated to be special. Sometimes the best dishes come from a stranger in a hardware store, a box of graham crackers, and a willingness to try something new. It is forgiving, adaptable, and always a crowd-pleaser.
Now I want to hear from you. Have you tried making this cake? Did you add your own twist? What is your favorite no-bake summer dessert? Drop a comment below and share your experience. And if you loved this recipe, share it with a friend who needs an easy, show-stopping dessert for their next gathering. Happy summer, and happy eating!
Frequently Asked Questions
Can I use frozen berries instead of fresh?
Yes, you can use frozen berries, but thaw them first and drain off any excess liquid. Frozen berries release more juice than fresh, which can make the cake watery. Pat them dry with paper towels before layering.
How long does this cake need to chill?
At least 6 hours, but overnight is best. The graham crackers need time to soften and absorb the cream. If you rush the chilling time, the cake will be crunchy and difficult to slice.
Can I make this cake in a different size dish?
Absolutely. For an 8×8-inch dish, halve the ingredients. For a 9×9-inch dish, use about two-thirds of the ingredients. Adjust the number of layers accordingly. The key is to maintain even layers of graham crackers and filling.
Can I use Cool Whip instead of homemade whipped cream?
Yes, you can use Cool Whip or any frozen whipped topping. Thaw it completely and fold it into the cream cheese mixture. The texture will be slightly different—Cool Whip is more stable but less rich than homemade whipped cream.
How do I prevent the graham crackers from getting too soggy?
Do not over-soak them. The graham crackers should be layered dry—they will absorb moisture from the cream as they chill. If you let the cake sit for more than 3 days, the crackers can become mushy. For best texture, serve within 2 days of making it.
Pin This Recipe!
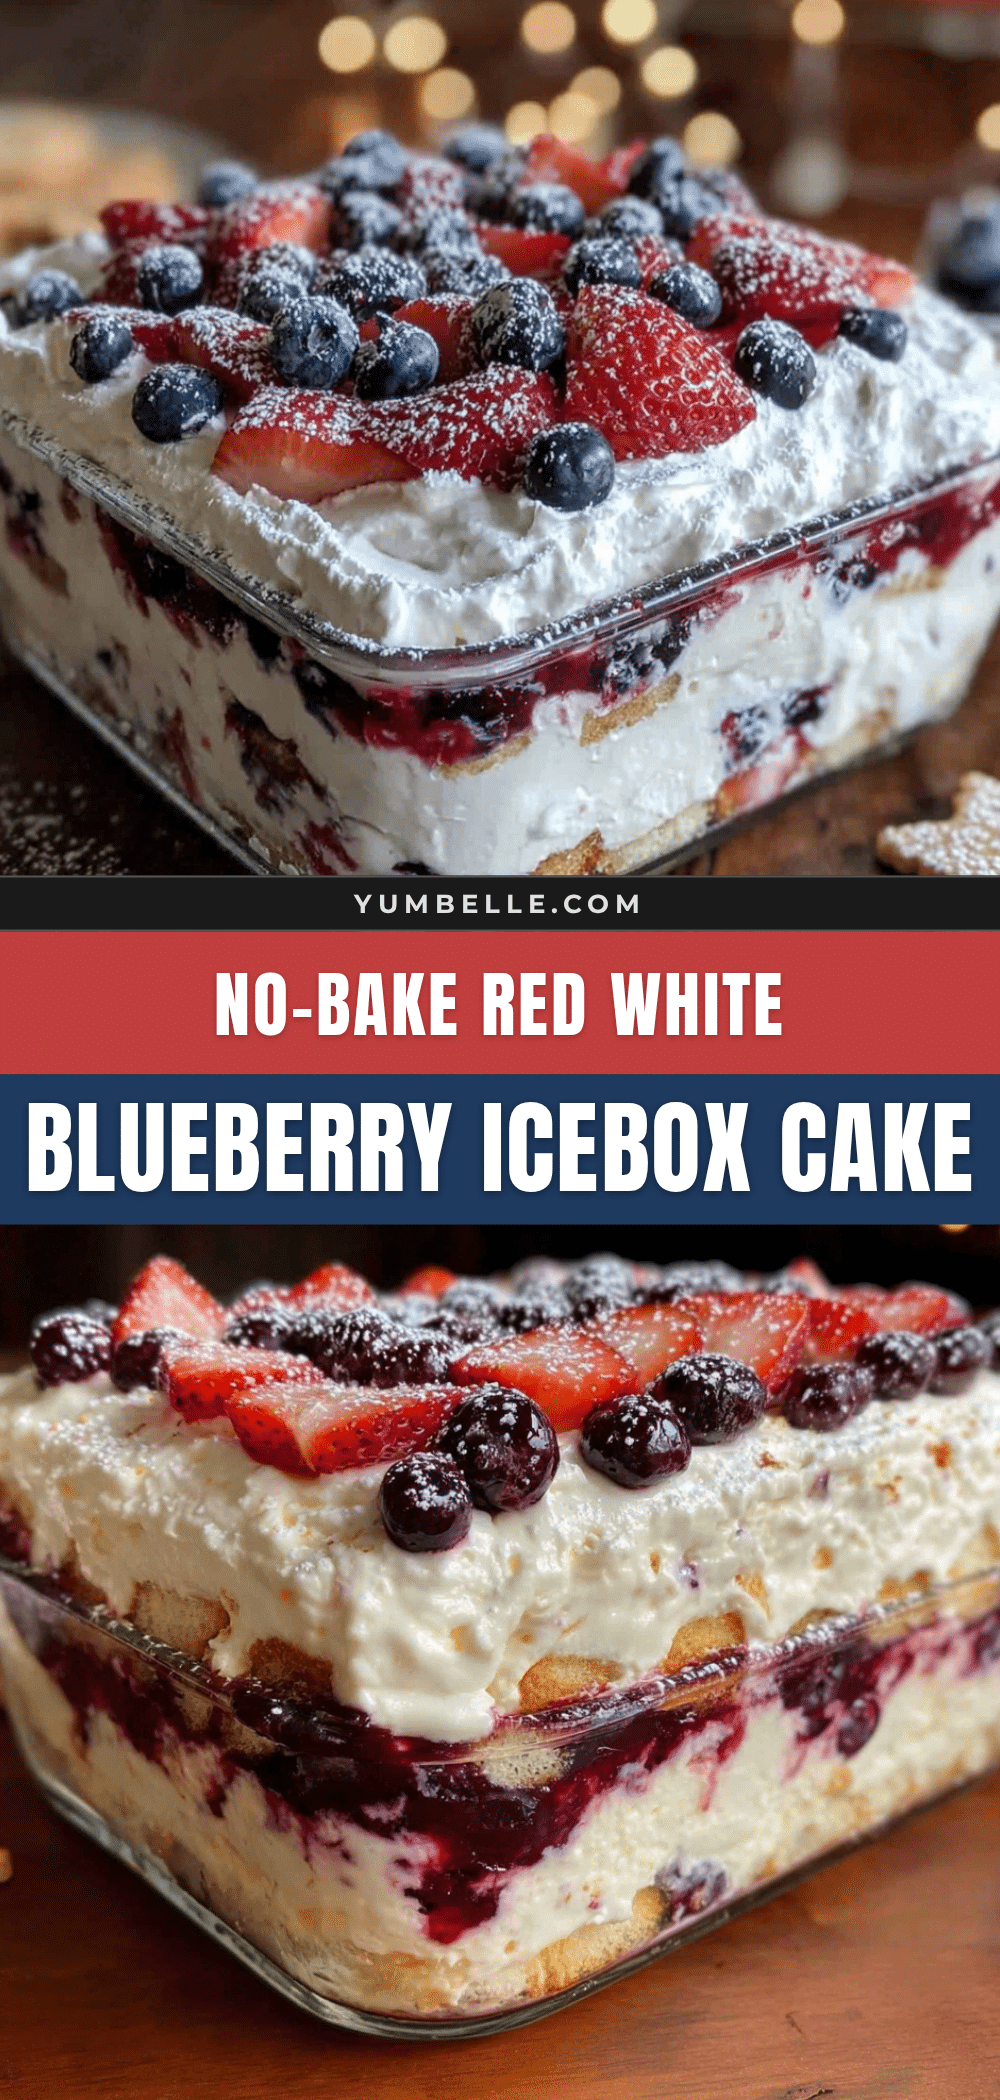
No-Bake Red White and Blueberry Icebox Cake
A quick and easy no-bake dessert featuring layers of graham crackers, cream cheese filling, and fresh berries. Perfect for patriotic holidays like Fourth of July and Memorial Day.
- Prep Time: 15 minutes
- Cook Time: 0 minutes
- Total Time: 6 hours 15 minutes (includes chilling)
- Yield: 12 servings
- Category: Dessert
- Cuisine: American
Ingredients
- Graham crackers (about 2 full boxes or 24-30 full sheets)
- Heavy cream (2 cups, cold)
- Cream cheese (8 ounces, softened)
- Powdered sugar (1 cup)
- Vanilla extract (1 teaspoon)
- Fresh strawberries (2 cups, hulled and sliced)
- Fresh blueberries (2 cups)
- Fresh raspberries (1 cup, optional but recommended)
Instructions
- Prepare the berries: Wash and dry the strawberries, blueberries, and raspberries. Hull the strawberries and slice them into thin, even slices (about 1/4-inch thick). Set the berries aside in separate bowls. If your strawberries are very juicy, pat them dry with a paper towel to prevent excess moisture in the cake.
- Make the cream cheese base: In a large mixing bowl, beat the softened cream cheese with an electric mixer on medium speed until smooth and fluffy, about 2 minutes. Scrape down the sides of the bowl with a spatula. Add the powdered sugar and vanilla extract, then beat on low speed until combined. Increase to medium speed and beat for another minute until the mixture is light and creamy.
- Whip the cream: In a separate large bowl, pour the cold heavy cream. Using clean beaters, whip the cream on medium-high speed until stiff peaks form. You will know it is ready when you lift the beaters and the cream holds a peak that does not flop over. Be careful not to over-whip, or you will end up with butter.
- Combine the fillings: Gently fold the whipped cream into the cream cheese mixture using a spatula. Start with about one-third of the whipped cream, folding until just combined, then add the rest. Fold gently—you want to keep the mixture light and airy. Do not stir vigorously or you will deflate the cream.
- Layer the graham crackers: Arrange a single layer of graham crackers in the bottom of your 9×13-inch dish. You will need to break some crackers to fit the edges. Do not overlap them—they should sit flat in a single layer. It is okay if there are small gaps; the filling will fill them in.
- Add the first filling layer: Spread about one-third of the cream mixture evenly over the graham crackers. Use a spatula to smooth it out to the edges. Do not press too hard or you will crush the crackers.
- Add the strawberry layer: Arrange the sliced strawberries evenly over the cream layer. Press them gently into the cream so they stay in place. If you are using raspberries, scatter them over the strawberries now.
- Repeat the layers: Add another layer of graham crackers on top of the strawberries. Spread another third of the cream mixture over them. Top with the blueberries, spreading them evenly across the surface.
- Final layers: Add a third layer of graham crackers. Spread the remaining cream mixture over the top, smoothing it out to the edges. This top layer should be thick and even. If you have any leftover berries, arrange them on top for decoration. I like to create a pattern with alternating strawberries and blueberries for a festive look.
- Chill the cake: Cover the dish tightly with plastic wrap or aluminum foil. Refrigerate for at least 6 hours, but overnight is best. The graham crackers need time to soften and absorb the cream. If you rush this step, the cake will be crunchy and dry instead of tender and luscious.
- Serve: Remove the cake from the fridge about 10 minutes before serving. Slice into squares using a sharp knife, wiping the blade clean between cuts for neat edges. Serve cold.
Notes
Use room temperature cream cheese for a smooth filling. Chill your bowl and beaters for fluffier whipped cream. Do not skimp on chilling time—overnight is best for the graham crackers to soften properly. Pat berries dry to prevent a watery cake. Use a sharp knife for clean slices.
Nutrition
- Serving Size: 1 square (1/12 of ca
- Calories: 380
- Sugar: 24
- Fat: 24
- Saturated Fat: 14
- Carbohydrates: 38
- Fiber: 2
- Protein: 5
Keywords: no-bake dessert, icebox cake, Fourth of July, Memorial Day, summer dessert, berry dessert, graham cracker cake, easy dessert, patriotic dessert


