Love this? Save it for later!
Share the inspiration with your friends
It was 10:47 PM on a random Wednesday, and I had a violent craving for something spicy, messy, and completely indulgent. I didn’t have chicken wings—the usual suspect for this kind of late-night food emergency—but I had a package of boneless chicken thighs in the fridge, a half-empty bottle of Frank’s RedHot, and a bag of sweet Hawaiian rolls that were dangerously close to their expiration date. That’s when the idea hit me: why not make a slider version? Something you could actually eat without getting your entire face covered in sauce, but still packed with that same buffalo wing energy.
I’ll be honest, I was skeptical at first. Sliders feel like a party food, something you make for a crowd, not for yourself at nearly midnight while standing in your kitchen in sweatpants. But let me tell you, that first bite changed everything. The sweet, buttery rolls against the tangy, spicy shredded chicken? It was like they were made for each other. I stood there at my counter, eating three of them in a row, and I knew I had stumbled onto something special. Maybe you’ve been there—that moment when a random kitchen experiment turns into your new favorite recipe.
These Easy Buffalo Chicken Tailgate Sliders on Hawaiian Rolls have since become my go-to for game days, potlucks, and honestly, any Tuesday night when I need a little comfort food therapy. They come together fast, use ingredients you probably already have, and somehow manage to be both ridiculously satisfying and surprisingly simple. I’ve made them for Super Bowl parties, backyard barbecues, and even just for myself on a rainy Sunday afternoon. Every single time, they disappear within minutes.
Why You’ll Love This Recipe
Let me tell you why these sliders have earned a permanent spot in my recipe rotation. After testing this recipe at least a dozen times—for crowds and for myself—I can confidently say it delivers on every level.
- Quick & Easy: From start to finish, these sliders come together in about 30 minutes. Perfect for those last-minute cravings or when you need to feed a hungry crowd fast.
- Simple Ingredients: No fancy grocery trips needed. Chicken, hot sauce, butter, cheese, and Hawaiian rolls—that’s basically it. You probably have most of this stuff already.
- Perfect for Tailgating & Game Day: These are the ultimate finger food. Easy to eat standing up, no forks required, and they travel beautifully in a foil pan.
- Crowd-Pleaser: I’ve served these to kids, picky eaters, and spice wimps alike. Everyone loves them. The sweetness of the rolls balances the heat perfectly.
- Unbelievably Delicious: There’s something magical about the combination of buttery, sweet bread with tangy, spicy buffalo chicken and melted cheese. It’s next-level comfort food.
What makes this recipe different from all the other slider recipes out there? It’s the technique. Instead of just dumping shredded chicken onto rolls, I caramelize the Buffalo sauce with butter to create a sticky, flavorful glaze that coats every single piece of chicken. Plus, I brush the tops of the rolls with garlic butter before baking, which gives them that golden, crispy-top texture that makes these sliders absolutely irresistible. This isn’t just another version—it’s my best version, perfected through trial and error.
These sliders are the kind of food that makes you close your eyes after the first bite. It’s comfort food reimagined—faster, easier, and somehow even more satisfying than the original wings. Perfect for impressing your friends without stressing yourself out.
What Ingredients You Will Need
This recipe uses simple, everyday ingredients to deliver big, bold flavor. Here’s everything you’ll need, along with a few notes from my personal testing experience.
For the Buffalo Chicken Filling
- 1.5 lbs boneless, skinless chicken breasts or thighs (I prefer thighs for extra moisture and flavor, but breasts work great too)
- 1/2 cup Buffalo wing sauce (Frank’s RedHot is my go-to—it has the perfect balance of heat and tang)
- 2 tablespoons unsalted butter
- 1 tablespoon ranch or blue cheese dressing mix (optional, but adds a nice savory depth)
- 1/2 teaspoon garlic powder
- 1/4 teaspoon onion powder
- Salt and black pepper to taste
For the Sliders
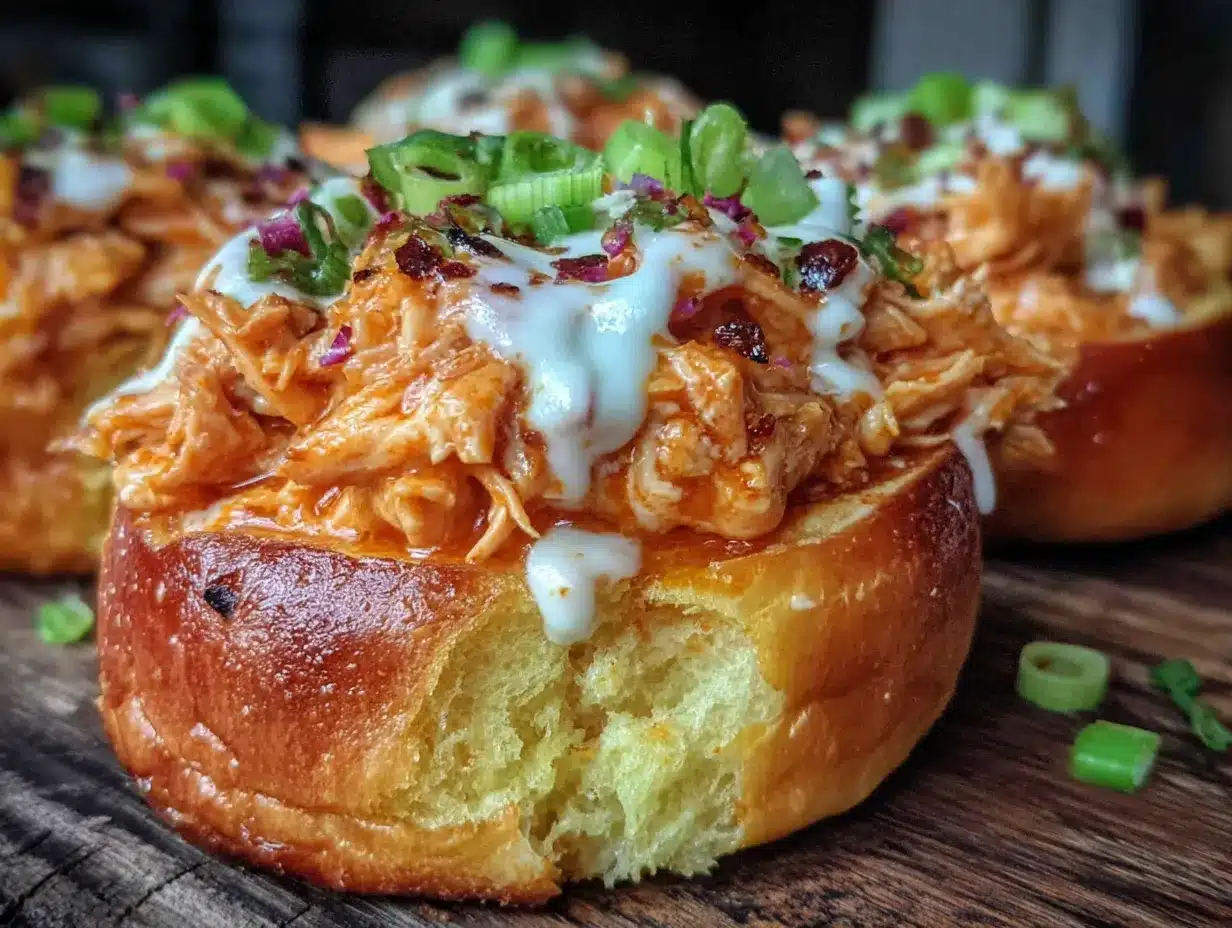
- 1 package (12-count) Hawaiian sweet rolls (King’s Hawaiian is the classic choice—don’t substitute with regular dinner rolls, the sweetness is key)
- 1 1/2 cups shredded sharp cheddar cheese (or a mix of cheddar and Monterey Jack for extra meltiness)
- 1/4 cup melted butter (for brushing the tops)
- 1 teaspoon garlic powder
- 1/2 teaspoon dried parsley
- 1 tablespoon sesame seeds (optional, for that bakery-style look)
For Serving
- Ranch or blue cheese dressing (for dipping)
- Celery sticks and carrot sticks (classic buffalo pairing)
- Pickled jalapeños (if you like extra heat)
A quick note on ingredient selection: Look for a Buffalo sauce that lists aged cayenne peppers as the first ingredient—that’s where the real flavor comes from. If you’re sensitive to heat, you can use a mild wing sauce or mix the hot sauce with a little extra melted butter to tone it down. For a dairy-free version, use vegan butter and your favorite plant-based shredded cheese.
Equipment Needed
You don’t need any fancy equipment for these sliders, which is part of what makes them so great. Here’s what you’ll need:
- Large skillet or saucepan (for cooking the chicken and making the sauce)
- Two forks or a hand mixer (for shredding the chicken—I’ve used both, and honestly, a hand mixer on low speed is a game-changer for shredding)
- 9×13 inch baking dish (or a rimmed baking sheet if you’re making a smaller batch)
- Sharp knife and cutting board
- Small bowl (for mixing the garlic butter topping)
- Pastry brush (or just use a spoon if you don’t have one—I’ve done it both ways)
- Aluminum foil (for covering the sliders while they bake)
If you don’t have a 9×13 dish, you can use a cast-iron skillet or even a disposable foil pan—especially handy if you’re taking these to a tailgate or potluck. I’ve used a cheap foil pan from the grocery store more times than I can count, and they work perfectly.
Preparation Method
Alright, let’s make these sliders. I’ve broken everything down step by step so you can follow along easily. Trust me, you’re going to love how simple this is.
- Cook the chicken: Place your chicken breasts or thighs in a large skillet and add enough water to cover them by about an inch. Bring to a gentle boil over medium-high heat, then reduce the heat to medium-low, cover, and simmer for 12-15 minutes, or until the chicken is cooked through and reaches an internal temperature of 165°F. (If you’re in a hurry, you can use a rotisserie chicken from the store—just skip this step and shred 3 cups of cooked chicken.)
- Shred the chicken: Remove the chicken from the water and let it cool for a few minutes—just enough that you can handle it. Using two forks, shred the chicken into bite-sized pieces. Or, here’s my favorite trick: put the cooked chicken in the bowl of a stand mixer with the paddle attachment and mix on low speed for about 30 seconds. Perfectly shredded chicken with zero effort.
- Make the Buffalo sauce: In the same skillet you used for the chicken, melt 2 tablespoons of butter over medium heat. Add the Buffalo wing sauce, garlic powder, onion powder, and the ranch or blue cheese dressing mix if you’re using it. Whisk everything together and let it simmer for 2-3 minutes until it thickens slightly and becomes fragrant.
- Combine chicken and sauce: Add the shredded chicken to the skillet with the Buffalo sauce. Stir well to coat every piece of chicken evenly. Let it cook together for 2-3 minutes so the chicken absorbs all that spicy, tangy flavor. Taste and adjust seasoning with salt and pepper if needed—remember, the Buffalo sauce is already salty, so go easy.
- Prepare the rolls: Preheat your oven to 350°F. Without separating the individual rolls, slice the entire package of Hawaiian rolls in half horizontally using a serrated knife. Place the bottom half of the rolls in your 9×13 baking dish, cut side up.
- Assemble the sliders: Spread the Buffalo chicken mixture evenly over the bottom half of the rolls. Top with the shredded cheese—don’t be shy, cover it completely. Place the top half of the rolls back on, pressing down gently.
- Make the garlic butter topping: In a small bowl, combine the melted butter, garlic powder, dried parsley, and sesame seeds if using. Brush this mixture generously over the tops of the rolls. Make sure you get into all the cracks and crevices—that’s where the magic happens.
- Bake the sliders: Cover the baking dish with aluminum foil and bake for 15 minutes. Then remove the foil and bake for another 5-7 minutes, until the tops are golden brown and the cheese is melted and bubbly. The smell at this point is absolutely intoxicating.
- Rest and serve: Let the sliders rest for 5 minutes before slicing. This allows the cheese to set slightly so your sliders hold together when you cut them. Use a sharp knife to cut along the individual roll lines. Serve warm with ranch or blue cheese dressing for dipping.
Cooking Tips & Techniques
Over the many times I’ve made these sliders, I’ve picked up a few tricks that make a real difference. Let me share them with you so you can nail this recipe on your first try.
Don’t skip the resting step. I know it’s tempting to dive right in, but letting the sliders rest for 5 minutes after baking is crucial. The cheese needs that time to set so your sliders don’t fall apart into a delicious but messy pile. Trust me, I learned this the hard way at a Super Bowl party where my sliders turned into Buffalo chicken nachos.
Toast the rolls first for extra crunch. If you want your sliders to have a little more structural integrity, pop the bottom half of the rolls under the broiler for 1-2 minutes before adding the chicken. This creates a barrier that prevents the bread from getting soggy. I do this every time now, and it makes a noticeable difference.
Use room temperature cream cheese for a creamy version. Sometimes I mix 4 ounces of softened cream cheese into the Buffalo chicken mixture before assembling the sliders. It adds a rich, creamy element that balances the heat beautifully. Just make sure the cream cheese is fully softened so it incorporates smoothly.
Watch your oven temperature. Ovens vary wildly, so start checking your sliders at the 12-minute mark (with foil on). You want the cheese melted and the tops golden, not burnt. If your oven runs hot, reduce the temperature to 325°F.
Make extra sauce. The Buffalo sauce is so good that you’ll want extra for dipping. I usually double the sauce recipe and set aside half before adding the chicken. It’s perfect for drizzling over the finished sliders or for dipping.
Variations & Adaptations
One of the best things about this recipe is how adaptable it is. Here are some of my favorite variations that I’ve tested over the years.
Baked Buffalo Chicken Sliders (Casserole Style): Instead of keeping the rolls intact, cube the Hawaiian rolls and layer them with the Buffalo chicken and cheese like a bread pudding. Bake until golden and bubbly. It’s less neat but somehow even more comforting.
Low-Carb Buffalo Chicken Sliders: Skip the Hawaiian rolls entirely and serve the Buffalo chicken mixture over lettuce cups or in bell pepper halves. Top with cheese and broil for 2-3 minutes. You get all the flavor with none of the carbs.
Smoky Buffalo Chicken Sliders: Add 1 teaspoon of smoked paprika and 1/2 teaspoon of chipotle powder to the Buffalo sauce. The smokiness adds a whole new dimension that pairs beautifully with the sweet rolls.
Buffalo Chicken Sliders with Bacon: Cook 6 strips of bacon until crispy, crumble them, and sprinkle over the cheese before adding the top rolls. Because everything is better with bacon, right?
Vegetarian Buffalo Sliders: Substitute the chicken with 2 cans of drained chickpeas, mashed slightly, or use 2 cups of shredded jackfruit. The Buffalo sauce works beautifully with both options.
My personal favorite variation? I once made these with leftover Thanksgiving turkey instead of chicken, and it was absolutely incredible. The turkey was already seasoned and moist, and the Buffalo sauce gave it a whole new life. It’s now my go-to for using up holiday leftovers.
Serving & Storage Suggestions
These sliders are incredibly versatile when it comes to serving. Here’s everything you need to know.
Serving Temperature and Presentation: Serve these sliders warm, straight from the oven. Arrange them on a large platter with small bowls of ranch and blue cheese dressing for dipping. Garnish with celery sticks, carrot sticks, and a few extra pickled jalapeños for color. If you’re serving at a tailgate, a disposable foil pan lined with parchment paper works perfectly.
Complementary Dishes and Beverages: These sliders pair beautifully with classic game day sides like crispy french fries, sweet potato wedges, or a simple coleslaw. For drinks, an ice-cold beer (a light lager or IPA works great) or a spicy Bloody Mary is the perfect match. If you’re going non-alcoholic, a tangy lemonade or iced tea cuts through the richness nicely.
Storage Instructions: Store leftover sliders in an airtight container in the refrigerator for up to 3 days. The flavors actually meld together and get even better overnight. To freeze, wrap each slider individually in plastic wrap, then place them in a freezer bag. They’ll keep for up to 3 months.
Reheating Methods: The best way to reheat these sliders is in the oven at 350°F for 10-12 minutes, covered with foil to prevent drying out. You can also use an air fryer at 350°F for 5-6 minutes for extra crispy tops. The microwave works in a pinch, but the rolls will be softer.
How Flavors Develop Over Time: Honestly, these sliders taste even better the next day. The Buffalo sauce continues to soak into the rolls, and the flavors meld together beautifully. If you can resist eating them all, make a batch the night before your event and reheat them just before serving.
Nutritional Information & Benefits
While these sliders are definitely an indulgence, they do have some redeeming qualities. Here’s a rough nutritional breakdown per slider (assuming 12 sliders):
- Calories: Approximately 280-320 calories per slider
- Protein: 22-25 grams (thanks to the chicken and cheese)
- Carbohydrates: 22-25 grams (mostly from the Hawaiian rolls)
- Fat: 14-16 grams (from butter, cheese, and chicken)
- Fiber: 1-2 grams
Health Benefits of Key Ingredients: Chicken is an excellent source of lean protein, which helps with muscle repair and keeps you feeling full. The cayenne peppers in Buffalo sauce contain capsaicin, which has anti-inflammatory properties and can boost metabolism. Cheese provides calcium and protein, while the garlic in the topping has immune-boosting properties.
Dietary Considerations: This recipe is naturally gluten-free if you use gluten-free rolls. For a lower-calorie version, use reduced-fat cheese and skip the butter topping. To make it dairy-free, use vegan butter and plant-based cheese.
Potential Allergens: This recipe contains dairy (butter, cheese) and gluten (Hawaiian rolls). It may also contain soy depending on the brand of rolls you use. Always check labels if you’re cooking for someone with allergies.
I personally love that these sliders let me enjoy game day food without feeling like I’ve completely abandoned my health goals. One slider is satisfying enough that I don’t need to eat six of them—well, most of the time.
Conclusion
These Easy Buffalo Chicken Tailgate Sliders on Hawaiian Rolls are everything I want in a recipe: quick, delicious, and guaranteed to make everyone happy. They’ve saved me countless times when I needed to bring a dish to a party or just wanted to treat myself on a random weeknight. The combination of sweet, buttery rolls with spicy, tangy Buffalo chicken and melted cheese is simply unbeatable.
I encourage you to make these your own. Add extra heat if that’s your thing, swap in different cheeses, or pile on the bacon. The beauty of this recipe is how forgiving and adaptable it is. Don’t be afraid to experiment and find your perfect version.
Honestly, I think what I love most about these sliders is how they bring people together. There’s something about sharing a plate of warm, messy, delicious food that just makes everything better. Whether you’re watching the big game, hosting a backyard barbecue, or just feeding your family on a busy Tuesday night, these sliders deliver every single time.
Now I want to hear from you! Have you tried these sliders? Did you add your own twist? Drop a comment below and let me know how they turned out. And if you loved them as much as I do, share this recipe with your friends—they’ll thank you later. Happy cooking!
Frequently Asked Questions
Can I make these Buffalo chicken sliders ahead of time?
Absolutely! You can assemble the sliders completely up to 24 hours in advance. Just cover and refrigerate them, then bake when you’re ready to serve. You may need to add 5-10 minutes to the baking time since they’ll be cold from the fridge.
Can I use canned chicken for this recipe?
You can, but I don’t recommend it. Canned chicken has a different texture and can be drier than freshly cooked chicken. If you’re in a real pinch, drain the canned chicken well and mix it with a little extra Buffalo sauce to add moisture.
What’s the best way to shred chicken quickly?
My favorite method is using a hand mixer on low speed in a large bowl. It takes about 30 seconds and gives you perfectly shredded chicken. You can also use a stand mixer with the paddle attachment, or just two forks if you prefer the traditional method.
Can I use a different type of roll?
Hawaiian sweet rolls are ideal because their sweetness balances the spicy Buffalo sauce. However, you can use brioche rolls, potato rolls, or even slider buns in a pinch. Just know that the flavor profile will be different—still delicious, but different.
How do I make these sliders less spicy?
To reduce the heat, use a mild Buffalo sauce or mix the hot sauce with extra melted butter (try a 1:1 ratio). You can also add a tablespoon of honey or brown sugar to the sauce to balance the heat with sweetness. Serving with a creamy ranch or blue cheese dip also helps cool things down.
Pin This Recipe!
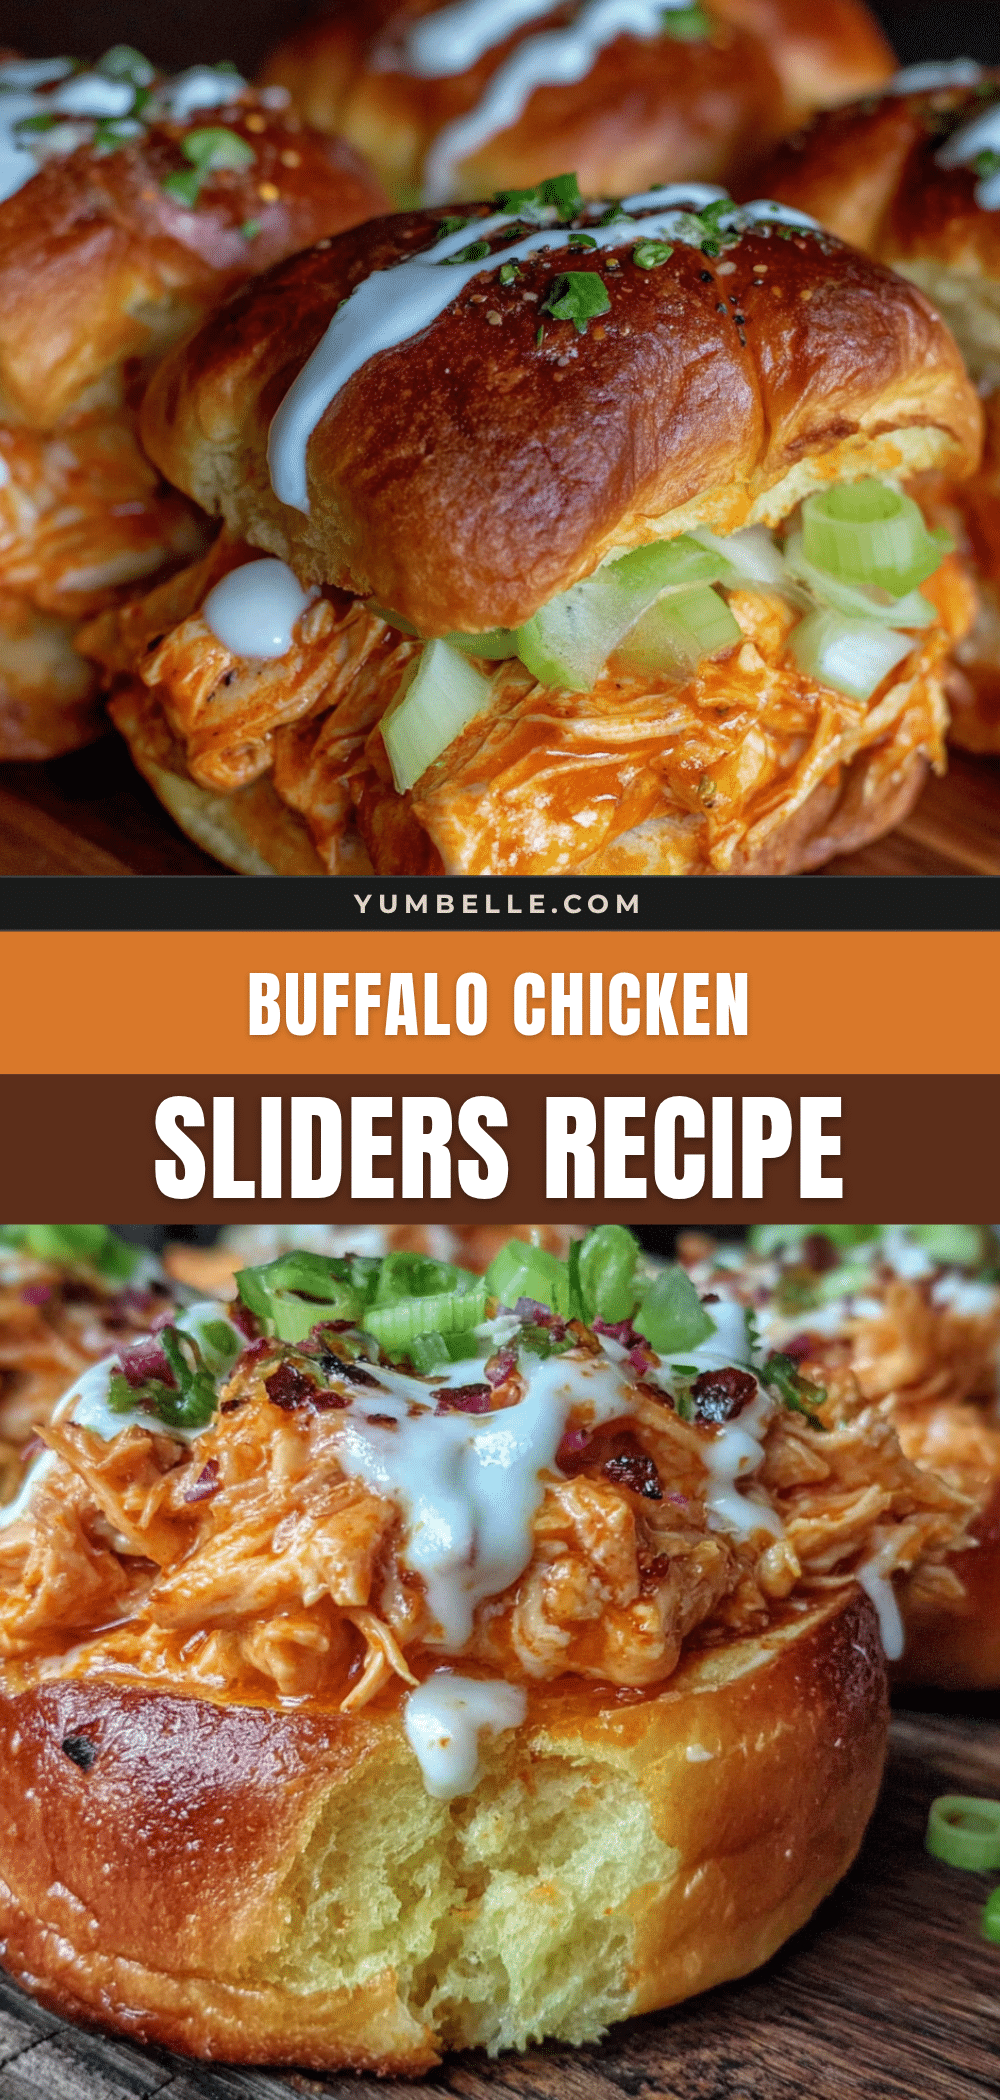
Easy Buffalo Chicken Sliders: Best Tailgate Recipe

These Easy Buffalo Chicken Tailgate Sliders on Hawaiian Rolls are quick, delicious, and guaranteed to make everyone happy. The combination of sweet, buttery rolls with spicy, tangy Buffalo chicken and melted cheese is simply unbeatable.
- Prep Time: 15 minutes
- Cook Time: 30 minutes
- Total Time: 45 minutes
- Yield: 12 sliders 1x
- Category: Main Course
- Cuisine: American
Ingredients
- 1.5 lbs boneless, skinless chicken breasts or thighs
- 1/2 cup Buffalo wing sauce (Frank’s RedHot recommended)
- 2 tablespoons unsalted butter
- 1 tablespoon ranch or blue cheese dressing mix (optional)
- 1/2 teaspoon garlic powder
- 1/4 teaspoon onion powder
- Salt and black pepper to taste
- 1 package (12-count) Hawaiian sweet rolls
- 1 1/2 cups shredded sharp cheddar cheese (or cheddar and Monterey Jack mix)
- 1/4 cup melted butter
- 1 teaspoon garlic powder
- 1/2 teaspoon dried parsley
- 1 tablespoon sesame seeds (optional)
- Ranch or blue cheese dressing (for serving)
- Celery sticks and carrot sticks (for serving)
- Pickled jalapeños (optional, for serving)
Instructions
- Cook the chicken: Place chicken in a large skillet, cover with water by about an inch. Bring to a gentle boil, then reduce heat to medium-low, cover, and simmer for 12-15 minutes until cooked through (165°F internal temperature).
- Shred the chicken: Remove chicken from water, let cool slightly, then shred using two forks or a hand mixer on low speed.
- Make the Buffalo sauce: In the same skillet, melt 2 tablespoons butter over medium heat. Add Buffalo wing sauce, garlic powder, onion powder, and ranch/blue cheese dressing mix if using. Whisk and simmer for 2-3 minutes until slightly thickened.
- Combine chicken and sauce: Add shredded chicken to the skillet, stir to coat evenly, and cook for 2-3 minutes. Season with salt and pepper to taste.
- Prepare the rolls: Preheat oven to 350°F. Slice the entire package of Hawaiian rolls horizontally in half. Place bottom half in a 9×13 baking dish, cut side up.
- Assemble the sliders: Spread Buffalo chicken mixture evenly over bottom rolls. Top with shredded cheese. Place top half of rolls back on, pressing gently.
- Make garlic butter topping: In a small bowl, combine melted butter, garlic powder, dried parsley, and sesame seeds if using. Brush generously over the tops of the rolls.
- Bake the sliders: Cover with aluminum foil and bake for 15 minutes. Remove foil and bake for another 5-7 minutes until tops are golden brown and cheese is melted and bubbly.
- Rest and serve: Let sliders rest for 5 minutes before slicing along individual roll lines. Serve warm with ranch or blue cheese dressing for dipping.
Notes
For extra crunch, toast the bottom half of the rolls under the broiler for 1-2 minutes before adding the chicken. To make a creamy version, mix 4 ounces of softened cream cheese into the Buffalo chicken mixture. For less spice, use a mild wing sauce or mix hot sauce with extra melted butter. Leftovers can be stored in an airtight container in the refrigerator for up to 3 days or frozen for up to 3 months.
Nutrition
- Serving Size: 1 slider
- Calories: 300
- Sugar: 8
- Sodium: 800
- Fat: 15
- Saturated Fat: 7
- Carbohydrates: 23
- Fiber: 1
- Protein: 23
Keywords: buffalo chicken sliders, tailgate recipe, game day food, Hawaiian rolls, easy appetizer, party food, spicy chicken sliders


