Love this? Save it for later!
Share the inspiration with your friends
The car battery died in the parking lot of a plumbing supply store. Not exactly where you expect to find a life-changing recipe, right? I was waiting for a jump start—my trunk full of groceries, my patience running thin—when the store’s delivery driver, a guy named Leo who looked like he hadn’t smiled in a decade, started telling me about the meatball sub sliders his wife made for his bowling league. He described them with this unexpected tenderness, like he was talking about a childhood pet. “She uses honey and garlic,” he said, almost whispering. “They disappear in ten minutes.” I scribbled his instructions on the back of a receipt while jumper cables dangled from my bumper.
Honestly, I forgot about the recipe for almost a year. Then tailgating season rolled around, and I was desperate for something that wasn’t dry wings or cold sandwiches. I found that crumpled receipt in my glove box, and let me tell you, Leo was not exaggerating. These honey garlic meatball sub sliders are the kind of thing that makes people stop mid-conversation and just chew. The sweet and savory glaze clings to tender homemade meatballs, all piled onto soft slider buns with melty provolone. I’ve made them for every game day since, and they never fail to get that same reverent silence Leo described. Maybe you’ve had one too many sad tailgate sandwiches. Trust me, this is the fix.
Why You’ll Love This Recipe
I’ve tested this recipe more times than I care to admit—through burnt batches, under-seasoned meatballs, and one memorable incident involving a broken broiler. What I’ve landed on is a version that works every single time, and here is why it stands out from every other slider recipe on the internet.
- Quick & Easy: These come together in about 35 minutes, which is practically a miracle for homemade meatballs. Perfect for that frantic pre-game rush when you’re juggling dips and drinks.
- Simple Ingredients: You likely have garlic, honey, and breadcrumbs in your pantry right now. No specialty stores required—I promise.
- Perfect for Tailgating: These sliders hold up beautifully in a warm cooler or on a buffet table. They don’t get soggy, and they’re easy to eat standing up with one hand holding a soda.
- Crowd-Pleaser: I’ve served these at parties where half the guests claimed they “didn’t like meatball subs.” Every single one of them came back for seconds. Kids love them too, which is a miracle in itself.
- Unbelievably Delicious: The honey garlic glaze is the star here—it caramelizes slightly under the broiler, creating this sticky, tangy coating that soaks into the bun just enough without making it mushy. It’s next-level comfort food, and I mean that sincerely.
What makes this recipe different from the rest is the balance. Most meatball subs are either too saucy or too dry. This one hits that sweet spot where the meatballs are moist, the glaze is sticky but not overwhelming, and the bun stays sturdy. I tested it with three different types of bread before settling on slider rolls. It’s not just another version—it’s my best version, born from trial and error and a lot of hungry friends.
This recipe isn’t just good—it’s the kind that makes you close your eyes after the first bite. It’s tailgate food reimagined: faster, messier in the best way, but with the same soul-soothing satisfaction as a full-sized sub. Perfect for impressing your crew without spending the whole morning in the kitchen.
What Ingredients You Will Need
This recipe uses simple, honest ingredients to deliver bold flavor and satisfying texture without the fuss. Most of these are pantry staples, but I’ve included notes on what to look for at the store.
For the Meatballs
- Ground beef (1 lb, 80/20 blend): The fat content keeps the meatballs moist. I’ve tried leaner blends, and they just don’t hold up as well. (If you prefer, you can use half ground pork for extra richness.)
- Breadcrumbs (½ cup, plain): I prefer Progresso plain breadcrumbs for consistent texture. They absorb moisture evenly without making the meatballs dense.
- Egg (1 large): This binds everything together. Make sure it’s at room temperature so it mixes evenly.
- Garlic (3 cloves, minced): Fresh garlic is non-negotiable here. The jarred stuff lacks that sharp, aromatic punch.
- Parmesan cheese (¼ cup, grated): Adds saltiness and umami. Use the real stuff, not the green can—trust me on this.
- Italian seasoning (1 teaspoon): A blend of oregano, basil, and rosemary works beautifully.
- Salt and black pepper (to taste): Don’t skimp on the salt. Meatballs need it to taste like anything at all.
- Milk (2 tablespoons): This keeps the breadcrumbs moist and the meatballs tender. Whole milk works best, but any kind will do.
For the Honey Garlic Glaze
- Honey (⅓ cup): Use a mild honey like clover or orange blossom. Strong buckwheat honey can overpower the garlic.
- Soy sauce (3 tablespoons): Low-sodium is best—you can always add more salt later. I recommend Kikkoman for consistent flavor.
- Garlic (4 cloves, minced): Yes, more garlic. This is the star of the show.
- Ketchup (2 tablespoons): Adds a touch of tomato sweetness and color. Don’t skip it—it balances the honey.
- Rice vinegar (1 tablespoon): Cuts through the sweetness with a little acidity. Apple cider vinegar works in a pinch.
- Cornstarch (1 teaspoon): Thickens the glaze slightly so it clings to the meatballs.
For Assembly
- Slider buns (12 count): Look for soft, slightly sturdy rolls. Martin’s potato rolls are my go-to—they hold up without falling apart.
- Provolone cheese (6 slices, halved): Melts beautifully and doesn’t overpower the glaze. Mozzarella works too, but provolone has more flavor.
- Butter (2 tablespoons, melted): For brushing the tops of the buns before toasting. Optional, but highly recommended.
- Fresh parsley (for garnish): Adds a pop of color and freshness.
Equipment Needed
You don’t need a professional kitchen for this, but having the right tools makes the process smoother. Here is what I use:
- Large mixing bowl: For combining the meatball ingredients. A glass or stainless steel bowl works best—plastic can retain odors.
- Baking sheet (rimmed): Line it with parchment paper for easy cleanup. I’ve used foil in a pinch, but the meatballs tend to stick.
- Small saucepan: For simmering the glaze. A non-stick pan makes cleanup even easier.
- Whisk: For combining the glaze ingredients without lumps.
- Cookie scoop (1.5-inch): This is my secret weapon for uniform meatballs. If you don’t have one, wet your hands slightly and roll them by hand.
- Pastry brush: For brushing the glaze onto the meatballs and butter onto the buns. A silicone brush is easier to clean.
- Broiler-safe baking dish: For toasting the assembled sliders. A 9×13-inch dish works perfectly.
- Cooling rack: If you have one, place it on the baking sheet to elevate the meatballs while they bake. This prevents them from sitting in grease.
If you don’t have a cookie scoop, a tablespoon measure works fine—just expect slightly irregular sizes. And if you don’t have a pastry brush, you can spoon the glaze over the meatballs. It’s not as even, but it gets the job done.
Preparation Method
Let’s get cooking. I’ve broken this down into clear steps with time estimates and sensory cues so you know exactly what to look for.
Step 1: Make the Meatballs (10 minutes prep, 15 minutes bake)
Preheat your oven to 400°F (200°C). Line a rimmed baking sheet with parchment paper or foil. In a large mixing bowl, combine the ground beef, breadcrumbs, egg, minced garlic, grated Parmesan, Italian seasoning, salt, pepper, and milk. Use your hands to mix everything together—don’t overwork it. You want it just combined, not tough. The mixture should feel moist but hold together when pressed. If it feels too wet, add another tablespoon of breadcrumbs. Too dry? Add a splash more milk.
Using a cookie scoop or your hands, form the mixture into 12 evenly sized meatballs, about 1.5 inches in diameter. Place them on the prepared baking sheet, spacing them about an inch apart. Bake for 12-15 minutes, or until the meatballs are browned on the outside and cooked through. You’ll know they’re done when an instant-read thermometer reads 160°F (71°C) in the center. The kitchen should smell like garlic and herbs at this point—if it doesn’t, you might need to check your seasoning.
Step 2: Make the Honey Garlic Glaze (5 minutes)
While the meatballs bake, combine the honey, soy sauce, minced garlic, ketchup, rice vinegar, and cornstarch in a small saucepan. Whisk until the cornstarch dissolves completely—no lumps allowed. Place the saucepan over medium heat and bring the mixture to a gentle simmer. You’ll see small bubbles forming around the edges. Let it cook for 2-3 minutes, stirring occasionally, until it thickens slightly. It should coat the back of a spoon. Remove from heat and set aside. The glaze will continue to thicken as it cools.
Step 3: Glaze the Meatballs (5 minutes)
Once the meatballs are done, remove them from the oven. Using a pastry brush or a spoon, coat each meatball generously with the honey garlic glaze. Don’t be shy—you want them sticky and glossy. Return the glazed meatballs to the oven for another 3-5 minutes. This allows the glaze to caramelize slightly, creating that irresistible sticky coating. Watch them closely; you don’t want the sugar in the honey to burn. They should look shiny and slightly darkened at the edges.
Step 4: Prepare the Slider Buns (5 minutes)
While the meatballs finish, split the slider buns in half horizontally. Place the bottom halves in a broiler-safe baking dish or on a baking sheet. Brush the cut sides with melted butter if you’re using it. Toast them under the broiler for 1-2 minutes, watching carefully, until they’re golden and slightly crisp. Don’t walk away—broilers work fast and buns burn in seconds. Remove and set aside.
Step 5: Assemble the Sliders (5 minutes)
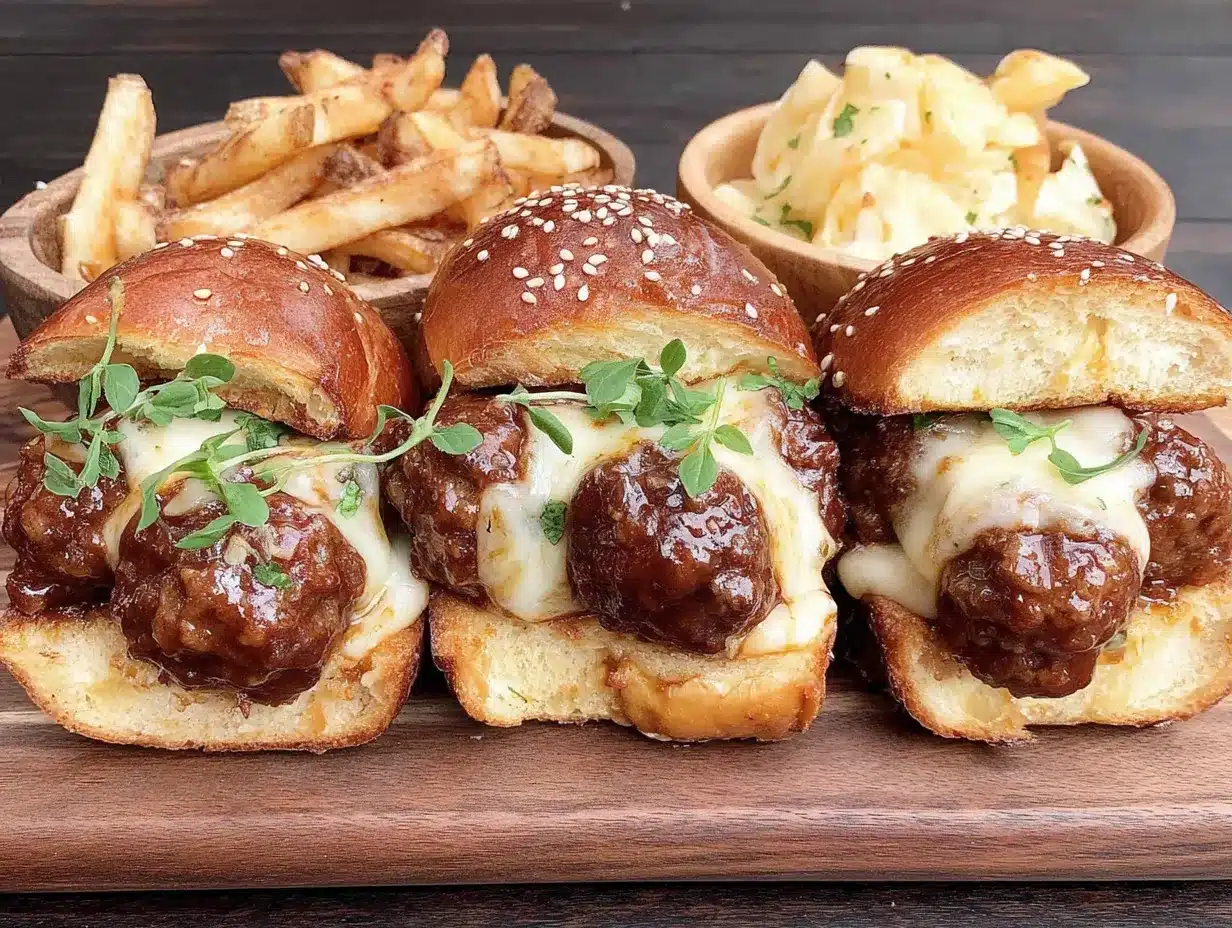
Place a glazed meatball on each bottom bun half. Top each meatball with half a slice of provolone cheese. Place the top bun halves on top. Brush the tops of the buns with any remaining melted butter or glaze. Return the assembled sliders to the broiler for 1-2 minutes, just until the cheese melts and the buns are lightly toasted. Keep an eye on them—you want gooey cheese, not a charred bun.
Step 6: Garnish and Serve (2 minutes)
Remove the sliders from the oven. Sprinkle fresh chopped parsley over the top for color and a hint of freshness. Serve immediately while the cheese is still stretchy and the meatballs are warm. If you’re taking them to a tailgate, keep them in a warm cooler or wrap them in foil and place them in a preheated insulated bag.
Cooking Tips & Techniques
I’ve made this recipe more times than I can count, and I’ve learned a few things the hard way. Here are my best tips for perfect sliders every time.
Don’t overmix the meatball mixture. I know it’s tempting to keep working it until everything looks uniform, but overmixing makes meatballs dense and tough. Stop as soon as the ingredients are combined. A few streaks of breadcrumbs are fine—they’ll disappear during baking.
Use a cookie scoop for even meatballs. This isn’t just about presentation. Evenly sized meatballs cook at the same rate, so you don’t end up with some overcooked and others undercooked. If you’re rolling by hand, wet your fingers slightly to prevent sticking.
Toast the buns before assembling. This is non-negotiable. Untoasted buns get soggy from the glaze and meatball juices. A quick trip under the broiler creates a barrier that keeps the bread intact. I learned this after serving a batch of sad, soggy sliders to my friends. Never again.
Watch the broiler like a hawk. Broilers are unpredictable. One minute your buns are golden, the next they’re charcoal. Stay close, and rotate the pan if needed for even browning.
Double the glaze if you like extra sauce. Some people (me) want extra glaze for dipping. If that’s you, make 1.5 times the glaze recipe. Just keep the cornstarch ratio the same to avoid a gummy texture.
Let the meatballs rest for 2 minutes after glazing. This allows the glaze to set slightly, so it doesn’t slide off when you assemble the sliders. I know it’s hard to wait, but it makes a difference.
Variations & Adaptations
One of the best things about this recipe is how flexible it is. Here are some variations I’ve tried and loved.
Spicy Honey Garlic Sliders: Add 1 teaspoon of sriracha or red pepper flakes to the glaze for a kick of heat. The sweetness of the honey balances the spice beautifully. I made this version for a friend who loves heat, and she ate four in a row.
Turkey Meatball Version: Substitute ground turkey for the beef. Add an extra tablespoon of olive oil to the mixture since turkey is leaner and can dry out. Bake for 2-3 minutes less to avoid overcooking. The texture is lighter, but the glaze still shines.
Gluten-Free Option: Use gluten-free breadcrumbs and gluten-free slider buns. I’ve tested this with Schar gluten-free rolls, and they held up well. The meatballs themselves are naturally gluten-free if you skip the breadcrumbs and use almond flour instead.
Baked vs. Pan-Fried Meatballs: I prefer baking for ease and even cooking, but pan-frying gives you a crispier exterior. Heat a tablespoon of oil in a skillet over medium-high heat and cook the meatballs in batches, turning occasionally, until browned all over and cooked through. Drain on paper towels before glazing.
Cheese Swap: Not a provolone fan? Use mozzarella for extra stretch, or sharp cheddar for a bolder flavor. I tried gouda once, and it was fantastic—smoky and creamy.
Make it a Meal: Serve the sliders with a side of sweet potato fries or a simple green salad. The sweetness of the glaze pairs well with something tangy, like a vinaigrette.
Serving & Storage Suggestions
These sliders are best served warm, right after the cheese melts. The glaze is at its stickiest and most flavorful at this point. Arrange them on a platter with extra napkins—things get messy, and that’s part of the fun.
For tailgating, I recommend keeping the sliders in a warm cooler or wrapping them individually in foil and placing them in an insulated bag. They’ll stay warm for about an hour. If you’re serving them at home, a baking dish in a low oven (200°F) will keep them warm without drying them out.
Storage: Leftover sliders (if you have any) can be stored in an airtight container in the refrigerator for up to 3 days. The buns will soften slightly, but the flavor is still fantastic. To reheat, place them on a baking sheet in a 350°F oven for 5-7 minutes, or until the meatballs are warmed through and the cheese is melty again. Avoid the microwave—it makes the buns rubbery.
Freezer instructions: You can freeze the unglazed meatballs for up to 3 months. Place them on a baking sheet in the freezer until solid, then transfer to a freezer bag. When ready to use, thaw in the refrigerator overnight, then glaze and bake as directed. The glaze itself can be made ahead and stored in the refrigerator for up to a week.
The flavors actually develop and deepen after a day in the fridge. I’ve been known to make the meatballs and glaze a day ahead, then assemble and broil just before serving. It saves time and the results are even better.
Nutritional Information & Benefits
These sliders are indulgent, but they also have some redeeming qualities. Here is an approximate breakdown per slider (based on 12 servings):
- Calories: 320
- Protein: 18g
- Fat: 16g
- Carbohydrates: 28g
- Sugar: 12g
- Sodium: 480mg
The meatballs provide a solid amount of protein, which is great for keeping you full during a long game day. Garlic is known for its anti-inflammatory properties, and honey offers antioxidants—though let’s be honest, we’re here for the taste. If you’re watching your sugar intake, you can reduce the honey by a tablespoon, though the glaze will be less sticky.
This recipe contains gluten (from the breadcrumbs and buns) and dairy (from the cheese and Parmesan). For a dairy-free version, use vegan cheese and omit the Parmesan. For a gluten-free version, use gluten-free breadcrumbs and buns.
From a wellness perspective, I believe in balance. These sliders are a treat, and they’re worth every calorie. Pair them with a vegetable-heavy side dish, and you’ve got a meal that satisfies both your cravings and your nutritional needs.
Conclusion
These honey garlic meatball sub sliders are the kind of recipe that becomes a tradition. They’re easy enough for a weeknight dinner, impressive enough for a party, and portable enough for tailgating. The combination of tender meatballs, sticky-sweet glaze, and melty cheese on a soft bun is hard to beat.
I love this recipe because it brings people together. Every time I make it, I think of Leo and his bowling league, and I smile. Food has a way of creating connections, and these sliders are a perfect example. They’re simple, honest, and deeply satisfying.
I encourage you to make this recipe your own. Add extra garlic, swap the cheese, double the glaze—whatever makes you happy. And when you do, come back and tell me about it. Leave a comment below, share a photo, or tag me on social media. I want to hear how your version turned out. Until then, happy cooking, and may your tailgate be legendary.
Frequently Asked Questions
Can I use frozen meatballs for this recipe?
You can, but I don’t recommend it. Frozen meatballs often have a different texture and can release excess water, which thins out the glaze. If you’re in a pinch, thaw them completely, pat them dry, and bake them before glazing. The result won’t be as good as homemade, but it’ll still be tasty.
How do I prevent the sliders from getting soggy?
Toasting the buns is key. A quick broil creates a barrier that keeps the bread from absorbing too much moisture. Also, don’t overdress the meatballs with glaze—a light coating is enough. If you’re transporting them, assemble right before serving or keep the components separate until you’re ready.
Can I make these in a slow cooker?
Yes, for a party setting. Cook the meatballs as directed, then transfer them to a slow cooker with the glaze. Keep them on warm setting. Toast the buns and assemble the sliders just before serving. This method is great for keeping meatballs warm for hours without drying out.
What’s the best way to reheat leftover sliders?
Skip the microwave. Place them on a baking sheet in a 350°F oven for 5-7 minutes. The oven re-crisps the buns and melts the cheese evenly. If you’re in a hurry, an air fryer at 350°F for 3-4 minutes works beautifully.
Can I use a different type of meat?
Absolutely. Ground pork, chicken, or a blend of beef and pork all work well. Just adjust the cooking time based on the fat content. Leaner meats like chicken may need a splash of olive oil to stay moist. I’ve also made these with lamb, and the honey garlic glaze pairs surprisingly well with its richness.
Pin This Recipe!
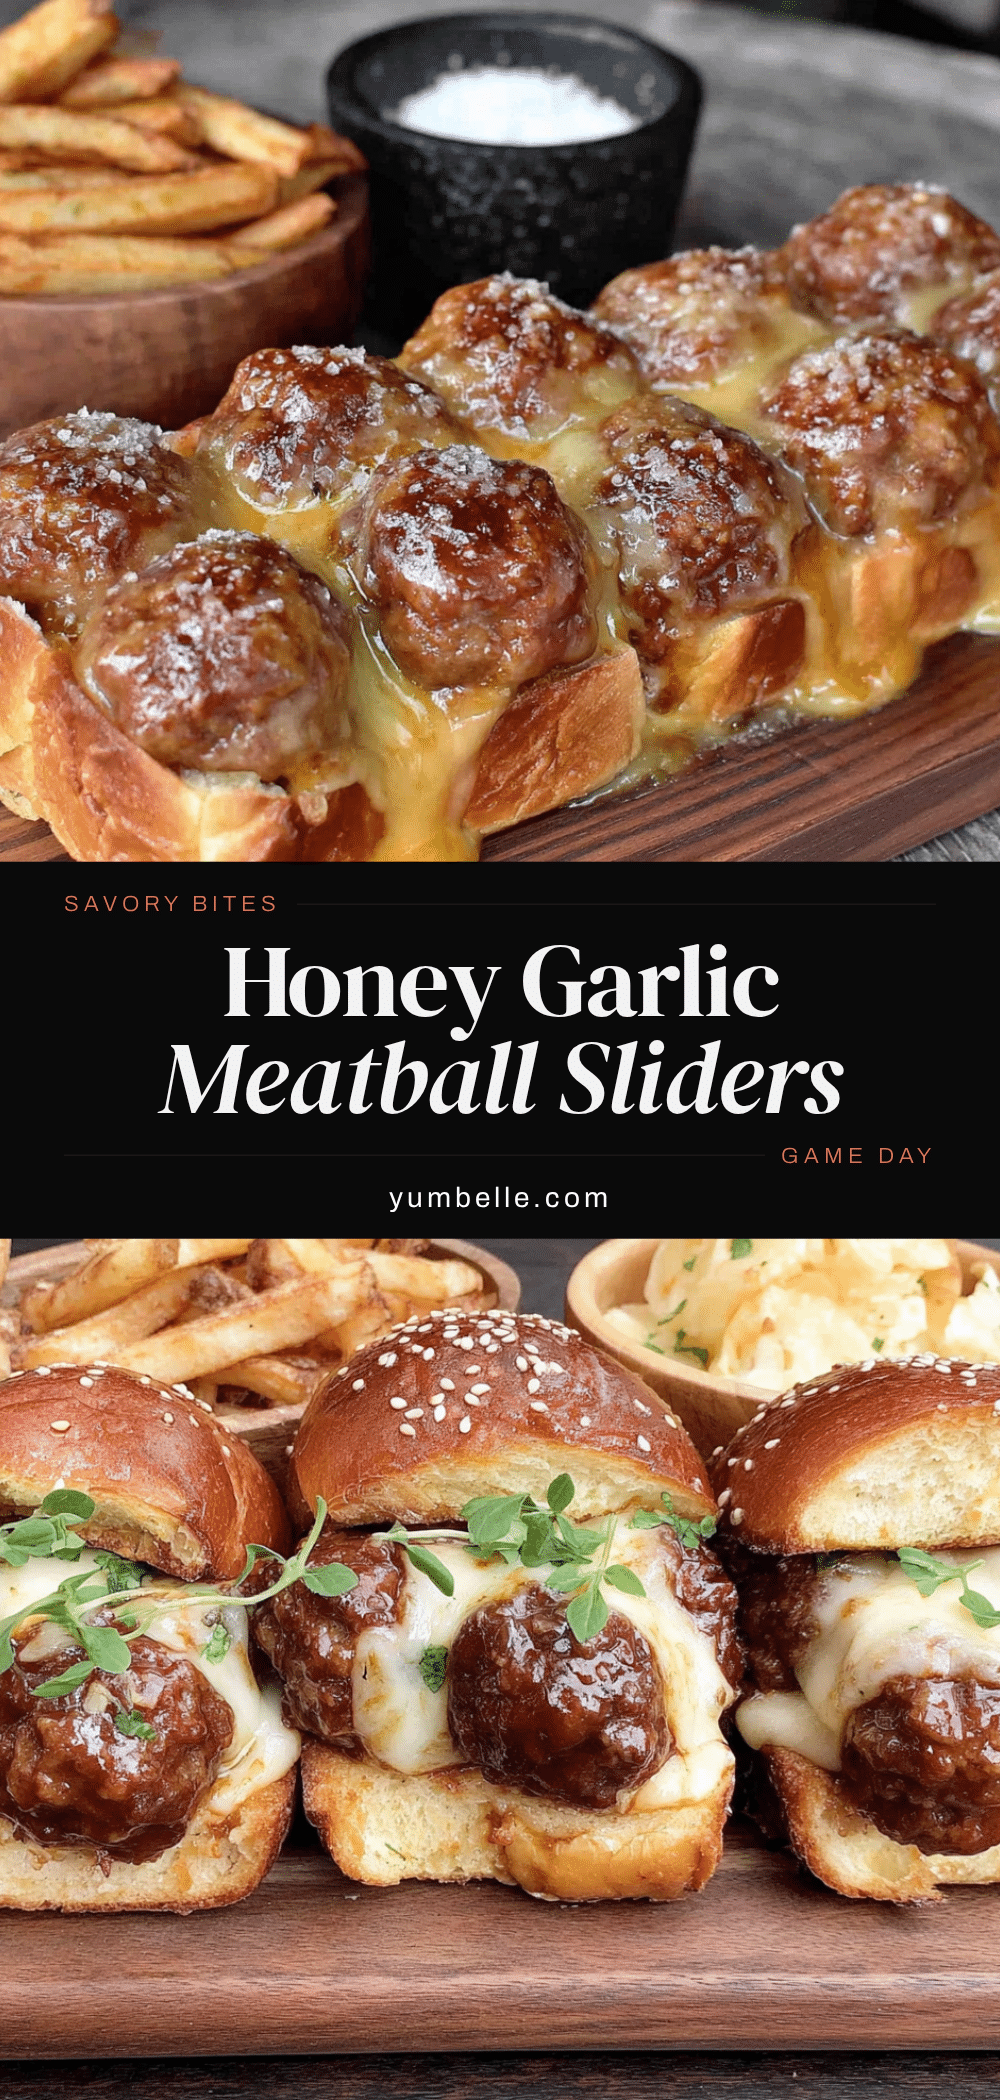
Best Honey Garlic Meatball Sub Sliders: Easy Tailgating Recipe
These honey garlic meatball sub sliders are the ultimate tailgating food: tender homemade meatballs coated in a sticky-sweet glaze, piled onto soft slider buns with melty provolone cheese. Quick to make and impossible to resist, they’re a guaranteed crowd-pleaser.
- Prep Time: 15 minutes
- Cook Time: 20 minutes
- Total Time: 35 minutes
- Yield: 12 sliders 1x
- Category: Main Course
- Cuisine: American
Ingredients
- 1 lb ground beef (80/20 blend)
- ½ cup plain breadcrumbs
- 1 large egg, at room temperature
- 3 cloves garlic, minced
- ¼ cup grated Parmesan cheese
- 1 teaspoon Italian seasoning
- Salt and black pepper to taste
- 2 tablespoons milk (whole milk preferred)
- ⅓ cup honey (mild, like clover or orange blossom)
- 3 tablespoons low-sodium soy sauce (recommended: Kikkoman)
- 4 cloves garlic, minced
- 2 tablespoons ketchup
- 1 tablespoon rice vinegar (or apple cider vinegar)
- 1 teaspoon cornstarch
- 12 slider buns (recommended: Martin’s potato rolls)
- 6 slices provolone cheese, halved
- 2 tablespoons butter, melted (optional)
- Fresh parsley for garnish
Instructions
- Preheat oven to 400°F (200°C). Line a rimmed baking sheet with parchment paper or foil.
- In a large bowl, combine ground beef, breadcrumbs, egg, minced garlic, Parmesan, Italian seasoning, salt, pepper, and milk. Mix with your hands until just combined; do not overwork.
- Form mixture into 12 evenly sized meatballs (about 1.5 inches in diameter) using a cookie scoop or your hands. Place on prepared baking sheet, spacing about 1 inch apart.
- Bake meatballs for 12-15 minutes, until browned and cooked through (internal temperature of 160°F / 71°C).
- While meatballs bake, make the glaze: In a small saucepan, whisk together honey, soy sauce, minced garlic, ketchup, rice vinegar, and cornstarch until cornstarch dissolves.
- Place saucepan over medium heat and bring to a gentle simmer. Cook for 2-3 minutes, stirring occasionally, until glaze thickens slightly and coats the back of a spoon. Remove from heat.
- Remove baked meatballs from oven. Brush or spoon honey garlic glaze generously over each meatball. Return to oven for 3-5 minutes, until glaze caramelizes slightly.
- While meatballs finish, split slider buns in half horizontally. Place bottom halves in a broiler-safe baking dish. Brush cut sides with melted butter if using. Toast under broiler for 1-2 minutes until golden. Watch carefully.
- Assemble sliders: Place one glazed meatball on each bottom bun half. Top each with half a slice of provolone cheese. Place top bun halves on top. Brush tops with any remaining melted butter or glaze.
- Return assembled sliders to broiler for 1-2 minutes, until cheese melts and buns are lightly toasted. Watch closely.
- Remove from oven, sprinkle with fresh chopped parsley, and serve immediately.
Notes
Don’t overmix the meatball mixture to avoid dense meatballs. Toast the buns before assembling to prevent sogginess. Watch the broiler closely to avoid burning. For extra sauce, double the glaze ingredients. Let glazed meatballs rest 2 minutes before assembling to set the glaze.
Nutrition
- Serving Size: 1 slider
- Calories: 320
- Sugar: 12
- Sodium: 480
- Fat: 16
- Carbohydrates: 28
- Protein: 18
Keywords: honey garlic meatball sliders, tailgating recipe, meatball sub sliders, easy slider recipe, game day food


