Love this? Save it for later!
Share the inspiration with your friends
The woman at the craft store register watched me load a cart with two bags of candy eyes and a mountain of crescent roll dough. She didn’t say anything at first, just raised an eyebrow and scanned the pile like she was trying to solve a puzzle. Then she leaned forward and whispered, “You’re doing the mummy dogs thing, aren’t you?” I laughed and admitted I was, for the third Halloween in a row. She told me her daughter calls them “the best part of October” and that she makes them every single year without fail. That conversation stuck with me—not because of the recipe itself, but because of how it connected two strangers over something so simple. Honestly, that is exactly what this recipe does. It brings people together, makes everyone smile, and turns a regular dinner into something memorable.
I first made these mummy hot dogs about five years ago when I was scrambling for something festive that my picky nephew would actually eat. The internet was full of complicated Halloween recipes back then—things that required fondant and food coloring and way more patience than I had on a Tuesday night. I needed something fast, fun, and foolproof. Enter the crescent roll mummy. It was love at first bite, let me tell you. The first batch I made looked more like sad little ghosts than actual mummies, with the dough strips falling off and the eyes sliding sideways. But you know what? Everyone still devoured them. That is the beauty of this recipe. It doesn’t need to be perfect to be absolutely delicious.
There is something magical about wrapping a hot dog in dough and calling it a mummy. It is silly, sure, but it is also genuinely satisfying. The kids get to help wrap, the adults get to snack, and nobody complains about dinner. I have made these for Halloween parties, classroom treats, and even a last-minute movie night when I needed something quick. They always disappear first. The combination of flaky, golden crescent dough wrapped around a juicy hot dog is hard to beat. Add in those little candy eyes staring up at you, and suddenly dinner feels like a party. Maybe you have been there—scrolling through recipes at 5 PM, wondering what on earth to make that feels special without taking hours. This is that recipe. This is the one.
Why You’ll Love This Recipe
Let me be honest with you. I have tested a lot of Halloween recipes over the years, and most of them fall into one of two categories: way too complicated or way too boring. These mummy hot dogs hit the sweet spot perfectly. They look impressive enough to get oohs and ahhs at any party, but they come together in under twenty minutes with ingredients you probably already have in your kitchen. That is the kind of recipe I can get behind.
- Quick & Easy: From start to finish, these take about 15 to 20 minutes. That includes the time it takes to preheat your oven. Seriously, you can make these on a busy weeknight without breaking a sweat.
- Simple Ingredients: You only need three main ingredients—hot dogs, crescent roll dough, and candy eyes. That is it. No fancy grocery trips, no obscure spices, no hunting down specialty items at three different stores.
- Perfect for Halloween: Whether you are hosting a costume party, sending treats to school, or just want something fun for dinner on October 31st, these fit the bill perfectly. They are festive without being fussy.
- Crowd-Pleaser: I have yet to meet a kid—or an adult, honestly—who doesn’t love these. They are fun to look at and even more fun to eat. The combination of salty hot dog and buttery, flaky dough is universally adored.
- Unbelievably Delicious: This is not just about the cute factor. The crescent dough gets golden and crispy in the oven, while the hot dog stays juicy and warm. Dip them in ketchup or mustard, and you have got a snack that punches way above its weight class.
What makes this recipe different from the dozens of other mummy dog recipes out there? It comes down to the wrapping technique. I learned the hard way that if you wrap the dough too tightly, it puffs up and loses that mummy look. Too loosely, and it falls apart. I have perfected the balance over years of trial and error, and I will share every trick with you below. This is not just another version—it is the best version, tested and approved by a crowd of hungry Halloween fans.
This recipe is the kind that makes you close your eyes after the first bite. It is comfort food reimagined for a holiday that deserves a little fun. Perfect for impressing guests without stress, or turning a simple weeknight meal into something memorable. Honestly, it is hard to beat a recipe that makes both kids and adults genuinely excited about dinner.
What Ingredients You Will Need
This recipe uses simple, pantry-friendly ingredients that come together to create something unexpectedly delightful. The magic is in the combination of textures—flaky, buttery dough wrapped around a warm, savory hot dog, with those little candy eyes adding a touch of whimsy. Here is everything you will need:
For the Mummy Dogs
- 8 hot dogs (standard size works best; I prefer beef hot dogs for richer flavor, but any variety works)
- 1 can (8 ounces) refrigerated crescent roll dough (I recommend Pillsbury for consistent results; the sheets version works too but requires cutting into strips yourself)
- 16 candy eyes (the small edible ones found in the baking aisle; Wilton brand holds up well during baking)
For Serving (Optional)
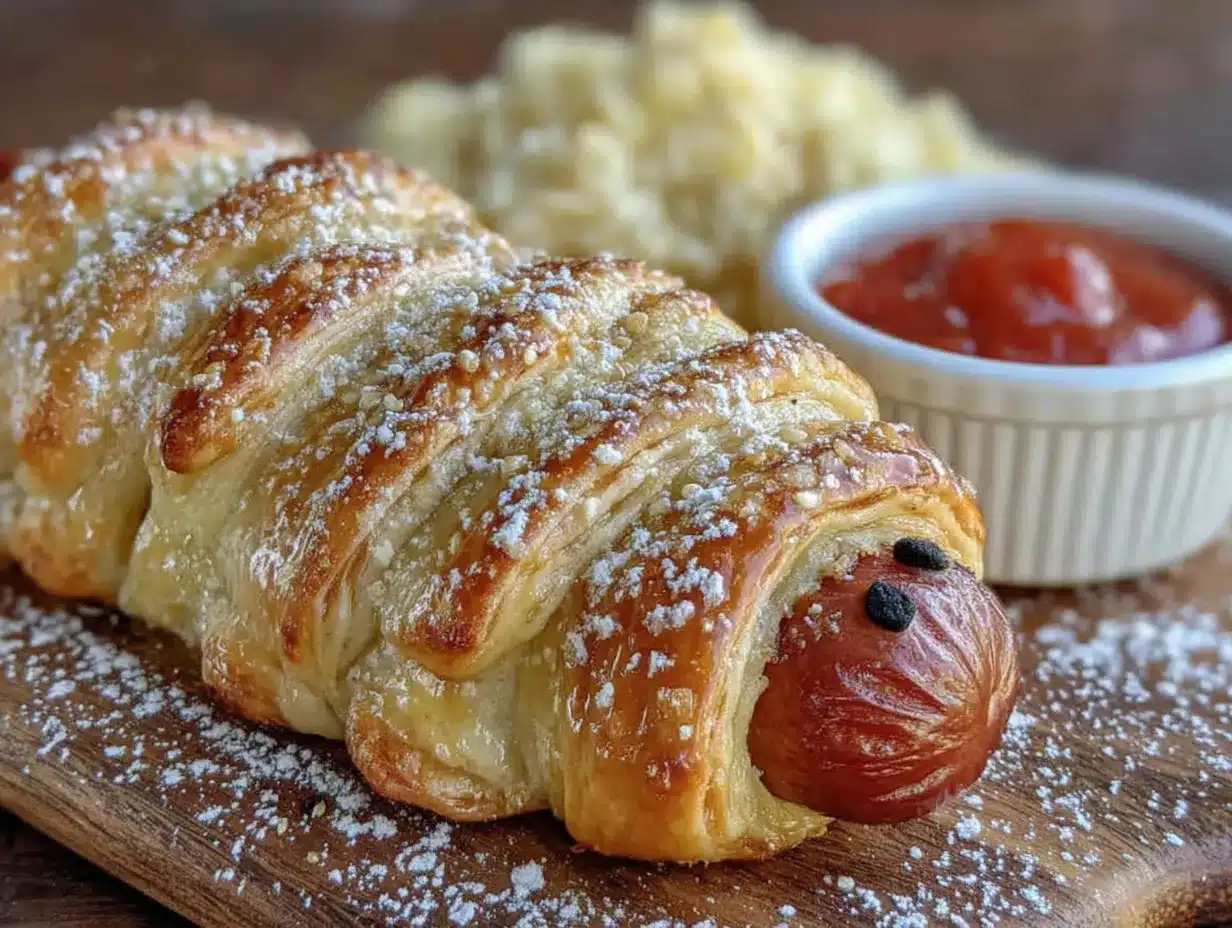
- Ketchup (for dipping)
- Yellow mustard (adds a nice tangy contrast)
- Ranch dressing (surprisingly good with these)
Ingredient Selection Tips: When choosing hot dogs, look for ones that are uniform in size so they bake evenly. I have used both regular and jumbo hot dogs, and standard size works best for the dough-to-hot dog ratio. If you want to go the extra mile, try all-beef hot dogs—they have a deeper, richer flavor that stands up well to the buttery dough. For the crescent rolls, stick with the original flavor rather than the butter or flaky versions. The original dough has just the right texture for wrapping without becoming too greasy.
Substitution Guidance: Need a gluten-free option? Use gluten-free crescent roll dough if available, or try wrapping the hot dogs in gluten-free tortillas cut into strips. For a lower-carb version, use cheese wraps or thin slices of deli meat instead of dough. Vegetarian? Swap in your favorite plant-based hot dogs or even cheese sticks for a different take. The candy eyes are purely decorative, so you can skip them if needed, though they really do make the mummies come alive.
Where to Find Candy Eyes: These little guys are surprisingly easy to find. Most major grocery stores carry them in the baking aisle near the sprinkles and cake decorations. You can also find them at craft stores like Michaels or Joann, or order them online. I always keep a couple of bags in my pantry during October because they disappear fast.
Equipment Needed
You do not need much for this recipe, which is part of its charm. Here is what you will need:
- Baking sheet (standard half-sheet pan works perfectly; line it with parchment paper for easy cleanup)
- Parchment paper (optional but highly recommended—keeps the dough from sticking and makes cleanup a breeze)
- Sharp knife or pizza cutter (for cutting the crescent dough into strips; a pizza cutter gives cleaner edges)
- Small bowl (for holding the candy eyes while you work)
- Cooling rack (optional, but helps the mummies stay crisp instead of getting soggy on the bottom)
Budget-Friendly Options: If you do not have parchment paper, you can grease the baking sheet lightly with cooking spray or butter. No pizza cutter? A sharp knife works just fine—just make sure it is sharp enough to cut through the dough cleanly without dragging. I have used a butter knife in a pinch, and while it was not pretty, it got the job done.
Personal Experience: I have made these in multiple kitchens over the years, and the one tool I always reach for is my pizza cutter. It makes cutting the dough strips quick and even, which is important for getting that uniform mummy look. If you are making a big batch for a party, a second pair of scissors or a bench scraper can speed things up considerably.
Preparation Method
Making these mummy hot dogs is genuinely easy, but there are a few tricks that make the difference between “cute” and “oh my gosh, these are adorable.” Follow these steps, and you will be the hero of any Halloween gathering.
- Preheat your oven to 375°F (190°C). Line a baking sheet with parchment paper for easy cleanup. Trust me on this one—the sugar in the crescent dough can caramelize and stick to unlined pans, and nobody wants to scrub that off.
- Unroll the crescent dough and separate it along the perforated lines into 8 triangles. If you are using the sheet version, you will need to cut it into 8 equal rectangles first, then cut each rectangle into strips.
- Cut each dough triangle into thin strips. Using a sharp knife or pizza cutter, slice each triangle lengthwise into 3 or 4 strips, depending on how thick you want the mummy wrappings. I usually go with 3 strips per triangle for a nice balance of dough-to-hot dog ratio. The strips should be about ½ inch (1.25 cm) wide. Do not worry if they are not perfectly even—mummies are supposed to look a little messy.
- Wrap each hot dog with the dough strips. Start at one end of the hot dog and wrap the strip around it at a slight angle, overlapping slightly as you go. Leave a small gap near the top of the hot dog where the eyes will go. The wrapping should be snug but not tight—you want the dough to have room to puff up during baking. If you wrap too tightly, the dough will tear or the hot dog will bulge out in weird places.
- Place the wrapped hot dogs on the prepared baking sheet, spacing them about 2 inches (5 cm) apart. The dough will expand during baking, so give them room to breathe. If they are too close together, they will steam instead of getting crispy.
- Bake for 10 to 12 minutes, or until the dough is golden brown and cooked through. Keep an eye on them toward the end—ovens vary, and you want the dough to be fully baked but not burnt. The edges should be lightly browned and flaky.
- Remove from the oven and let cool for 2 to 3 minutes. This is important! If you add the candy eyes while the dough is too hot, the eyes will melt or slide off. Give them just a couple of minutes to cool down slightly, but do not let them cool completely—the residual warmth helps the eyes stick.
- Press the candy eyes onto the exposed hot dog area near the top of each mummy. Use two eyes per mummy, positioning them close together for maximum cuteness. If the eyes do not stick well, dab a tiny bit of ketchup or mustard on the back to act as glue. I have also used a small dot of cream cheese in a pinch.
- Serve immediately while the mummies are still warm and the dough is flaky. These are best enjoyed fresh out of the oven, though they are still good at room temperature for a little while.
Troubleshooting Tip: If your dough strips keep tearing while you wrap, the dough might be too cold. Let it sit at room temperature for 5 minutes before cutting. If it is too sticky, dust your hands lightly with flour. I have had batches where the dough was stubborn, and a little patience goes a long way.
Sensory Cues: You will know the mummies are done when the kitchen smells like buttery, baked goodness and the dough has turned a deep golden brown. The edges should look flaky and slightly crispy. If you tap the dough lightly with a fork, it should sound hollow. The hot dogs will be plump and juicy inside, releasing a little steam when you cut into them.
Cooking Tips & Techniques
Over the years, I have made plenty of mistakes with these mummy dogs—and learned from every single one. Here are the tips that will save you from my early disasters.
Do not overwork the dough. Crescent roll dough is delicate, and handling it too much can make it tough. When you cut the strips, use a sharp blade and a clean, swift motion. If you saw back and forth, you will squish the dough and ruin its flaky texture. I learned this the hard way during my second batch, which came out dense and sad.
Leave room for the eyes. This is the mistake I see most often in photos online. People wrap the dough all the way to the top of the hot dog, leaving no space for the candy eyes. The result is a mummy with eyes floating on dough, which looks more like a confused monster than a cute mummy. Leave about ½ inch (1.25 cm) of exposed hot dog at the top. The eyes will sit perfectly there, and the mummy will look intentional.
Watch the baking time closely. These bake quickly, and the difference between perfect and burnt is about 60 seconds. Start checking at the 10-minute mark. If the dough is golden brown and the edges are just starting to darken, they are done. If you see any black spots, pull them out immediately. Every oven runs a little differently, so trust your eyes over the timer.
Multitasking strategy: While the mummies are baking, set out your dipping sauces and arrange the serving platter. This is also a good time to make a quick salad or heat up some baked beans if you are serving these as a meal. The mummies only take 12 minutes to bake, so you want everything else ready to go when they come out of the oven.
Make ahead tip: You can assemble the mummies up to 2 hours ahead of time and keep them covered in the refrigerator. Just add the candy eyes after baking—they will melt if you put them on before baking. I have done this for parties, and it works beautifully. The dough stays fresh, and you can pop them in the oven right when guests arrive.
Variations & Adaptations
One of the best things about this recipe is how easy it is to customize. Here are some variations I have tried and loved:
Cheesy Mummy Dogs: Before wrapping the hot dog, cut a slit lengthwise down the center and stuff it with a thin strip of cheddar cheese or a cheese stick. The cheese melts inside as it bakes, creating a gooey, delicious surprise. I tried this for the first time last year, and my family demanded it become the new standard.
Spicy Mummy Dogs: Brush the dough strips with a mixture of melted butter and hot sauce before wrapping. The heat cuts through the richness of the dough beautifully. I recommend using a mild hot sauce like Frank’s RedHot so it does not overpower the other flavors. For extra kick, use spicy jalapeño hot dogs as the base.
Breakfast Mummy Dogs: Swap the hot dogs for breakfast sausages and use pancake batter instead of crescent dough. Cook them in a skillet or on a griddle until golden brown. Drizzle with maple syrup for a sweet-and-savory breakfast that feels like a special occasion. My kids lost their minds over this version.
Veggie Mummy Dogs: Use plant-based hot dogs or even carrot sticks (blanched first) as the base. Wrap in crescent dough and bake as directed. The carrot version is surprisingly good—the natural sweetness of the carrot pairs well with the buttery dough. Just make sure to blanch the carrots first so they are tender enough to eat.
Dessert Mummy Dogs: Replace the hot dogs with banana pieces or thick apple slices. Wrap in cinnamon-sugar-dusted crescent dough strips and bake. Skip the candy eyes or use white chocolate chips instead. Dust with powdered sugar before serving for a sweet Halloween treat that feels completely different from the savory version.
Serving & Storage Suggestions
These mummy hot dogs are best served warm, right out of the oven. The contrast between the hot, flaky dough and the juicy hot dog is what makes them so addictive. Arrange them on a platter with a small bowl of ketchup in the center and mustard drizzled in a zigzag pattern around the edges. If you are feeling fancy, add some black olive “spiders” or carrot “bones” around the platter for extra Halloween flair.
Complementary Dishes: These pair beautifully with a simple side salad or roasted vegetables to balance out the richness. For a full Halloween-themed meal, serve them alongside a bowl of pumpkin soup or some roasted pumpkin seeds. They also work great as part of a larger appetizer spread with other finger foods like deviled eggs, popcorn balls, and veggie sticks with dip.
Storage Instructions: If you have leftovers (which honestly does not happen often in my house), store them in an airtight container in the refrigerator for up to 3 days. The dough will soften over time, but they are still tasty. To reheat, pop them in a 350°F (175°C) oven for 5 to 7 minutes until warmed through and the dough crisps up again. The microwave works in a pinch, but the dough will be soft rather than flaky.
Freezer Tips: You can freeze the assembled (unbaked) mummy dogs for up to 2 months. Arrange them on a baking sheet and freeze until solid, then transfer to a freezer bag. When ready to bake, add a couple of extra minutes to the baking time—no need to thaw first. Just do not add the candy eyes until after baking, as they can get lost in the freezer.
Flavor Development: These are really best fresh, but I have noticed that the flavor of the hot dog and dough melds together nicely after a day in the fridge. The dough absorbs some of the smoky flavor from the hot dog, which is actually pretty delicious. Just do not expect the same crispy texture you get fresh out of the oven.
Nutritional Information & Benefits
Let me be real with you—these are not health food, and that is okay. They are a fun, festive treat meant to be enjoyed in moderation. But here is the breakdown if you are curious:
Per serving (1 mummy dog): Approximately 210 calories, 12g fat, 18g carbohydrates, 7g protein, 2g sugar, 480mg sodium. Values will vary based on the specific brands you use.
Health Benefits of Key Ingredients: Hot dogs provide protein and iron, which are essential for energy and overall health. Crescent roll dough offers carbohydrates for quick energy—perfect for active kids running around on Halloween night. The candy eyes are purely for fun, but they do add a touch of whimsy that makes eating more enjoyable, which has its own psychological benefits.
Dietary Considerations: This recipe is not gluten-free, low-carb, or vegetarian in its standard form. However, with the substitutions I mentioned earlier, you can adapt it to fit most dietary needs. The gluten-free version using gluten-free crescent dough works surprisingly well, though the texture is slightly different. For a lower-sodium option, use low-sodium hot dogs and reduced-fat crescent dough.
Potential Allergens: This recipe contains wheat (gluten), dairy (in the crescent dough), and possible soy (in some hot dog brands). Check labels carefully if you are cooking for someone with allergies. The candy eyes are typically made from sugar and cornstarch, but always verify the packaging.
Personal Wellness Perspective: I believe in balance. These mummy dogs are a once-a-year treat in my house, something we look forward to and enjoy without guilt. Pairing them with a side of veggies or a fresh salad helps round out the meal. And honestly, the joy they bring to the table is worth every calorie.
Conclusion
These Easy Spooky Mummy Hot Dogs have become a Halloween tradition in my kitchen, and I have a feeling they will become one in yours too. They are quick, simple, and genuinely fun to make. The kids love wrapping the dough and placing the eyes, and the adults love how they disappear in minutes. It is one of those rare recipes that checks every box—easy, delicious, and absolutely adorable.
I encourage you to make these your own. Try the cheesy version, go spicy, or experiment with different dipping sauces. The beauty of this recipe is that it is forgiving. Even if your mummies look a little wonky, they will still taste amazing. That is the kind of cooking I love—low pressure, high reward.
Honestly, this recipe reminds me why I love cooking for holidays. It is not about perfection. It is about creating moments that people remember. The laughter when someone’s mummy loses an eye. The satisfied crunch of flaky dough. The shared joy of eating something that looks too cute to eat. That is what Halloween is all about.
So grab your hot dogs and your crescent rolls, and get wrapping. I would love to hear how your mummies turn out. Drop a comment below and tell me about your Halloween creations. Did you try a fun variation? Did your kids help? Share your stories—I read every single one. Happy Halloween, and happy snacking!
Frequently Asked Questions
Can I use puff pastry instead of crescent roll dough?
Absolutely! Puff pastry will give you a flakier, more buttery result. Just thaw it according to the package directions, cut it into thin strips, and wrap the hot dogs the same way. The baking time may be slightly longer—check at the 12-minute mark and add time as needed.
How do I keep the candy eyes from falling off?
The key is to add the eyes after baking, when the dough has cooled for 2 to 3 minutes. The residual warmth helps them stick. If they still fall off, dab a tiny bit of ketchup, mustard, or cream cheese on the back of each eye before pressing it onto the hot dog. That acts like edible glue.
Can I make these in an air fryer?
Yes! Preheat your air fryer to 350°F (175°C) and cook the mummy dogs for 6 to 8 minutes, flipping halfway through. The air fryer gives them an extra-crispy exterior. Just make sure to leave space between each one so the air can circulate properly.
What if I cannot find candy eyes?
No worries! You can make your own by cutting small circles out of black olives or using dots of black gel food coloring on the hot dog. Alternatively, skip the eyes entirely—the mummies will still look cute with just the dough wrappings. You can also use small pieces of nori (seaweed) cut into circles.
How far in advance can I prepare these?
You can assemble the wrapped mummy dogs up to 2 hours ahead and keep them covered in the refrigerator. Just add the candy eyes after baking. You can also freeze the assembled, unbaked mummies for up to 2 months. Bake directly from frozen, adding a few extra minutes to the cooking time.
Pin This Recipe!
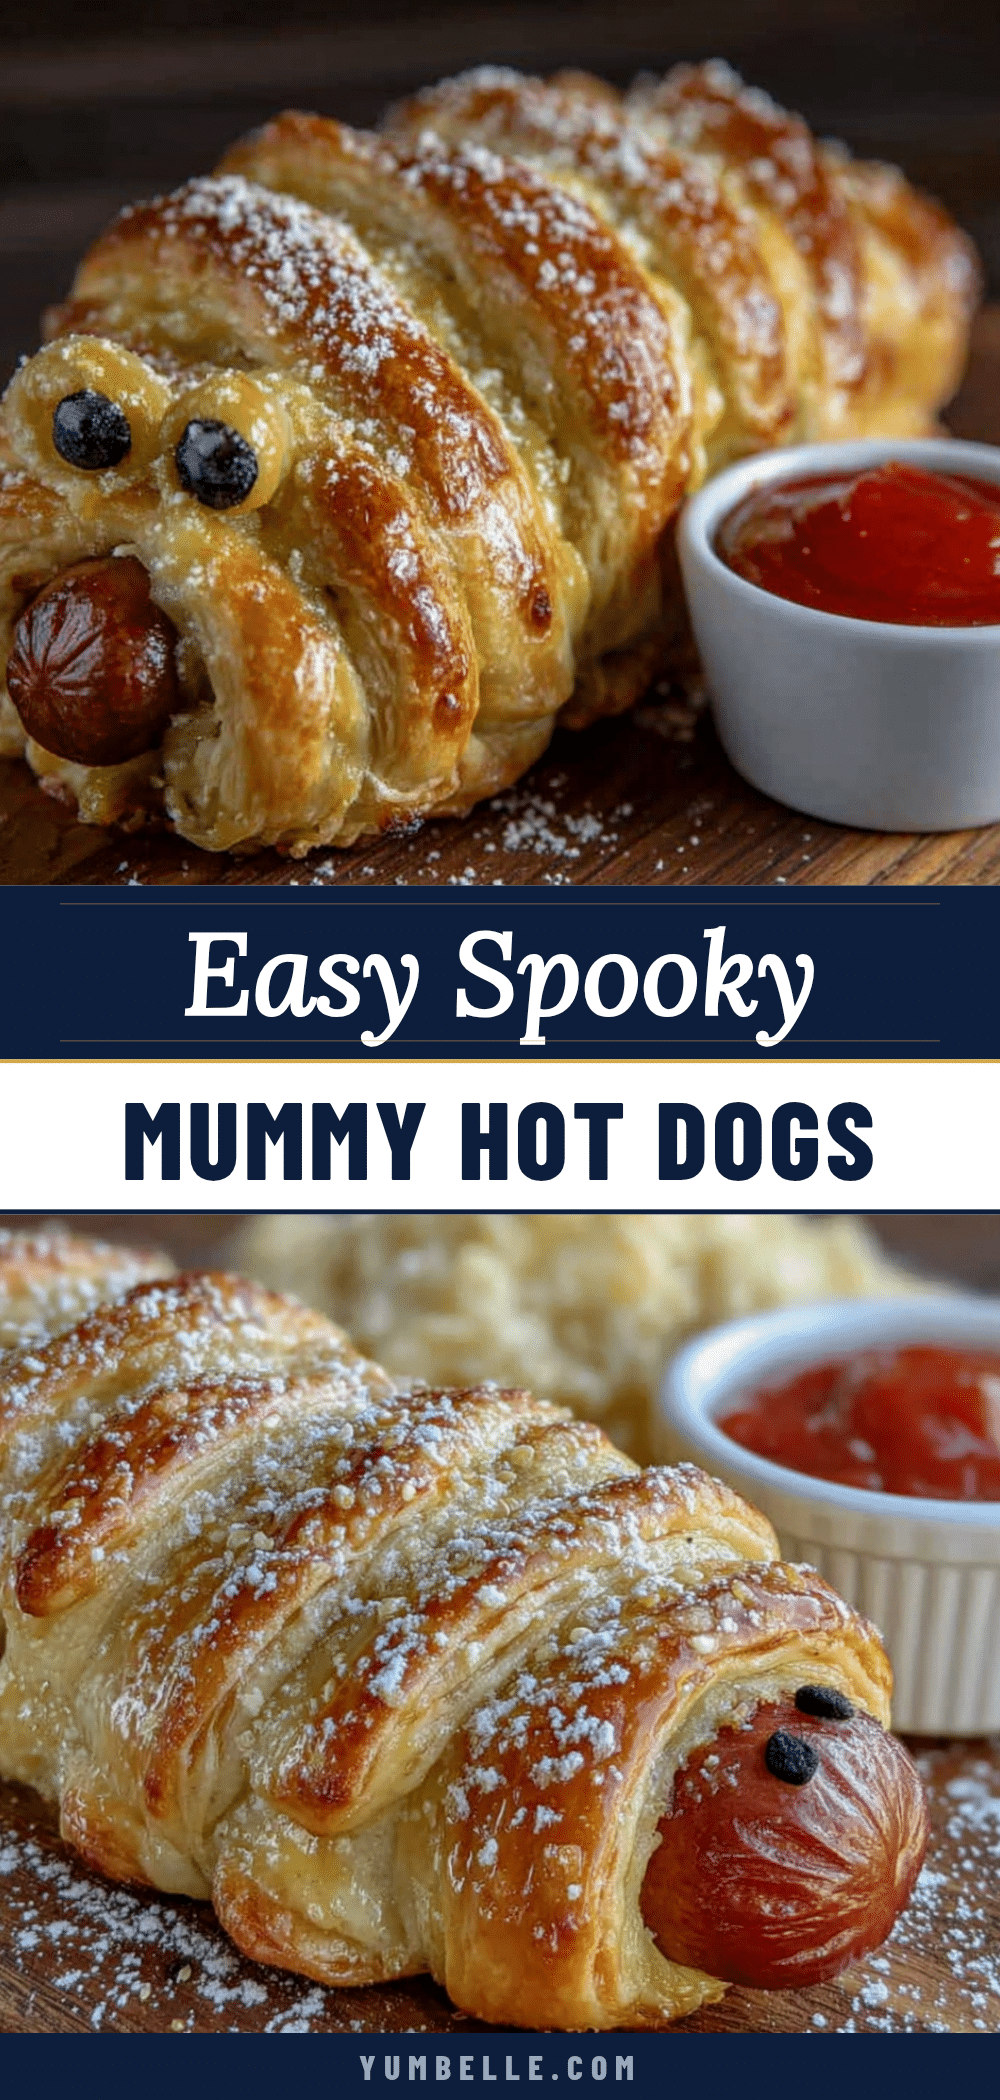
Easy Spooky Mummy Hot Dogs Best Halloween Recipe
These mummy hot dogs are a quick, fun, and foolproof Halloween treat made with just three main ingredients. Wrapped in flaky crescent dough and topped with candy eyes, they’re perfect for parties, classroom treats, or a festive weeknight dinner.
- Prep Time: 10 minutes
- Cook Time: 12 minutes
- Total Time: 22 minutes
- Yield: 8 servings 1x
- Category: Appetizer
- Cuisine: American
Ingredients
- 8 hot dogs (standard size, preferably beef)
- 1 can (8 ounces) refrigerated crescent roll dough (e.g., Pillsbury)
- 16 candy eyes (small edible ones, e.g., Wilton)
- Ketchup (for serving, optional)
- Yellow mustard (for serving, optional)
- Ranch dressing (for serving, optional)
Instructions
- Preheat your oven to 375°F (190°C). Line a baking sheet with parchment paper.
- Unroll the crescent dough and separate it along the perforated lines into 8 triangles.
- Using a sharp knife or pizza cutter, cut each dough triangle lengthwise into 3 or 4 thin strips, about ½ inch (1.25 cm) wide.
- Wrap each hot dog with the dough strips, starting at one end and wrapping at a slight angle with slight overlap. Leave about ½ inch (1.25 cm) of exposed hot dog at the top for the eyes.
- Place the wrapped hot dogs on the prepared baking sheet, spacing them about 2 inches (5 cm) apart.
- Bake for 10 to 12 minutes, until the dough is golden brown and cooked through.
- Remove from the oven and let cool for 2 to 3 minutes.
- Press two candy eyes onto the exposed hot dog area near the top of each mummy. If needed, dab a tiny bit of ketchup, mustard, or cream cheese on the back of each eye to help it stick.
- Serve immediately while warm.
Notes
For best results, do not overwork the dough. Leave room at the top of the hot dog for the eyes. Watch the baking time closely—start checking at 10 minutes. You can assemble the mummies up to 2 hours ahead and refrigerate; add eyes after baking. To freeze, assemble unbaked mummies, freeze on a baking sheet, then transfer to a freezer bag for up to 2 months; bake directly from frozen, adding a few extra minutes.
Nutrition
- Serving Size: 1 mummy dog
- Calories: 210
- Sugar: 2
- Sodium: 480
- Fat: 12
- Saturated Fat: 4
- Carbohydrates: 18
- Protein: 7
Keywords: mummy hot dogs, Halloween recipe, crescent roll hot dogs, easy Halloween appetizer, spooky snacks, kid-friendly Halloween


