Love this? Save it for later!
Share the inspiration with your friends
I was standing in the checkout line at Target last Tuesday when a bag of tortilla chips caught my eye—and suddenly I was eight years old at my Aunt Rita’s cluttered kitchen table, the smell of simmering ground beef and melting cheese filling every corner of her tiny apartment. The way she’d lay out every single topping in little mismatched bowls, letting us kids build our own plates like we were creating edible art. She passed away three years ago, and I still haven’t found a way to replicate the exact feeling of those Friday night nacho bars.
Honestly, I’ve been chasing that memory for a while now. I’ve tried the fancy restaurant versions with their carefully arranged toppings and their $18 price tags. I’ve attempted the microwave shortcut that leaves you with soggy chips and lukewarm cheese. Nothing ever felt right—until I stopped trying to recreate Aunt Rita’s exact recipe and started building my own version of what a loaded nacho bar should be. Let me tell you, the results were worth every single burned fingertip and spilled spoonful of queso.
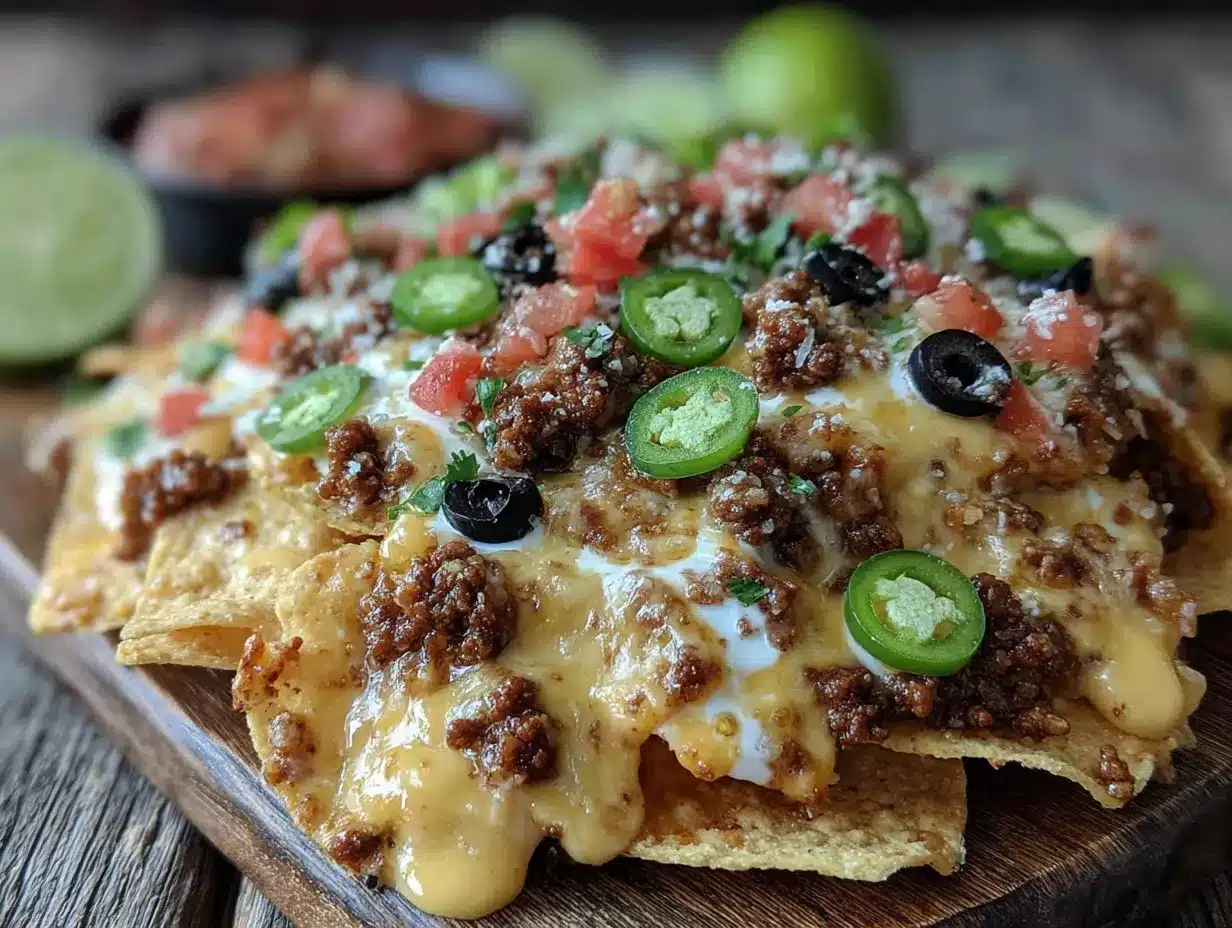
This Ultimate Loaded Nacho Bar with Ground Beef and Queso isn’t just another recipe—it’s a whole experience. It’s the kind of meal that makes people crowd around your kitchen counter, grabbing chips and piling on toppings while they chat and laugh. Maybe you’ve been there, standing in your own kitchen wondering how to make game day or taco Tuesday feel special. This is it. This is the one that brings everyone together, and I’m honestly a little emotional about how perfectly it turned out.
Why You’ll Love This Recipe
After testing this recipe about seven times (my neighbors have been very patient), I can confidently say this is the best loaded nacho bar recipe you’ll find. It hits every single note you want from a crowd-pleasing meal without making you feel like you’re running a restaurant from your own kitchen.
- Quick & Easy: From start to table in under 30 minutes. Perfect for those weeknights when you need dinner on the table fast or for game day gatherings where you don’t want to miss the action.
- Simple Ingredients: Everything you need is probably already in your pantry or fridge. No fancy grocery store runs or obscure ingredients that you’ll use once and forget about.
- Perfect for Entertaining: This is the ultimate party food. Everyone builds their own plate, which means less work for you and more fun for everyone else.
- Crowd-Pleaser: I’ve served this to kids, picky eaters, and serious food lovers—every single person went back for seconds. The combination of seasoned ground beef, creamy queso, and fresh toppings is basically irresistible.
- Unbelievably Delicious: The texture contrast between crispy chips, warm meat, gooey cheese, and fresh crunchy vegetables is next-level comfort food. You’ll close your eyes after the first bite—I promise.
What makes this recipe different from the dozens of other nacho recipes out there is the technique. I figured out that layering matters more than anyone talks about. You don’t just dump everything on top. You build layers of chips, cheese, meat, more chips, more cheese—so every single bite has a little bit of everything. Plus, my queso recipe uses real cheese melted with a touch of evaporated milk, which gives you that smooth, creamy texture without the grainy mess that homemade queso usually turns into.
This is comfort food reimagined—faster, more practical, but with the same soul-soothing satisfaction that makes you want to curl up on the couch and watch the whole game. Or, you know, just eat nachos for dinner like the adult you are.
What Ingredients You Will Need
This loaded nacho bar recipe uses simple, wholesome ingredients to deliver bold flavor and satisfying texture without the fuss. Most of these are pantry staples or easy to find at any grocery store.
For the Seasoned Ground Beef
- 1 pound ground beef (80/20 blend works best for flavor—leaner blends will be drier)
- 1 tablespoon olive oil
- 1 small yellow onion, finely diced (adds sweetness and depth)
- 3 cloves garlic, minced (fresh is best, but jarred works in a pinch)
- 1 tablespoon chili powder (I prefer McCormick for consistent heat)
- 1 teaspoon ground cumin
- 1 teaspoon smoked paprika
- ½ teaspoon garlic powder
- ½ teaspoon onion powder
- ½ teaspoon salt
- ¼ teaspoon black pepper
- ¼ cup beef broth (adds moisture and helps the seasoning coat the meat)
For the Queso
- 1 tablespoon butter
- 1 tablespoon all-purpose flour
- ½ cup evaporated milk (this is the secret to smooth queso—trust me)
- 2 cups shredded sharp cheddar cheese (shred your own for best melting; pre-shredded has anti-caking agents)
- ¼ cup pickled jalapeño juice (from the jar—adds tang and heat)
- 2 tablespoons pickled jalapeños, finely chopped
For the Nacho Base and Toppings
- 1 large bag restaurant-style tortilla chips (about 16 ounces—go for sturdy ones that won’t break under toppings)
- 1 cup shredded Mexican blend cheese
- 1 cup black beans, drained and rinsed
- 1 cup pico de gallo or diced fresh tomatoes
- ½ cup sour cream
- ½ cup guacamole (store-bought or homemade)
- ¼ cup sliced black olives
- ¼ cup fresh cilantro, chopped
- 2 green onions, sliced
- 1 jalapeño, thinly sliced (optional, for extra heat)
- Lime wedges, for serving
Equipment Needed
You don’t need fancy equipment for this loaded nacho bar recipe, which is part of what makes it so great. Here’s what you’ll need:
- Large skillet or frying pan (12-inch works best—gives the ground beef room to brown properly)
- Medium saucepan (for the queso—a heavy-bottomed one prevents scorching)
- Baking sheet (half-sheet size is perfect for the nacho base)
- Wooden spoon or spatula (for breaking up the ground beef)
- Whisk (for smooth queso without lumps)
- Cutting board and sharp knife
- Small bowls (for holding all those toppings—I use my grandma’s old mixing bowls)
- Cheese grater (if you’re shredding your own cheese, which you should)
If you don’t have a baking sheet, a large oven-safe skillet or even a cast-iron pan works beautifully. I’ve made this in a disposable aluminum pan when camping, and it turned out just as good. The queso can be made in a microwave-safe bowl in a pinch—just heat in 30-second intervals, whisking between each. Budget tip: thrift stores always have small bowls for toppings, and they add character to your spread.
Preparation Method
Let me walk you through this step by step. I’ve made this recipe enough times to know where things can go wrong, so I’ll point out the pitfalls along the way.
- Preheat your oven to 375°F. This gives it time to come to temperature while you prep everything else. I once forgot this step and stood there with a tray of assembled nachos waiting for the oven to heat up. Learn from my mistakes.
- Start the ground beef. Heat 1 tablespoon olive oil in your large skillet over medium-high heat. Add the diced onion and cook for 3-4 minutes until it’s translucent and starting to soften. Add the ground beef and break it apart with your wooden spoon. Let it cook undisturbed for about 3 minutes—this gives you those nice brown bits that add so much flavor. Then stir and continue cooking until the beef is fully browned, about 5-7 minutes total.
- Add the aromatics and seasonings. Drain off any excess fat (leave about a tablespoon for flavor). Push the meat to one side of the pan and add the minced garlic. Cook for 30 seconds until fragrant, then stir everything together. Add the chili powder, cumin, smoked paprika, garlic powder, onion powder, salt, and pepper. Stir to coat the meat evenly. Pour in the beef broth and let it simmer for 2-3 minutes until the liquid reduces slightly. The meat should look glossy and smell incredible at this point. Set aside and keep warm.
- Make the queso. While the beef is simmering, melt the butter in your medium saucepan over medium heat. Whisk in the flour and cook for 1 minute—this gets rid of the raw flour taste. Slowly pour in the evaporated milk while whisking constantly. Keep whisking until the mixture thickens slightly, about 2 minutes. Reduce the heat to low and add the shredded cheddar cheese a handful at a time, whisking until each addition is fully melted before adding more. This gradual approach prevents the cheese from seizing up. Stir in the jalapeño juice and chopped jalapeños. Remove from heat and cover to keep warm. If the queso thickens too much, stir in a splash of milk to thin it out.
- Assemble the nacho base. Spread half the tortilla chips in an even layer on your baking sheet. Sprinkle half the Mexican blend cheese over the chips. Spoon half the seasoned ground beef over the cheese layer. Add half the black beans. Repeat with another layer of chips, remaining cheese, remaining beef, and remaining black beans. This layering is the secret to getting cheese and toppings in every bite—not just on top.
- Bake the nachos. Place the baking sheet in the preheated oven and bake for 8-10 minutes, until the cheese is fully melted and bubbly. Watch closely toward the end—the chips can burn quickly. You want them golden and the cheese gooey, not crispy and dark.
- Add the finishing touches. Remove the baking sheet from the oven. Drizzle the warm queso generously over the top. Add dollops of sour cream and guacamole. Sprinkle with pico de gallo, sliced black olives, fresh cilantro, green onions, and fresh jalapeño slices if using. Squeeze lime wedges over everything just before serving.
- Serve immediately. This is not a make-ahead dish—nachos are best hot and fresh. Set out extra bowls of toppings so everyone can customize their plate. I like to put the baking sheet right on the table so people can grab from the edges first (those are the crispiest chips).
Cooking Tips & Techniques
After making this loaded nacho bar recipe more times than I care to count, I’ve picked up a few tricks that make a real difference. Let me share the ones that saved me from disaster more than once.
The biggest mistake people make is using too many toppings. I know it sounds counterintuitive for a “loaded” nacho bar, but piling everything on at once creates a soggy mess. The chips need room to stay crispy, so layer strategically and don’t overload any single chip. Think of it as building a landscape, not a mountain.
Shred your own cheese. I cannot stress this enough. Pre-shredded cheese is coated with cellulose and anti-caking agents that prevent it from melting smoothly. Your queso will turn out grainy, and your baked nachos won’t have that beautiful stretchy texture. A block of sharp cheddar takes two minutes to shred and makes all the difference.
Toast your spices. When you add the chili powder and cumin to the ground beef, let them cook in the hot pan for about 30 seconds before adding the broth. This releases their essential oils and deepens the flavor. I learned this after making bland nacho meat for years—it was a revelation.
Keep the queso warm but not hot. If you let it boil or keep it on high heat, the cheese will separate and turn into a greasy mess. Low and slow is the way to go. If you’re making this for a party, you can keep the queso in a small slow cooker on the warm setting—just stir it occasionally.
Timing is everything. I like to prep all the toppings while the beef is cooking. That way, everything is ready to go when the nachos come out of the oven. The queso can sit covered for about 15 minutes without issues, but the baked nachos need to be served right away. Plan your workflow so the last thing you do is assemble and bake.
Variations & Adaptations
One of the best things about this loaded nacho bar recipe is how easily it adapts to different tastes and dietary needs. Here are some variations I’ve tried and loved.
Vegetarian Version: Swap the ground beef for two cans of black beans (drained and rinsed) or a plant-based crumble. Season them the same way you would the beef—the spice blend works beautifully with beans. Add sautéed bell peppers and onions for extra texture. I made this for my vegetarian sister-in-law, and she asked for the recipe immediately.
Chicken Nacho Bar: Use shredded rotisserie chicken instead of ground beef. Toss the chicken with the same spice blend and a splash of lime juice. It’s a lighter option that still feels indulgent. This works great if you have leftover chicken from another meal.
Spicy Lover’s Version: Add 1 teaspoon cayenne pepper to the beef seasoning and use pepper jack cheese instead of Mexican blend. Top with extra pickled jalapeños and a drizzle of hot sauce. My husband insists on this version every time now.
Breakfast Nachos: This is a fun twist I discovered by accident when I had leftover ingredients. Use the same base but swap the ground beef for scrambled eggs and chorizo. Top with queso, pico de gallo, and a fried egg. It’s ridiculous and wonderful.
Low-Carb Option: Replace the tortilla chips with bell pepper strips or large cucumber slices. The toppings work exactly the same way, and you get all the flavor without the carbs. I’ve served this at parties alongside the regular version, and the low-carb option disappears just as fast.
Serving & Storage Suggestions
This loaded nacho bar is best served immediately, but I’ll give you honest advice about leftovers and planning.
Serving Temperature: Serve the nachos hot from the oven with the queso warm. The cold toppings (sour cream, guacamole, pico de gallo) provide a nice temperature contrast. I like to set out the toppings in small bowls so everyone can customize their plate.
Presentation: Place the baking sheet on a large cutting board or trivet in the center of the table. Surround it with small bowls of extra toppings. This creates a beautiful, communal spread that encourages people to dig in. I usually put out extra chips on the side because someone always wants more.
Complementary Dishes: This recipe is a meal on its own, but if you’re feeding a crowd, add a simple side salad with lime vinaigrette or a bowl of Mexican street corn. For drinks, margaritas or cold beer are the obvious choices, but I’m partial to a spicy Michelada.
Storage: Leftover nachos don’t reheat well—the chips get soggy. If you have leftover components, store them separately. The seasoned ground beef keeps in the refrigerator for 3-4 days. The queso will keep for about 5 days in an airtight container. Reheat the queso gently on the stovetop or in the microwave, adding a splash of milk to restore the creamy texture.
Make-Ahead Tips: You can prep the ground beef and queso up to two days in advance. Store them separately in the refrigerator. When you’re ready to serve, reheat the beef in a skillet and the queso on the stovetop. Assemble and bake the nachos just before serving. This makes entertaining so much less stressful.
Nutritional Information & Benefits
Let’s be real—this is indulgent food, and I’m not going to pretend otherwise. But it does have some redeeming qualities worth mentioning.
Estimated Nutritional Values (per serving, about ⅙ of the recipe):
- Calories: 520
- Protein: 28g
- Fat: 32g
- Carbohydrates: 35g
- Fiber: 6g
- Sugar: 5g
- Sodium: 890mg
Health Benefits: The black beans add fiber and plant-based protein, which helps with satiety. The tomatoes and cilantro provide vitamins A and C, plus antioxidants. The jalapeños contain capsaicin, which may boost metabolism. And the lime juice adds a dose of vitamin C that helps your body absorb iron from the beef.
Dietary Considerations: This recipe is naturally gluten-free if you use corn tortilla chips (check the label—some brands add wheat flour). For a dairy-free version, use vegan cheese shreds and make a cashew-based queso. The recipe is nut-free as written. If you’re watching sodium, use low-sodium broth and skip the added salt in the beef seasoning.
My Personal Take: I believe in balance. This isn’t everyday food—it’s celebration food. And when you make it with quality ingredients and fresh toppings, you’re nourishing more than just your body. You’re creating a moment of connection and joy. That counts for something.
Conclusion
This Ultimate Loaded Nacho Bar with Ground Beef and Queso is the recipe I’ve been searching for since those Friday nights at Aunt Rita’s table. It captures everything I loved about those evenings—the chaos of everyone building their own plate, the smell of seasoned meat filling the kitchen, the way food brings people together in the most natural way possible.
I hope you’ll make this your own. Add your favorite toppings, adjust the spice level to your liking, and don’t be afraid to experiment. The beauty of a nacho bar is that there’s no wrong way to do it. Whether you’re feeding a crowd on game day or just treating yourself to a fun dinner, this recipe delivers every single time.
I’d love to hear how it turns out for you. Drop a comment below and tell me about your favorite topping combinations, or share a photo of your loaded nacho bar on social media. Tag me so I can see your creation—nothing makes me happier than knowing someone else is enjoying this recipe as much as I do. Now go make some nachos. You deserve them.
Frequently Asked Questions
Can I use ground turkey instead of ground beef?
Absolutely. Ground turkey works well, but it’s leaner, so add an extra tablespoon of olive oil to keep it from drying out. The seasoning blend will still taste great—just make sure you don’t overcook the turkey, or it will turn crumbly.
How do I prevent my nachos from getting soggy?
The key is layering. Don’t pile everything on at once. Use sturdy restaurant-style chips, limit wet toppings like salsa to the top layer only, and serve immediately after baking. If you’re serving a crowd, make two smaller trays instead of one giant one so the chips don’t sit under toppings too long.
Can I make the queso ahead of time?
Yes! Make the queso up to two days in advance and store it in an airtight container in the refrigerator. To reheat, warm it gently on the stovetop over low heat, stirring frequently. Add a splash of milk if it’s too thick. Avoid microwaving on high—it can cause the cheese to separate.
What are the best chips for loaded nachos?
Look for thick, sturdy restaurant-style tortilla chips. Thin chips will break under the weight of the toppings. I like the ones from On The Border or Juanita’s. Avoid flavored chips like chili lime or nacho cheese—they compete with your homemade toppings.
Can I make this recipe in a slow cooker?
You can cook the ground beef in a skillet first, then transfer it to a slow cooker to keep warm for serving. But don’t assemble and bake the nachos in a slow cooker—you won’t get the crispy texture. Use the slow cooker as a serving vessel for the meat and queso, and bake the chips separately.
Pin This Recipe!
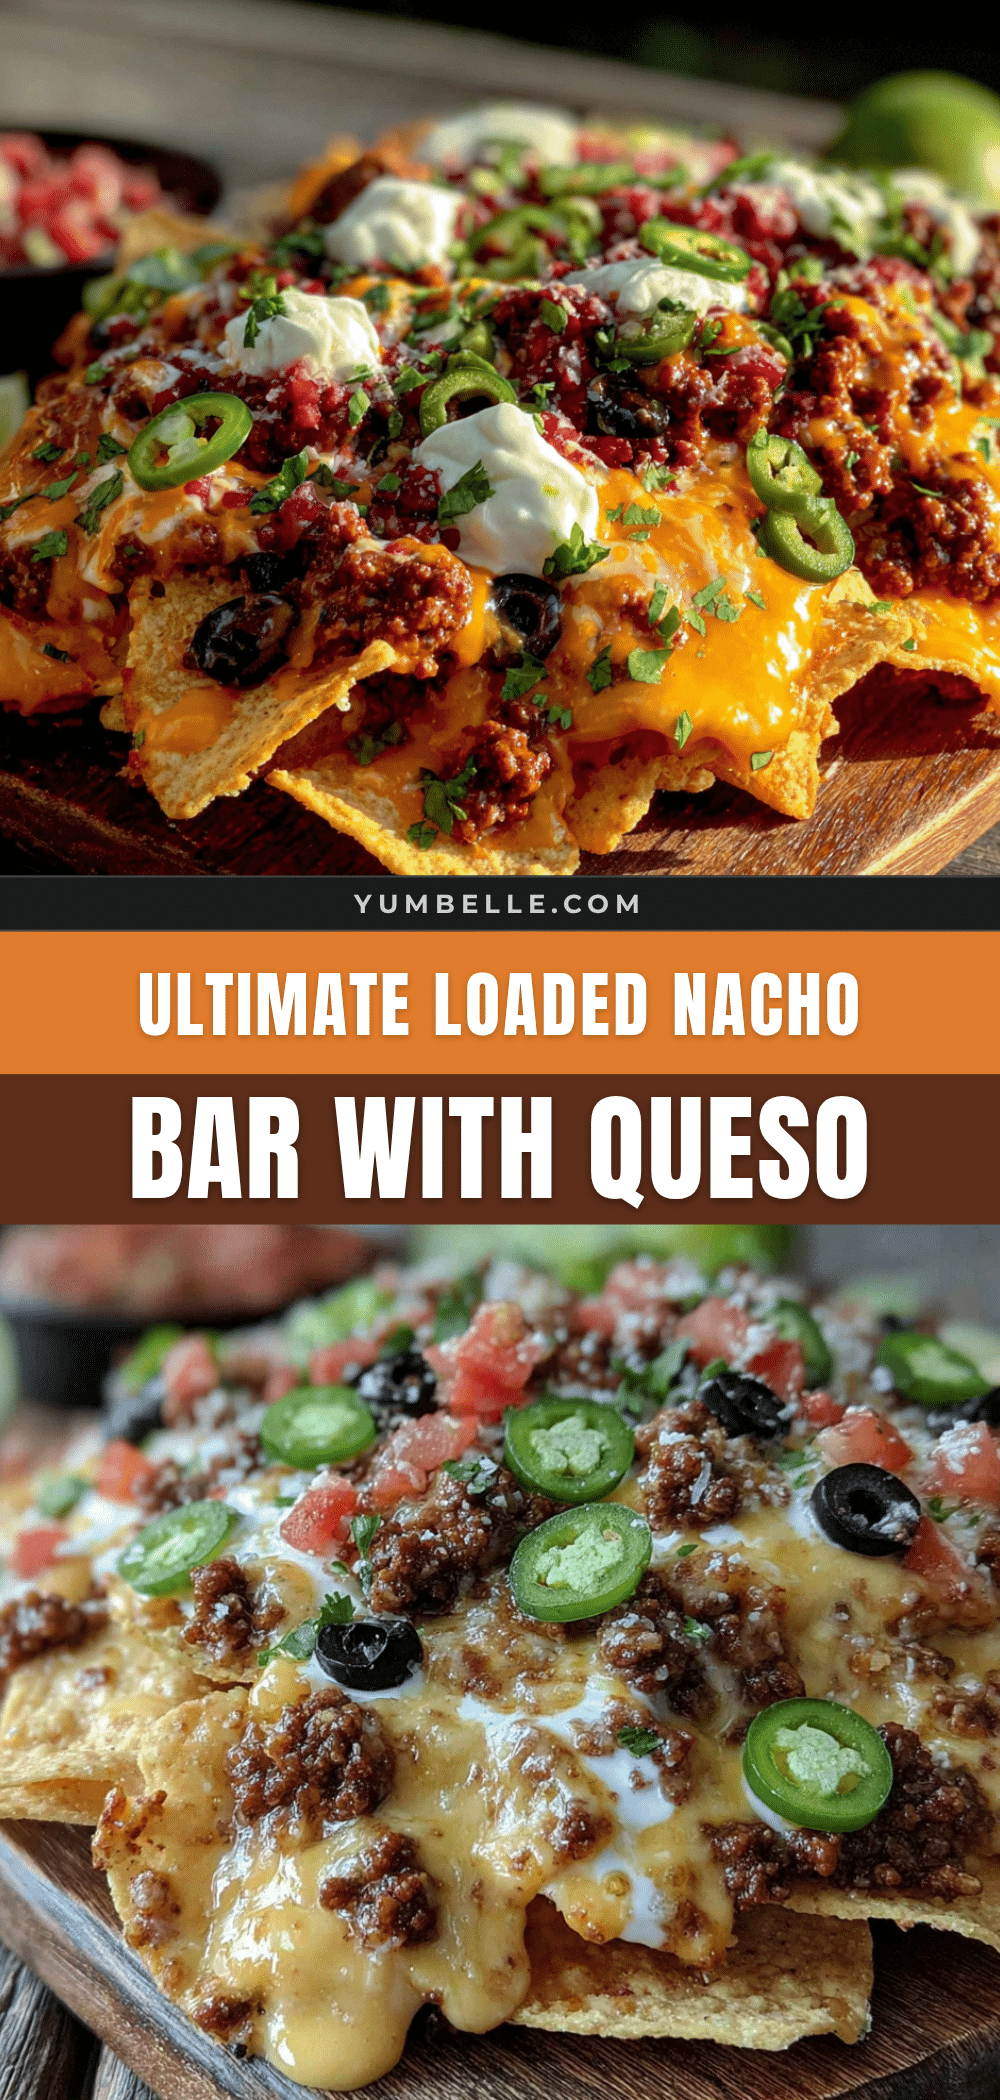
Best Loaded Nacho Bar Recipe with Ground Beef Queso
This Ultimate Loaded Nacho Bar with Ground Beef and Queso is a crowd-pleasing, customizable meal that brings everyone together. With seasoned ground beef, smooth homemade queso, and layers of crispy chips and fresh toppings, it’s perfect for game day or a fun weeknight dinner.
- Prep Time: 15 minutes
- Cook Time: 20 minutes
- Total Time: 35 minutes
- Yield: 6 servings 1x
- Category: Main Course
- Cuisine: Mexican
Ingredients
- 1 pound ground beef (80/20 blend)
- 1 tablespoon olive oil
- 1 small yellow onion, finely diced
- 3 cloves garlic, minced
- 1 tablespoon chili powder
- 1 teaspoon ground cumin
- 1 teaspoon smoked paprika
- ½ teaspoon garlic powder
- ½ teaspoon onion powder
- ½ teaspoon salt
- ¼ teaspoon black pepper
- ¼ cup beef broth
- 1 tablespoon butter
- 1 tablespoon all-purpose flour
- ½ cup evaporated milk
- 2 cups shredded sharp cheddar cheese
- ¼ cup pickled jalapeño juice
- 2 tablespoons pickled jalapeños, finely chopped
- 1 large bag restaurant-style tortilla chips (about 16 ounces)
- 1 cup shredded Mexican blend cheese
- 1 cup black beans, drained and rinsed
- 1 cup pico de gallo or diced fresh tomatoes
- ½ cup sour cream
- ½ cup guacamole
- ¼ cup sliced black olives
- ¼ cup fresh cilantro, chopped
- 2 green onions, sliced
- 1 jalapeño, thinly sliced (optional)
- Lime wedges, for serving
Instructions
- Preheat your oven to 375°F.
- Heat 1 tablespoon olive oil in a large skillet over medium-high heat. Add the diced onion and cook for 3-4 minutes until translucent. Add the ground beef and break it apart. Cook undisturbed for 3 minutes, then stir and continue cooking until fully browned, about 5-7 minutes total.
- Drain excess fat, leaving about a tablespoon. Push meat to one side, add minced garlic, and cook for 30 seconds. Stir in chili powder, cumin, smoked paprika, garlic powder, onion powder, salt, and pepper. Pour in beef broth and simmer for 2-3 minutes until slightly reduced. Set aside and keep warm.
- For the queso: Melt butter in a medium saucepan over medium heat. Whisk in flour and cook for 1 minute. Slowly pour in evaporated milk while whisking constantly until thickened, about 2 minutes. Reduce heat to low and add shredded cheddar cheese a handful at a time, whisking until melted. Stir in jalapeño juice and chopped jalapeños. Remove from heat and cover to keep warm.
- Assemble the nacho base: Spread half the tortilla chips on a baking sheet. Sprinkle half the Mexican blend cheese over chips. Spoon half the seasoned ground beef over cheese. Add half the black beans. Repeat with remaining chips, cheese, beef, and black beans.
- Bake for 8-10 minutes until cheese is melted and bubbly.
- Remove from oven. Drizzle warm queso over the top. Add dollops of sour cream and guacamole. Sprinkle with pico de gallo, black olives, cilantro, green onions, and fresh jalapeño slices if using. Squeeze lime wedges over everything.
- Serve immediately.
Notes
Shred your own cheese for best melting. Layer chips and toppings to prevent sogginess. Serve immediately for crispiest results. Leftover components can be stored separately: ground beef for 3-4 days, queso for 5 days. Reheat queso gently with a splash of milk.
Nutrition
- Serving Size: 1/6 of recipe
- Calories: 520
- Sugar: 5
- Sodium: 890
- Fat: 32
- Saturated Fat: 12
- Carbohydrates: 35
- Fiber: 6
- Protein: 28
Keywords: loaded nachos, nacho bar, ground beef nachos, queso, game day food, party food, easy dinner


