Love this? Save it for later!
Share the inspiration with your friends
The neighborhood bake sale was in six hours and I’d completely forgotten. Everyone else would be bringing those picture-perfect layer cakes with buttercream rosettes and those fancy French pastries that take three days to make. I had a half-can of pumpkin puree in the fridge, a bag of oats that was about to expire, and absolutely no granulated sugar in the house. Not a single cup. I stood there staring into my pantry like it had personally betrayed me. I mean, who runs a baking blog and forgets to buy sugar? This girl, apparently. Maybe you’ve been there—staring at a half-empty kitchen, convinced you’re about to show up empty-handed while everyone else looks like they stepped out of a baking magazine.
I was this close to grabbing a box of store-bought muffins from the gas station when I spotted the maple syrup hiding behind the olive oil. And then I remembered the jar of honey my neighbor had given me last spring. I figured, why not? It’s just sugar, right? Swapping one sweetener for another couldn’t be that hard. I tossed some oats into the food processor, dumped in the pumpkin, cracked a couple of eggs, and crossed my fingers. Honestly, I was preparing myself for a dense, flat, sad little muffin that I’d have to bury under a mountain of cream cheese frosting just to make edible.
But then the kitchen started smelling like fall in a way I wasn’t ready for. Warm cinnamon, that earthy pumpkin scent, something almost caramel-like from the maple syrup. When I pulled those muffins out of the oven, they were golden on top, perfectly domed, and the kitchen was absolutely silent except for the little crackle of the muffin tops cooling. I brought them to the bake sale feeling like a fraud. You know what happened? They sold out in forty-five minutes. A woman actually asked me if I owned a bakery. I laughed and said no, I just ran out of sugar. That’s the honest truth. These Healthy Pumpkin Oatmeal Muffins are the ones I keep making, not because they’re healthy, but because they actually taste like a warm hug on a cool morning.
Why You’ll Love This Recipe
I’ve tested this recipe about eleven times now, and I can tell you with total confidence—this is not one of those dry, sad “healthy” muffins that tastes like cardboard and regret. These are genuinely delicious. The oats give them this lovely, hearty texture that keeps you full, and the pumpkin keeps everything incredibly moist without any oil or butter. Let me tell you why these muffins deserve a permanent spot in your recipe rotation.
- Naturally Sweetened: No refined sugar here. We’re using maple syrup and a touch of honey, which means you get that deep, complex sweetness without the blood sugar crash. Your body will thank you.
- Incredibly Moist: Pumpkin puree is basically nature’s butter. It adds so much moisture and richness that you genuinely won’t miss the oil. I’ve had friends swear these are “regular” muffins until I tell them otherwise.
- Made with Whole Grains: Oat flour is just blended oats, which means you’re getting fiber, protein, and all those good complex carbs. No white flour, no empty calories.
- One Bowl Wonder: You mix the wet ingredients in one bowl, stir in the dry, and you’re done. Minimal dishes, maximum flavor. My kind of baking.
- Freezer Friendly: Make a double batch on Sunday and you’ve got breakfast sorted for two weeks. They thaw beautifully and taste just as good as the day you baked them.
- Kid Approved: I tested these on my neighbor’s three kids, ages four through nine. They ate them without complaint and asked for seconds. That’s the real test, isn’t it?
What makes this recipe different from every other pumpkin muffin out there is the texture. Most oat-based muffins turn out dense and gummy, but I figured out that grinding the oats into a fine flour and letting the batter rest for ten minutes makes all the difference. The result is a muffin that’s tender, fluffy, and has that perfect crumb. Plus, the combination of maple and pumpkin is honestly better than any sugar-laden version I’ve ever tried. It’s comfort food that actually makes you feel good.
What Ingredients You Will Need
This recipe uses simple, wholesome ingredients that you probably already have in your kitchen. The beauty of these muffins is that they don’t require any fancy health food store trips or obscure superfood powders. Let’s break down what you’ll need and why each ingredient matters.
For the Muffins
- Rolled Oats (2 cups / 180g): Not quick oats, not steel-cut—just regular rolled oats. You’ll blend these into a flour in your food processor. I’ve tried both quick oats and rolled oats, and rolled oats give a better texture. Bob’s Red Mill is my go-to brand for consistency.
- Pumpkin Puree (1 cup / 245g): Make sure you’re buying 100% pure pumpkin puree, not pumpkin pie filling. The pie filling has added sugar and spices that will throw off the whole recipe. Libby’s is reliable, but any brand works as long as it’s pure pumpkin.
- Maple Syrup (1/3 cup / 80ml): Real maple syrup, not pancake syrup. The real stuff has a deeper, more complex flavor that pairs beautifully with pumpkin. Grade A dark amber is my preference for a stronger maple taste.
- Honey (2 tablespoons / 30ml): Local honey is ideal if you can find it. It adds floral notes and helps with browning. If you’re vegan, you can substitute with additional maple syrup, though the texture will be slightly different.
- Eggs (2 large, room temperature): Room temperature eggs incorporate better into the batter and give a fluffier muffin. If you forgot to take them out of the fridge, place them in a bowl of warm water for five minutes.
- Coconut Oil (1/4 cup / 60ml, melted): Use refined coconut oil if you don’t want any coconut flavor. Unrefined adds a subtle coconut taste that actually works really well with the pumpkin and maple.
- Milk (1/4 cup / 60ml): Any milk works here—dairy, almond, oat, or soy. I’ve used unsweetened almond milk in most of my tests and it works perfectly.
- Vanilla Extract (1 teaspoon): Pure vanilla extract, not imitation. It enhances all the warm flavors without being overpowering.
- Baking Soda (1 teaspoon): This is your leavening agent. Make sure it’s fresh—if it doesn’t fizz when you drop it in vinegar, it’s time to buy a new box.
- Baking Powder (1/2 teaspoon): Double-acting baking powder gives an extra lift. Aluminum-free brands like Rumford are great if you’re sensitive to metallic aftertastes.
- Salt (1/2 teaspoon): Don’t skip this. Salt balances the sweetness and enhances all the flavors. Fine sea salt works best.
For the Spice Blend
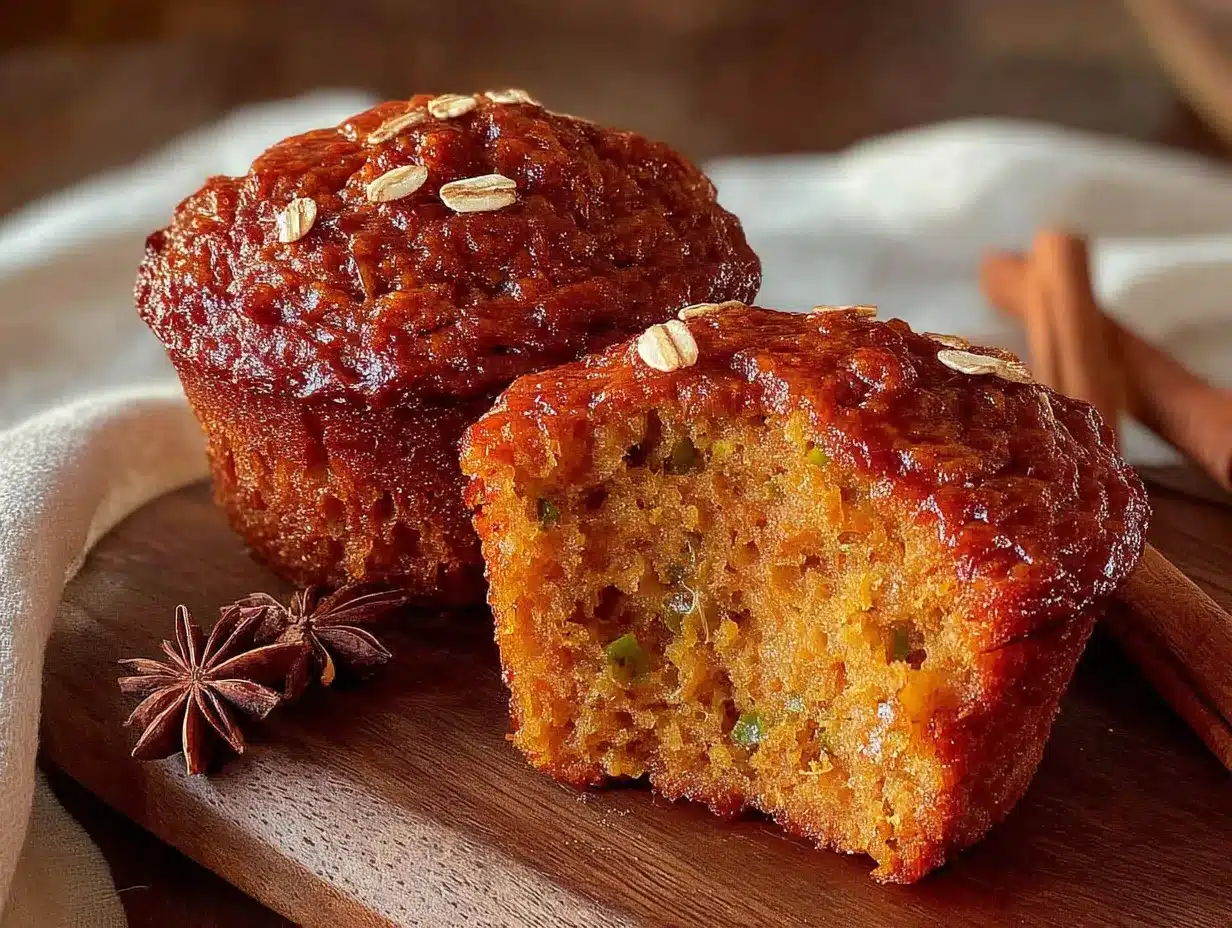
- Cinnamon (2 teaspoons): The backbone of any pumpkin recipe. I use Ceylon cinnamon for a milder, sweeter flavor, but Cassia works fine too.
- Ginger (1/2 teaspoon, ground): Adds a little warmth and zip. Freshly ground is nice, but pre-ground is perfectly fine.
- Nutmeg (1/4 teaspoon, freshly grated if possible): Fresh nutmeg is a game-changer. It has this aromatic, almost floral quality that pre-ground nutmeg just doesn’t have.
- Cloves (1/4 teaspoon, ground): A little goes a long way. Cloves add that deep, almost smoky warmth that makes pumpkin recipes taste like fall.
- Allspice (1/4 teaspoon): Tastes like a combination of cinnamon, nutmeg, and cloves. It rounds out the spice blend beautifully.
Optional Add-Ins
- Dark Chocolate Chips (1/2 cup / 90g): Because everything is better with chocolate. Use 70% or higher dark chocolate to keep it lower in sugar.
- Chopped Pecans or Walnuts (1/2 cup / 60g): Adds a lovely crunch and some healthy fats. Toast them lightly first for extra flavor.
- Dried Cranberries (1/4 cup / 30g): The tartness cuts through the sweetness perfectly. Look for ones sweetened with apple juice instead of sugar.
Equipment Needed
You don’t need a professional bakery setup for these muffins, which is honestly my favorite part. Here’s what you’ll need:
- Food Processor or High-Speed Blender: This is essential for grinding the oats into flour. I use my Cuisinart 14-cup food processor, but a Vitamix or NutriBullet works just as well. If you don’t have either, you can buy oat flour pre-made.
- 12-Cup Muffin Pan: Standard size works best. I’ve tried mini muffin pans, but the baking time changes significantly.
- Paper Muffin Liners: Silicone liners are reusable and work great. If using paper, give them a quick spray with non-stick cooking spray.
- Large Mixing Bowl: Any large bowl will do. I use a glass mixing bowl because it’s easy to see when everything is combined.
- Whisk: For mixing the wet ingredients. A fork works in a pinch, but a whisk gives you a smoother batter.
- Rubber Spatula: For folding in the dry ingredients and scraping every last bit of batter into the pan.
- Measuring Cups and Spoons: Accurate measurements matter in baking. I use stainless steel ones that won’t warp over time.
- Cooling Rack: Essential for getting those perfectly crisp muffin bottoms. If you don’t have one, just tilt the muffins on their sides after a few minutes.
- Ice Cream Scoop (optional): A 1/4 cup scoop makes portioning the batter into the muffin cups so much cleaner and faster.
One thing I learned the hard way—don’t use a blender that’s not very powerful for grinding oats. I tried using my old personal blender once, and it left chunks of oats in the flour, which made the muffins gritty. Stick with something that has at least 500 watts of power.
Preparation Method
Alright, let’s get into the actual making of these muffins. I’ve broken this down into clear steps with all the little details I wish someone had told me the first time I made them. Trust me on the resting step—it’s not optional.
Step 1: Preheat and Prep
Preheat your oven to 350°F (175°C). Line your muffin pan with paper liners or lightly grease each cup with coconut oil. I prefer using parchment liners because they peel off so cleanly, but any liner will work. Set the pan aside while you prepare the batter.
Step 2: Make the Oat Flour
Place the rolled oats in your food processor or blender. Pulse them for about 30 to 45 seconds until they turn into a fine, powdery flour. You’re looking for something that resembles whole wheat flour in texture—no whole oats should remain. Let the flour settle for a minute before opening the lid, otherwise you’ll get a face full of oat dust. Trust me on that one.
Step 3: Mix the Dry Ingredients
In a medium bowl, whisk together the oat flour, baking soda, baking powder, salt, and all the spices. Make sure everything is evenly distributed. I like to whisk for a good 15 seconds to aerate the flour a bit. Set this bowl aside.
Step 4: Combine the Wet Ingredients
In a large mixing bowl, whisk together the pumpkin puree, maple syrup, honey, melted coconut oil, eggs, milk, and vanilla extract. Whisk until the mixture is completely smooth and uniform. The color should be a beautiful deep orange, and it should smell like fall already. If your coconut oil solidifies when it hits the cold pumpkin, don’t panic—just keep whisking. It will incorporate eventually.
Step 5: Combine Wet and Dry
Pour the dry ingredients into the wet ingredients. Use a rubber spatula to fold everything together gently. Stir just until you no longer see any streaks of flour. Overmixing at this stage will make your muffins tough and dense, so stop as soon as it comes together. A few small lumps are totally fine—they’ll disappear during baking.
Step 6: The Resting Step (This is Important)
Here’s the trick that took me four failed batches to figure out. Let the batter rest at room temperature for 10 to 15 minutes. This allows the oat flour to absorb the liquid and soften, which gives you a much lighter, fluffier muffin. If you skip this step, your muffins will be grainy and dense. I learned this the hard way when I brought a batch to my book club and everyone politely chewed for way too long.
Step 7: Fill the Muffin Cups
After the batter has rested, give it a gentle stir. Use your ice cream scoop or a spoon to divide the batter evenly among the 12 muffin cups. Fill each cup about three-quarters full—these muffins rise beautifully but don’t overflow. If you want bakery-style domed tops, fill them slightly fuller, about 7/8 full.
Step 8: Add Toppings (Optional)
If you’re adding any toppings like pepitas, chopped nuts, or a sprinkle of oats, now’s the time. Gently press them into the top of the batter so they stick during baking. I love adding a few pumpkin seeds and a light dusting of cinnamon sugar (using coconut sugar for no refined sugar) for a little crunch.
Step 9: Bake
Place the muffin pan in the preheated oven on the middle rack. Bake for 18 to 22 minutes, or until the tops are golden brown and a toothpick inserted into the center comes out clean or with just a few moist crumbs. My oven runs hot, so I start checking at 18 minutes. The muffins should spring back when you gently press the top.
Step 10: Cool
Let the muffins cool in the pan for 5 minutes. This allows them to set and makes them easier to remove. Then transfer them to a wire cooling rack to cool completely. If you try to eat them immediately—and I know you’ll want to—they’ll be a bit fragile. Let them cool for at least 10 minutes for the best texture.
Cooking Tips & Techniques
I’ve made these muffins more times than I care to count, and I’ve collected a few tricks along the way that make the process smoother and the results more consistent. Here are the things I wish I’d known from the beginning.
Don’t Overprocess the Oats: When you’re making oat flour, stop as soon as it looks like flour. If you keep blending, the heat from the friction can start cooking the oats and change the texture. You want a fine powder, not a paste.
Room Temperature Ingredients Matter: I know it’s tempting to use cold eggs straight from the fridge, but room temperature ingredients emulsify better and create a more uniform batter. If you’re in a hurry, place your eggs in a bowl of warm water for five minutes and microwave your milk for 15 seconds.
The Toothpick Test Isn’t Foolproof: With oat-based muffins, the toothpick can sometimes come out looking moist even when the muffins are done because of the pumpkin. Instead, look for the edges pulling away from the liners and a golden brown top. You can also use an instant-read thermometer—the internal temperature should be around 200°F (93°C).
Let Them Cool Completely Before Storing: I made this mistake once and ended up with soggy muffins the next morning. If you store them while they’re still warm, the steam gets trapped and makes the tops sticky. Patience, my friend.
Double the Batch: These freeze so well that I always make a double batch. I keep one dozen in the freezer for busy mornings and share the other with friends. They thaw in about 30 minutes at room temperature or 15 seconds in the microwave.
Use a Cookie Scoop for Even Portions: A #20 cookie scoop (about 3 tablespoons) gives you perfectly even muffins every time. No more fighting over who got the biggest one.
Variations & Adaptations
One of my favorite things about this recipe is how adaptable it is. I’ve tested quite a few variations over the months, and here are the ones that actually worked. Feel free to experiment based on what you have in your pantry or what dietary needs you’re working with.
Gluten-Free Version
This recipe is already gluten-free if you use certified gluten-free oats. Just make sure your oats are labeled gluten-free, as regular oats can be cross-contaminated during processing. Everything else in the recipe is naturally gluten-free.
Vegan Version
Replace the two eggs with flax eggs (2 tablespoons ground flaxseed mixed with 6 tablespoons water, let sit for 5 minutes). Use maple syrup instead of honey, and choose a plant-based milk. The texture will be slightly denser, but still delicious. I tested this for a vegan friend’s brunch and nobody noticed the difference.
Chocolate Chip Pumpkin Muffins
Fold in 1/2 cup of dark chocolate chips (70% cacao or higher) after combining the wet and dry ingredients. The chocolate melts into little pockets of richness that pair beautifully with the pumpkin and maple. This is my personal favorite variation.
Apple Pumpkin Muffins
Add 1/2 cup of finely diced apple (I use Honeycrisp or Fuji) to the batter. The apple adds little bursts of sweetness and moisture. Reduce the maple syrup by 1 tablespoon to account for the extra sweetness from the apple.
Savory-Sweet Version
Reduce the maple syrup to 1/4 cup and add 1/2 cup of shredded sharp cheddar cheese and 2 tablespoons of chopped fresh sage. This sounds weird, I know, but it’s honestly incredible. The cheese gets all melty and the sage adds this earthy note that’s perfect for fall.
Serving & Storage Suggestions
These muffins are incredibly versatile when it comes to serving. Here’s how I like to enjoy them and how to keep them fresh for as long as possible.
Serving Suggestions
These muffins are best served slightly warm, with a pat of butter melting into the top. I also love them split in half and toasted in a skillet with a little coconut oil—the edges get crispy while the inside stays tender. For a more indulgent breakfast, serve them alongside a dollop of Greek yogurt and a drizzle of maple syrup.
They pair beautifully with a hot cup of coffee or chai tea. In the fall, I like to serve them with a warm mug of spiced apple cider. For a brunch spread, arrange them on a wooden board with fresh fruit, sliced cheese, and a bowl of honey butter.
Storage Instructions
Store the muffins in an airtight container at room temperature for up to 3 days. If your kitchen is warm or humid, I recommend storing them in the refrigerator, where they’ll keep for up to a week. Just let them come to room temperature before serving, or warm them in the microwave for 15 seconds.
Freezer Instructions
These muffins freeze beautifully. Let them cool completely, then place them in a single layer on a baking sheet and freeze for 1 hour. Once they’re frozen solid, transfer them to a freezer-safe bag or container. They’ll keep for up to 3 months. To thaw, leave them at room temperature for about 30 minutes, or microwave for 20 to 30 seconds.
One thing I’ve noticed—the flavors actually get better after a day or two. The pumpkin and spices have time to meld together, and the texture becomes even more tender. So don’t be disappointed if they taste even better on day two.
Nutritional Information & Benefits
I’m not a nutritionist, but I’ve done my research on the ingredients in these muffins, and I feel good about feeding them to my family. Here’s a rough breakdown of what you’re getting in each muffin (based on 12 muffins, without any add-ins).
| Nutrient | Amount Per Muffin |
|---|---|
| Calories | 165 |
| Total Fat | 7g |
| Saturated Fat | 5g |
| Carbohydrates | 23g |
| Fiber | 3g |
| Sugar | 9g (naturally occurring) |
| Protein | 4g |
| Vitamin A | 45% of Daily Value |
The star ingredient here is pumpkin, which is packed with vitamin A for eye health and immune function. Oats provide soluble fiber (beta-glucan) that helps lower cholesterol and keeps you full. The maple syrup and honey are natural sweeteners that contain antioxidants and trace minerals, unlike refined white sugar which is essentially empty calories. Plus, the coconut oil contains medium-chain triglycerides (MCTs) that are metabolized differently than other fats and may support brain function.
These muffins are also dairy-free if you use plant-based milk, and they’re free from refined sugar, artificial preservatives, and hydrogenated oils. They’re a great option for anyone looking to reduce their sugar intake without sacrificing flavor.
Conclusion
These Healthy Pumpkin Oatmeal Muffins have become my go-to recipe for so many reasons. They came out of a moment of panic and pantry desperation, but they’ve turned into something I genuinely look forward to making. They’re proof that you don’t need fancy ingredients or complicated techniques to create something delicious and nourishing. The fact that they’re made with whole grains and naturally sweetened is just a bonus—they taste like a treat, through and through.
I hope you give these a try and make them your own. Add chocolate chips if that’s your thing, throw in some nuts, experiment with the spices—baking should be fun, not stressful. If you make them, I’d love to hear how they turned out. Leave a comment below and let me know what variations you tried, or tag me in your photos on social media. There’s something special about knowing these muffins are being baked in kitchens all over the place, filling homes with that cozy pumpkin smell.
Happy baking, friends. And remember—sometimes the best recipes come from the moments when you least expect them.
Frequently Asked Questions
Can I use quick oats instead of rolled oats?
You can, but the texture will be different. Quick oats are more finely processed and will result in a denser, slightly gummier muffin. If that’s all you have, go ahead and use them, but I recommend rolling oats for the best results.
Can I make these muffins without a food processor?
Absolutely. You can buy pre-made oat flour at most grocery stores or online. Bob’s Red Mill makes a great oat flour that works perfectly in this recipe. Just use 1 3/4 cups of oat flour instead of the 2 cups of whole oats.
Why did my muffins turn out dry?
Dry muffins usually mean they were overbaked. Oat-based muffins can go from perfectly moist to dry very quickly. Check them at 18 minutes and use a toothpick test. Also, make sure you’re measuring your pumpkin puree accurately—too little pumpkin can lead to dryness.
Can I replace the maple syrup with another sweetener?
Yes, but the texture may change. Honey works as a direct substitute, though the flavor will be different. Coconut sugar can be used, but you’ll need to add an extra 2 tablespoons of milk since coconut sugar is dry. I haven’t tested this with stevia or monk fruit, so I can’t recommend those.
How do I make these muffins nut-free?
This recipe is naturally nut-free as written, as long as you use a nut-free milk like oat milk or dairy milk. Just be sure to check your oat flour label for any cross-contamination warnings if you have a serious allergy.
Pin This Recipe!
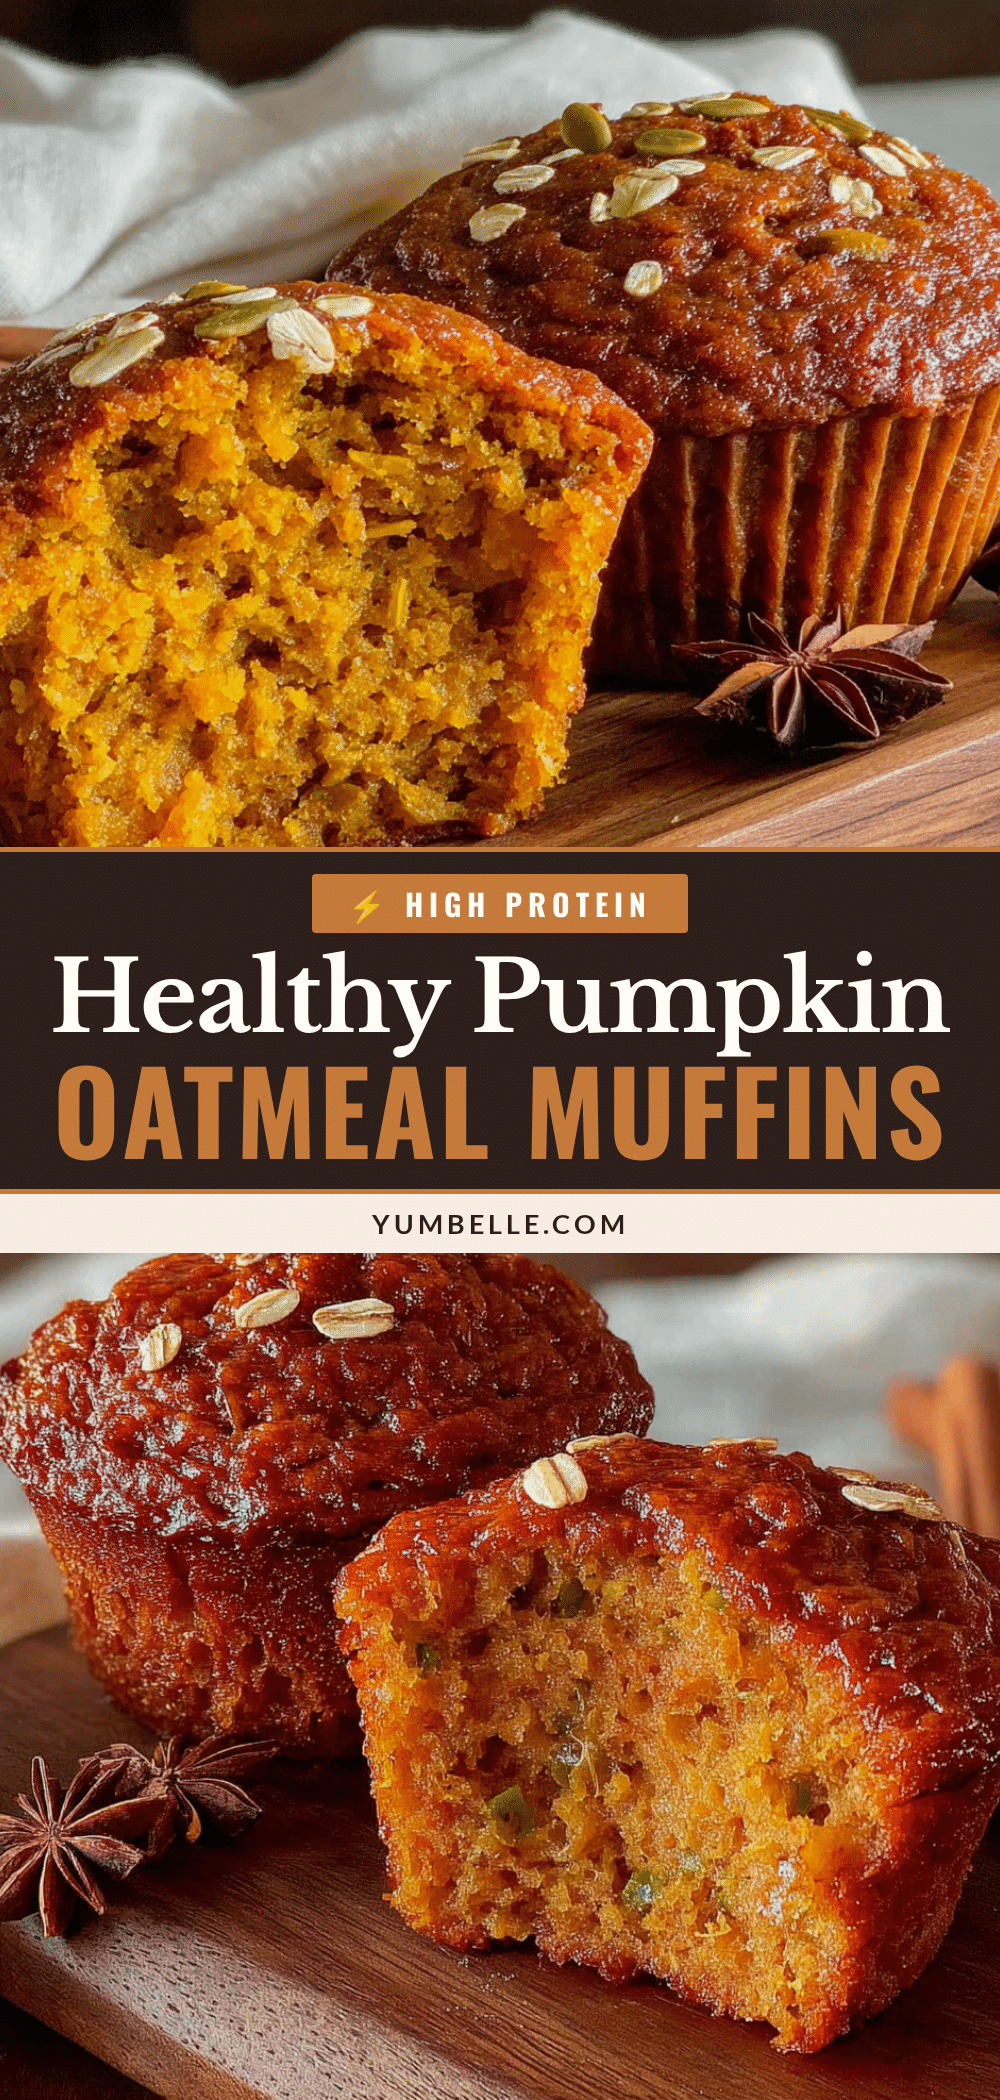
Healthy Pumpkin Oatmeal Muffins: Easy No Sugar Recipe
Naturally sweetened with maple syrup and honey, these moist and tender pumpkin oatmeal muffins are made with whole grain oat flour and no refined sugar. Perfect for a healthy breakfast or snack, they come together in one bowl and are freezer-friendly.
- Prep Time: 15 minutes
- Cook Time: 20 minutes
- Total Time: 35 minutes
- Yield: 12 muffins 1x
- Category: Breakfast
- Cuisine: American
Ingredients
- 2 cups (180g) rolled oats
- 1 cup (245g) pumpkin puree (100% pure, not pie filling)
- 1/3 cup (80ml) maple syrup (real maple syrup)
- 2 tablespoons (30ml) honey
- 2 large eggs, room temperature
- 1/4 cup (60ml) coconut oil, melted
- 1/4 cup (60ml) milk (dairy or plant-based)
- 1 teaspoon vanilla extract
- 1 teaspoon baking soda
- 1/2 teaspoon baking powder
- 1/2 teaspoon salt
- 2 teaspoons ground cinnamon
- 1/2 teaspoon ground ginger
- 1/4 teaspoon freshly grated nutmeg
- 1/4 teaspoon ground cloves
- 1/4 teaspoon allspice
- Optional: 1/2 cup (90g) dark chocolate chips, 1/2 cup (60g) chopped pecans or walnuts, 1/4 cup (30g) dried cranberries
Instructions
- Preheat oven to 350°F (175°C). Line a 12-cup muffin pan with paper liners or grease with coconut oil.
- Place rolled oats in a food processor or high-speed blender. Pulse for 30-45 seconds until a fine flour forms. Let settle before opening lid.
- In a medium bowl, whisk together oat flour, baking soda, baking powder, salt, cinnamon, ginger, nutmeg, cloves, and allspice.
- In a large bowl, whisk together pumpkin puree, maple syrup, honey, melted coconut oil, eggs, milk, and vanilla extract until smooth.
- Pour dry ingredients into wet ingredients. Fold gently with a rubber spatula until just combined (a few lumps are fine). Do not overmix.
- Let batter rest at room temperature for 10-15 minutes to allow oat flour to absorb liquid.
- Divide batter evenly among muffin cups, filling each about 3/4 full. Add optional toppings (e.g., pepitas, nuts) if desired.
- Bake on middle rack for 18-22 minutes, until tops are golden brown and a toothpick inserted in center comes out clean or with a few moist crumbs.
- Cool in pan for 5 minutes, then transfer to a wire rack to cool completely. For best texture, let cool at least 10 minutes before serving.
Notes
Let the batter rest for 10-15 minutes to ensure a light, fluffy texture. For vegan version, replace eggs with flax eggs (2 tbsp ground flaxseed + 6 tbsp water) and use maple syrup instead of honey. Muffins freeze well for up to 3 months. Flavors improve after a day or two.
Nutrition
- Serving Size: 1 muffin
- Calories: 165
- Sugar: 9
- Sodium: 200
- Fat: 7
- Saturated Fat: 5
- Carbohydrates: 23
- Fiber: 3
- Protein: 4
Keywords: pumpkin muffins, oatmeal muffins, healthy muffins, no sugar muffins, naturally sweetened, whole grain, fall baking, easy muffin recipe


