Love this? Save it for later!
Share the inspiration with your friends
I wasn’t expecting cooking advice from my accountant, but there I was, sitting in his cramped office during tax season, watching him pull a crumpled piece of paper from his drawer. “You’re a food blogger, right?” he asked, sliding the paper across the desk. It was covered in greasy fingerprints and scribbled notes. “This is my grandmother’s cookie recipe. She browned the butter. Changed everything.” Honestly, I almost laughed. Here I was, stressed about deductions and receipts, and my accountant wanted to talk cookies. But let me tell you—I took that paper home, and those Chewy Brown Butter Chocolate Chip Cookies became the recipe I couldn’t stop making. Maybe you’ve been there, finding the best thing in the most unexpected place. That’s exactly how this story starts.
The first batch I made, I burned the butter. Not a little—I mean, black smoke, fire alarm, the whole dramatic scene. My kitchen smelled like a campfire gone wrong. But I tried again the next day, and the day after that, until I got it right. That nutty, toasty aroma of properly browned butter is something else. It turns a simple chocolate chip cookie into something that makes people close their eyes when they take a bite. I mean, I’ve made hundreds of cookie batches over the years, but this one? This one stuck.
These Chewy Brown Butter Chocolate Chip Cookies are the kind of recipe you’ll pass down. They have that perfect texture—crispy edges, soft centers, and that deep, almost caramel-like flavor from the browned butter. I keep making them because they’re reliable. They work every single time, and they make people happy. And honestly, that’s the whole point of baking, right?
Why You’ll Love This Recipe
Let me tell you why these cookies are different from every other chocolate chip cookie recipe you’ve tried. I’ve tested this recipe more times than I can count, and I’ve learned a few things along the way. These cookies aren’t just good—they’re the kind that make you text your friends and say, “You need to try these.”
- Quick & Easy: From start to finish, these cookies come together in about 30 minutes. The dough needs a quick chill, but that’s hands-off time. Perfect for when you need cookies, and you need them now.
- Simple Ingredients: No fancy grocery trips. You probably have everything in your kitchen right now—butter, sugar, eggs, flour, chocolate chips. The only special step is browning the butter, and I promise, it’s easier than you think.
- Perfect for Any Occasion: Cookie swaps, bake sales, after-school snacks, late-night cravings—these cookies fit every situation. They’re fancy enough for a holiday party but simple enough for a Tuesday.
- Crowd-Pleaser: I’ve served these to kids, grandparents, picky eaters, and professional chefs. Every single person has asked for the recipe. That’s not an exaggeration.
- Unbelievably Delicious: The browned butter adds this nutty, toasty depth that regular cookies just don’t have. Combined with the chewy texture and melty chocolate chips, it’s next-level comfort food.
What makes this recipe different is the technique. Browning the butter isn’t just a gimmick—it changes the entire flavor profile. The milk solids in the butter toast and caramelize, creating notes of toffee and toasted nuts. Plus, I’ve perfected the ratio of ingredients to guarantee that chewy texture every single time. No flat, crispy cookies here. Just soft, thick, perfectly chewy cookies that stay that way for days.
This recipe isn’t just good—it’s the kind that makes you close your eyes after the first bite. It’s comfort food reimagined: richer, more complex, but with the same soul-soothing satisfaction you remember from childhood. Perfect for impressing guests without stress, or turning a simple afternoon into something memorable.
What Ingredients You Will Need
This recipe uses simple, wholesome ingredients to deliver bold flavor and satisfying texture without the fuss. Most of these are pantry staples, and the star of the show is obviously the butter. Let’s break down everything you’ll need.
For the Cookie Dough
- Unsalted butter, 1 cup (2 sticks or 226 grams) — You’ll brown this, so don’t use salted butter. The browning process concentrates flavors, and you want to control the salt level yourself. I recommend using a high-quality European-style butter like Kerrygold for the richest flavor.
- Dark brown sugar, 1 cup packed (200 grams) — This is key for chewiness. Brown sugar has molasses, which adds moisture and that soft texture. Light brown sugar works too, but dark gives a deeper flavor.
- Granulated sugar, ½ cup (100 grams) — Adds crispness to the edges and balances the brown sugar’s moisture.
- Large eggs, 2, room temperature — Room temperature eggs incorporate better into the browned butter. If you forget to take them out early, place them in a bowl of warm water for 5 minutes.
- Vanilla extract, 2 teaspoons — Pure vanilla extract is worth it here. The browned butter and vanilla work together beautifully. I prefer Nielsen-Massey for its rich flavor.
- All-purpose flour, 2 ¼ cups (280 grams) — Spoon and level your flour. Scooping directly from the bag packs it down and leads to dry cookies. Trust me on this one.
- Baking soda, 1 teaspoon — Helps the cookies spread just enough while keeping them thick.
- Salt, 1 teaspoon — Use flaky sea salt like Maldon for the best flavor. It balances the sweetness and enhances the browned butter notes.
- Semisweet chocolate chips, 2 cups (340 grams) — I use Ghirardelli 60% cacao chips. They’re not too sweet and melt beautifully. You can also chop up a good-quality chocolate bar for those melty puddles.
Ingredient Selection Tips
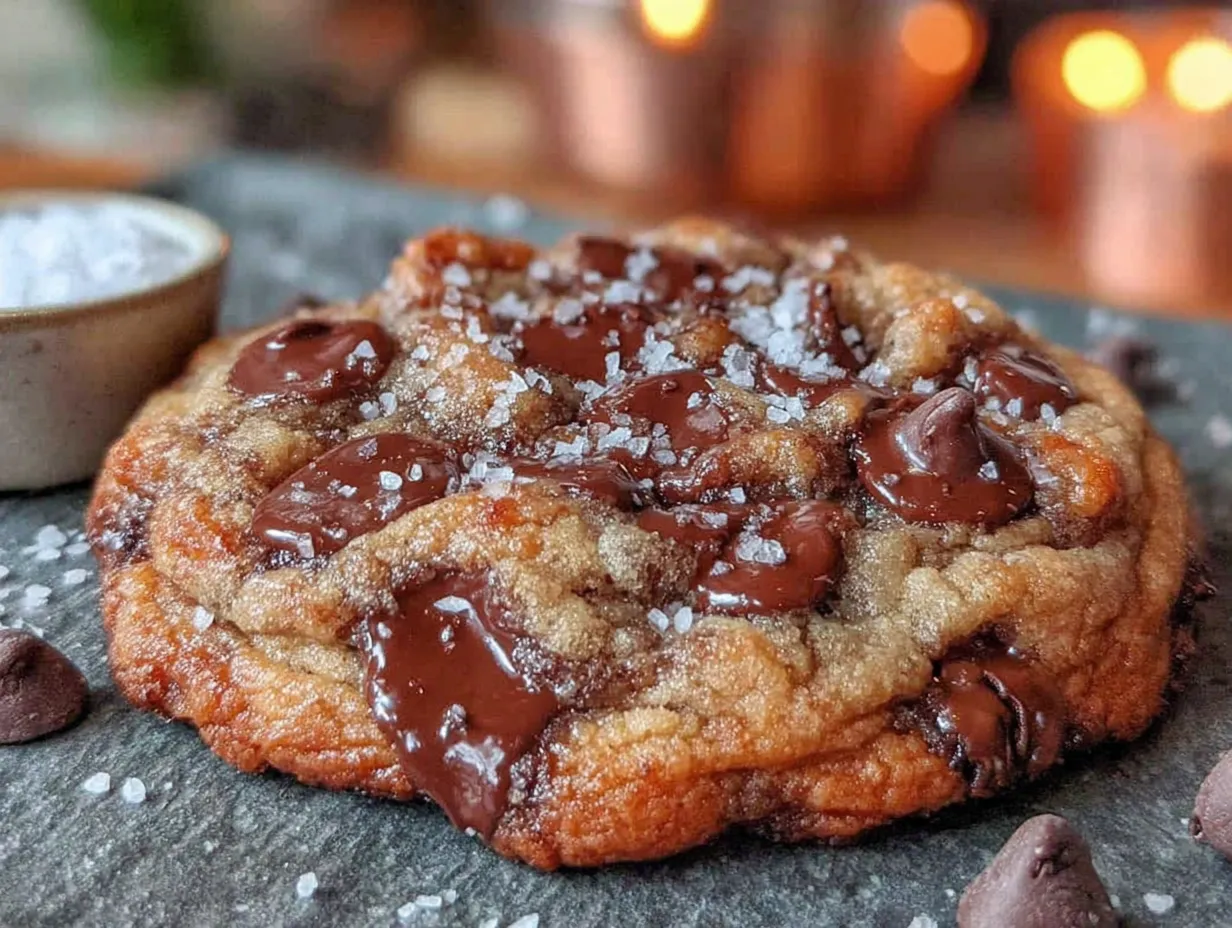
For the best results, use fresh baking soda. Old baking soda won’t give you the right spread and texture. Also, make sure your eggs are truly room temperature—cold eggs can seize the browned butter and create a greasy dough. If you’re using chocolate chunks instead of chips, that’s totally fine. Just know they’ll melt into bigger puddles, which is honestly a good thing.
Substitution Guidance
Need a gluten-free version? Swap the all-purpose flour for a 1:1 gluten-free baking flour blend like King Arthur’s. For a dairy-free option, use vegan butter—just know the browning process won’t be the same, and the flavor will be slightly different. You can also swap semisweet chips for milk chocolate, dark chocolate, or even white chocolate if that’s your thing.
Equipment Needed
You don’t need a fancy kitchen to make these cookies. Here’s what you’ll actually use:
- Light-colored saucepan or skillet — This is important. A dark pan makes it hard to see the butter browning, and you might burn it. I use a stainless steel saucepan. It’s my go-to for browning butter.
- Mixing bowls — One large bowl for wet ingredients, one medium for dry. Nothing fancy needed.
- Whisk — For combining the browned butter and sugars. A wooden spoon works too, but a whisk gets it smoother.
- Rubber spatula — For folding in the chocolate chips and scraping every last bit of dough.
- Baking sheets — Two standard half-sheet pans work well. Line them with parchment paper or silicone baking mats.
- Cookie scoop — A 1.5-tablespoon scoop gives you uniform cookies. If you don’t have one, use two spoons. I got mine at a kitchen supply store for like eight bucks.
- Cooling rack — Lets air circulate under the cookies so they don’t get soggy bottoms.
- Stand mixer or hand mixer — You can do this by hand, but a mixer makes creaming the butter and sugars easier. I’ve done both, and honestly, by hand works fine if you have some arm strength.
If you don’t have a cookie scoop, just wet your hands slightly and roll the dough into balls. It’s a little messier, but it works. And if you’re using a dark nonstick baking sheet, reduce your oven temperature by 25°F to prevent over-browning.
Preparation Method
Let’s get to the fun part. Follow these steps carefully, and you’ll have perfect Chewy Brown Butter Chocolate Chip Cookies every single time.
- Brown the butter — Place the 1 cup of unsalted butter in your light-colored saucepan over medium heat. Stir constantly with a rubber spatula or wooden spoon. The butter will melt, then foam, then start to crackle and pop. After about 5-7 minutes, you’ll see brown specks forming at the bottom. The butter will smell nutty and toasty. Once it’s a golden amber color, remove it from the heat immediately. Pour it into a heatproof bowl, including all those brown bits—that’s pure flavor. Let it cool for 10-15 minutes. Don’t skip this cooling step, or your cookies will spread too much.
- Mix the wet ingredients — In a large mixing bowl, combine the cooled browned butter with 1 cup packed dark brown sugar and ½ cup granulated sugar. Whisk until well combined and smooth. Add the 2 room temperature eggs, one at a time, whisking well after each. Stir in 2 teaspoons of vanilla extract. The mixture should look glossy and smooth.
- Combine the dry ingredients — In a separate medium bowl, whisk together 2 ¼ cups all-purpose flour, 1 teaspoon baking soda, and 1 teaspoon salt. Make sure there are no clumps.
- Combine wet and dry — Gradually add the dry ingredients to the wet mixture. Stir with a rubber spatula until just combined. A few streaks of flour are okay—overmixing leads to tough cookies. The dough will be thick and slightly greasy-looking. That’s normal.
- Add the chocolate chips — Fold in 2 cups of semisweet chocolate chips with your spatula. Make sure they’re evenly distributed. If you want, reserve a handful to press onto the tops of the dough balls before baking. It makes them look bakery-style.
- Chill the dough — Cover the bowl with plastic wrap and refrigerate for at least 30 minutes, or up to 72 hours. This step is non-negotiable. Chilling solidifies the browned butter, prevents excessive spreading, and deepens the flavor. If you’re in a rush, 30 minutes works, but 2 hours is better.
- Preheat the oven — While the dough chills, preheat your oven to 375°F (190°C). Line two baking sheets with parchment paper or silicone mats.
- Scoop the dough — Use your cookie scoop to portion out 1.5-tablespoon-sized balls. Place them 2 inches apart on the prepared baking sheets. If the dough is too firm to scoop, let it sit at room temperature for 5 minutes.
- Bake — Bake one sheet at a time for 10-12 minutes. At 10 minutes, the edges should be golden brown and the centers should look slightly underdone and puffy. That’s exactly what you want. The cookies will continue to set on the hot baking sheet.
- Cool — Let the cookies rest on the baking sheet for 5 minutes. Then transfer them to a cooling rack to cool completely. If you try to move them too soon, they’ll fall apart. Trust the process.
One thing I learned the hard way—don’t overcrowd the baking sheet. Eight cookies per sheet is the max. They need room to spread without merging into one giant cookie. Which, okay, sounds delicious, but not what we’re going for here.
Cooking Tips & Techniques
After dozens of batches, I’ve picked up some tricks that make a real difference. Let me share them with you.
Watch the butter like a hawk. The line between browned butter and burned butter is thin—about 30 seconds. Once you see those brown specks and smell that nutty aroma, pull it off the heat. I’ve burned more batches than I’d like to admit because I walked away to answer my phone. Don’t be me.
Use a kitchen scale for flour. This is the single best tip I can give you. Measuring flour by volume is inconsistent. One cup can weigh anywhere from 120 to 150 grams depending on how you scoop. For these cookies, 280 grams of flour (2 ¼ cups) is the sweet spot. Too much flour, and your cookies will be dry and cakey. Too little, and they’ll spread into flat discs.
Chill the dough, seriously. I know you want cookies now. But if you skip the chill, your cookies will spread thin and greasy. The browned butter is soft, and without chilling, the dough is too warm. Thirty minutes is the minimum. Overnight is magic—the flavors meld, and the texture gets even better.
Rotate your baking sheet halfway through. Ovens have hot spots. Halfway through baking, spin the sheet 180 degrees. This ensures even browning and prevents burnt edges. I forgot to do this once, and half my cookies were dark while the other half were pale. Lesson learned.
Use a cookie scoop for uniform size. Uniform cookies bake evenly. If some are bigger than others, you’ll end up with underdone and overdone cookies in the same batch. A scoop makes it effortless.
Don’t overbake. The cookies will look underdone when you pull them out. That’s the goal. They continue baking on the hot sheet from residual heat. If you wait until they look fully set in the oven, they’ll be overbaked and hard. Trust the 10-12 minute mark.
Tap the baking sheet. Right when the cookies come out of the oven, gently tap the baking sheet on the counter. This deflates the cookies slightly and creates those beautiful crinkly tops. It’s a pro trick I picked up from a bakery tour.
Variations & Adaptations
One of the best things about this recipe is how adaptable it is. Here are some variations I’ve tried and loved.
Dietary Variations
Gluten-Free: Swap the all-purpose flour with a 1:1 gluten-free baking blend. I’ve used King Arthur’s Measure for Measure with great results. The texture is slightly more delicate, but the flavor is still amazing. Add an extra tablespoon of flour if the dough seems too wet.
Vegan: Use vegan butter (like Miyoko’s) and a flax egg (1 tablespoon ground flaxseed mixed with 3 tablespoons water, let sit for 5 minutes). The browning won’t be as pronounced, but it still works. Chill the dough for at least an hour.
Flavor Variations
Toffee Crunch: Replace ½ cup of chocolate chips with ½ cup of chopped toffee bits. The buttery toffee pairs perfectly with the browned butter. I made these for a holiday party, and they disappeared in minutes.
Sea Salt Finish: Before baking, sprinkle a tiny pinch of flaky sea salt on each dough ball. The salt cuts through the sweetness and enhances the nutty browned butter flavor. It’s a simple upgrade that looks fancy.
Double Chocolate: Replace ¼ cup of flour with ¼ cup of unsweetened cocoa powder. Use white chocolate chips instead of semisweet. The combination of browned butter and chocolate is incredible. Just reduce the baking time by a minute or two.
Seasonal Adaptations
Fall Spice: Add 1 teaspoon of cinnamon, ½ teaspoon of nutmeg, and ¼ teaspoon of cloves to the dry ingredients. Use a mix of semisweet and butterscotch chips. These taste like autumn in cookie form.
Summer Berry: Fold in ½ cup of dried cherries or cranberries along with the chocolate chips. The tartness balances the rich browned butter. I made these for a summer picnic, and they were a hit.
Personal Variation I Love
My favorite twist is swapping half the semisweet chips for chopped dark chocolate (70% cacao) and adding ½ cup of toasted pecans. The bitterness of the dark chocolate and the crunch of the pecans take these cookies to another level. I call them my “adult cookies,” and they’re perfect with a cup of black coffee.
Serving & Storage Suggestions
These cookies are incredibly versatile when it comes to serving and storing. Here’s everything you need to know.
Serving
Serve these cookies slightly warm for the best experience. The chocolate should be melty, and the edges should be crisp while the center stays soft. Let them cool on the baking sheet for 5 minutes, then enjoy. If you’re serving them later, pop them in a 300°F oven for 3-4 minutes to rewarm.
Presentation-wise, stack them on a wooden board or a simple white plate. A sprinkle of flaky sea salt on top makes them look bakery-worthy. For a dessert spread, pair them with a glass of cold milk, a scoop of vanilla ice cream, or a cup of strong coffee. I’ve also crumbled them over vanilla ice cream for an impromptu sundae—highly recommend.
Storage
Room Temperature: Store baked cookies in an airtight container at room temperature for up to 5 days. Place a slice of bread in the container to keep them soft—the bread absorbs excess air and releases moisture. Replace the bread every other day.
Refrigerator: Baked cookies also store well in the fridge for up to a week. Let them come to room temperature before serving, or warm them briefly in the oven.
Freezer (Baked Cookies): Freeze baked cookies in a single layer on a baking sheet, then transfer to a freezer-safe bag or container. They’ll keep for up to 3 months. Thaw at room temperature or warm in a 300°F oven for 5 minutes.
Freezer (Cookie Dough): This is my favorite trick. Scoop the dough into balls, place them on a baking sheet, and freeze until solid. Transfer to a freezer bag. You can bake them directly from frozen—just add 2-3 minutes to the baking time. Fresh cookies anytime you want, with zero effort.
One thing to note—the flavors actually deepen after a day or two. The browned butter notes become more pronounced, and the texture softens slightly. So if you can resist eating them all on day one, day two is even better.
Nutritional Information & Benefits
Let’s be real—these are cookies, not health food. But here’s the nutritional breakdown per cookie (based on 24 cookies), along with some notes on the benefits of key ingredients.
| Nutrient | Amount Per Cookie |
|---|---|
| Calories | 220 |
| Total Fat | 12g |
| Saturated Fat | 7g |
| Cholesterol | 35mg |
| Sodium | 150mg |
| Total Carbohydrates | 28g |
| Dietary Fiber | 1g |
| Sugars | 18g |
| Protein | 3g |
Health Benefits of Key Ingredients
Dark chocolate (if using 60% or higher) contains antioxidants called flavonoids, which can support heart health. It also provides a small amount of iron, magnesium, and zinc. Not bad for a cookie ingredient.
Butter provides fat-soluble vitamins A, D, E, and K. While it’s high in saturated fat, moderate consumption can be part of a balanced diet. The browning process also creates new flavor compounds that make you feel like you’re eating something indulgent—which you are, and that’s okay.
Eggs offer high-quality protein and essential nutrients like choline, which supports brain health. They also help with the structure and texture of the cookies.
Dietary Considerations
This recipe contains gluten, dairy, and eggs. For a gluten-free option, use a 1:1 gluten-free flour blend. For dairy-free, use vegan butter. For egg-free, use a flax egg. The texture will vary slightly, but the flavor will still be delicious.
I’m not a nutritionist, but I believe in enjoying treats in moderation. These cookies are meant to be savored, not stressed over. One cookie with a cup of tea? Perfect. The whole batch in one sitting? We’ve all been there.
Conclusion
There you have it—the recipe for the best Chewy Brown Butter Chocolate Chip Cookies you’ll ever make. These cookies have become my go-to for every occasion, from casual weeknight cravings to holiday cookie swaps. The browned butter adds a depth of flavor that regular cookies just can’t match, and the chewy texture is exactly what you want in a chocolate chip cookie.
I love this recipe because it’s forgiving. You can mess up the butter (like I did), forget to chill the dough (done that too), and still end up with delicious cookies. But when you follow the steps carefully—browning the butter just right, chilling the dough, not overbaking—these cookies are absolutely magical.
I encourage you to make these your own. Add nuts, swap the chocolate, sprinkle on some sea salt. Baking is about experimenting and finding what makes you happy. And honestly, these cookies are a great place to start.
I’d love to hear how they turn out for you! Drop a comment below and let me know—did you try a variation? Did you burn the butter on your first try too? Share your photos, your stories, your successes. Happy baking, friend. You’ve got this.
Frequently Asked Questions
Can I use salted butter instead of unsalted?
You can, but reduce the added salt in the recipe to ½ teaspoon. Salted butter has varying salt levels, so it’s harder to control the final flavor. Unsalted butter gives you full control, which is especially important with browned butter since the flavor is more concentrated.
Why did my cookies turn out flat?
Flat cookies usually mean the dough was too warm, or there wasn’t enough flour. Make sure your browned butter is fully cooled before mixing, and chill the dough for at least 30 minutes. Also, check your flour measurement—using a kitchen scale is the most accurate way to avoid this problem.
Can I make the dough ahead of time?
Absolutely! The dough can be refrigerated for up to 72 hours. In fact, the flavor improves over time as the browned butter and sugars meld. You can also freeze the dough balls for up to 3 months and bake them directly from frozen—just add 2-3 minutes to the baking time.
How do I get that bakery-style look?
After scooping the dough balls, press a few extra chocolate chips onto the tops. This gives the cookies that iconic, chunky look. Also, tap the baking sheet on the counter right when they come out of the oven to create crinkly tops. A sprinkle of flaky sea salt before baking adds a professional touch.
Can I use margarine or vegan butter?
Yes, but the browning process won’t be the same. Vegan butters have different fat and water content, so they don’t brown as easily or create the same nutty flavor. If you’re using vegan butter, skip the browning step and use it melted and cooled. The cookies will still be good, just with a slightly different flavor profile.
Pin This Recipe!
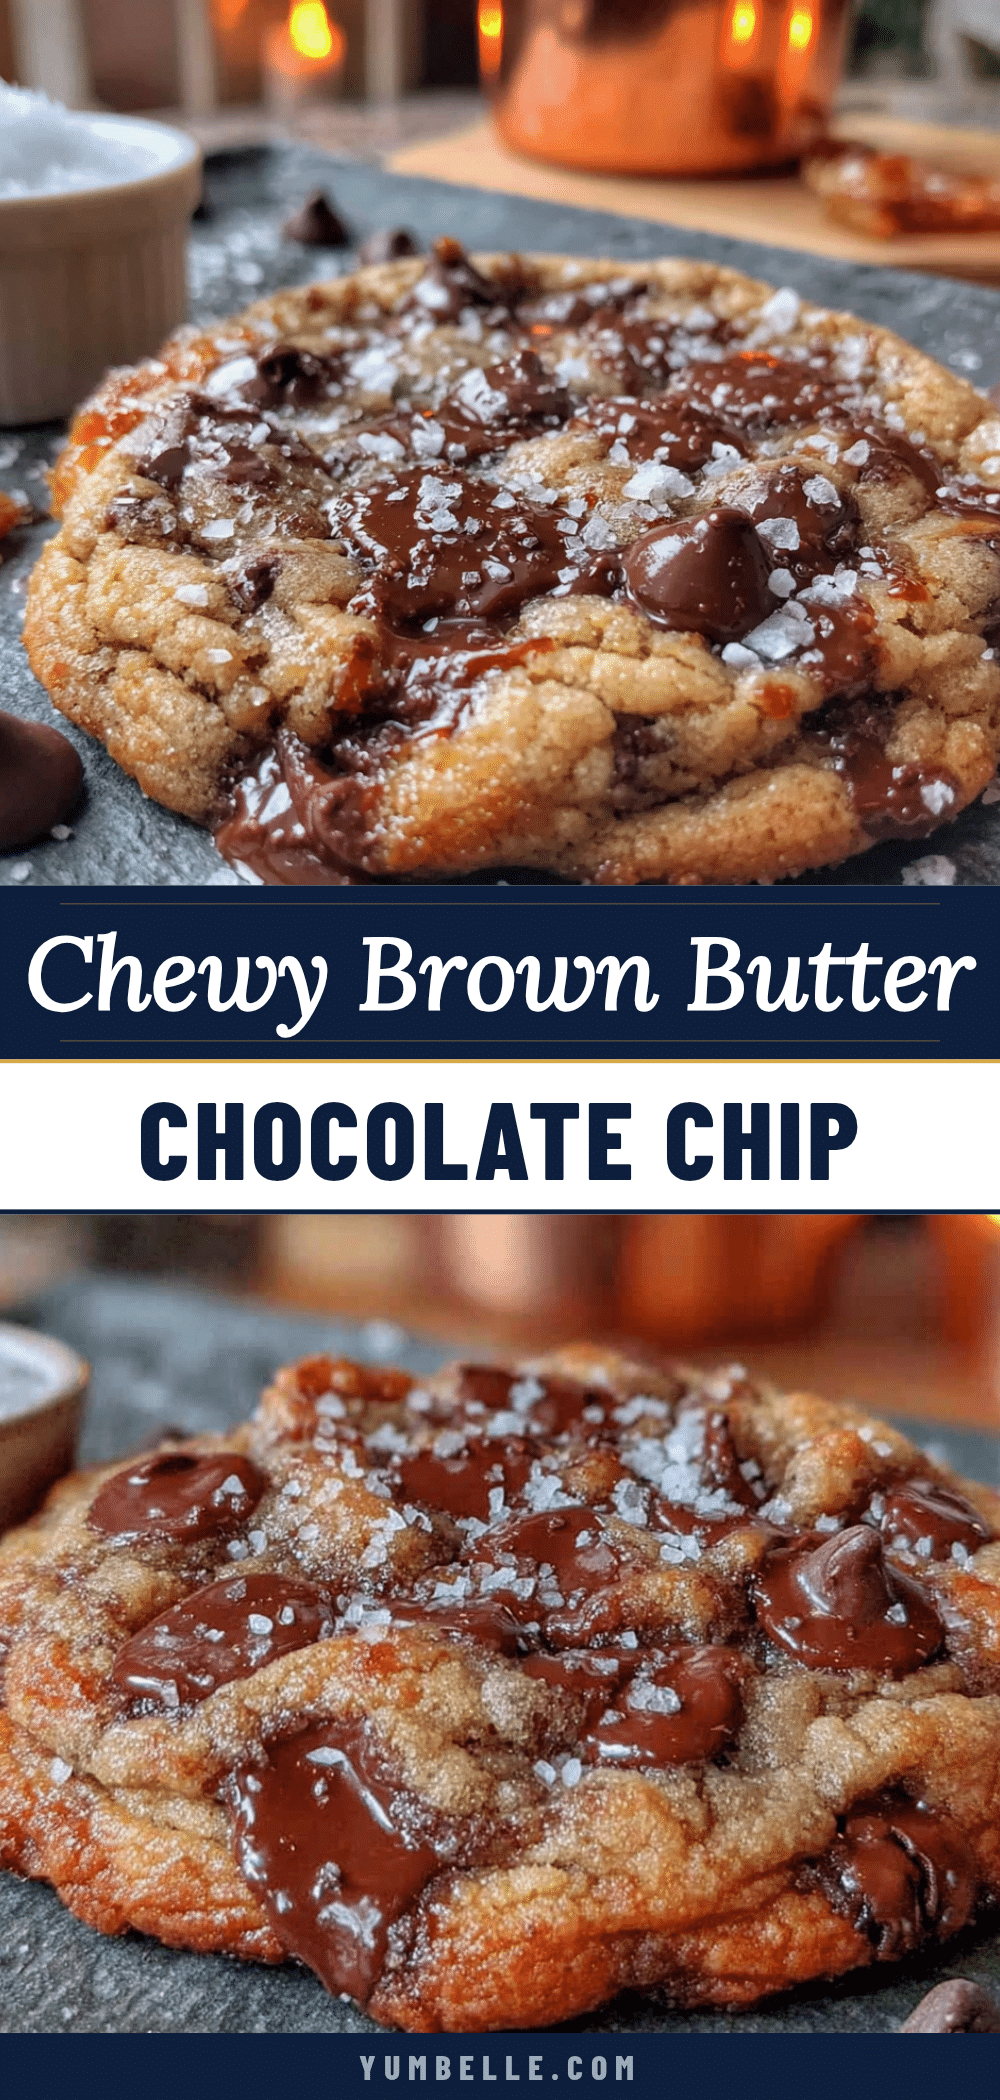
Best Chewy Brown Butter Chocolate Chip Cookies Recipe
These Chewy Brown Butter Chocolate Chip Cookies have crispy edges, soft centers, and a deep, caramel-like flavor from browned butter. They’re quick, easy, and perfect for any occasion.
- Prep Time: 15 minutes
- Cook Time: 12 minutes
- Total Time: 30 minutes (plus 30 minutes chilling)
- Yield: 24 cookies 1x
- Category: Dessert
- Cuisine: American
Ingredients
- 1 cup (2 sticks or 226 grams) unsalted butter
- 1 cup packed (200 grams) dark brown sugar
- ½ cup (100 grams) granulated sugar
- 2 large eggs, room temperature
- 2 teaspoons vanilla extract
- 2 ¼ cups (280 grams) all-purpose flour
- 1 teaspoon baking soda
- 1 teaspoon salt
- 2 cups (340 grams) semisweet chocolate chips
Instructions
- Brown the butter: Place 1 cup unsalted butter in a light-colored saucepan over medium heat. Stir constantly until the butter melts, foams, and turns golden amber with brown specks (about 5-7 minutes). Remove from heat immediately and pour into a heatproof bowl, including all brown bits. Let cool for 10-15 minutes.
- Mix the wet ingredients: In a large bowl, combine the cooled browned butter with 1 cup packed dark brown sugar and ½ cup granulated sugar. Whisk until smooth. Add 2 room temperature eggs, one at a time, whisking well after each. Stir in 2 teaspoons vanilla extract until glossy.
- Combine the dry ingredients: In a separate medium bowl, whisk together 2 ¼ cups all-purpose flour, 1 teaspoon baking soda, and 1 teaspoon salt.
- Combine wet and dry: Gradually add the dry ingredients to the wet mixture, stirring with a rubber spatula until just combined. Do not overmix.
- Add chocolate chips: Fold in 2 cups semisweet chocolate chips until evenly distributed. Optionally, reserve a handful to press onto dough balls before baking.
- Chill the dough: Cover the bowl with plastic wrap and refrigerate for at least 30 minutes (up to 72 hours).
- Preheat oven: Preheat oven to 375°F (190°C). Line two baking sheets with parchment paper or silicone mats.
- Scoop the dough: Use a 1.5-tablespoon cookie scoop to portion dough into balls. Place 2 inches apart on prepared baking sheets.
- Bake: Bake one sheet at a time for 10-12 minutes, until edges are golden brown and centers look slightly underdone. Rotate the sheet halfway through.
- Cool: Let cookies rest on the baking sheet for 5 minutes, then transfer to a cooling rack to cool completely.
Notes
Chill the dough for at least 30 minutes to prevent spreading. Use a kitchen scale for flour for best results. Tap the baking sheet on the counter after baking for crinkly tops. Cookies can be stored at room temperature for up to 5 days or frozen for up to 3 months.
Nutrition
- Serving Size: 1 cookie
- Calories: 220
- Sugar: 18
- Sodium: 150
- Fat: 12
- Saturated Fat: 7
- Carbohydrates: 28
- Fiber: 1
- Protein: 3
Keywords: brown butter chocolate chip cookies, chewy cookies, chocolate chip cookies, easy cookie recipe, homemade cookies


