Love this? Save it for later!
Share the inspiration with your friends
There used to be a little Italian spot tucked between a laundromat and a vintage shop on the south side of town that made the most incredible garlic parmesan chicken. When they closed their doors three years ago—right before the holidays, actually—I felt a real pang of loss. I mean, I’d drive twenty minutes out of my way just to grab that chicken to-go. After twelve tries—some embarrassingly dry, a few that were just sad—I finally got it. And honestly? This air fryer version might actually be better than the original.
The first attempt was a disaster. I used way too much oil and ended up with soggy breading that slid right off the chicken. My kitchen smelled amazing, but the result was a complete mess. The second time, I cranked the air fryer up too high and got what I can only describe as burnt garlic powder sadness. But somewhere around attempt number seven, something clicked. I started paying attention to how the coating actually stuck to the chicken, how the cheese browned in the air fryer’s hot air, and how a simple trick with the breading made all the difference.
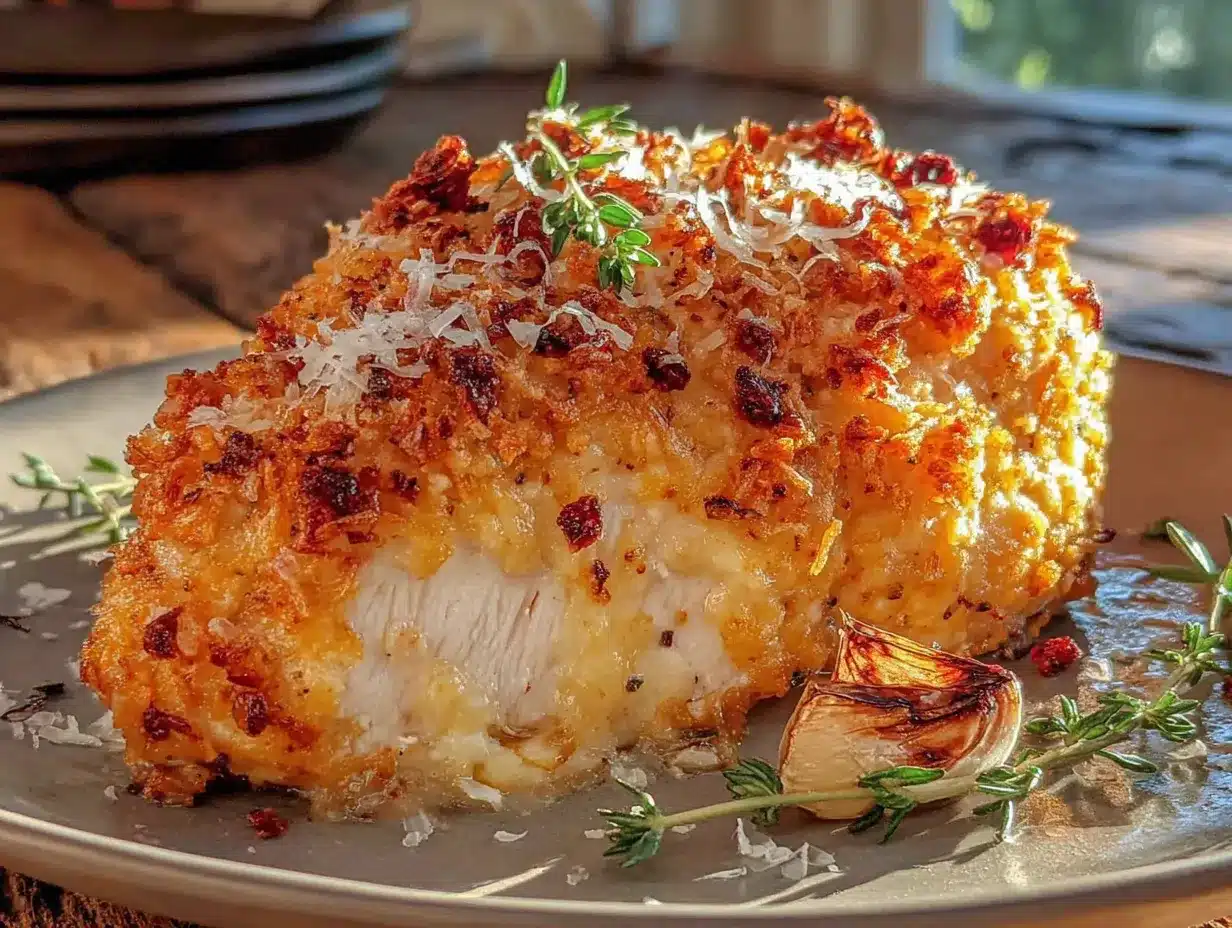
You know that feeling when you take a bite and everything just works? The crunch, the garlicky punch, that salty parmesan finish? That’s what this recipe delivers every single time. The air fryer gives you that deep golden crust without the mess of deep frying, and the garlic parmesan coating stays put—no sliding off onto the basket. I keep making this because it’s the kind of dinner that feels special on a Tuesday night. No fuss, no complicated techniques, just really good crispy chicken that brings back that restaurant memory every single time.
Why You’ll Love This Recipe
Let me tell you why this air fryer crispy garlic parmesan chicken breast has become my most-requested dinner. I’ve tested this recipe on busy weeknights, lazy Sundays, and even when my in-laws came over unexpectedly. It passed every single test with flying colors.
- Quick & Easy: From start to finish, this comes together in under 30 minutes. The air fryer does all the heavy lifting while you prep a quick salad or steam some veggies.
- Simple Ingredients: You probably already have everything in your kitchen right now. No fancy grocery store trips needed—just pantry staples that deliver big flavor.
- Perfect for Busy Weeknights: When you’re tired and hungry and just want something that tastes like you tried, this is your answer. It feels indulgent but takes almost no effort.
- Crowd-Pleaser: I’ve served this to picky kids, health-conscious friends, and serious food lovers. Everyone goes back for seconds. The crispy coating and cheesy garlic flavor just works for everybody.
- Unbelievably Delicious: The texture is what gets me every time. That crunchy, golden exterior gives way to juicy, tender chicken inside. It’s the kind of meal that makes you close your eyes after the first bite.
What makes this version different from all those other air fryer chicken recipes out there? It’s the way the parmesan melts into the breading, creating this almost crust-like layer that stays crispy even after sitting for a few minutes. I spent weeks perfecting the coating ratio—too much cheese and it gets greasy, too little and you lose that signature flavor. This is the sweet spot, I promise.
This isn’t just another chicken dinner. It’s comfort food reimagined—healthier because we’re using the air fryer, faster because we’re not messing with oil, but with the same soul-soothing satisfaction as the restaurant version I’ve been chasing for years.
What Ingredients You Will Need
This recipe uses simple, wholesome ingredients that work together to create that irresistible crispy coating. Most of these are pantry staples, which makes this perfect for those nights when you need dinner on the table fast.
For the Chicken
- 2 boneless, skinless chicken breasts (about 6-8 ounces each, pounded to even thickness)
- 1/2 cup all-purpose flour (for dredging)
- 2 large eggs, beaten
- 1 cup panko breadcrumbs (I prefer Kikkoman for the best crunch)
- 1/2 cup freshly grated parmesan cheese (skip the pre-shredded stuff—it doesn’t melt the same)
- 2 teaspoons garlic powder (not garlic salt—we’ll control the salt separately)
- 1 teaspoon onion powder
- 1/2 teaspoon paprika (smoked paprika adds a nice depth if you have it)
- 1/2 teaspoon dried oregano
- 1/2 teaspoon salt
- 1/4 teaspoon black pepper
- 2 tablespoons olive oil spray (or avocado oil spray for higher smoke point)
For the Garlic Butter Topping
- 2 tablespoons unsalted butter, melted
- 3 cloves garlic, minced (about 1 tablespoon)
- 2 tablespoons freshly grated parmesan cheese (for finishing)
- 1 tablespoon fresh parsley, chopped (optional, but pretty)
A few notes on ingredients. The panko breadcrumbs are non-negotiable here—regular breadcrumbs just won’t give you that same light, airy crunch. I’ve tried both, and panko wins every single time. For the parmesan, please buy a block and grate it yourself. The pre-shredded stuff has anti-caking agents that prevent it from melting properly into the coating. Trust me on this one—I learned the hard way when my first few batches came out with weird, clumpy bits.
If you’re watching your sodium, you can reduce the salt in the breading and rely more on the parmesan for saltiness. The cheese itself is pretty salty, so start with less and adjust. For a gluten-free option, use almond flour instead of all-purpose flour and gluten-free panko. The texture will be slightly different, but still delicious.
Equipment Needed
You don’t need much for this recipe, which is part of why I love it. Here’s what you’ll need:
- Air fryer (any size works—I use a 5.8-quart Cosori and it fits two chicken breasts perfectly)
- Meat mallet or rolling pin (for pounding the chicken to even thickness)
- Three shallow bowls (for the flour, eggs, and breading station)
- Tongs (for transferring the chicken without making a mess)
- Small saucepan or microwave-safe bowl (for melting the butter)
- Instant-read thermometer (optional but highly recommended for perfect doneness)
If you don’t have a meat mallet, a heavy skillet or even a wine bottle works in a pinch. Just cover the chicken with plastic wrap first to avoid splatter. I’ve used the bottom of a cast iron pan more times than I can count. For the air fryer, honestly, any brand will work—just keep an eye on the cooking time since different models run at different temperatures. My first air fryer was a cheap one from a discount store, and it worked fine for years.
Preparation Method
Let’s get cooking. This whole process takes about 25 minutes from start to finish, and most of that is hands-off air fryer time.
- Prep the chicken (5 minutes). Place your chicken breasts between two sheets of plastic wrap or parchment paper. Using a meat mallet or rolling pin, pound them to an even thickness of about 1/2 inch. This is crucial—uneven chicken means uneven cooking, and nobody wants dry ends. Season both sides lightly with salt and pepper.
- Set up your breading station (3 minutes). Get three shallow bowls ready. In the first bowl, add the 1/2 cup flour. In the second bowl, beat the 2 eggs with a splash of water until smooth. In the third bowl, combine the panko breadcrumbs, 1/2 cup grated parmesan, garlic powder, onion powder, paprika, oregano, salt, and pepper. Mix everything together with a fork until the cheese is evenly distributed.
- Bread the chicken (5 minutes). Working with one piece at a time, dredge the chicken in the flour, shaking off any excess. Dip it into the egg wash, letting any extra drip off. Finally, press it firmly into the panko-parmesan mixture, making sure both sides are fully coated. I like to use one hand for the dry ingredients and one for the wet to avoid turning my fingers into a breaded mess. Place the breaded chicken on a plate while you finish the second piece.
- Preheat the air fryer (2 minutes). Set your air fryer to 375°F and let it preheat for about 2 minutes. Some newer models don’t require preheating, but I find it helps the coating start crisping immediately.
- Air fry the chicken (12-14 minutes). Lightly spray the air fryer basket with oil. Place the breaded chicken breasts in a single layer—don’t crowd them or they won’t crisp properly. Spray the tops of the chicken with olive oil spray. This is the secret to that golden color. Air fry at 375°F for 6 minutes, then flip the chicken carefully with tongs, spray the other side, and cook for another 6-8 minutes. The chicken is done when the internal temperature reaches 165°F and the coating is deep golden brown and crispy.
- Make the garlic butter (2 minutes). While the chicken cooks, melt the butter in a small saucepan over low heat or in the microwave. Add the minced garlic and let it sizzle for about 30 seconds until fragrant. Remove from heat and stir in the remaining 2 tablespoons of grated parmesan. The residual heat will melt the cheese into the butter.
- Finish and serve (2 minutes). As soon as the chicken comes out of the air fryer, brush the garlic parmesan butter over the top. The hot chicken will absorb all that flavor immediately. Sprinkle with fresh parsley if you’re using it, and let the chicken rest for 2-3 minutes before slicing. This resting time lets the juices redistribute so every bite is tender and moist.
A few things to watch for during cooking. If your air fryer runs hot, check the chicken at the 10-minute mark. The coating should be deeply golden, not burnt. If the chicken is browning too quickly, lower the temperature to 360°F. Also, don’t skip the oil spray—it’s what gives you that restaurant-quality crunch instead of a dry, pale coating.
Cooking Tips & Techniques
After making this recipe more times than I care to count, I’ve picked up a few tricks that make a real difference. Let me share what I’ve learned the hard way so you don’t have to.
The biggest mistake people make is skipping the flour step. I know it seems like an extra bother, but that thin layer of flour is what helps the egg wash stick to the chicken. Without it, the breading slides right off during cooking. I learned this one when I was in a hurry and thought I could skip it—I ended up with a basket full of loose breadcrumbs and naked chicken. Never again.
Don’t overcrowd the air fryer basket. I know it’s tempting to cook more at once, but the air needs to circulate around each piece to create that crispy crust. If the pieces are touching, you’ll end up with soft spots. Cook in batches if you need to, and keep the first batch warm in a 200°F oven while the second batch cooks.
Let the breaded chicken rest for 5 minutes before air frying. This is a game-changer. Giving the coating a few minutes to set helps it adhere better during cooking. I usually bread both pieces, then wash my hands and prep the garlic butter while they rest. Perfect timing.
Use an instant-read thermometer for perfect doneness. Chicken breasts are notorious for going from perfectly cooked to dry in about 30 seconds. Pull them at 160°F—they’ll carry over to 165°F while resting. I’ve ruined so many beautiful chicken breasts by overcooking them that I finally bought a thermometer and never looked back.
Spray, flip, spray again. That double spray is what gives you the all-over crunch. If you only spray the top, the bottom stays pale and soft. Take the extra 10 seconds to flip and spray—your taste buds will thank you.
Variations & Adaptations
One of the best things about this recipe is how easily it adapts to different tastes and dietary needs. Here are some of my favorite variations.
Spicy Garlic Parmesan: Add 1/2 teaspoon of cayenne pepper and 1/2 teaspoon of red pepper flakes to the breading mixture. The heat cuts through the richness of the parmesan beautifully. I make this version when I’m cooking just for myself and want something with a kick.
Lemon Herb Version: Replace the garlic powder with 1 tablespoon of lemon zest and add 1 teaspoon of dried thyme and 1 teaspoon of dried rosemary to the breading. Finish with a squeeze of fresh lemon juice over the hot chicken. This is perfect for spring and summer dinners.
Gluten-Free Adaptation: Use 1/2 cup of almond flour or coconut flour instead of all-purpose flour, and substitute gluten-free panko for regular panko. The texture will be slightly different—a bit more dense—but still deliciously crispy. I’ve made this for celiac friends and they couldn’t tell the difference.
Cheese Lovers Variation: Add 1/4 cup of grated pecorino romano to the breading mixture along with the parmesan. The pecorino adds a sharper, saltier flavor that cheese enthusiasts will love. You can also sprinkle extra parmesan on top during the last 2 minutes of cooking.
Air Fryer Chicken Thighs: This recipe works beautifully with boneless, skinless chicken thighs. Just adjust the cooking time to 10-12 minutes at 375°F, flipping halfway through. Thighs are more forgiving than breasts and stay incredibly juicy.
Serving & Storage Suggestions
This crispy garlic parmesan chicken is versatile enough to serve with almost anything. Here’s how I like to enjoy it.
Serving Temperature and Presentation: Serve the chicken hot, right after it comes out of the air fryer. Slice it against the grain into 1/2-inch thick strips and fan them out on a plate. Drizzle any remaining garlic butter from the pan over the top. A sprinkle of fresh parsley and an extra grating of parmesan makes it look restaurant-worthy.
What to Serve With It: This chicken pairs beautifully with a simple arugula salad dressed with lemon vinaigrette—the peppery greens balance the richness. For heartier meals, serve it alongside roasted potatoes or a creamy risotto. I also love it with steamed broccoli or roasted asparagus. The chicken is so flavorful that you don’t need much else on the plate.
Storage Instructions: Leftover chicken keeps well in the refrigerator for up to 4 days. Store it in an airtight container, but don’t stack the pieces or the coating will get soggy. Place a paper towel in the container to absorb any excess moisture.
Reheating Tips: The air fryer is your best friend for reheating. Preheat to 350°F and warm the chicken for 3-4 minutes until hot and crispy again. The microwave will work in a pinch, but you’ll lose that beautiful crunch. I’ve also had success reheating in a 350°F oven for about 8 minutes.
Freezing Instructions: You can freeze the breaded, uncooked chicken for up to 3 months. Place the breaded chicken pieces on a baking sheet and freeze until solid, then transfer to a freezer bag. Cook from frozen at 375°F for 14-16 minutes, adding a few extra minutes to the cooking time. The garlic butter is best made fresh when you’re ready to serve.
The flavors actually develop nicely overnight. I’ve found that the garlic parmesan taste is even more pronounced the next day, making this a great meal prep option for lunches.
Nutritional Information & Benefits
Here’s the nutritional breakdown for one serving (one chicken breast with garlic butter topping):
- Calories: 485
- Protein: 42g
- Fat: 22g
- Carbohydrates: 28g
- Fiber: 2g
- Sugar: 2g
- Sodium: 780mg
This recipe is a fantastic source of lean protein, which supports muscle health and keeps you feeling full and satisfied. The parmesan cheese adds calcium and a touch of healthy fat, while the garlic provides allicin, a compound known for its immune-boosting properties. Using the air fryer instead of deep frying significantly reduces the fat content—we’re using just a light spray of oil instead of cups of it.
For those watching their carbohydrate intake, you can reduce the carbs by using almond flour instead of all-purpose flour. The panko breadcrumbs do add some carbs, but they’re what give this dish its signature crunch. If you’re gluten-sensitive, the gluten-free adaptation works wonderfully without sacrificing flavor.
I personally love that this recipe feels indulgent but fits well into a balanced diet. It’s the kind of meal that satisfies a craving for fried chicken without the guilt or the grease.
Conclusion
This air fryer crispy garlic parmesan chicken breast is everything I wanted it to be when I started my quest to recreate that restaurant version. It’s crispy, garlicky, cheesy, and comes together in under 30 minutes with minimal fuss. The air fryer does the heavy lifting, and you get all the flavor without the mess of deep frying.
What I love most about this recipe is how reliable it is. After all those failed attempts—the soggy coatings, the burnt garlic, the dry chicken—I finally have a version that works every single time. It’s become my go-to for busy nights when I want something that feels special without spending hours in the kitchen. My family requests it weekly, and I never get tired of making it.
I’d love to hear how this turns out for you. Did you try any of the variations? Did you discover your own twist? Drop a comment below and let me know. And if you loved this recipe, please share it with a friend who needs a reliable weeknight dinner in their rotation. Happy cooking, friends—this one’s a keeper.
Frequently Asked Questions
Can I use chicken thighs instead of chicken breasts?
Absolutely! Boneless, skinless chicken thighs work beautifully with this recipe. They’re more forgiving than breasts and stay incredibly juicy. Cook them at 375°F for 10-12 minutes, flipping halfway through. The internal temperature should reach 165°F.
Why is my breading falling off in the air fryer?
This usually happens for one of three reasons: you skipped the flour dredging step, the chicken wasn’t patted dry before breading, or you didn’t let the breaded chicken rest before cooking. Make sure to follow the full breading process and let the coated chicken sit for 5 minutes before air frying.
Can I make this recipe dairy-free?
Yes, with a few adjustments. Use nutritional yeast or a dairy-free parmesan alternative in the breading, and substitute the butter with vegan butter or olive oil for the topping. The texture will be slightly different, but still delicious and crispy.
How do I keep the chicken crispy if I’m cooking for a crowd?
Cook the chicken in batches and keep the finished pieces warm on a wire rack set over a baking sheet in a 200°F oven. The wire rack allows air to circulate underneath, preventing the bottom from getting soggy. This method keeps the chicken crispy for up to 30 minutes.
Can I prep this recipe ahead of time?
You can bread the chicken up to 24 hours in advance and store it in the refrigerator on a parchment-lined baking sheet, covered with plastic wrap. When you’re ready to cook, let it sit at room temperature for 10 minutes, then air fry as directed. You can also freeze the breaded chicken for up to 3 months.
Pin This Recipe!
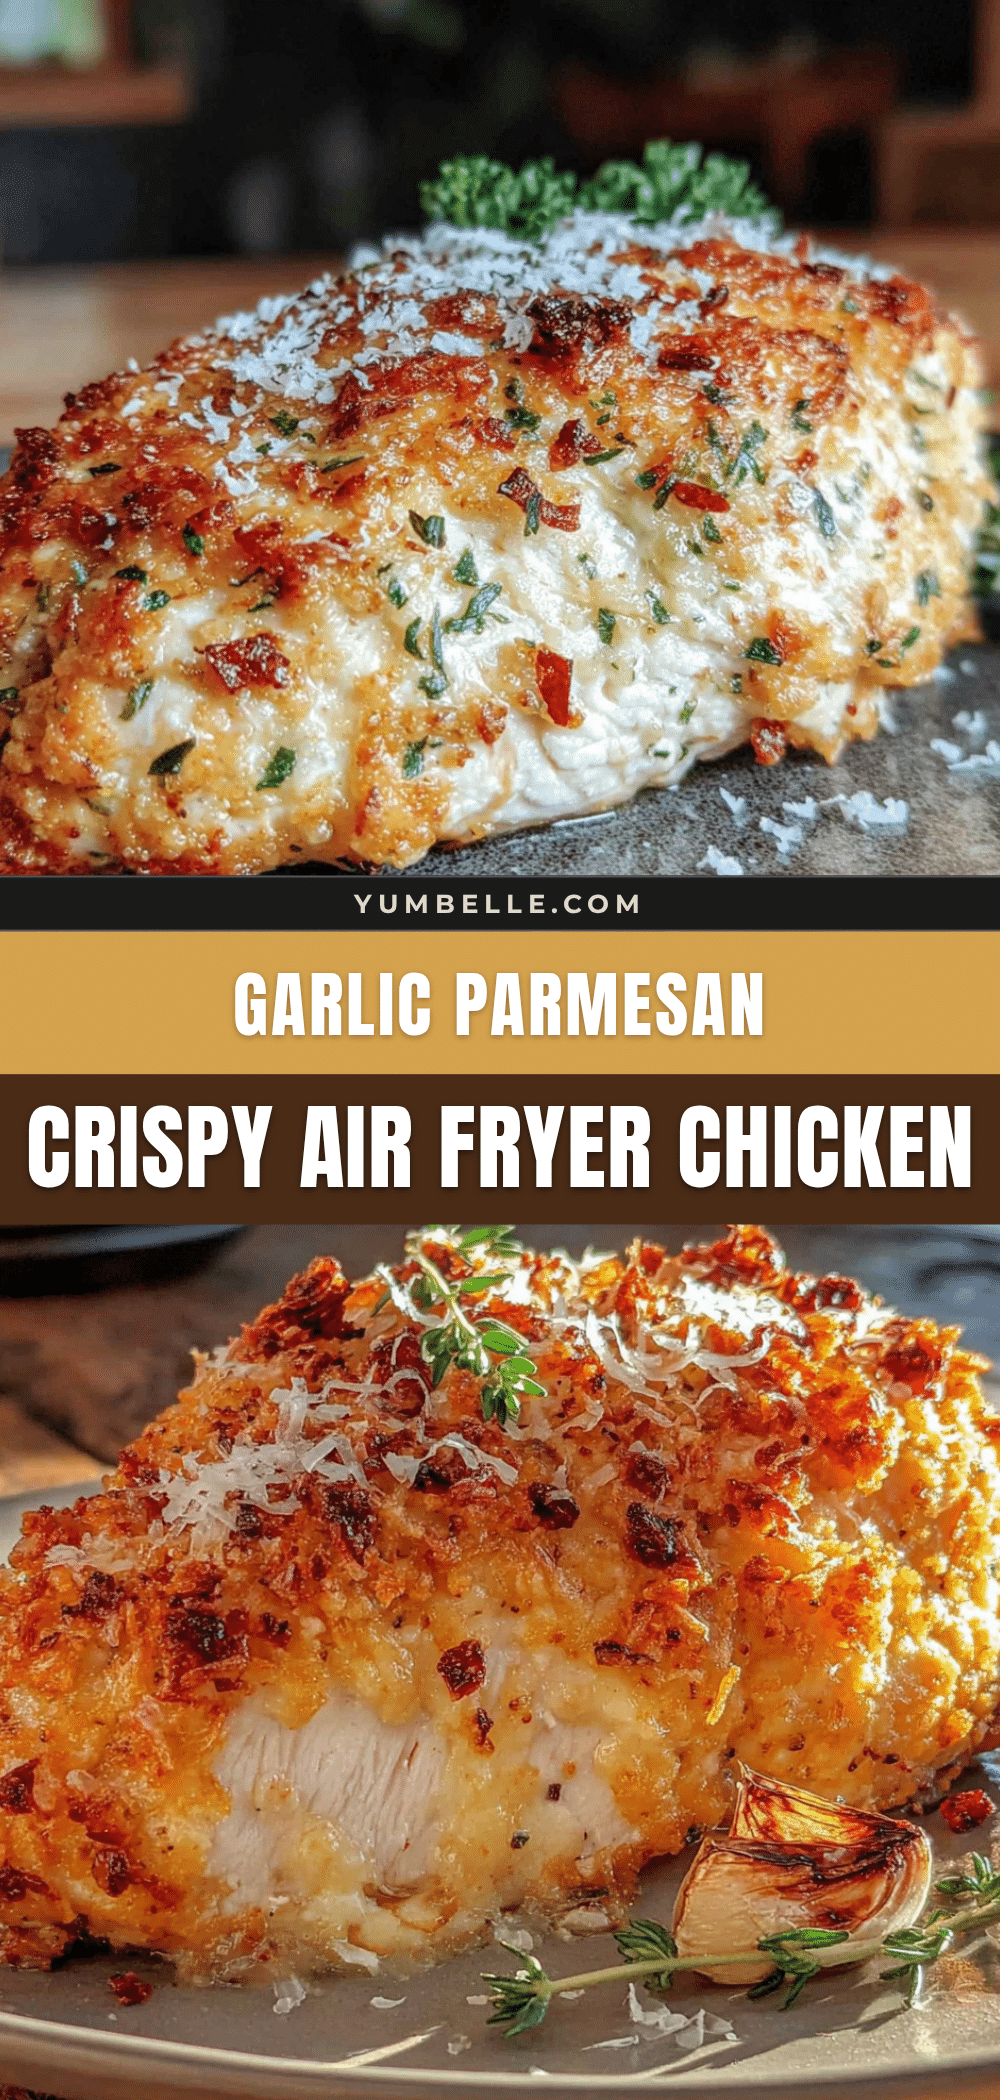
Easy Air Fryer Crispy Garlic Parmesan Chicken Breast

This air fryer crispy garlic parmesan chicken breast is quick, easy, and delivers a crunchy, golden crust with juicy, tender chicken inside. Perfect for busy weeknights, it uses simple pantry ingredients and comes together in under 30 minutes.
- Prep Time: 10 minutes
- Cook Time: 14 minutes
- Total Time: 24 minutes
- Yield: 2 servings 1x
- Category: Main Course
- Cuisine: Italian-American
Ingredients
- 2 boneless, skinless chicken breasts (about 6–8 ounces each, pounded to even thickness)
- 1/2 cup all-purpose flour
- 2 large eggs, beaten
- 1 cup panko breadcrumbs
- 1/2 cup freshly grated parmesan cheese
- 2 teaspoons garlic powder
- 1 teaspoon onion powder
- 1/2 teaspoon paprika
- 1/2 teaspoon dried oregano
- 1/2 teaspoon salt
- 1/4 teaspoon black pepper
- 2 tablespoons olive oil spray
- 2 tablespoons unsalted butter, melted
- 3 cloves garlic, minced
- 2 tablespoons freshly grated parmesan cheese (for finishing)
- 1 tablespoon fresh parsley, chopped (optional)
Instructions
- Prep the chicken: Place chicken breasts between two sheets of plastic wrap or parchment paper. Pound to an even thickness of about 1/2 inch. Season both sides lightly with salt and pepper.
- Set up breading station: In first bowl, add flour. In second bowl, beat eggs with a splash of water. In third bowl, combine panko, 1/2 cup parmesan, garlic powder, onion powder, paprika, oregano, salt, and pepper.
- Bread the chicken: Dredge chicken in flour, shaking off excess. Dip into egg wash, letting extra drip off. Press firmly into panko-parmesan mixture, coating both sides. Place on a plate.
- Preheat air fryer to 375°F for 2 minutes.
- Lightly spray air fryer basket with oil. Place breaded chicken in a single layer. Spray tops with olive oil. Air fry at 375°F for 6 minutes, flip, spray other side, and cook for another 6-8 minutes until internal temperature reaches 165°F and coating is golden brown.
- While chicken cooks, melt butter in a small saucepan or microwave. Add minced garlic and cook for 30 seconds until fragrant. Remove from heat and stir in remaining 2 tablespoons parmesan.
- Brush garlic parmesan butter over hot chicken. Sprinkle with parsley if desired. Let rest for 2-3 minutes before slicing.
Notes
For best results, don’t skip the flour dredging step—it helps the breading stick. Let breaded chicken rest for 5 minutes before air frying. Use an instant-read thermometer to avoid overcooking. For gluten-free, use almond flour and gluten-free panko.
Nutrition
- Serving Size: 1 chicken breast wit
- Calories: 485
- Sugar: 2
- Sodium: 780
- Fat: 22
- Saturated Fat: 8
- Carbohydrates: 28
- Fiber: 2
- Protein: 42
Keywords: air fryer chicken, garlic parmesan chicken, crispy chicken breast, easy weeknight dinner, air fryer recipe


