Love this? Save it for later!
Share the inspiration with your friends
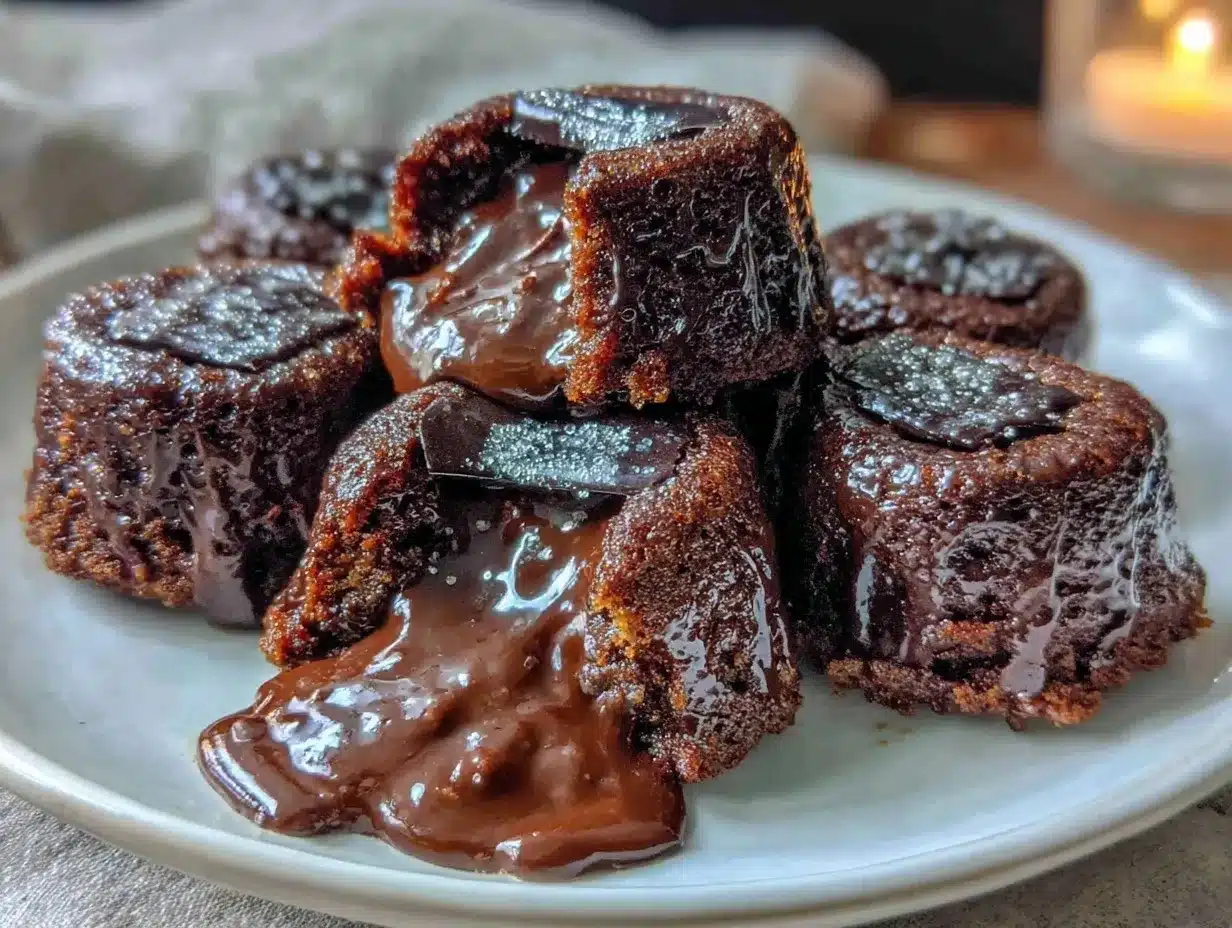
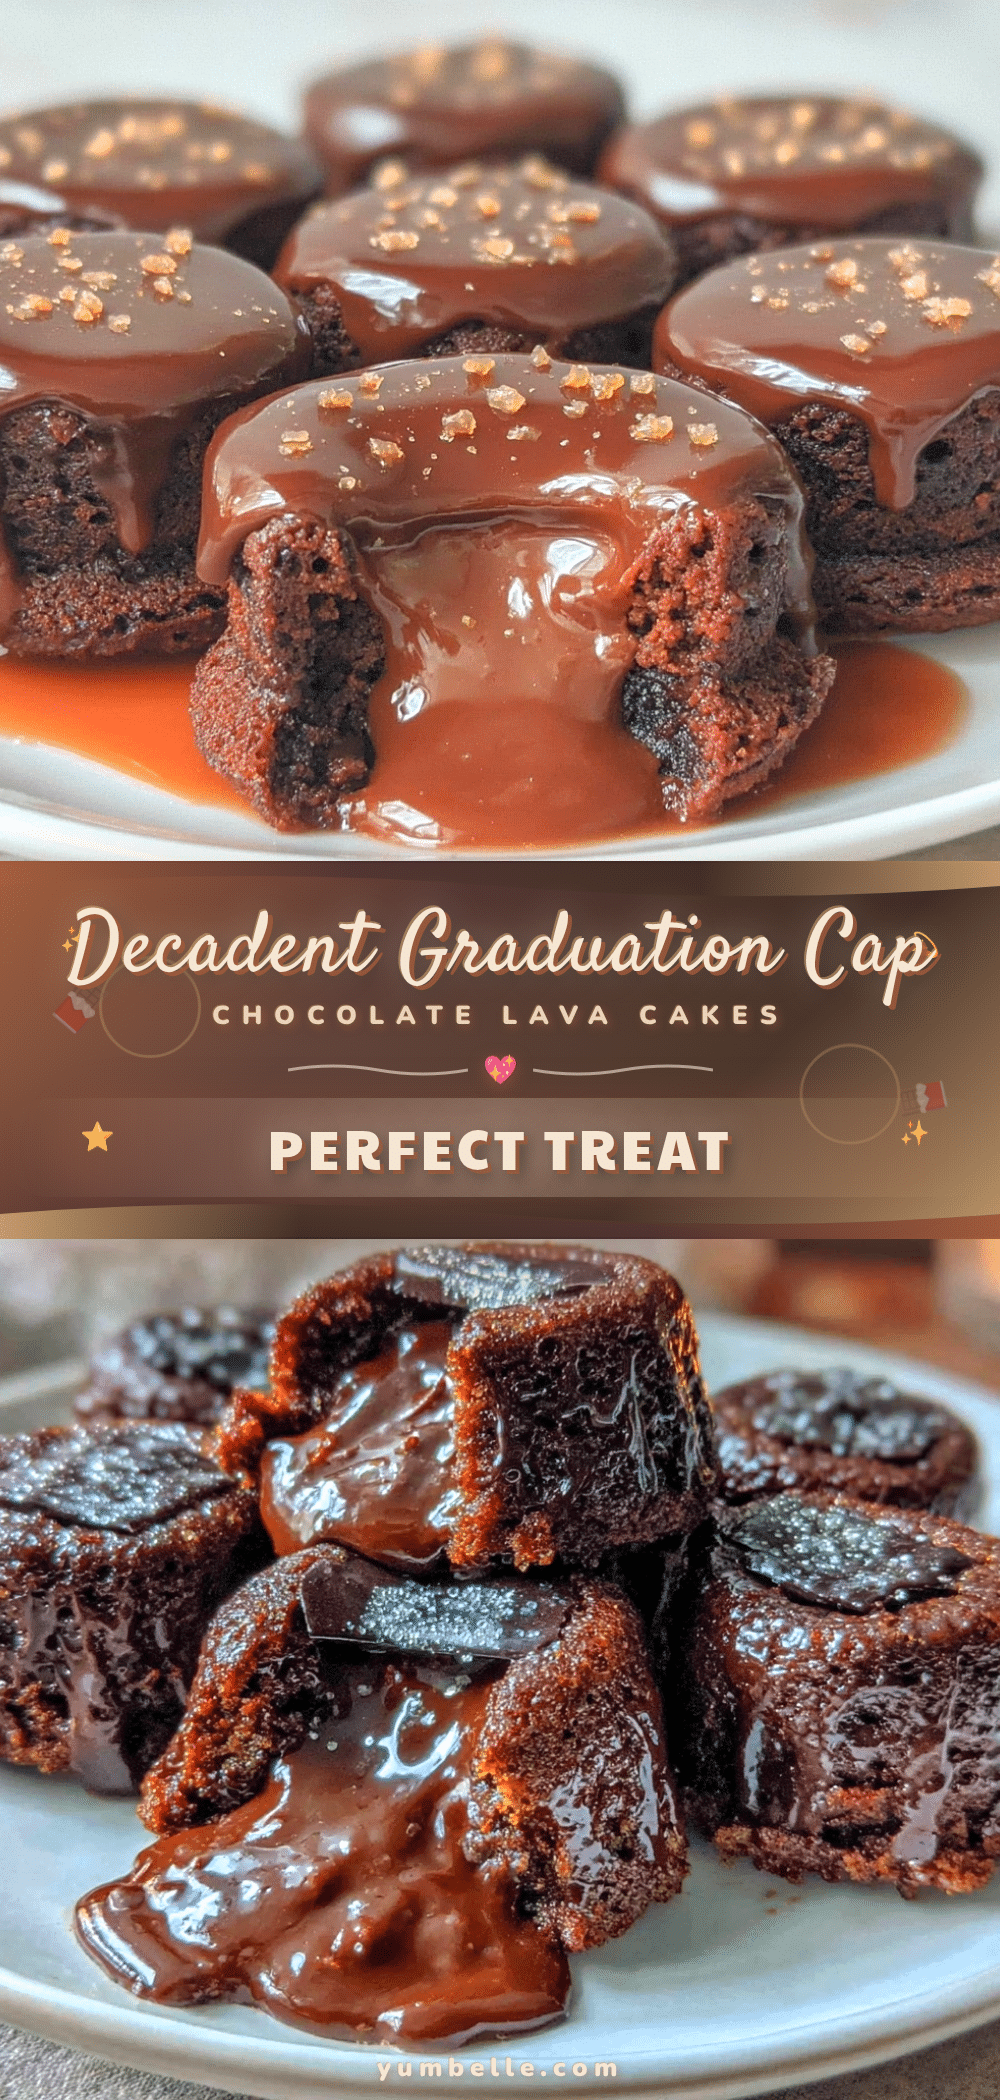
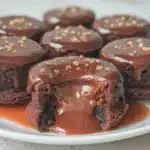
“You know that feeling when you’re scrambling to put together a graduation party dessert last minute, and somehow the kitchen turns into a mini chocolate factory?” That’s exactly what happened to me last May. I was hosting a small gathering for my cousin’s graduation, and honestly, I hadn’t planned to make anything fancy. But then, while rummaging through my baking supplies, I stumbled on a forgotten packet of high-quality cocoa powder and a block of bittersweet chocolate. Suddenly, the idea of making Perfect Graduation Cap Chocolate Lava Cakes with Diploma Detail popped into my head. I was a bit nervous, I won’t lie—lava cakes can be tricky if you don’t get the timing right.
The kitchen got a little chaotic (I dropped some flour, and the timer went off mid-stir), but what came out was pure magic. The rich, gooey chocolate center was everything I hoped for, and the little graduation cap design on top? It made the cakes feel like a true celebration. I remember my cousin’s eyes lighting up when she saw her dessert, holding that tiny diploma icing detail. It was simple, sweet, and honestly, one of the most fun things I’ve baked in a while. Maybe you’ve been there, last-minute baking for a special occasion, wondering if you can pull it off. Well, let me tell you: this recipe stayed with me because it’s foolproof, impressive, and absolutely delicious—perfect for marking those milestone moments.
Why You’ll Love This Recipe
- Quick & Easy: These cakes come together in under 30 minutes, perfect for busy graduation days or surprise celebrations.
- Simple Ingredients: No fancy or hard-to-find items here—just pantry staples and a few basic baking essentials.
- Perfect for Celebrations: Whether you’re throwing a big party or a cozy family dinner, these lava cakes bring a festive touch.
- Crowd-Pleaser: Kids and adults alike rave about the rich, molten chocolate center that oozes out with every bite.
- Unbelievably Delicious: The contrast between the soft cake exterior and the warm, gooey inside is pure comfort food bliss.
What sets this recipe apart is the special diploma detail piped right onto the cakes. It’s a charming little nod to the graduate’s achievement that’s surprisingly easy to do—even if you don’t have fancy decorating skills. Plus, the chocolate batter is perfectly balanced with a touch of espresso powder to deepen the flavor without making it taste like coffee (honestly, it’s a secret ingredient I picked up from a pastry chef friend). This isn’t just another lava cake recipe—it’s your go-to for making memorable graduation desserts that look as good as they taste.
What Ingredients You Will Need
This recipe uses simple, wholesome ingredients to deliver bold chocolate flavor and that satisfying molten texture without fuss. Most are pantry staples, so you can whip this up anytime you have a craving or a celebration to mark.
- Bittersweet chocolate, 6 oz (170 g), chopped (I prefer Ghirardelli for a smooth, rich taste)
- Unsalted butter, ½ cup (115 g), plus extra for greasing the ramekins
- Granulated sugar, ¾ cup (150 g)
- Large eggs, 2, room temperature
- Large egg yolks, 2, room temperature (adds richness and helps with the molten center)
- All-purpose flour, ½ cup (65 g), sifted
- Espresso powder, 1 teaspoon (optional, but it really enhances the chocolate)
- Vanilla extract, 1 teaspoon
- Powdered sugar, for dusting
- White royal icing or white chocolate, for piping the diploma detail (you can make simple royal icing with egg whites and powdered sugar or melt white chocolate for an easier option)
- Black food gel or melted dark chocolate, for piping the graduation cap detail
If you need a gluten-free version, swapping the all-purpose flour with almond flour works well, just expect a slightly denser texture. For dairy-free, use coconut oil instead of butter and a plant-based chocolate chip brand like Enjoy Life.
Equipment Needed
- Ramekins (4 to 6-ounce size): These little dishes are perfect for lava cakes. If you don’t have ramekins, small oven-safe bowls or custard cups work too.
- Mixing bowls: At least two—one for melting chocolate and butter, and one for beating eggs and sugar.
- Whisk and spatula: For smooth batter mixing and folding in flour gently.
- Double boiler or microwave-safe bowl: For melting butter and chocolate without burning.
- Piping bags or small zip-lock bags: For decorating the graduation cap and diploma detail. If you don’t have piping bags, a toothpick or small brush can work for drawing details.
- Baking sheet: To place the ramekins on while baking—makes transferring easier and catches any drips.
I once tried baking these in a muffin tin lined with foil cups, and while it worked, the ramekins give a much prettier shape and help the cakes keep their molten center. Also, a reliable kitchen timer is a must—these cakes only need about 12 minutes in the oven, and overshooting by even a minute can mean losing that lava effect!
Preparation Method
- Preheat your oven to 425°F (220°C). Butter the ramekins generously and dust them lightly with cocoa powder to prevent sticking. This little step makes unmolding the cakes a breeze.
- Melt the chocolate and butter together using a double boiler or microwave in 30-second bursts, stirring between each. Once smooth, set aside to cool slightly—about 5 minutes.
- In a mixing bowl, whisk the eggs, egg yolks, and granulated sugar vigorously until pale and thick—about 3 minutes. You want it to look fluffy and slightly tripled in volume; this traps air for a tender crumb.
- Pour the melted chocolate mixture into the eggs gradually, folding gently with a spatula. Add vanilla extract and espresso powder now, folding until combined but don’t overmix.
- Sift the flour over the batter and fold in carefully. The batter should be thick but smooth, with no flour streaks.
- Divide the batter evenly among the prepared ramekins, filling about ¾ full. Place them on a baking sheet for stability.
- Bake for 12-14 minutes. The edges should be firm and set, but the center will still jiggle slightly when you gently shake the ramekin. This wobble is your molten core!
- Remove from oven and let them cool for 1-2 minutes. Run a knife around the edges before gently inverting each cake onto a serving plate.
- Decorate the top with the graduation cap and diploma detail using your piping bags. I find drawing the square cap first with black melted chocolate or gel and then adding the diploma with white royal icing works best. If you mess up, no worries—practice makes perfect, and each cake has its own charm.
- Dust with powdered sugar lightly for a finishing touch, and serve immediately for the best lava flow experience!
If you find your cake isn’t molten enough, reduce baking time by 30 seconds next round. If it’s too gooey or falls apart, add a minute and watch closely. The timing is everything here, and honestly, it’s worth a couple of test runs.
Cooking Tips & Techniques
When making these Perfect Graduation Cap Chocolate Lava Cakes, a few things can make or break the final result. First, temperature control is crucial—both in melting the chocolate and baking the cakes. Overheating chocolate can cause it to seize, so melt it gently. I usually stop microwaving at 70% power and stir in between.
Eggs at room temperature help create a smooth, aerated batter. Cold eggs might cause the batter to seize or not rise well. Also, folding in the flour with a light hand keeps the batter airy—don’t stir vigorously or you’ll knock out all that precious air.
Use a timer religiously. Lava cakes are notoriously sensitive to baking time, so keep an eye on the oven window and trust the jiggle test. I always bake mine on a middle rack for even heat distribution.
For decorating, don’t worry if your piping skills are still a work in progress. Practice the graduation cap and diploma shapes on parchment paper first. If you mess up, gently wipe off and start again. It’s a fun way to get into the celebratory spirit!
Variations & Adaptations
- Flavor twists: Add a teaspoon of orange zest or a splash of raspberry liqueur to the batter for a fruity note that pairs beautifully with chocolate.
- Dietary swaps: Use gluten-free flour blend instead of all-purpose for gluten-free guests; coconut oil can replace butter for dairy-free versions.
- Alternative toppings: Instead of royal icing, try drizzling salted caramel or dusting with chili powder for a spicy kick.
- Cooking method: These can be made in a toaster oven for small batches or even air-fried at 400°F (205°C) for about 10 minutes—just watch closely!
- Personal variation: I once swapped the black piping gel for edible gold dust mixed with a little clear alcohol to make a shimmering graduation cap. It was a hit at a summer graduation party!
Serving & Storage Suggestions
Serve these chocolate lava cakes warm, right after decorating, with a scoop of vanilla ice cream or a dollop of freshly whipped cream. A side of fresh berries or a drizzle of raspberry coulis adds a lovely tart contrast. For drinks, a rich espresso or a glass of dessert wine complements the chocolate beautifully.
If you have leftovers (rare, but it happens!), store the cakes in an airtight container in the fridge for up to 2 days. Reheat gently in a microwave for 20-30 seconds—don’t overdo it or the lava center will cook through.
Flavors actually deepen if you prepare the batter ahead and bake just before serving, which makes party prep easier. Just cover the ramekins tightly and refrigerate for up to 24 hours.
Nutritional Information & Benefits
Each lava cake (serving size: 1 cake) contains approximately:
| Calories | 350-400 kcal |
|---|---|
| Fat | 22 g (mostly from butter and chocolate) |
| Carbohydrates | 38 g |
| Protein | 6 g |
| Fiber | 3 g |
Chocolate provides antioxidants, and the eggs add protein and essential vitamins. Using real butter and high-quality chocolate means you’re getting rich flavor without unnecessary additives. For those mindful of allergens, this recipe contains dairy, eggs, and gluten (unless modified), so plan accordingly.
Personally, I see this dessert as a treat that brings joy and celebration, perfect for marking milestones without overindulgence. A small cake like this is just enough indulgence to make a moment special.
Conclusion
These Perfect Graduation Cap Chocolate Lava Cakes with Diploma Detail are more than just a dessert—they’re a little celebration on a plate, combining rich chocolate goodness with a personalized touch. Whether you’re baking for a graduation party or simply craving a chocolate treat, this recipe is approachable, impressive, and downright delicious.
I love making these because they bring smiles, little gasps of delight, and that warm, cozy feeling you want at any celebration. Feel free to adapt the decorations or flavors to your taste—I’d love to hear how you make this recipe your own!
Go ahead, try your hand at these cakes, and share your creations in the comments or on social media. Let’s keep celebrating life’s sweet moments together!
FAQs
How do I know when the lava cakes are perfectly baked?
Look for firm, set edges and a center that still jiggles slightly when you gently shake the ramekin. That wobble means the inside is molten and gooey.
Can I prepare the batter ahead of time?
Absolutely! You can make the batter up to 24 hours in advance, cover the ramekins tightly, and refrigerate. Bake just before serving for best results.
What if I don’t have a piping bag for the diploma detail?
No worries! You can use a small zip-lock bag with a tiny corner snipped or even a toothpick to draw the details carefully.
Can I freeze these lava cakes?
It’s best to bake them fresh for the molten center effect, but you can freeze the unbaked batter in ramekins for up to 1 month. Thaw overnight in the fridge before baking.
What is the espresso powder for?
It’s optional but adds depth and intensity to the chocolate flavor without tasting like coffee. It’s a little trick I picked up from a pastry chef friend that really makes a difference.
For a dessert that also pairs beautifully with the richness of these lava cakes, you might enjoy my crispy garlic chicken recipe, perfect for a full celebratory meal. And if you’re into chocolate treats, check out this decadent chocolate mousse for another luscious option.
Pin This Recipe!
Perfect Graduation Cap Chocolate Lava Cakes
Rich, gooey chocolate lava cakes with a festive graduation cap and diploma detail, perfect for celebrations and easy to make with simple pantry ingredients.
- Prep Time: 10 minutes
- Cook Time: 12-14 minutes
- Total Time: 22-24 minutes
- Yield: 4 servings 1x
- Category: Dessert
- Cuisine: American
Ingredients
- 6 oz (170 g) bittersweet chocolate, chopped
- ½ cup (115 g) unsalted butter, plus extra for greasing ramekins
- ¾ cup (150 g) granulated sugar
- 2 large eggs, room temperature
- 2 large egg yolks, room temperature
- ½ cup (65 g) all-purpose flour, sifted
- 1 teaspoon espresso powder (optional)
- 1 teaspoon vanilla extract
- Powdered sugar, for dusting
- White royal icing or white chocolate, for piping diploma detail
- Black food gel or melted dark chocolate, for piping graduation cap detail
Instructions
- Preheat oven to 425°F (220°C). Butter ramekins generously and dust lightly with cocoa powder.
- Melt chocolate and butter together using a double boiler or microwave in 30-second bursts, stirring between each. Cool slightly for about 5 minutes.
- Whisk eggs, egg yolks, and granulated sugar vigorously until pale and thick, about 3 minutes.
- Gradually fold melted chocolate mixture into eggs. Add vanilla extract and espresso powder, folding until combined without overmixing.
- Sift flour over batter and fold in carefully until smooth with no flour streaks.
- Divide batter evenly among ramekins, filling about ¾ full. Place ramekins on a baking sheet.
- Bake for 12-14 minutes until edges are firm but center jiggles slightly.
- Remove from oven and cool 1-2 minutes. Run a knife around edges and invert cakes onto serving plates.
- Decorate tops with graduation cap and diploma details using piping bags or alternatives.
- Dust lightly with powdered sugar and serve immediately.
Notes
Use a timer carefully to avoid overbaking; the center should jiggle slightly for the perfect molten texture. Eggs should be at room temperature for best results. For gluten-free, substitute all-purpose flour with almond flour; for dairy-free, use coconut oil and plant-based chocolate. Practice piping decorations on parchment paper first.
Nutrition
- Serving Size: 1 lava cake
- Calories: 375
- Sugar: 28
- Sodium: 50
- Fat: 22
- Saturated Fat: 13
- Carbohydrates: 38
- Fiber: 3
- Protein: 6
Keywords: chocolate lava cake, graduation dessert, molten chocolate cake, easy chocolate dessert, celebration cake, homemade lava cake