Love this? Save it for later!
Share the inspiration with your friends
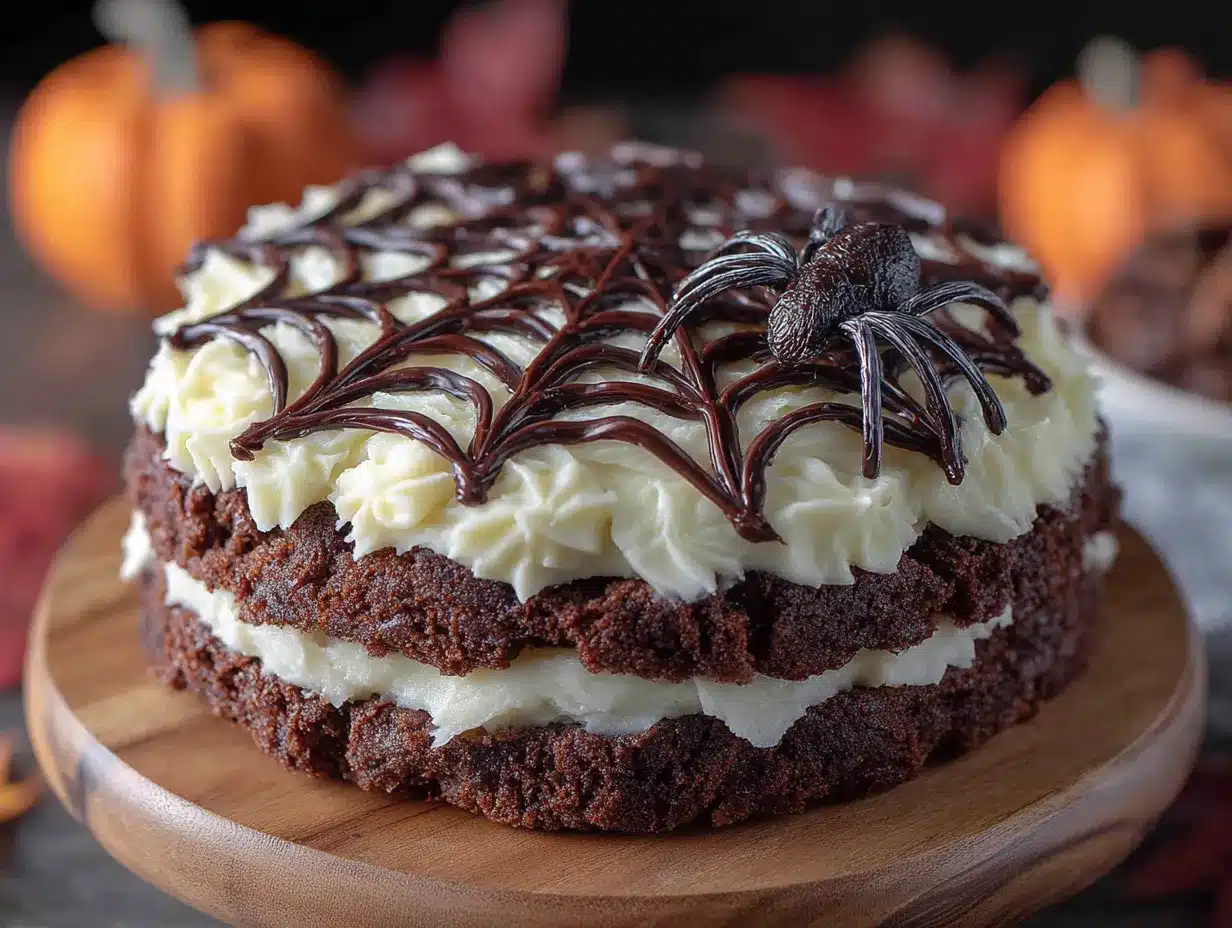
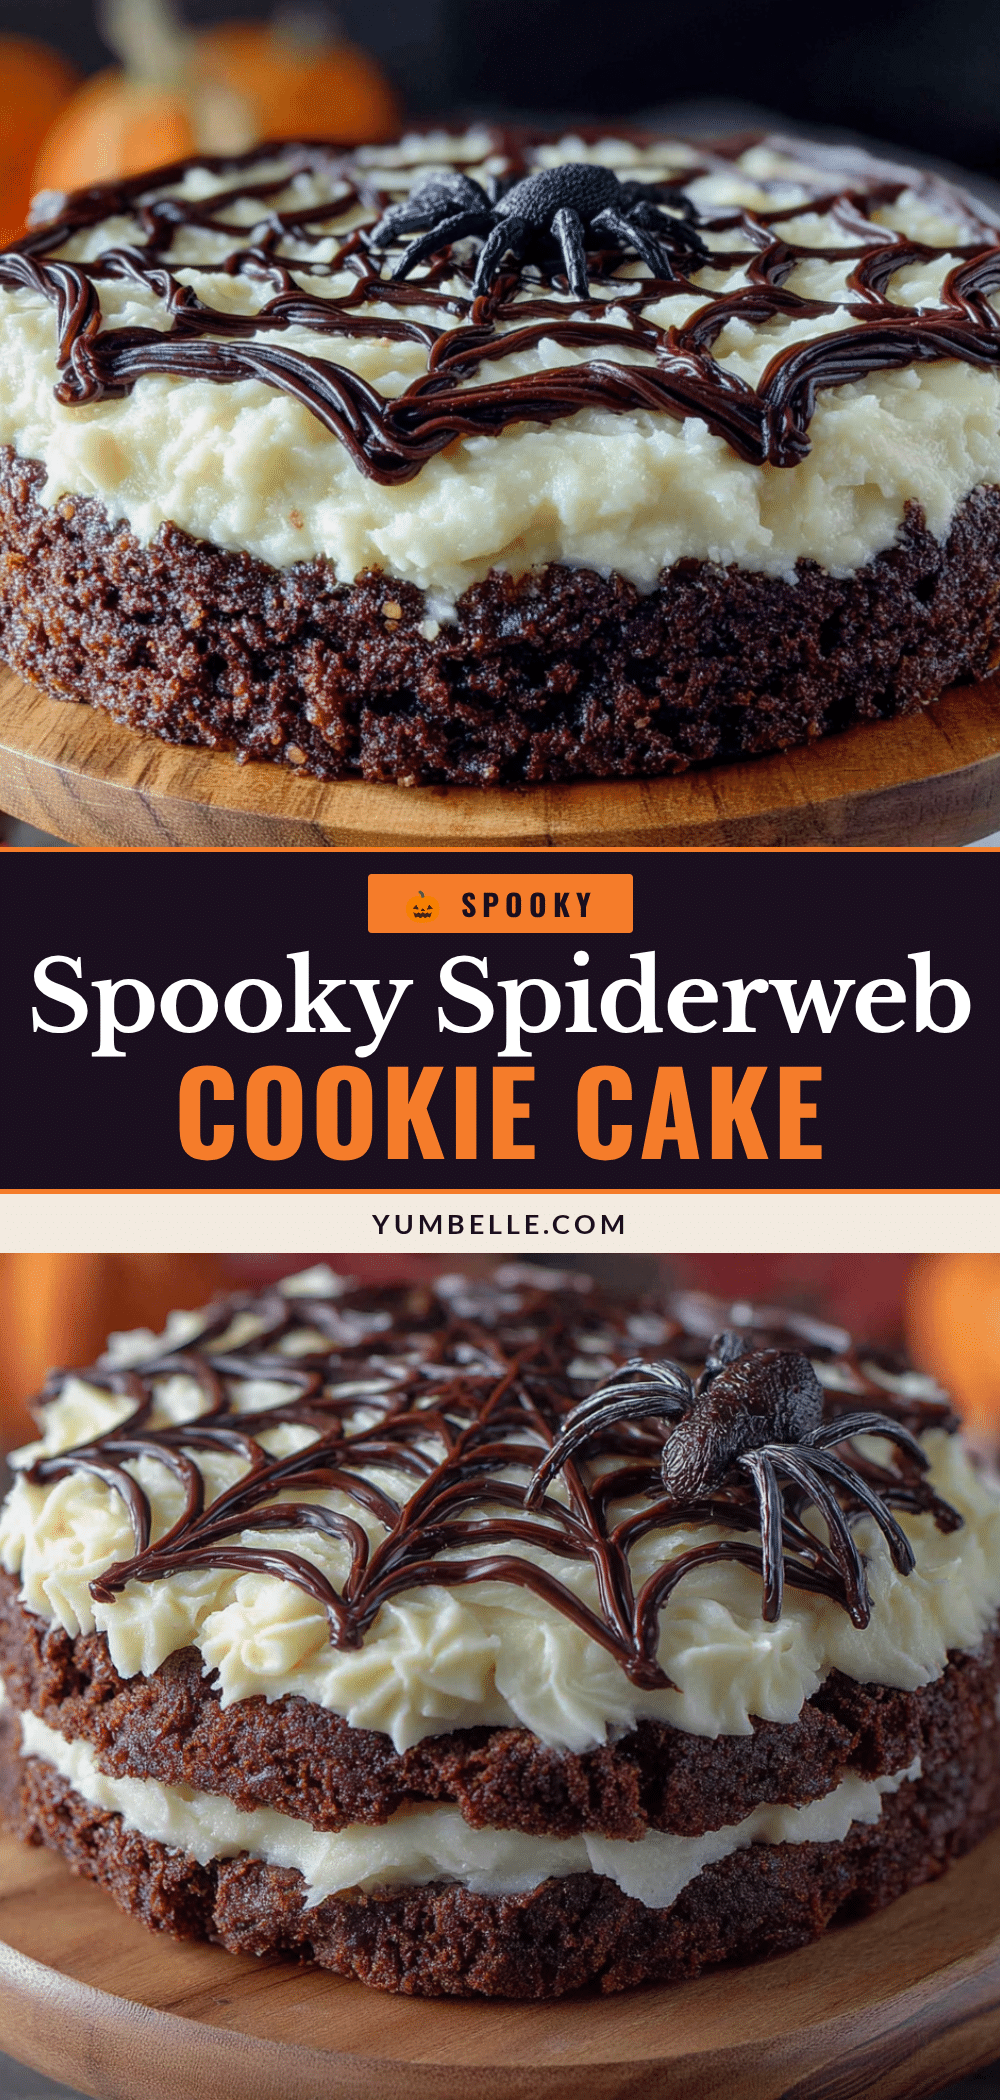
A friend asked me last year why I couldn’t just pipe a spiderweb design onto a regular chocolate cake. I started to explain why that wouldn’t work — then stopped. Honestly, I had no good reason. I’d just always made spiderweb cookies, not cakes. But she had a point. Why not combine the dramatic look of a spiderweb with the satisfying, fudgy texture of a cookie cake? That conversation stuck with me. It bothered me, actually. I spent the next week tinkering in my kitchen, trying to figure out how to make a cookie cake that was sturdy enough to hold a web pattern but soft enough to feel like a real cookie. I got it wrong three times before I got it right. The first one cracked. The second one was too dry. The third one? Let me tell you, it was pure magic. I brought it to a Halloween party, and people literally stopped mid-sentence when they saw it. You know that moment when a recipe just clicks? This was that moment. I’ve been making this Spooky Spiderweb Halloween Cookie Cake ever since, and it never fails to steal the show. It’s the kind of dessert that makes people smile before they even take a bite.
Why You’ll Love This Recipe
This isn’t just another Halloween dessert. This Spooky Spiderweb Halloween Cookie Cake is the one you’ll reach for year after year. I’ve tested it more times than I care to admit, and I can tell you with confidence — it works every single time.
- Incredibly Easy : No complicated techniques or fancy equipment. If you can stir, you can make this. It comes together in about 30 minutes of active time.
- Simple Ingredients : You probably have most of these in your pantry right now. Butter, sugar, flour, eggs — the usual suspects. No weird specialty items.
- Perfect for Halloween Parties : This cake is a showstopper. It looks like you spent hours on it, but between us, it’s deceptively simple. The spiderweb design is actually easier than frosting a regular cake.
- Crowd-Pleaser : Kids love the spooky look. Adults love the nostalgic cookie-cake texture. It’s a win-win. I’ve never brought one home with leftovers.
- Unbelievably Delicious : The edges are slightly crisp, the center is soft and chewy, and that chocolate flavor is deep and rich. It’s comfort food with a Halloween twist.
What makes this recipe different from all the other spiderweb desserts out there? It’s the texture. Most spiderweb cakes are regular layer cakes with frosting piped on top. They look great, but they’re fussy. This cookie cake is one solid layer — no stacking, no crumbling, no stress. The web pattern is made with a simple white icing that contrasts beautifully against the dark chocolate base. It’s dramatic without being difficult. That’s my favorite kind of recipe.
This is the kind of dessert that makes you close your eyes after the first bite. It’s Halloween fun without sacrificing flavor. Perfect for impressing guests without breaking a sweat.
What Ingredients You Will Need
This recipe uses simple, wholesome ingredients to deliver that perfect cookie-cake texture and rich chocolate flavor. Most of these are pantry staples, which makes this an easy last-minute Halloween treat.
For the Cookie Cake Base
- 1 cup (2 sticks) unsalted butter, softened (I prefer Land O’Lakes for consistent results)
- 1 cup granulated sugar
- 3/4 cup packed light brown sugar (adds moisture and that chewy texture)
- 2 large eggs, room temperature
- 2 teaspoons vanilla extract (use pure vanilla if you have it — it makes a difference)
- 2 1/4 cups all-purpose flour
- 1/2 cup unsweetened cocoa powder (I recommend Ghirardelli or Hershey’s Special Dark for a richer flavor)
- 1 teaspoon baking soda
- 1/2 teaspoon salt
- 1 cup semi-sweet chocolate chips (optional but highly recommended for extra chocolate pockets)
For the Spiderweb Icing
- 1 cup powdered sugar
- 2-3 tablespoons milk (add one tablespoon at a time until you reach drizzling consistency)
- 1/2 teaspoon vanilla extract
Ingredient Tips & Substitutions
For a deeper chocolate flavor, try using dark cocoa powder instead of regular. It gives the cake a almost black color that makes the white spiderweb really pop. If you’re dairy-free, you can substitute the butter with a high-quality vegan butter stick (not the spreadable kind in a tub). I’ve used Miyoko’s with good results. For the eggs, a flax egg works in a pinch, but the texture will be slightly less tender.
Don’t skip the brown sugar. It’s not just for sweetness — it adds moisture and that slight chewiness that makes a cookie cake different from a regular cake. Trust me on this one.
If you want to get extra festive, you can add a few drops of orange food coloring to the icing for a more Halloween look. I’ve done it both ways, and the white web on dark chocolate is more dramatic, but orange is fun too.
Equipment Needed
You don’t need much for this recipe, and that’s part of the beauty.
- 10-inch round cake pan or a 12-inch cast iron skillet (I prefer the skillet for even baking and those gorgeous edges)
- Parchment paper (essential for easy removal — don’t skip this)
- Large mixing bowl
- Electric hand mixer or stand mixer (you can do this by hand, but your arm will get tired)
- Rubber spatula
- Piping bag or zip-top bag for the icing (a zip-top bag with a tiny corner snipped off works perfectly)
- Cooling rack
- Measuring cups and spoons
If you don’t have a 10-inch cake pan, you can use a 9-inch pan — just increase the baking time by 5-7 minutes and keep an eye on it. A springform pan also works well if you have one. I actually prefer it because the sides come off cleanly.
Preparation Method
Let’s make this Spooky Spiderweb Halloween Cookie Cake. I’ll walk you through every step.
- Preheat your oven to 350°F (175°C). Line your 10-inch cake pan with parchment paper and lightly grease the sides. This is not the time to be lazy — parchment paper is your best friend for clean removal.
- Cream the butter and sugars together. In a large bowl, beat the softened butter, granulated sugar, and brown sugar together until light and fluffy. This takes about 3-4 minutes with an electric mixer. Scrape down the sides halfway through. You’re looking for a pale, airy mixture. Don’t rush this step — it’s what gives the cookie cake its tender texture.
- Add the eggs and vanilla. Beat in the eggs one at a time, mixing well after each addition. Then add the vanilla extract. The mixture might look slightly curdled at this point — that’s normal. Don’t panic.
- Combine the dry ingredients. In a separate bowl, whisk together the flour, cocoa powder, baking soda, and salt. This ensures everything is evenly distributed. If you skip this step, you might end up with a pocket of baking soda in your cake. I learned this the hard way.
- Gradually add the dry ingredients to the wet mixture. Add the flour mixture in three additions, mixing on low speed until just combined. Overmixing will make your cookie cake tough. Stop as soon as you don’t see any more streaks of flour. Fold in the chocolate chips with a spatula if you’re using them.
- Press the dough into the pan. Transfer the dough to your prepared pan. It will be thick — more like cookie dough than cake batter. Use your hands or a spatula to press it evenly into the pan. Try to make it as level as possible so it bakes evenly.
- Bake for 20-25 minutes. The edges should look set and slightly cracked, but the center will still look soft. A toothpick inserted in the center should come out with a few moist crumbs — not wet batter. This is crucial. Overbaking is the number one mistake people make with cookie cakes. You want that soft, gooey center.
- Cool completely. Let the cookie cake cool in the pan for 10 minutes, then transfer it to a wire rack to cool completely. Do not attempt to add the spiderweb design while the cake is still warm. The icing will melt and slide right off. I learned this the messy way.
- Make the spiderweb icing. In a small bowl, whisk together the powdered sugar, 2 tablespoons of milk, and vanilla extract. Add more milk one teaspoon at a time until you get a consistency that’s thick but still flows slowly off a spoon. It should be thick enough to hold its shape slightly but thin enough to pipe easily.
- Create the spiderweb design. Transfer the icing to a piping bag or a zip-top bag with a tiny corner snipped off. Pipe a small circle in the center of the cookie cake. Then pipe concentric circles radiating outward, spacing them about an inch apart. Working quickly before the icing sets, use a toothpick or a knife to drag lines from the center outward through all the circles. This creates the classic spiderweb pattern. Wipe the toothpick clean between each line for the best effect.
- Let the icing set. Allow the spiderweb design to set for at least 30 minutes before slicing. This gives the icing time to firm up slightly so your web stays intact when you cut into it.
Cooking Tips & Techniques
I’ve made this Spooky Spiderweb Halloween Cookie Cake at least a dozen times, and I’ve made every mistake in the book so you don’t have to.
Don’t overbake. I cannot stress this enough. Cookie cakes continue to cook from residual heat after they come out of the oven. Pull it out when the center still looks slightly underdone. It will set up perfectly as it cools. My first attempt was a dry, crumbly mess because I waited until the center looked fully set. Learn from my failure.
Use room temperature ingredients. Cold butter doesn’t cream properly, and cold eggs can cause the batter to separate. Take your butter and eggs out of the fridge about 30 minutes before you start. Set a timer if you have to — I’ve forgotten and ended up with lumpy batter more than once.
Get the icing consistency right. The spiderweb design only works if your icing is the right thickness. Too thin, and it will run into a puddle. Too thick, and it won’t pipe smoothly. Aim for the consistency of thick maple syrup. If you make a mistake, just scrape it off and start again. The cookie cake is forgiving.
Work quickly with the toothpick. The key to a clean spiderweb pattern is dragging the toothpick through the icing while it’s still wet. If you wait too long, the lines will be jagged instead of smooth. I like to pipe all the circles first, then do all the toothpick drags in one go.
Let it cool completely. I know you’ll be tempted to rush this part, but patience pays off. A warm cookie cake will turn your beautiful spiderweb into a sad, melted mess. Give it the full hour on the cooling rack.
Variations & Adaptations
This recipe is surprisingly flexible. Here are some ways I’ve adapted it over the years.
Peanut Butter Spiderweb Cake: Swap out 1/2 cup of the butter for creamy peanut butter. The chocolate-peanut butter combo is incredible, and it gives the cake a slightly different texture. I made this version for a friend who claims to hate chocolate cake, and she ate three slices.
Gluten-Free Version: Substitute the all-purpose flour with a 1:1 gluten-free baking flour blend. I’ve used King Arthur’s Measure for Measure with great results. The texture is slightly more crumbly, but the flavor is still spot-on.
Mint Chocolate Version: Add 1/2 teaspoon of peppermint extract to the dough along with the vanilla. Top with crushed candy canes or Andes mints before serving. This is my go-to for Christmas, but it works for Halloween too — just call it a “spooky mint web.”
Extra Spooky Version: Add a few drops of black food coloring to the dough for an even darker, more dramatic cake. You can also add edible glitter or silver luster dust to the icing for a magical effect. My niece calls this the “witch’s web cake.”
Individual Cookie Cakes: Press the dough into a muffin tin instead of a large pan. Bake for 12-15 minutes and pipe a small spiderweb on each one. These are perfect for Halloween parties or school events. Just make sure to grease the muffin tin well.
Serving & Storage Suggestions
This Spooky Spiderweb Halloween Cookie Cake is best served at room temperature. The texture is perfect — slightly crisp on the edges, soft and chewy in the center. I like to cut it into wedges like a pizza and serve it on a dark plate for maximum visual impact.
For an extra treat, serve it with a scoop of vanilla ice cream or a dollop of whipped cream. The cold creaminess contrasts beautifully with the rich chocolate cake. A drizzle of caramel sauce on top is also amazing, though it does cover up the spiderweb design.
Storage: Leftovers (if you have any) can be stored in an airtight container at room temperature for up to 3 days. The cookie cake actually gets slightly softer and more fudgy on the second day. I kind of prefer it that way.
Freezing: You can freeze the unfrosted cookie cake for up to 3 months. Wrap it tightly in plastic wrap, then aluminum foil. When you’re ready to serve, thaw it at room temperature, then add the spiderweb design. Do not freeze the cake with the icing on — it will get soggy when it thaws.
Reheating: If you want that just-baked warmth, pop individual slices in the microwave for 10-15 seconds. It won’t be as crisp as fresh, but it will be gooey and delicious.
Nutritional Information & Benefits
Let’s be honest — this is a treat. It’s not health food, and it shouldn’t be. But here’s the breakdown if you’re curious.
Per serving (1/12 of the cake): Approximately 380 calories, 18g fat, 52g carbohydrates, 5g protein, 2g fiber, 32g sugar. These values will vary based on your specific ingredients and any substitutions.
The cocoa powder in this recipe is actually good for you — it’s rich in antioxidants and flavonoids that support heart health. Dark chocolate has anti-inflammatory properties too. So there’s that. The eggs provide protein and healthy fats. The butter? Well, butter makes everything better. Everything in moderation, right?
This recipe contains gluten, dairy, and eggs. For allergen-friendly versions, check the variations section above. If you’re watching your sugar intake, you can reduce the granulated sugar by 1/4 cup without significantly affecting the texture. I’ve done it, and it still tastes plenty sweet.
Frequently Asked Questions
Can I make this Spooky Spiderweb Halloween Cookie Cake ahead of time?
Absolutely. Bake the cookie cake up to 2 days in advance and store it at room temperature. Add the spiderweb design on the day you plan to serve it for the best visual effect. The icing can bleed into the cake if it sits for too long.
Why did my cookie cake turn out dry?
You likely overbaked it. Remember, pull it out when the center still looks slightly underdone. The residual heat will finish the cooking process. Also, make sure you’re measuring your flour correctly — scoop it into the measuring cup and level it off, don’t pack it down.
Can I use a different pan size?
Yes, but adjust the baking time. A 9-inch pan will need 5-7 extra minutes. A 12-inch pan will need 5-7 fewer minutes. Keep an eye on it and use the toothpick test to check for doneness.
My spiderweb design didn’t turn out well. What went wrong?
The most common issue is icing that’s too thin. Add more powdered sugar a tablespoon at a time until it thickens up. Also, make sure you’re dragging the toothpick through all the circles while the icing is still wet. If the icing starts to set, your lines will be jagged.
Can I double this recipe?
Yes, but bake it in two separate pans. A double batch in one pan will be too thick and won’t bake evenly. Two 10-inch cakes will serve a crowd beautifully.
Conclusion
This Spooky Spiderweb Halloween Cookie Cake is everything I want in a Halloween dessert. It’s dramatic enough to impress, simple enough to make on a busy weeknight, and delicious enough to disappear within minutes. The first time I made it, I stood back and just looked at it for a full minute before cutting into it. It felt like art. But then I cut into it, and it tasted even better than it looked.
I love that this recipe doesn’t require any fancy skills or specialty equipment. Anyone can make it. Anyone can nail that spiderweb design on their first try. And anyone can walk into a Halloween party looking like a baking genius. That’s the kind of recipe I want to share.
I’d love to hear how yours turns out. Did you add your own twist? Did your kids help pipe the web? Did it disappear as fast as mine always does? Drop a comment below and let me know. And if you share it on social media, tag me — I want to see your spooky creations. Happy Halloween, and happy baking!
Pin This Recipe!
The Best Spooky Spiderweb Halloween Cookie Cake
This Spooky Spiderweb Halloween Cookie Cake combines the dramatic look of a spiderweb with the satisfying, fudgy texture of a cookie cake. It’s an incredibly easy, showstopping dessert that’s perfect for Halloween parties and guaranteed to impress guests.
- Prep Time: 30 minutes
- Cook Time: 25 minutes
- Total Time: 55 minutes
- Yield: 12 servings 1x
- Category: Dessert
- Cuisine: American
Ingredients
- 1 cup (2 sticks) unsalted butter, softened
- 1 cup granulated sugar
- 3/4 cup packed light brown sugar
- 2 large eggs, room temperature
- 2 teaspoons vanilla extract
- 2 1/4 cups all-purpose flour
- 1/2 cup unsweetened cocoa powder
- 1 teaspoon baking soda
- 1/2 teaspoon salt
- 1 cup semi-sweet chocolate chips (optional)
- 1 cup powdered sugar
- 2–3 tablespoons milk
- 1/2 teaspoon vanilla extract
Instructions
- Preheat your oven to 350°F (175°C). Line your 10-inch cake pan with parchment paper and lightly grease the sides.
- In a large bowl, beat the softened butter, granulated sugar, and brown sugar together until light and fluffy, about 3-4 minutes with an electric mixer. Scrape down the sides halfway through.
- Beat in the eggs one at a time, mixing well after each addition. Then add the vanilla extract.
- In a separate bowl, whisk together the flour, cocoa powder, baking soda, and salt.
- Gradually add the dry ingredients to the wet mixture in three additions, mixing on low speed until just combined. Fold in the chocolate chips with a spatula if using.
- Transfer the dough to the prepared pan. Use your hands or a spatula to press it evenly into the pan, making it as level as possible.
- Bake for 20-25 minutes. The edges should look set and slightly cracked, but the center will still look soft. A toothpick inserted in the center should come out with a few moist crumbs.
- Let the cookie cake cool in the pan for 10 minutes, then transfer it to a wire rack to cool completely.
- In a small bowl, whisk together the powdered sugar, 2 tablespoons of milk, and vanilla extract. Add more milk one teaspoon at a time until you get a consistency that’s thick but still flows slowly off a spoon.
- Transfer the icing to a piping bag or a zip-top bag with a tiny corner snipped off. Pipe a small circle in the center of the cookie cake. Then pipe concentric circles radiating outward, spacing them about an inch apart.
- Working quickly before the icing sets, use a toothpick or a knife to drag lines from the center outward through all the circles to create the classic spiderweb pattern. Wipe the toothpick clean between each line.
- Let the spiderweb design set for at least 30 minutes before slicing.
Notes
Don’t overbake. Pull the cake out when the center still looks slightly underdone. Use room temperature ingredients for best results. The spiderweb design only works if the icing is the right thickness – aim for the consistency of thick maple syrup. Work quickly with the toothpick while the icing is still wet. Let the cake cool completely before adding the spiderweb design.
Nutrition
- Serving Size: 1 slice (1/12 of cak
- Calories: 380
- Sugar: 32
- Sodium: 220
- Fat: 18
- Saturated Fat: 11
- Carbohydrates: 52
- Fiber: 2
- Protein: 5
Keywords: Halloween, spiderweb, cookie cake, chocolate, spooky, easy dessert, party dessert


