Love this? Save it for later!
Share the inspiration with your friends
I wasn’t expecting to get a dessert recipe from a man repairing my gutters, but there I was, standing in my driveway holding a clipboard, watching him gesture so enthusiastically with a caulking gun that he nearly poked himself in the eye. “You gotta layer it slow,” he said, like he was sharing a secret. “And don’t you dare use frozen berries if you want it to look like the Fourth of July.” His name was Frank, and he’d been making this red white and blue layered berry trifle for forty years, ever since his wife asked him to bring something to a block party and he panicked. I scribbled his instructions on the back of an invoice, and honestly, I was skeptical. A guy who fixes roofs for a living probably wasn’t the first person I’d trust with a patriotic dessert. But Frank was persistent, and let me tell you, he was right about everything. That first bite—the way the tart berries cut through the sweet cream, the soft cake soaking up all that juice—it made me close my eyes. Maybe you’ve been there, where a recipe comes from the most unexpected place and ends up being the one you make every single year. This is that recipe for me now. It’s become my go-to for Memorial Day barbecues, July Fourth cookouts, and any summer gathering where I want to show up with something that looks like I spent hours on it (when really, Frank’s method makes it almost too easy).
Why You’ll Love This Recipe
This red white and blue layered berry trifle is the kind of dessert that makes people think you’re a pastry chef, but it’s secretly one of the simplest things you can make. I’ve tested this recipe at least a dozen times—bringing it to potlucks, family dinners, and even a neighborhood watch meeting where it disappeared in fifteen minutes. Here’s why it works so well.
- Quick & Easy: You can put this together in about 30 minutes of active time. The hardest part is washing the berries, and that’s not even hard.
- Simple Ingredients: No fancy grocery store trips needed. Pound cake, pudding mix, berries, and whipped topping—that’s it. You probably have most of this in your kitchen right now.
- Perfect for Summer Celebrations: This trifle was basically designed for Memorial Day, July Fourth, and Labor Day. The red, white, and blue layers are a showstopper on any dessert table.
- Crowd-Pleaser: I’ve watched kids go back for thirds, and adults who claim they’re “not dessert people” ask for the recipe. It’s universally loved.
- Unbelievably Delicious: The texture combo is next-level. You get the soft, soaked cake, the creamy pudding layer, and the burst of fresh berries all in one spoonful.
What makes this version different from all the other trifle recipes out there? It’s the layering technique Frank taught me. Most people just dump everything in and hope for the best, but there’s a specific way to arrange the berries and cake so every single bite has the perfect ratio of cream to fruit to cake. I’ve refined it over the years, and this is the version that works every time. It’s comfort food reimagined—lighter, fresher, and perfect for hot summer days when you want something cold and satisfying without turning on the oven for too long.
What Ingredients You Will Need
This recipe uses simple, wholesome ingredients to deliver bold flavor and satisfying texture without the fuss. Most of these are pantry staples or easy to find at any grocery store, especially during berry season.
- For the Cake Layer:
- 1 store-bought pound cake (about 10.75 ounces), cut into 1-inch cubes (I prefer Sara Lee or the bakery section at your local store for the best texture)
- 1/4 cup strawberry jam or preserves (adds a fruity sweetness that soaks into the cake)
- 2 tablespoons water (to thin the jam)
- For the Cream Layer:
- 1 package (3.4 ounces) instant vanilla pudding mix (Jell-O brand works great, but store brands are fine too)
- 2 cups cold whole milk (for the richest, creamiest texture)
- 1 1/2 cups heavy whipping cream (you can substitute with 2 cups of thawed Cool Whip if you’re short on time)
- 1/4 cup powdered sugar
- 1 teaspoon vanilla extract
- For the Berry Layer:
- 2 cups fresh strawberries, hulled and sliced (look for bright red, firm berries without soft spots)
- 1 1/2 cups fresh blueberries (small, firm berries work best)
- 1 1/2 cups fresh raspberries (handle these gently—they’re delicate)
- 2 tablespoons granulated sugar (optional, only if your berries are tart)
- 1 tablespoon fresh lemon juice (brightens the berry flavor)
- For Garnish:
- Fresh mint leaves (optional, but adds a nice pop of green for presentation)
- Extra berries for the top
When selecting your berries, look for ones that are firm and not mushy. I’ve found that organic berries tend to have better flavor, but conventional works just fine. If strawberries aren’t in season, you can use frozen berries, but thaw and drain them well first, or you’ll end up with a soggy trifle. For a dairy-free option, use coconut cream and your favorite plant-based milk for the pudding. Just know the texture will be slightly different—still delicious, just not as thick.
Equipment Needed
You don’t need a lot of fancy equipment for this red white and blue layered berry trifle, which is part of why I love it. Here’s what you’ll need.
- Trifle Bowl or Large Glass Dish: A clear glass bowl is best so you can see those beautiful layers. I use a 4-quart trifle dish I found at a thrift store for five dollars. If you don’t have one, a large glass salad bowl works perfectly.
- Electric Mixer or Whisk: A hand mixer makes whipping cream much faster, but a good old-fashioned whisk and some elbow grease will get the job done too.
- Medium Mixing Bowls: You’ll need at least two—one for the cream and one for the berries.
- Spatula: A rubber spatula is essential for scraping every last bit of cream into the bowl. I’ve learned this the hard way.
- Sharp Knife and Cutting Board: For slicing strawberries and cubing the pound cake.
- Measuring Cups and Spoons: Accuracy matters here, especially for the pudding mix.
- Small Saucepan: For warming the jam and water together (optional, you can also do this in the microwave).
If you don’t have a trifle dish, don’t run out and buy one. I’ve made this in a large glass mixing bowl, a rectangular baking dish, and even individual mason jars for a picnic. The presentation won’t be as dramatic, but the taste is exactly the same.
Preparation Method
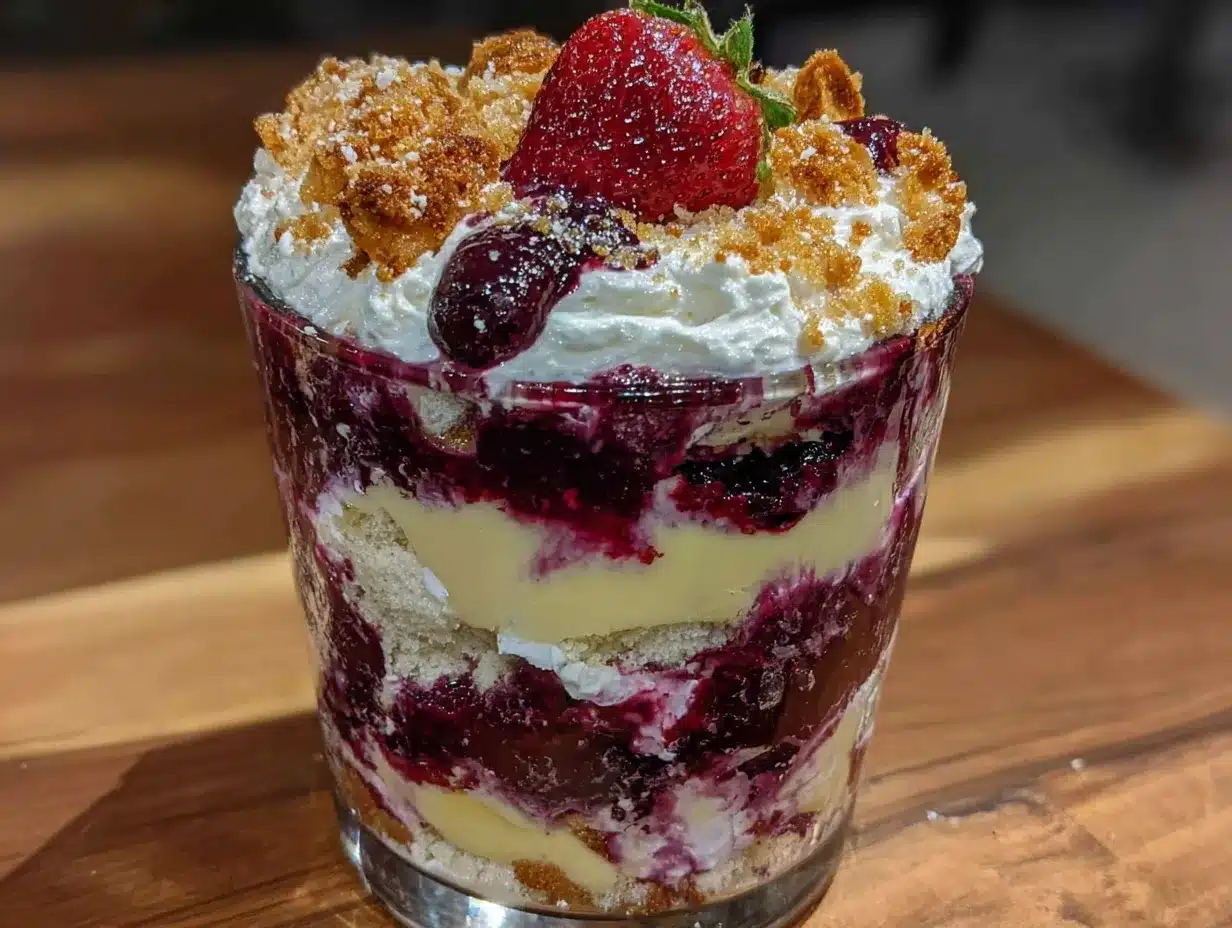
Let me walk you through this step by step. I’ve made this red white and blue layered berry trifle so many times that I could do it in my sleep, but I’ll share all the little tricks I’ve picked up along the way.
- Start with the berries. Wash all your berries gently in cold water and pat them dry with paper towels. You don’t want extra water diluting the layers. Hull and slice the strawberries into even pieces, about 1/4-inch thick. Leave the blueberries and raspberries whole. If your berries taste tart, toss them with the sugar and lemon juice in a medium bowl and let them sit for 10 minutes. This draws out their natural juices and makes them even more flavorful.
- Make the jam syrup. In a small saucepan or microwave-safe bowl, combine the strawberry jam and water. Heat gently until the jam melts and becomes syrupy, about 30 seconds in the microwave or 2 minutes on the stove. Stir until smooth. This will be brushed onto the cake cubes to add moisture and flavor. Don’t skip this step—it’s what keeps the cake from being dry and boring.
- Prepare the vanilla cream. In a medium bowl, whisk together the instant vanilla pudding mix and cold milk. Whisk vigorously for about 2 minutes until it thickens. It will be fairly thick already. Set it aside to set up while you make the whipped cream. In a separate large bowl, pour the heavy whipping cream, powdered sugar, and vanilla extract. Using an electric mixer on medium-high speed, beat the cream until stiff peaks form. This takes about 3 to 4 minutes. You’ll know it’s ready when you lift the beaters and the cream holds its shape without drooping. Be careful not to over-beat, or you’ll end up with butter. I’ve done that before, and let me tell you, it’s a sad day.
- Fold it all together. Gently fold the thickened pudding into the whipped cream using a rubber spatula. Use a light hand here—you want to keep as much air in the mixture as possible. Fold until just combined, with no white streaks remaining. This is your creamy middle layer, and it should be light, fluffy, and dreamy.
- Assemble the layers. Now for the fun part. Start with a layer of cake cubes at the bottom of your trifle dish. Use about one-third of the cubes. Brush them generously with the jam syrup using a pastry brush or the back of a spoon. Next, spread one-third of the vanilla cream mixture over the cake, making sure it reaches the edges. Then, arrange one-third of the berries on top of the cream. Try to distribute the strawberries, blueberries, and raspberries evenly so each spoonful gets a mix of colors and flavors. Repeat these layers two more times, ending with a final layer of berries on top.
- Finish with garnish. Arrange your prettiest berries on the very top layer. I like to create a pattern—maybe alternating rows of red and blue, or a star shape with blueberries in the center. Add a few fresh mint leaves around the edges for color contrast. Cover the dish loosely with plastic wrap and refrigerate for at least 4 hours, but overnight is even better. This resting time is crucial—it lets the cake absorb the jam and cream, and the flavors meld together into something truly special.
Cooking Tips & Techniques
I’ve made this red white and blue layered berry trifle more times than I can count, and I’ve learned a few things the hard way. Here are my best tips to make sure yours turns out perfect.
Don’t rush the resting time. I know it’s tempting to dig right in, but this dessert really needs at least 4 hours in the fridge to set up properly. The cake needs time to soak up all that jammy goodness, and the cream needs to firm up so the layers hold their shape when you serve it. I once served it after just 2 hours because guests showed up early, and it was a soupy mess. Learn from my mistake.
Use a clear glass dish. The whole point of a trifle is the visual impact of those beautiful layers. A ceramic or opaque bowl will hide all your hard work. If you don’t have a trifle dish, use a large glass measuring cup or even a glass casserole dish. You want people to see those stripes of red, white, and blue.
Cut the cake into even cubes. If your cubes are all different sizes, some will get soggy while others stay dry. Aim for 1-inch cubes, and try to keep them uniform. A serrated knife works best for cutting pound cake without smashing it.
Wash and dry your berries thoroughly. Wet berries will water down your cream layers and make everything runny. After washing, spread them out on a clean kitchen towel and pat them dry. Let them air dry for a few minutes if you have time.
Make extra cream. I always make about 25% more cream than I think I need. There’s nothing worse than running out halfway through layering. Plus, extra cream means you can pile it high on top for a dramatic finish.
Use room temperature ingredients. For the smoothest pudding, make sure your milk is cold, but let the cream cheese or any other dairy ingredients come to room temperature if you’re adding them. This prevents lumps.
Variations & Adaptations
One of the best things about this red white and blue layered berry trifle is how easy it is to customize. Here are some variations I’ve tried and loved.
Gluten-Free Version: Swap the pound cake for your favorite gluten-free vanilla cake or gluten-free ladyfingers. I’ve used store-bought gluten-free pound cake from the freezer section, and it worked beautifully. Just make sure to let it thaw completely before cubing.
Low-Sugar Option: Use sugar-free vanilla pudding mix and skip the added sugar for the berries. You can also use a sugar-free pound cake or make your own with a sugar substitute. The berries will still be sweet enough on their own, especially if they’re in season.
Dairy-Free Version: Substitute the heavy cream with full-fat coconut cream (chilled overnight and whipped) and use almond or oat milk for the pudding. I’ve made this for a friend with dairy allergies, and it was still incredibly creamy. Just be aware that coconut cream has a slight coconut flavor that will come through.
Different Cake Options: Not a fan of pound cake? Try angel food cake for a lighter texture, or vanilla sponge cake. I’ve even used leftover birthday cake in a pinch, and it was fantastic. The key is to use a cake that’s sturdy enough to hold up to the cream and berries without falling apart.
Seasonal Berry Swaps: While this recipe is designed for summer berries, you can adapt it for other seasons. In spring, try sliced strawberries and blackberries. In fall, use poached pears and cranberries (though you’ll lose the red, white, and blue theme). For a winter holiday version, use frozen mixed berries and add a sprinkle of cinnamon to the cream.
Individual Servings: This is my favorite variation for parties. Instead of one large trifle, layer everything into small mason jars or clear plastic cups. They’re portable, portion-controlled, and everyone gets their own little masterpiece. Plus, no fighting over the last spoonful.
Serving & Storage Suggestions
This red white and blue layered berry trifle is best served cold, straight from the refrigerator. The contrast between the chilled cream and the juicy berries is what makes it so refreshing on a hot summer day.
How to Serve: Use a large spoon or a flat serving spoon to scoop down through all the layers, making sure each serving gets a bit of everything. I like to serve it in clear glass bowls or cups so guests can see the layers. If you’re feeling fancy, top each serving with an extra dollop of whipped cream and a few fresh berries.
What Goes Well With It: This trifle is rich enough to stand on its own, but it pairs beautifully with a cup of hot coffee or iced tea. For a summer barbecue, serve it alongside grilled meats and corn on the cob. It’s also perfect after a heavy meal because it feels light and fresh. A glass of sparkling wine or lemonade is a nice accompaniment too.
Storage Instructions: Cover the trifle tightly with plastic wrap or a lid and store it in the refrigerator. It will keep for up to 3 days, but honestly, it’s best within the first 24 to 48 hours. After that, the cake starts to get too soft, and the berries may release more juice, making the layers less distinct.
Can You Freeze It? I don’t recommend freezing this trifle. The cream will separate when thawed, and the berries will turn mushy. If you have leftovers, just keep them in the fridge and enjoy them within a couple of days.
How Flavors Develop: Interestingly, this trifle actually tastes better after it’s had time to sit. The flavors meld together overnight, and the cake absorbs all that berry juice and cream. The first day is good, but the second day is amazing. Just keep that in mind when planning your dessert timeline.
Nutritional Information & Benefits
While this red white and blue layered berry trifle is definitely a treat, it does have some redeeming qualities thanks to the fresh berries. Here’s a rough estimate of the nutritional content per serving (based on 12 servings).
| Nutrient | Amount Per Serving |
|---|---|
| Calories | 320 |
| Total Fat | 18g |
| Saturated Fat | 11g |
| Cholesterol | 65mg |
| Sodium | 280mg |
| Total Carbohydrates | 38g |
| Dietary Fiber | 3g |
| Sugars | 26g |
| Protein | 4g |
| Vitamin C | 35% DV |
| Calcium | 10% DV |
The berries in this recipe are packed with antioxidants, vitamin C, and fiber. Strawberries are particularly high in vitamin C, which supports immune health, while blueberries are known for their brain-boosting benefits. The calcium from the milk and cream is good for bone health too. Of course, this is still a dessert, so enjoy it in moderation. But compared to a heavy chocolate cake or a deep-fried treat, this trifle feels almost virtuous.
For those with dietary restrictions, this recipe contains dairy, gluten, and eggs. See the variations section above for substitutions to accommodate different needs.
Conclusion
This red white and blue layered berry trifle has become my signature summer dessert, and I think it deserves a spot in your recipe collection too. It’s the kind of dessert that looks like you spent hours in the kitchen, but really, it’s just a matter of layering things in the right order and letting time do the work. Frank the gutter repair guy was right—this recipe is a winner.
I love how adaptable it is. You can make it your own by swapping in your favorite berries, using a different cake, or adjusting the sweetness to your taste. That’s the beauty of a trifle—it’s forgiving and flexible. Don’t be afraid to experiment and find your perfect version.
I’d love to hear how yours turns out. Did you try a fun variation? Did it disappear at your Fourth of July party? Drop a comment below and let me know. And if you share a photo on social media, tag me so I can see your beautiful layers. Happy summer cooking, friends!
Frequently Asked Questions
Can I make this red white and blue berry trifle a day ahead?
Absolutely! In fact, I recommend it. Making it a day ahead gives the flavors time to meld together beautifully. Just cover it tightly and refrigerate. The cake will be perfectly soaked, and the cream will be nicely set by the next day.
Can I use frozen berries instead of fresh?
You can, but I don’t recommend it for the best results. Frozen berries release a lot of liquid as they thaw, which can make your trifle watery and the layers less distinct. If you must use frozen berries, thaw them completely in a colander, pat them dry, and toss them with a little sugar to draw out extra moisture before layering.
How long will this trifle keep in the refrigerator?
It will keep for up to 3 days in the refrigerator, but it’s best within the first 48 hours. After that, the cake gets very soft, and the berries may start to break down. The flavor is still good, but the texture won’t be as perfect.
Can I use homemade pudding instead of instant?
Yes, you can use homemade vanilla pudding, but you’ll need to let it cool completely before folding it into the whipped cream. Instant pudding is quicker and gives a more consistent texture, but homemade will work if you have the time and patience.
What if I don’t have a trifle dish?
No problem at all! You can use a large glass mixing bowl, a rectangular baking dish, or even individual mason jars. The presentation will be slightly different, but the taste is exactly the same. Individual jars are actually great for parties because everyone gets their own serving.
Pin This Recipe!
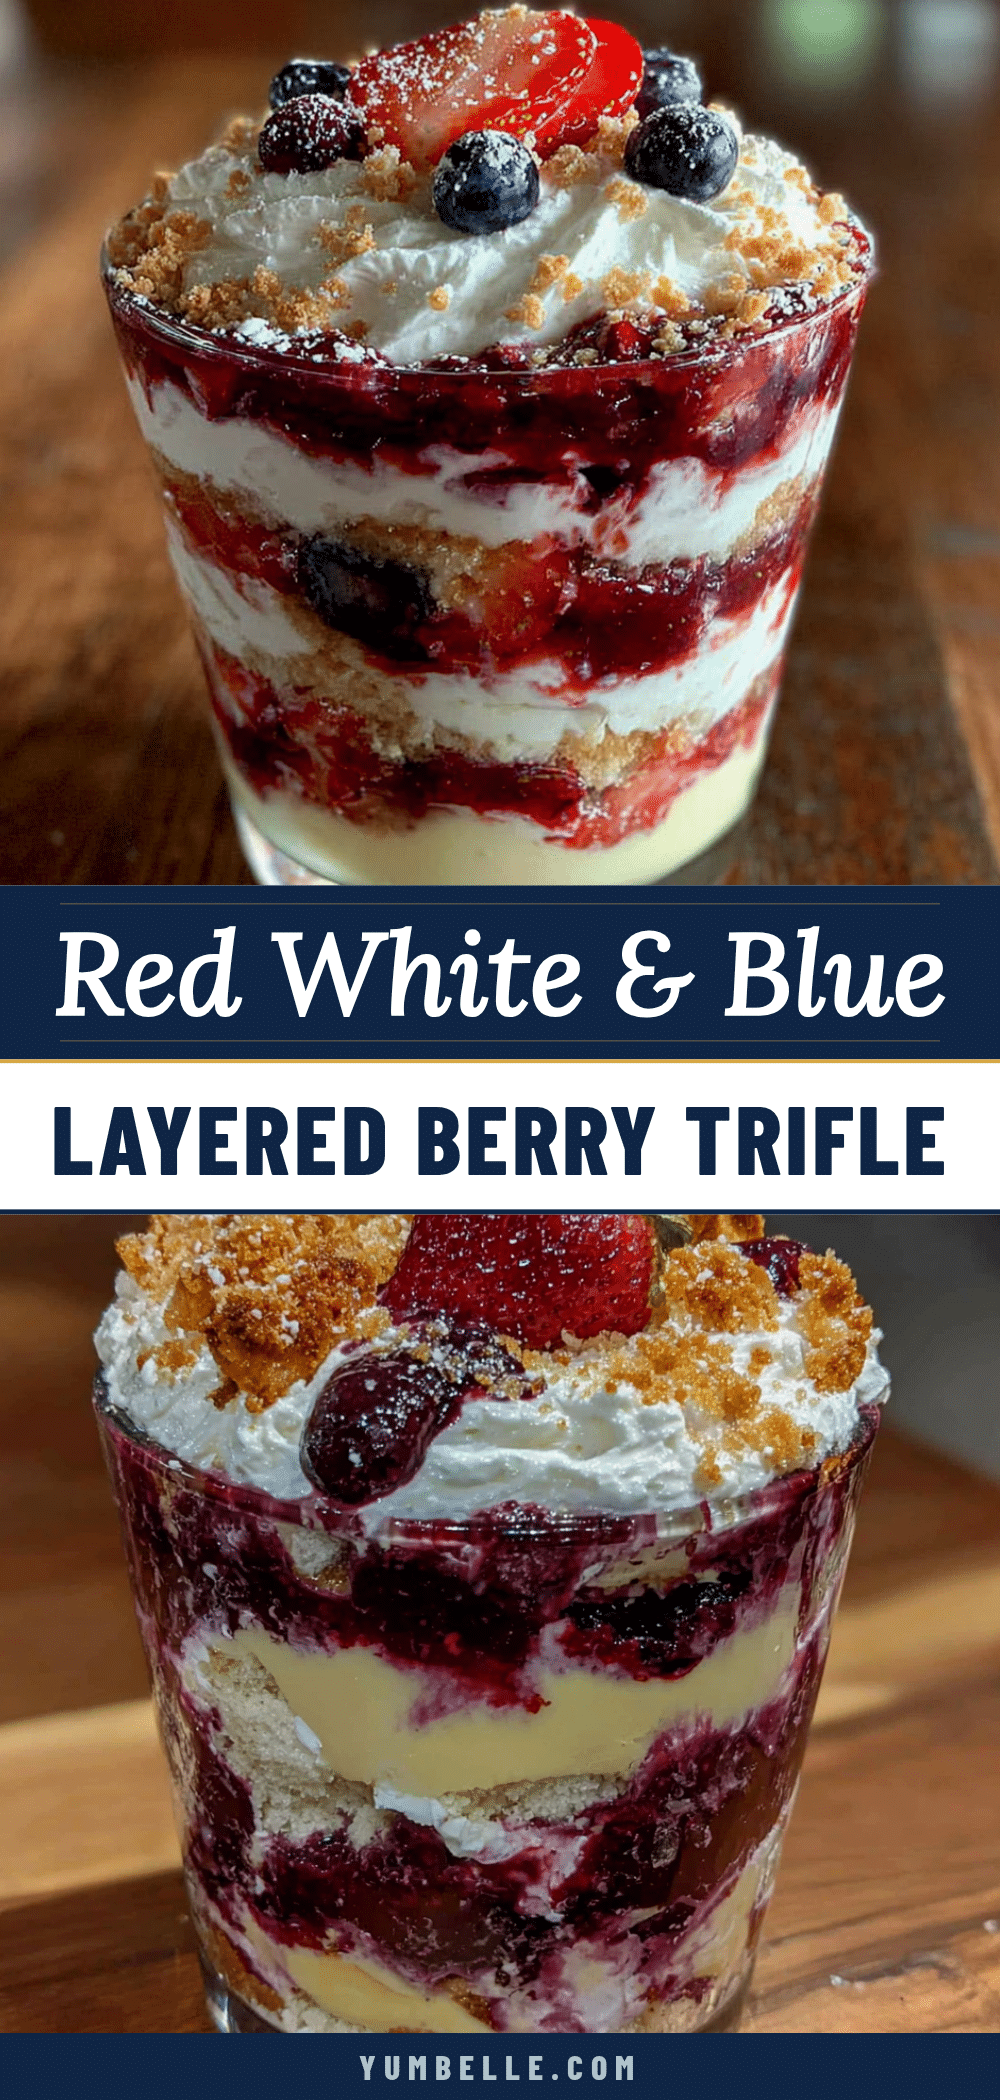
Perfect Red White & Blue Berry Trifle: Easy Layered Dessert

This red white and blue layered berry trifle is the kind of dessert that makes people think you’re a pastry chef, but it’s secretly one of the simplest things you can make. It’s become my go-to for Memorial Day barbecues, July Fourth cookouts, and any summer gathering where I want to show up with something that looks like I spent hours on it.
- Prep Time: 30 minutes
- Cook Time: 0 minutes
- Total Time: 4 hours 30 minutes (includes chilling time)
- Yield: 12 servings 1x
- Category: Dessert
- Cuisine: American
Ingredients
- 1 store-bought pound cake (about 10.75 ounces), cut into 1-inch cubes
- 1/4 cup strawberry jam or preserves
- 2 tablespoons water
- 1 package (3.4 ounces) instant vanilla pudding mix
- 2 cups cold whole milk
- 1 1/2 cups heavy whipping cream
- 1/4 cup powdered sugar
- 1 teaspoon vanilla extract
- 2 cups fresh strawberries, hulled and sliced
- 1 1/2 cups fresh blueberries
- 1 1/2 cups fresh raspberries
- 2 tablespoons granulated sugar (optional)
- 1 tablespoon fresh lemon juice
- Fresh mint leaves (optional, for garnish)
- Extra berries for the top
Instructions
- Start with the berries. Wash all your berries gently in cold water and pat them dry with paper towels. Hull and slice the strawberries into even pieces, about 1/4-inch thick. Leave the blueberries and raspberries whole. If your berries taste tart, toss them with the sugar and lemon juice in a medium bowl and let them sit for 10 minutes.
- Make the jam syrup. In a small saucepan or microwave-safe bowl, combine the strawberry jam and water. Heat gently until the jam melts and becomes syrupy, about 30 seconds in the microwave or 2 minutes on the stove. Stir until smooth.
- Prepare the vanilla cream. In a medium bowl, whisk together the instant vanilla pudding mix and cold milk. Whisk vigorously for about 2 minutes until it thickens. Set it aside. In a separate large bowl, pour the heavy whipping cream, powdered sugar, and vanilla extract. Using an electric mixer on medium-high speed, beat the cream until stiff peaks form, about 3 to 4 minutes.
- Fold it all together. Gently fold the thickened pudding into the whipped cream using a rubber spatula. Fold until just combined, with no white streaks remaining.
- Assemble the layers. Start with a layer of cake cubes at the bottom of your trifle dish. Use about one-third of the cubes. Brush them generously with the jam syrup. Next, spread one-third of the vanilla cream mixture over the cake. Then, arrange one-third of the berries on top of the cream. Repeat these layers two more times, ending with a final layer of berries on top.
- Finish with garnish. Arrange your prettiest berries on the very top layer. Add a few fresh mint leaves around the edges for color contrast. Cover the dish loosely with plastic wrap and refrigerate for at least 4 hours, but overnight is even better.
Notes
Don’t rush the resting time—at least 4 hours in the fridge is crucial for the cake to absorb the jam and cream. Use a clear glass dish to show off the layers. Cut the cake into even 1-inch cubes. Wash and dry berries thoroughly to avoid watering down the cream. Make extra cream (about 25% more) to ensure you don’t run out. Use room temperature ingredients for smoothest pudding.
Nutrition
- Serving Size: 1 serving (1/12 of t
- Calories: 320
- Sugar: 26
- Sodium: 280
- Fat: 18
- Saturated Fat: 11
- Carbohydrates: 38
- Fiber: 3
- Protein: 4
Keywords: red white and blue trifle, berry trifle, Fourth of July dessert, patriotic dessert, summer dessert, layered dessert, easy trifle


