Love this? Save it for later!
Share the inspiration with your friends
I had refused to make themed food for Halloween for years. Eight years, actually. Every October, I’d watch my friends post photos of spider-web dips and monster eyeball meatballs, and I’d feel this stubborn resistance. It seemed like a lot of work for something kids would pick at for five minutes before diving into their candy haul. Then last October, I was hosting our block’s pre-trick-or-treat gathering, and I found my neighbor’s seven-year-old, Liam, standing in my kitchen. He was holding a crescent roll tube and looking at me with the kind of serious expression only a second-grader can muster. “My mom says you make the best snacks,” he said. “But she also says you don’t do Halloween food.” The little guy had called me out, and honestly, it stung a little.
So I caved. I grabbed some pizza sauce, mozzarella, and those pre-made dough sheets I usually keep for emergencies. I was determined to make something that didn’t feel like a Pinterest fail waiting to happen. I sliced the cheese into strips, wrapped them around little pizza filling blobs, and popped them in the oven. I fully expected a mess—maybe the cheese would slide off, or the “bandages” would unravel. But when the timer went off, I pulled out a tray of the most ridiculous, adorable little mummy faces, complete with olive eyes staring back at me. Liam was the first to grab one, and I swear he ate four before the other kids even made it to the kitchen. That moment—watching a kid who had called me out get caught in the act of loving my Halloween snack—is exactly why these Easy Mummy Pizza Bites became a permanent part of my fall rotation. They are simple, genuinely fun to make, and they don’t require a degree in culinary arts to pull off. If you have ever been skeptical about festive food, let me tell you, this is the recipe that will change your mind.
Why You’ll Love This Recipe
These mummy pizza bites are not just another cute snack idea. They are a legitimate lifesaver for anyone hosting a Halloween party or just trying to make a weeknight dinner feel special. I have tested this recipe through three different parties and two very picky taste-testing sessions with my niece and nephew, and it holds up every single time.
- Quick & Easy: You can have these on the table in under 20 minutes. No marinating, no chilling, no complicated steps. It is the perfect recipe for a busy Halloween evening when you are juggling costumes and candy prep.
- Simple Ingredients: You probably already have everything in your fridge and pantry. Pizza sauce, mozzarella, crescent rolls, and olives. That is it. No specialty store trips required.
- Perfect for a Party: These are ideal for Halloween parties, classroom treats, or even a fun dinner before trick-or-treating. They are portable, easy to eat with your hands, and kids absolutely love them.
- Crowd-Pleaser: I have watched adults sneak these from the platter just as often as the kids do. The combination of warm, melted cheese and crispy, buttery dough is universally loved.
- Unbelievably Delicious: Let’s be honest, crescent rolls with pizza filling is a winning combo on a normal day. Wrapping them up like little mummies just makes them taste better. It is science, I swear.
What makes these different from other Halloween snacks is the texture. The cheese strips get slightly crispy on the edges where they peek out of the dough, creating a perfect little salty, cheesy bite. The dough bakes up golden and flaky, and the olive eyes add a briny pop that cuts through the richness. It’s not just a gimmick—it is genuinely good food that happens to look like a mummy.
What Ingredients You Will Need
This recipe uses simple, pantry-friendly ingredients to deliver maximum flavor and a whole lot of personality. The magic is in how you assemble them, not in fancy components.
- 1 can (8 oz) refrigerated crescent roll dough sheets – I prefer the sheet style over the perforated triangles because they give you a clean, unbroken surface for cutting your strips. If you can only find the perforated version, just press the seams together firmly before cutting. Pillsbury is my go-to brand for consistency.
- 8 ounces low-moisture mozzarella cheese, cut into 1-inch cubes – Low-moisture is key here. Fresh mozzarella will release too much water and make your dough soggy. You want a block of cheese that you can cube yourself for the best melt.
- 1/2 cup pizza sauce – Use your favorite jarred sauce, or make a quick one with canned tomatoes and Italian seasoning. I like Rao’s for its thick consistency, which prevents the dough from getting wet.
- 24 to 32 small pitted black olives (or sliced olives) – These become the mummy eyes. You can use whole olives cut in half or use the pre-sliced rounds. For a less briny flavor, you can substitute with small pieces of bell pepper or even a dot of pesto.
- 1 tablespoon olive oil or melted butter, for brushing – This helps the dough get that beautiful golden-brown color. Butter adds a richer flavor, but olive oil works perfectly if you are keeping it dairy-light.
- Optional: 1/2 teaspoon garlic powder or everything bagel seasoning – Sprinkle this on before baking for an extra layer of flavor. I often add a pinch of garlic powder to the olive oil before brushing.
Equipment Needed
You do not need any fancy gadgets for this recipe, which is one of the reasons I love it. Here is what you will need:
- Baking sheet – A standard half-sheet pan works perfectly. Line it with parchment paper for easy cleanup.
- Parchment paper – Non-negotiable for me. It prevents sticking and makes the cleanup almost zero.
- Sharp knife or pizza cutter – You will be cutting the dough into thin strips, so a sharp blade is important to get clean edges. A pizza cutter actually works better than a knife in my experience.
- Small pastry brush – For brushing the olive oil or butter on the dough. A silicone brush is easy to clean.
- Cutting board – For cubing the cheese.
- Small bowl – For holding your olive eyes and any seasoning mix.
If you do not have a pizza cutter, a sharp chef’s knife will do the job. Just be careful to cut in a single, smooth motion so you don’t tear the delicate dough. I have used a bench scraper in a pinch, and it worked fine, though the strips were a little less uniform.
Preparation Method
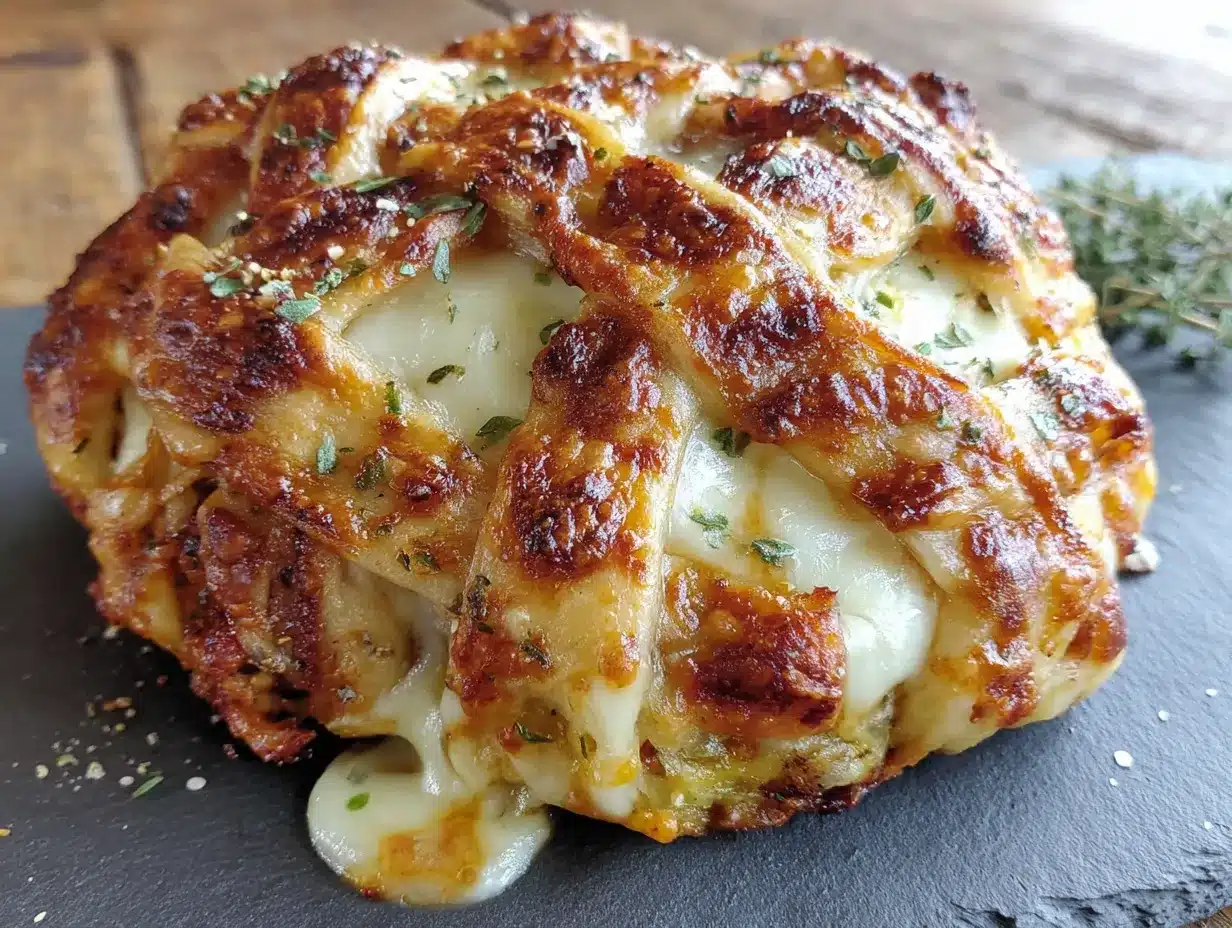
Let’s get to the fun part. These mummy pizza bites come together quickly, but there are a few small tricks that make them look professional.
- Preheat your oven to 375°F (190°C). Line your baking sheet with parchment paper. Getting the oven hot before you start assembling ensures the dough bakes up flaky and not greasy.
- Prepare your dough. Unroll the crescent dough sheet onto a clean cutting board. If you are using the perforated crescent rolls, press the seams together firmly with your fingers until you have a single, smooth sheet. Use a pizza cutter or sharp knife to cut the dough lengthwise into thin strips, about 1/2-inch wide. You want them thin enough to wrap around the cheese cube multiple times, but not so thin they tear. I usually get about 12 to 16 strips from one sheet.
- Cube the cheese. Cut the mozzarella block into 1-inch cubes. You will need one cube per mummy. If your cubes are too large, the dough might not wrap around them completely. Too small, and the mummy looks anemic. A 1-inch cube is just right.
- Assemble the mummies. Take one cheese cube and place it at one end of a dough strip. Wrap the strip around the cheese, overlapping slightly as you go, like you are bandaging a tiny, delicious patient. Leave a small gap at the top where the eyes will go. Do not wrap too tightly—the cheese will expand as it melts, and you want the dough to have room to puff up. Tuck the end of the strip underneath the mummy to secure it.
- Place on the baking sheet. Arrange the wrapped mummies on the prepared baking sheet, leaving about 1 inch of space between each one. They will puff up a little, but they don’t spread much.
- Add the eyes. Press two olive slices gently into the exposed cheese at the top of each mummy. They should stick without any help, but if the cheese is very cold, you can press them in slightly. The olives will stay put during baking.
- Brush with oil or butter. Using your pastry brush, lightly coat each mummy with olive oil or melted butter. This step is what gives them that gorgeous golden color. If you are using garlic powder, sprinkle it on now.
- Bake. Place the sheet in the preheated oven and bake for 10 to 12 minutes, or until the dough is golden brown and the cheese is melted and bubbly. The edges of the dough strips should look crispy. Keep an eye on them—ovens vary, and you do not want the cheese to start leaking out the bottom.
- Cool slightly. Let them rest on the baking sheet for 2 to 3 minutes before transferring to a serving platter. This allows the cheese to set just a little, so your mummies hold their shape when picked up. Serve warm with extra pizza sauce for dipping.
Cooking Tips & Techniques
I have made these mummy pizza bites at least a dozen times now, and I have learned a few things the hard way. Here are my best tips to ensure success.
Do not overwork the dough. Crescent roll dough is delicate, and if you handle it too much, it becomes tough. When you are cutting the strips, use a sharp blade and cut in one clean motion. When wrapping, be gentle. The dough will puff up beautifully in the oven, but only if you haven’t compressed it.
Keep the cheese cold. Cold cheese cubes are easier to wrap and less likely to melt prematurely. If your kitchen is warm, pop the cubed cheese in the fridge for 10 minutes before you start assembling. This little step prevents the dreaded cheese puddle on your baking sheet.
Watch the baking time. The first time I made these, I left them in for 14 minutes because I got distracted by a phone call. The bottoms were a little too dark, and the cheese had started oozing out. 10 to 12 minutes is the sweet spot. Check them at the 10-minute mark and decide from there.
Make extra. Seriously, double the batch. These disappear faster than you expect. I once made 24 for a party of 10 adults and 6 kids, and they were gone in 15 minutes. Now I always make at least 36.
Use a pizza cutter for the strips. I tried using a knife the first few times, and the strips were uneven. A pizza cutter gives you clean, straight lines with less effort. Roll it firmly in one pass.
Variations & Adaptations
This recipe is incredibly flexible, and I have experimented with several variations over the past year.
- Pepperoni Mummies: Before wrapping the cheese, place a small pepperoni slice on top of the cheese cube. It adds a nice spicy, savory kick. My nephew requests these every time.
- Vegetarian Option: Use a cube of firm tofu or a slice of roasted bell pepper in place of the cheese for a dairy-free version. The texture is different, but the flavor is still great. I tested this for a friend with a dairy allergy, and she loved them.
- Spicy Version: Add a tiny pinch of red pepper flakes to the pizza sauce before dipping. Or, use pepper jack cheese instead of mozzarella for a melty, spicy center.
- Gluten-Free Adaptation: Use gluten-free crescent roll dough. The texture is slightly more crumbly, but it works. Just handle the strips very gently, as gluten-free dough is more fragile.
- Breakfast Mummies: Swap the pizza sauce for a thin layer of cream cheese and fill with a small sausage link. Wrap the same way and bake. These are a huge hit for a Halloween breakfast before school.
Serving & Storage Suggestions
These mummy pizza bites are best served warm, right out of the oven. The cheese is gooey, the dough is crispy, and the olives are perfectly warm. I like to arrange them on a large wooden board with a bowl of warm pizza sauce in the center for dipping. You can also serve them with ranch dressing, marinara, or even a garlic aioli for adults.
If you are making them ahead for a party, you can assemble the mummies up to 4 hours in advance and keep them covered in the refrigerator. Bake them just before serving. Leftovers can be stored in an airtight container in the fridge for up to 2 days. To reheat, pop them in a 350°F (175°C) oven for 5 to 7 minutes, or until the dough crisps up again. I do not recommend microwaving them, as the dough becomes soft and the cheese gets rubbery.
These also freeze beautifully. Place the baked and cooled mummies on a baking sheet in a single layer and freeze for 1 hour. Transfer to a freezer-safe bag or container. To reheat, bake from frozen at 375°F (190°C) for 12 to 15 minutes. I have a bag of these in my freezer right now for last-minute Halloween visitors.
Nutritional Information & Benefits
Per serving (2 mummy bites): approximately 220 calories, 12g fat, 18g carbohydrates, 10g protein, 2g sugar, 450mg sodium. These are estimates and will vary based on your specific ingredients.
These mummy pizza bites offer a decent amount of protein from the cheese, which helps keep little bellies full before a night of candy consumption. The olives provide healthy monounsaturated fats and a touch of iron. If you use whole wheat crescent dough, you can increase the fiber content slightly. For a lower-sodium option, use low-sodium pizza sauce and reduce the amount of olives.
While this is definitely a treat food, it is a more balanced option than straight-up candy. The combination of carbs, fat, and protein provides sustained energy for running around the neighborhood. I always feel good about serving these to my family because I know exactly what is in them.
Conclusion
These Easy Mummy Pizza Bites have officially become my signature Halloween contribution, and I am not even a little bit embarrassed about it. They are proof that you do not need to spend hours in the kitchen to create something that feels festive and special. Whether you are hosting a big party, sending a treat to a school event, or just looking for a fun way to make dinner exciting on Halloween night, these little guys deliver.
I love that this recipe is forgiving. If your strips are a little uneven, the mummies just look more authentic. If you forget the olive eyes, they are still delicious. It is a recipe that invites creativity and doesn’t punish imperfection. So go ahead, make a batch. Or two. Let me know in the comments how your mummies turned out—did you add any fun variations? Did your kids help wrap them? I would love to hear your stories. Happy Halloween, and happy snacking!
Frequently Asked Questions
Can I use string cheese instead of a block of mozzarella?
Yes, you can. String cheese is already portioned, which makes it convenient. Just cut each stick into 1-inch pieces. The melt is slightly different—it is a bit more elastic—but it works perfectly fine.
How do I keep the dough strips from sticking to each other?
Make sure your strips are cut cleanly and are not touching each other on the cutting board. If your dough is very sticky, lightly dust your work surface with a tiny bit of flour. Do not use too much, or the dough will be dry.
Can I make these in an air fryer?
Absolutely. Preheat your air fryer to 350°F (175°C). Place the mummies in a single layer in the basket, leaving a little space between them. Cook for 6 to 8 minutes, checking at the 6-minute mark. The air fryer makes the dough extra crispy.
My cheese leaked out during baking. What did I do wrong?
This usually happens if the cheese cube is too large, the dough is wrapped too loosely, or the oven temperature is too low. Make sure your cheese cubes are 1-inch, wrap them snugly but not tight, and always preheat your oven fully.
Can I use a different type of cheese?
Yes, but stick to low-moisture cheeses. Provolone, Monterey Jack, or even cheddar work well. Avoid fresh mozzarella, brie, or any soft cheese, as they release too much moisture and will make your dough soggy.
Pin This Recipe!
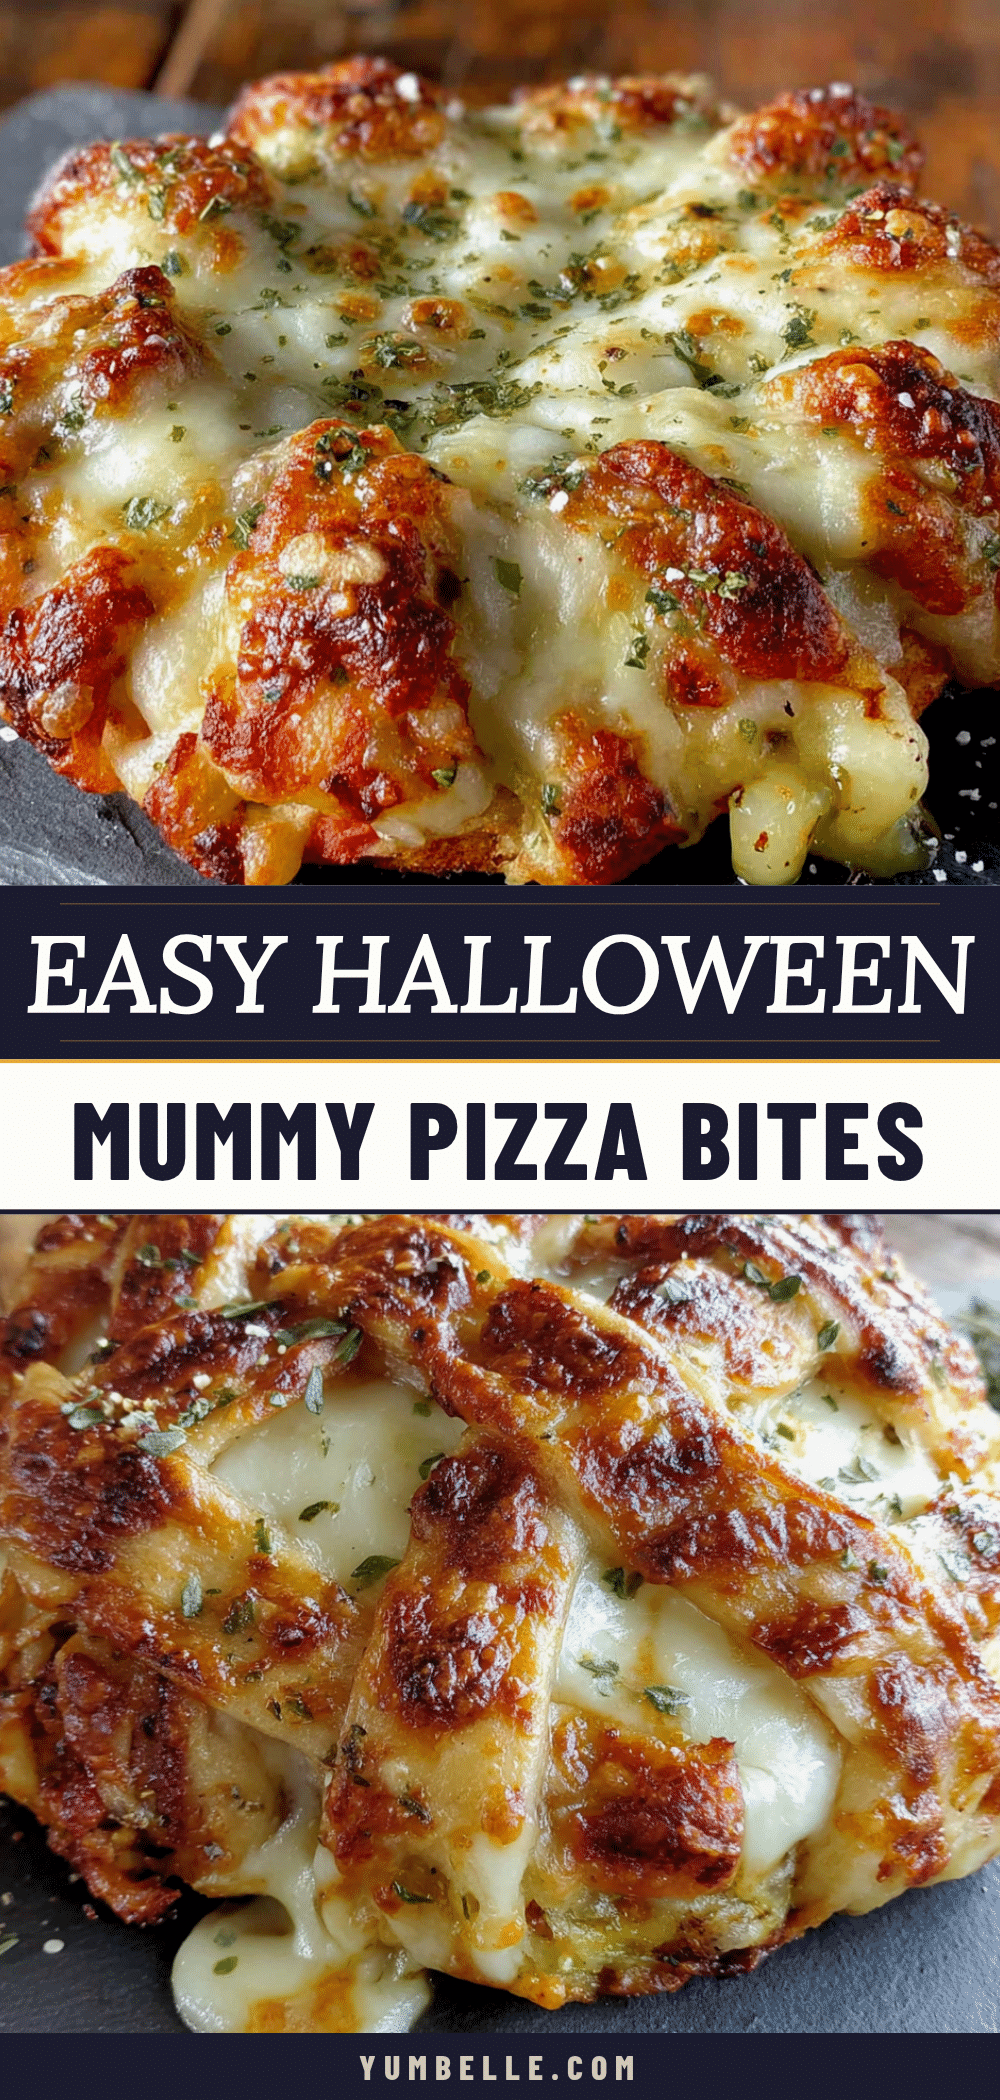
Easy Mummy Pizza Bites: Best Halloween Party Snack
These adorable mummy pizza bites are a quick and easy Halloween snack made with crescent roll dough, mozzarella cheese, pizza sauce, and olive eyes. Ready in under 20 minutes, they are perfect for parties, classroom treats, or a fun dinner before trick-or-treating.
- Prep Time: 10 minutes
- Cook Time: 12 minutes
- Total Time: 22 minutes
- Yield: 4 servings (2 mummy bites per serving) 1x
- Category: Appetizer
- Cuisine: American
Ingredients
- 1 can (8 oz) refrigerated crescent roll dough sheets
- 8 ounces low-moisture mozzarella cheese, cut into 1-inch cubes
- 1/2 cup pizza sauce
- 24 to 32 small pitted black olives (or sliced olives)
- 1 tablespoon olive oil or melted butter, for brushing
- Optional: 1/2 teaspoon garlic powder or everything bagel seasoning
Instructions
- Preheat your oven to 375°F (190°C). Line your baking sheet with parchment paper.
- Unroll the crescent dough sheet onto a clean cutting board. If using perforated crescent rolls, press the seams together firmly. Use a pizza cutter or sharp knife to cut the dough lengthwise into thin strips, about 1/2-inch wide.
- Cut the mozzarella block into 1-inch cubes. You will need one cube per mummy.
- Take one cheese cube and place it at one end of a dough strip. Wrap the strip around the cheese, overlapping slightly as you go, like bandaging. Leave a small gap at the top for the eyes. Do not wrap too tightly. Tuck the end of the strip underneath the mummy to secure it.
- Arrange the wrapped mummies on the prepared baking sheet, leaving about 1 inch of space between each one.
- Press two olive slices gently into the exposed cheese at the top of each mummy for eyes.
- Using a pastry brush, lightly coat each mummy with olive oil or melted butter. If using garlic powder, sprinkle it on now.
- Bake for 10 to 12 minutes, or until the dough is golden brown and the cheese is melted and bubbly.
- Let them rest on the baking sheet for 2 to 3 minutes before transferring to a serving platter. Serve warm with extra pizza sauce for dipping.
Notes
Keep cheese cold for easier wrapping. Do not overwork the dough. Check at 10 minutes to avoid overbaking. Double the batch for parties. Can be assembled up to 4 hours ahead and refrigerated. Leftovers can be stored in an airtight container in the fridge for up to 2 days. Reheat in a 350°F oven for 5-7 minutes. Freeze baked and cooled mummies for up to 3 months.
Nutrition
- Serving Size: 2 mummy bites
- Calories: 220
- Sugar: 2
- Sodium: 450
- Fat: 12
- Saturated Fat: 5
- Carbohydrates: 18
- Fiber: 1
- Protein: 10
Keywords: Halloween, mummy, pizza bites, crescent rolls, appetizer, party snack, kid-friendly, easy