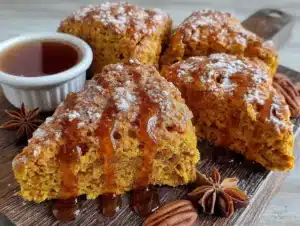
Love this? Save it for later!
Share the inspiration with your friends
My sister asked why I couldn’t just skip the butter and use pumpkin puree for moisture instead. I started to explain why that wouldn’t work — then stopped. I had no good reason, honestly. I just assumed scones needed all that cold butter cut in to get flaky. But she was standing there with a can of pumpkin in her hand, looking at me like I was the one being stubborn. So I shrugged and said, “Fine, let’s try it your way.”
I’ll never forget pulling that first tray out of the oven. The kitchen smelled like a bakery in October — all warm spices and something sweet. The scones were golden on the edges, soft in the middle, and absolutely nothing like the dry, crumbly things I’d been making for years. I mean, I actually laughed out loud. She was right. Completely right. And I had to eat my words along with about three of those scones.
That was two falls ago, and I haven’t made a plain scone since. This version with the maple glaze? That came later, after a few more happy accidents and one very sticky countertop. Let me tell you, once you try pumpkin scones that are actually moist and tender without being heavy, there’s no going back. Maybe you’ve been there — stuck in a recipe rut, convinced your way is the only way. If so, you’re going to love what happens when you let a little pumpkin change the game.
Why You’ll Love This Recipe
These Perfect Pumpkin Scones with Maple Glaze are the kind of recipe that makes you look like a baking pro without any of the stress. I’ve tested this batch more times than I care to admit, and every single time, the texture comes out exactly right — soft, tender, and just a little bit flaky on the outside.
- Quick & Easy: From mixing bowl to oven in under 15 minutes. Perfect for those mornings when you want something special but don’t have all day.
- Simple Ingredients: You probably already have pumpkin puree, flour, and maple syrup in your pantry. No weird specialty items here.
- Perfect for Fall Mornings: These scones scream cozy sweater weather and hot coffee. They’re great for brunch, Thanksgiving morning, or just a Tuesday that needs a little something extra.
- Crowd-Pleaser: I’ve brought these to book club, potlucks, and family gatherings. They disappear fast. Kids love the glaze, adults love the spice blend.
- Unbelievably Delicious: The texture is what gets everyone. It’s not dry like some scones can be. The pumpkin keeps everything moist while the maple glaze adds that sweet finish that makes you close your eyes after the first bite.
What makes this recipe different from all the other pumpkin scone recipes out there? It’s the ratio. Most recipes use too much butter or not enough moisture. This version uses pumpkin as both a flavor and a texture booster. Plus, the maple glaze isn’t an afterthought — it’s a thin, glossy layer that soaks into the warm scone just enough to make every bite taste like autumn.
This isn’t just another pumpkin recipe. It’s the one I make every single fall without fail. The one my neighbor texted me about at 9 PM asking for the recipe because her kids wouldn’t stop talking about it. It’s comfort food reimagined — faster, easier, but with the same soul-soothing satisfaction you want from a fall treat.
What Ingredients You Will Need
This recipe uses simple, wholesome ingredients to deliver bold flavor and satisfying texture without the fuss. Most of these are pantry staples, which means you can whip up a batch whenever the craving hits.
For the Scones
- All-purpose flour, 2 cups (250g) — spoon and level it for the best results. I’ve used King Arthur Flour for years and it never lets me down.
- Granulated sugar, 1/3 cup (65g) — adds just enough sweetness without overpowering the pumpkin.
- Baking powder, 1 tablespoon — make sure it’s fresh. Old baking powder is the number one reason scones don’t rise properly.
- Pumpkin pie spice, 1 ½ teaspoons — you can use store-bought or make your own with cinnamon, nutmeg, ginger, and cloves.
- Ground cinnamon, 1 teaspoon — because you can never have too much cinnamon in a fall recipe.
- Salt, ½ teaspoon — balances the sweetness and brings out the pumpkin flavor.
- Cold unsalted butter, 6 tablespoons (85g), cubed — keep it cold. This is still important even though we’re using pumpkin for moisture.
- Pumpkin puree, ½ cup (120g) — not pumpkin pie filling. Look for 100% pure pumpkin. I prefer Libby’s for its consistent texture.
- Heavy cream, ¼ cup (60ml) — adds richness. You can substitute with whole milk in a pinch.
- Large egg, 1 — room temperature is best for even mixing.
- Vanilla extract, 1 teaspoon — pure vanilla makes a difference here.
For the Maple Glaze
- Powdered sugar, 1 cup (120g) — sifted to avoid lumps.
- Pure maple syrup, 2 tablespoons — not pancake syrup. The real stuff gives that deep, woodsy sweetness.
- Heavy cream or milk, 1-2 tablespoons — to thin the glaze to the perfect drizzling consistency.
- Vanilla extract, ½ teaspoon — optional but recommended.
Ingredient Selection Tips: When choosing pumpkin puree, give the can a shake. You want to hear it slosh a little — that means it’s not too thick. If your puree seems dry, stir it before measuring. For the maple syrup, look for Grade A Dark Amber if you want a stronger maple flavor. It makes the glaze taste more complex.
Substitution Guidance: If you’re dairy-free, use cold coconut oil instead of butter and coconut cream instead of heavy cream. For a gluten-free version, swap the all-purpose flour with a 1:1 gluten-free baking blend. I’ve tried Bob’s Red Mill and it works great — just don’t overmix the dough.
Equipment Needed
You don’t need a fancy kitchen to make these scones. Here’s what you’ll actually use:
- Large mixing bowl — for combining dry ingredients. Any bowl works, but a wide one makes mixing easier.
- Pastry cutter or two forks — to cut the butter into the flour. I’ve used both and honestly, forks work fine if you don’t have a pastry cutter. Your hands work too, just work quickly so the butter stays cold.
- Baking sheet — lined with parchment paper. I learned the hard way that parchment is non-negotiable here. The glaze will stick to foil.
- Bench scraper or sharp knife — for cutting the dough into triangles. A bench scraper gives cleaner edges.
- Whisk — for the glaze. A small one works perfectly.
- Cooling rack — so the bottoms don’t get soggy while the glaze sets.
If you don’t have a pastry cutter, don’t run out and buy one. Two butter knives crossed in an X motion work just as well. I used that method for years before I finally caved and bought a pastry cutter at a thrift store for $2. It’s nice to have, but not essential.
Preparation Method
- Preheat your oven to 400°F (200°C). Line a baking sheet with parchment paper. This step matters — don’t skip the parchment. I once used a silicone mat and the bottoms browned too fast.
- Mix the dry ingredients. In a large bowl, whisk together 2 cups all-purpose flour, 1/3 cup granulated sugar, 1 tablespoon baking powder, 1 ½ teaspoons pumpkin pie spice, 1 teaspoon cinnamon, and ½ teaspoon salt. Make sure the baking powder is evenly distributed — clumps of it will create bitter spots.
- Cut in the cold butter. Add the 6 tablespoons of cubed cold butter to the flour mixture. Use a pastry cutter or two forks to cut the butter into the flour until it resembles coarse meal with pea-sized butter pieces. Don’t overdo it. You want visible bits of butter — that’s what creates flaky layers. If the butter starts to soften, pop the bowl in the fridge for 5 minutes.
- Combine the wet ingredients. In a separate small bowl, whisk together ½ cup pumpkin puree, ¼ cup heavy cream, 1 large egg, and 1 teaspoon vanilla extract until smooth. The mixture should be a uniform orange color with no streaks of egg white.
- Bring it together. Pour the wet mixture into the dry mixture. Stir with a spatula or wooden spoon just until combined. The dough will look shaggy and a little sticky — that’s exactly what you want. Do not keep stirring. Overmixing makes scones tough. I’ve done it. We’ve all done it. Stop when you can’t see dry flour anymore.
- Shape the dough. Turn the dough out onto a lightly floured surface. Gently bring it together with your hands, patting it into a circle about ¾-inch thick. Don’t knead it like bread. Just press it gently. Use a bench scraper or sharp knife to cut the circle into 8 equal wedges, like you’re cutting a pizza.
- Bake. Place the scones on the prepared baking sheet, spacing them about 2 inches apart. Bake for 14-16 minutes, or until the bottoms are golden brown and the tops are set. The scones should feel firm to the touch but still soft when you press the center. A toothpick inserted in the middle should come out clean or with a few moist crumbs.
- Cool slightly. Let the scones cool on the baking sheet for 5 minutes, then transfer them to a cooling rack. This is important — if you leave them on the hot sheet, the bottoms will keep cooking and dry out.
- Make the glaze. While the scones are cooling, whisk together 1 cup powdered sugar, 2 tablespoons maple syrup, ½ teaspoon vanilla, and 1 tablespoon of cream. Add more cream a teaspoon at a time until the glaze is thin enough to drizzle but thick enough to cling to the scone. It should flow slowly off the whisk.
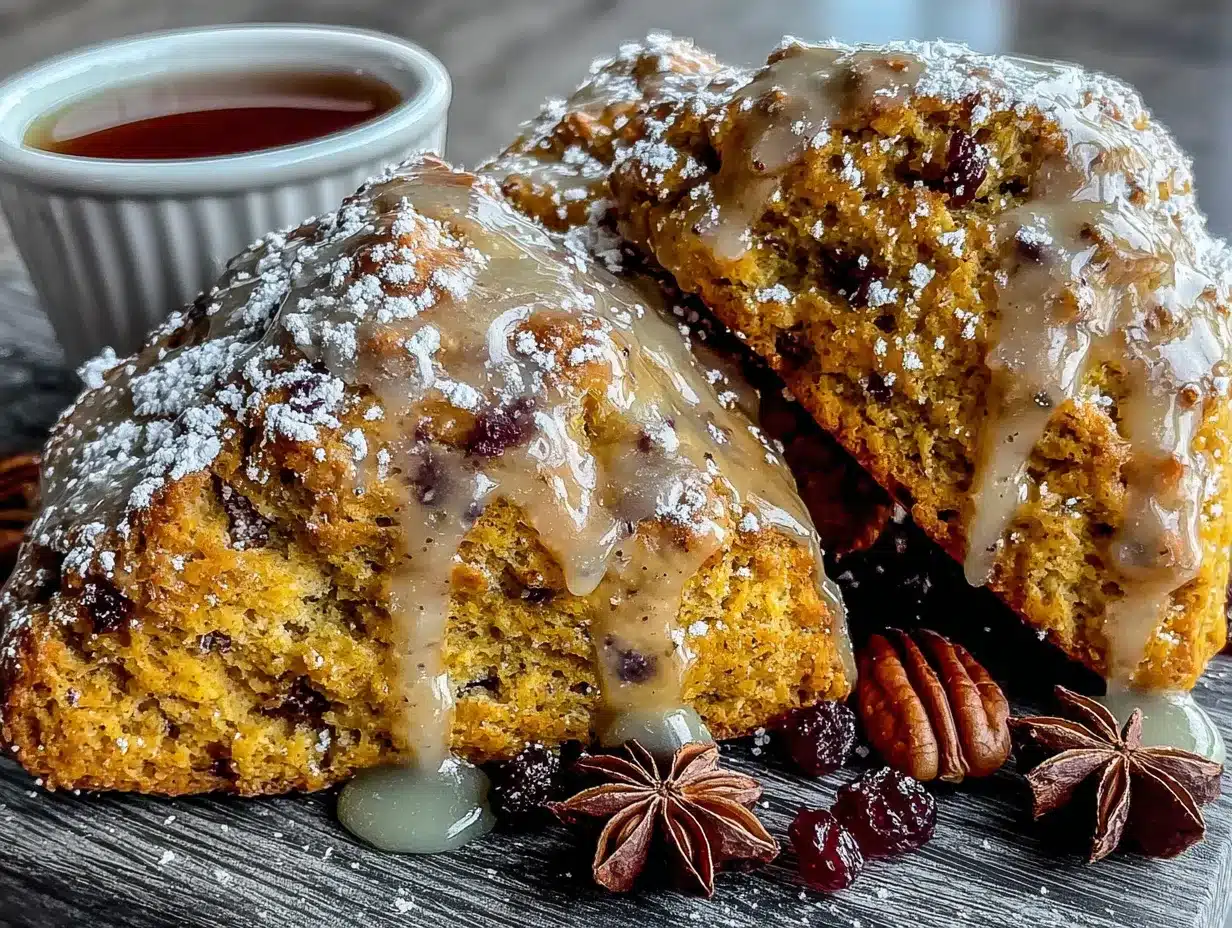
- Glaze the scones. Drizzle the glaze over the warm scones. Use a spoon or a piping bag with the tip snipped off. The glaze will soak in slightly and create that beautiful glossy finish. Let the glaze set for about 10 minutes before serving.
Sensory Cue: When the scones are done, your kitchen should smell like a pumpkin spice candle come to life. The edges will be slightly darker than the center, and the glaze will look like melted caramel as it drips down the sides.
Cooking Tips & Techniques
Here’s the thing about scones — they’re simple, but they have a few tricks that separate the good ones from the great ones. I learned most of these the hard way, so you don’t have to.
Keep everything cold. This is the golden rule of scone-making. Cold butter creates steam pockets as it melts in the oven, which gives you those flaky layers. If your kitchen is warm, pop the flour mixture and butter in the freezer for 10 minutes before you start. I’ve done this on hot summer days and it makes a noticeable difference.
Don’t overwork the dough. I cannot stress this enough. The more you handle the dough, the more gluten develops, and the tougher your scones will be. Mix until just combined. Pat into shape gently. Cut and bake. That’s it. The first time I made these, I kneaded the dough like bread because I wasn’t paying attention. They came out like hockey pucks. Edible hockey pucks, but still.
Use a sharp cutter. When you cut the scones, press straight down without twisting. Twisting seals the edges and prevents the scones from rising evenly. A bench scraper works perfectly for this. If you’re using a knife, make sure it’s sharp.
Bake on the middle rack. The middle rack gives the most even heat distribution. If you bake too close to the bottom, the bottoms burn before the tops are done. Too close to the top, and the glaze will bubble and run off.
Glaze while warm. This is the secret to that perfect glossy finish. If the scones are too hot, the glaze will melt and run off completely. If they’re too cold, it will sit on top and look dull. Aim for warm — about 5 minutes out of the oven is the sweet spot.
Timing strategy: Make the glaze while the scones are baking. That way, everything is ready at the same time. I learned this after a particularly chaotic morning where I was frantically whisking powdered sugar while my scones cooled too much. Not my finest moment.
Variations & Adaptations
One of the best things about this recipe is how flexible it is. Here are some variations I’ve tried and loved:
Maple Pecan Pumpkin Scones
Add ½ cup of chopped pecans to the dry ingredients before adding the wet mixture. Toast the pecans first for extra flavor — just spread them on a baking sheet and bake at 350°F for 5-7 minutes. The crunch adds a lovely contrast to the soft scone.
Chocolate Chip Pumpkin Scones
Fold in ½ cup of dark chocolate chips along with the wet ingredients. The bitterness of dark chocolate balances the sweetness of the maple glaze beautifully. My niece insists this is the only way to make them.
Gluten-Free Version
Use a 1:1 gluten-free baking blend instead of all-purpose flour. Add 1 teaspoon of xanthan gum if your blend doesn’t already include it. The texture will be slightly more tender and a bit more delicate, so handle the dough gently. I’ve had great results with this version for friends with celiac disease.
Dairy-Free Version
Substitute the butter with cold coconut oil or vegan butter. Use coconut cream or oat milk instead of heavy cream. The flavor changes slightly — coconut adds a subtle tropical note — but the texture stays remarkably similar.
Spiced Maple Glaze
Add ¼ teaspoon of cinnamon or pumpkin pie spice to the glaze. It gives the glaze a warm, speckled look and an extra layer of flavor. I do this when I want the scones to feel extra special.
Serving & Storage Suggestions
These scones are best served warm, about 10-15 minutes after glazing. The glaze will be set but still soft, and the scone will be tender and fragrant. Pair them with a hot cup of coffee, chai latte, or spiced apple cider for the ultimate fall experience.
For a brunch spread, arrange the scones on a wooden board with small bowls of whipped butter, honey, and fresh fruit. They also go beautifully with a side of scrambled eggs and crispy bacon for a savory-sweet balance.
Storage: Store leftover scones in an airtight container at room temperature for up to 3 days. The glaze may soften slightly, but they’ll still taste great. Do not refrigerate them — the fridge dries out baked goods faster than anything.
Freezing: You can freeze the unbaked scones. Cut them into wedges, place them on a baking sheet in the freezer until solid, then transfer to a freezer bag. Bake from frozen, adding 2-3 minutes to the baking time. You can also freeze baked, unglazed scones for up to 2 months. Thaw at room temperature, then warm in a 300°F oven for 5 minutes before glazing.
Reheating: Pop a scone in a 300°F oven for 5-7 minutes to bring back that fresh-from-the-oven texture. The microwave works in a pinch (about 15 seconds), but the oven is better for keeping the edges crisp.
Flavor development: These scones actually taste even better the next day. The spices meld together, and the pumpkin flavor becomes more pronounced. If you can resist eating them all on day one, you’re in for a treat on day two.
Nutritional Information & Benefits
Here’s the approximate nutritional breakdown for one scone (with glaze):
| Nutrient | Amount Per Serving |
|---|---|
| Calories | 285 |
| Total Fat | 12g |
| Saturated Fat | 7g |
| Cholesterol | 45mg |
| Sodium | 210mg |
| Total Carbohydrates | 40g |
| Dietary Fiber | 2g |
| Sugars | 20g |
| Protein | 4g |
Health Benefits: Pumpkin is packed with vitamin A, which supports eye health and immune function. It’s also a good source of fiber, which helps with digestion and keeps you feeling full. The cinnamon in this recipe has anti-inflammatory properties and may help regulate blood sugar. Maple syrup contains antioxidants and minerals like zinc and manganese — though let’s be honest, we’re eating these scones for the joy, not the health benefits.
Dietary Considerations: This recipe contains gluten, dairy, and eggs. For allergy-friendly versions, check the variations section above. These scones are nut-free as written, making them a safe option for school bake sales or gatherings with nut allergies.
Conclusion
These Perfect Pumpkin Scones with Maple Glaze have become my go-to fall recipe for a reason. They’re forgiving enough for a beginner baker but impressive enough to serve at a holiday brunch. The texture is soft and tender, the spices are warm and comforting, and that maple glaze on top? It’s the kind of finish that makes people ask for the recipe before they’ve even finished eating.
I love that this recipe started with my sister questioning everything I thought I knew about baking. It’s a good reminder that sometimes the best recipes come from being willing to try something different. So go ahead — make these scones your own. Add chocolate chips if that’s your thing. Swap the glaze for a simple dusting of powdered sugar. Or follow the recipe exactly and taste why I keep coming back to it year after year.
When you make them — and I hope you do — come back and let me know how they turned out. Did you try a variation? Did the glaze set perfectly? I’d love to hear about it in the comments below. And if you share a photo on Pinterest, tag me so I can see your beautiful fall creation.
Happy baking, friends. Here’s to warm scones, good coffee, and the people who teach us something new in the kitchen.
Frequently Asked Questions
Can I use pumpkin pie filling instead of pumpkin puree?
No, please don’t. Pumpkin pie filling is already sweetened and spiced, which will throw off the balance of this recipe. Stick with 100% pure pumpkin puree for the best results.
Why did my scones turn out dry?
Dry scones usually come from overmixing the dough or baking them too long. Make sure you stop mixing as soon as the flour disappears, and check the scones at the 14-minute mark. Every oven runs a little differently.
Can I make the dough ahead of time?
Yes! You can prepare the dough, cut it into wedges, and refrigerate them on a baking sheet for up to 24 hours. Bake them straight from the fridge — just add 1-2 minutes to the baking time.
How do I get the glaze to look smooth and not lumpy?
Sift your powdered sugar before whisking it with the maple syrup and cream. Lumps in the glaze usually come from clumpy powdered sugar. A quick sift solves that problem every time.
Can I freeze these scones after glazing?
I don’t recommend it. The glaze can become sticky and messy after thawing. It’s better to freeze the scones without glaze, then make fresh glaze when you’re ready to serve them. The glaze takes less than 2 minutes to whip up.
Pin This Recipe!
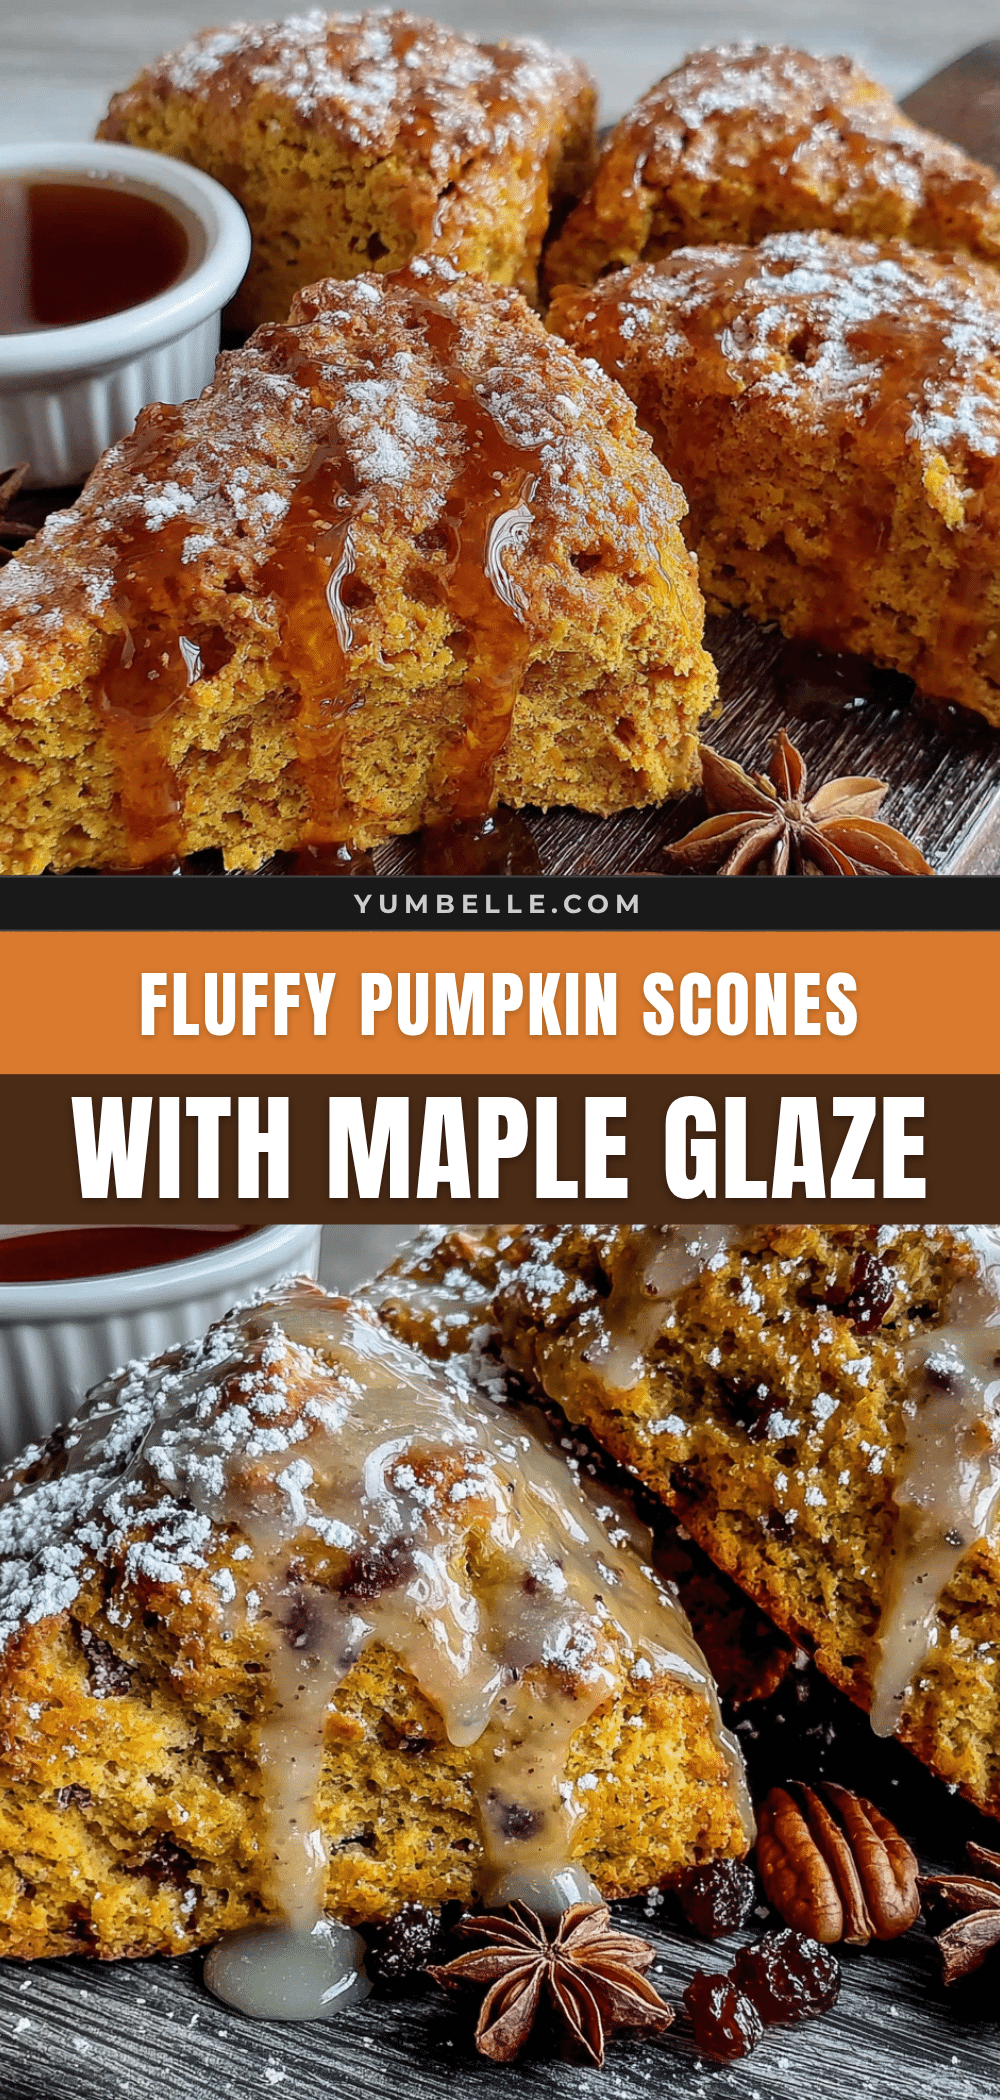
Perfect Pumpkin Scones with Maple Glaze: Easy Fall Recipe
These Perfect Pumpkin Scones with Maple Glaze are soft, tender, and just a little bit flaky on the outside, made moist with pumpkin puree and finished with a glossy maple glaze. They’re quick, easy, and perfect for fall mornings or any cozy occasion.
- Prep Time: 15 minutes
- Cook Time: 16 minutes
- Total Time: 31 minutes
- Yield: 8 servings 1x
- Category: Breakfast, Dessert
- Cuisine: American
Ingredients
- 2 cups (250g) all-purpose flour
- 1/3 cup (65g) granulated sugar
- 1 tablespoon baking powder
- 1 ½ teaspoons pumpkin pie spice
- 1 teaspoon ground cinnamon
- ½ teaspoon salt
- 6 tablespoons (85g) cold unsalted butter, cubed
- ½ cup (120g) pumpkin puree (100% pure)
- ¼ cup (60ml) heavy cream
- 1 large egg, room temperature
- 1 teaspoon vanilla extract
- 1 cup (120g) powdered sugar, sifted
- 2 tablespoons pure maple syrup
- 1–2 tablespoons heavy cream or milk
- ½ teaspoon vanilla extract (optional)
Instructions
- Preheat your oven to 400°F (200°C). Line a baking sheet with parchment paper.
- In a large bowl, whisk together 2 cups all-purpose flour, 1/3 cup granulated sugar, 1 tablespoon baking powder, 1 ½ teaspoons pumpkin pie spice, 1 teaspoon cinnamon, and ½ teaspoon salt.
- Add the 6 tablespoons of cubed cold butter to the flour mixture. Use a pastry cutter or two forks to cut the butter into the flour until it resembles coarse meal with pea-sized butter pieces.
- In a separate small bowl, whisk together ½ cup pumpkin puree, ¼ cup heavy cream, 1 large egg, and 1 teaspoon vanilla extract until smooth.
- Pour the wet mixture into the dry mixture. Stir with a spatula or wooden spoon just until combined. The dough will look shaggy and a little sticky.
- Turn the dough out onto a lightly floured surface. Gently bring it together with your hands, patting it into a circle about ¾-inch thick. Cut the circle into 8 equal wedges.
- Place the scones on the prepared baking sheet, spacing them about 2 inches apart. Bake for 14-16 minutes, until the bottoms are golden brown and the tops are set.
- Let the scones cool on the baking sheet for 5 minutes, then transfer them to a cooling rack.
- While the scones are cooling, whisk together 1 cup powdered sugar, 2 tablespoons maple syrup, ½ teaspoon vanilla, and 1 tablespoon of cream. Add more cream a teaspoon at a time until the glaze is thin enough to drizzle but thick enough to cling.
- Drizzle the glaze over the warm scones. Let the glaze set for about 10 minutes before serving.
Notes
Keep all ingredients cold for flaky scones. Do not overmix the dough. Glaze while scones are warm for best results. Scones can be frozen unbaked or baked without glaze.
Nutrition
- Serving Size: 1 scone
- Calories: 285
- Sugar: 20
- Sodium: 210
- Fat: 12
- Saturated Fat: 7
- Carbohydrates: 40
- Fiber: 2
- Protein: 4
Keywords: pumpkin scones, maple glaze, fall recipe, easy scones, pumpkin spice, breakfast, brunch