Love this? Save it for later!
Share the inspiration with your friends
Marta wasn’t trying to impress me. I’d stopped by her place to borrow a ladder—mine had mysteriously vanished after a neighbor’s garage sale—and the smell hit me before I even got past her screen door. Warm, spiced, sweet, but not cloying. Like autumn had been distilled into something edible. She was pulling a baking dish out of the oven with this completely unbothered look on her face, like she was just reheating leftovers. But what I saw was pure magic: pear slices, glistening with honey and cinnamon, bubbling gently around the edges. Honestly, I almost forgot about the ladder. I just stood there, staring at this dish like it held the secrets of the universe. She noticed my reaction and just shrugged, saying, “Oh, it’s nothing. Just pears.” Just pears. As if she hadn’t just created the most comforting, soul-warming dessert I’d ever seen. I grabbed a fork—maybe you’ve been there, where you just can’t wait—and took a bite right out of the dish. The pears were tender, the cinnamon and sugar had formed this lovely, almost caramelized crust, and the honey brought this floral sweetness that tied it all together. I knew right then I wasn’t leaving without that recipe. And honestly, that ladder? I borrowed it three weeks later. This dish has become my go-to for everything: a lazy Sunday dessert, a fancy-ish topping for yogurt, or just a snack when I need a little warmth in my day. It’s that kind of recipe—the kind you stumble upon when you’re not looking for it, and then you can’t imagine your life without it.
Why You’ll Love This Recipe
This isn’t just another baked fruit recipe. After countless trials in my own kitchen—testing different pear varieties, honey brands, and spice ratios—I can confidently say this version hits the sweet spot. It’s the kind of recipe that feels special enough for company but is simple enough for a random Tuesday night.
- Quick & Easy: From start to finish, you’re looking at about 25 minutes. Perfect for when that sugar craving hits out of nowhere or you need a last-minute dessert.
- Simple Ingredients: You probably have everything in your pantry right now. Pears, cinnamon, sugar, honey. That’s the core of it. No fancy trips to the store required.
- Perfect for Any Occasion: Serve it warm with a scoop of vanilla ice cream for a dinner party, or spoon it over your morning oatmeal for a cozy breakfast. It’s versatile like that.
- Crowd-Pleaser: I’ve served this to kids who claimed they didn’t like fruit and adults who are notoriously picky about desserts. It gets devoured every single time.
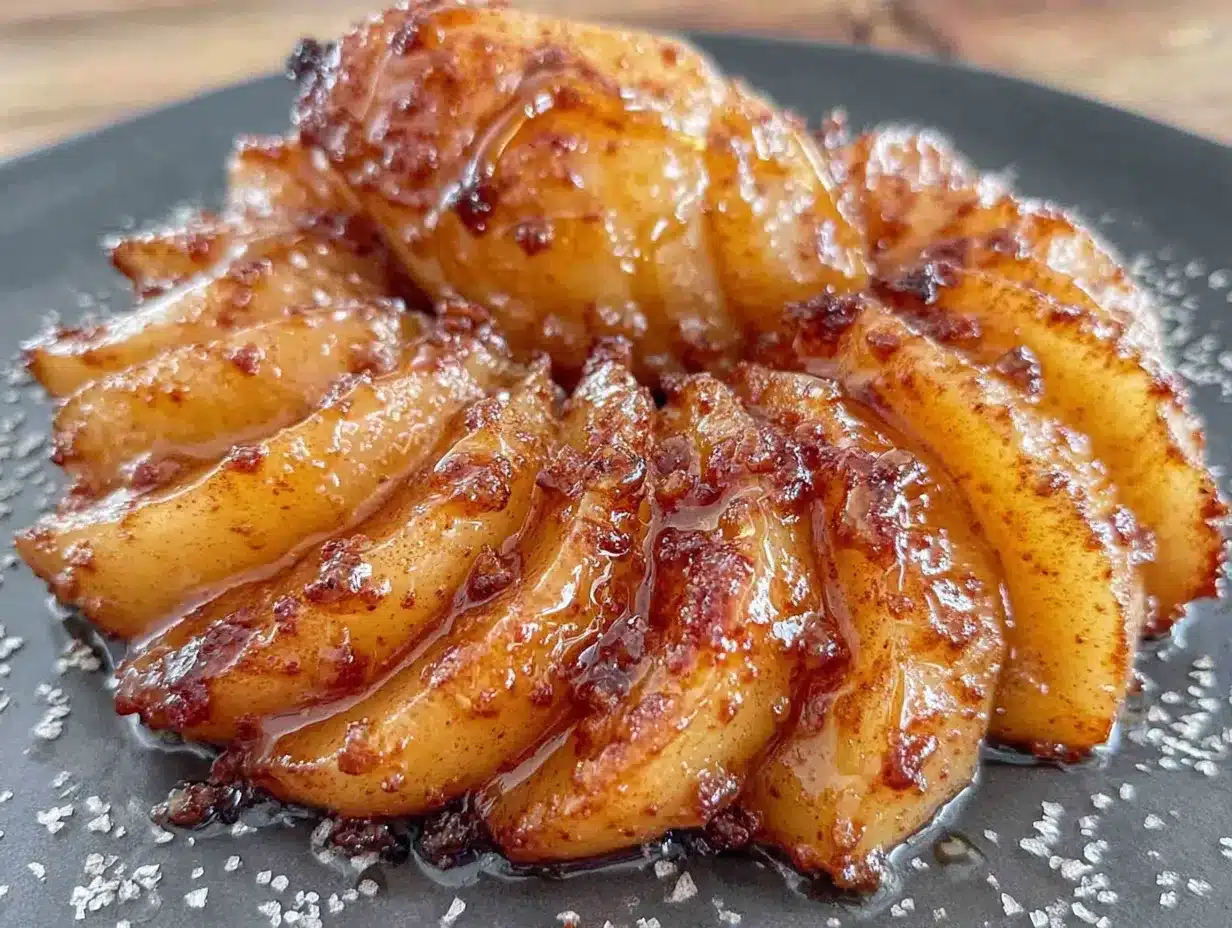
- Unbelievably Delicious: The magic is in the texture. The pears soften and release their natural juices, which then mingle with the honey and cinnamon to create this incredible, syrupy sauce. It’s comfort food at its finest, but with fruit, so you can almost pretend it’s healthy.
What makes this recipe different? It’s the ratio of cinnamon to honey, and the way the pears are sliced just thick enough to hold their shape but thin enough to soak up all that flavor. I’ve tested it with different sweeteners and spice blends, and this is the combination that makes you close your eyes after the first bite. It’s not fussy or complicated—it’s just honest, delicious food that makes you feel good.
What Ingredients You Will Need
This recipe uses simple, wholesome ingredients that work together to create something truly special. Most of these are pantry staples, which makes this dish perfect for spontaneous baking sessions.
- Pears (4 medium, firm but ripe): The star of the show. You want pears that are ripe enough to be sweet and fragrant, but still firm enough to hold their shape during baking. Bosc or Anjou pears work beautifully here. I personally prefer Bosc for their honeyed flavor and dense texture. Stay away from overly soft or mealy pears—they’ll turn into mush.
- Unsalted Butter (2 tablespoons, melted): Adds richness and helps the cinnamon sugar mixture adhere to the pears. It also contributes to that lovely caramelization around the edges. You can use salted butter if that’s all you have, just reduce the added salt by a pinch.
- Honey (3 tablespoons): Use a good-quality honey here—it makes a difference. The floral notes of the honey complement the pears beautifully. I like using a local wildflower honey or orange blossom honey. If your honey is crystallized, just warm it up slightly before using.
- Ground Cinnamon (1 teaspoon): The warm, spicy backbone of this dish. Fresh cinnamon makes a noticeable difference, so if your jar has been sitting in the pantry for years, consider replacing it. I recommend Saigon cinnamon for its bolder, sweeter flavor.
- Granulated Sugar (2 tablespoons): Helps create that slightly crunchy, caramelized top. You can substitute coconut sugar or brown sugar for a deeper flavor profile.
- Lemon Juice (1 tablespoon, freshly squeezed): This isn’t just for tang. The acidity of the lemon juice prevents the pears from browning too much and balances the sweetness of the honey and sugar.
- Salt (a pinch): Don’t skip this. A tiny pinch of salt enhances all the other flavors and prevents the dish from tasting one-dimensionally sweet. I use fine sea salt.
- Vanilla Extract (1/2 teaspoon, optional but recommended): Adds a warm, aromatic depth that pairs wonderfully with the pears and cinnamon. It rounds out the flavors beautifully.
Equipment Needed
You don’t need a fancy kitchen to make this recipe. Here’s what you’ll need:
- Baking Dish (8×8 or 9×9 inch): A square glass or ceramic dish works perfectly. I’ve used a 9-inch pie plate in a pinch, and it worked fine. The key is to have a dish where the pears can sit in a single layer without being too crowded.
- Sharp Knife and Cutting Board: For slicing the pears. A sharp knife makes clean, even slices, which helps them cook uniformly.
- Small Bowl: For mixing the cinnamon and sugar together.
- Measuring Spoons: For accuracy. Baking is a science, even if this is a simple recipe.
- Pastry Brush or Spoon: For brushing the butter and honey mixture over the pears. A spoon works just fine if you don’t have a pastry brush.
- Vegetable Peeler (optional): I prefer leaving the skin on for texture and nutrients, but if you prefer peeled pears, go for it.
If you don’t have a pastry brush, don’t worry. I’ve used the back of a spoon for years before I finally bought one. It’s not a dealbreaker.
Preparation Method
- Preheat your oven to 375°F (190°C). Give it a good 10-15 minutes to reach the right temperature. A properly preheated oven ensures even cooking and that lovely caramelization.
- Prepare the pears. Wash the pears thoroughly. If you’re leaving the skin on (which I recommend), just dry them with a clean towel. Cut each pear in half lengthwise, then use a melon baller or a small spoon to scoop out the core and seeds. Slice each half into 1/4-inch thick slices lengthwise. Try to keep the slices uniform in thickness so they cook evenly. I’ve had slices that were too thin turn into mush, and slices too thick stay crunchy—neither is ideal.
- Arrange the pears in the baking dish. Place the sliced pears in your baking dish in a single layer, slightly overlapping if needed. Don’t pile them up too high, or they’ll steam instead of roast. A single layer is your friend here.
- Mix the cinnamon sugar. In a small bowl, combine the ground cinnamon, granulated sugar, and a tiny pinch of salt. Stir with a fork until evenly mixed. Give it a sniff—it should smell warm and inviting.
- Add the butter and honey. In a separate small bowl or a liquid measuring cup, whisk together the melted butter, honey, lemon juice, and vanilla extract (if using). The mixture should be smooth and golden.
- Assemble the dish. Drizzle the butter-honey mixture evenly over the sliced pears. Use a pastry brush or the back of a spoon to make sure each slice gets a little coating. Then, sprinkle the cinnamon sugar mixture evenly over the top. Don’t dump it all in one spot—distribute it as evenly as you can.
- Bake. Place the dish in the preheated oven and bake for 20-25 minutes. At the 15-minute mark, check on it. The pears should be tender when pierced with a fork, and the juices should be bubbling around the edges. The tops should be slightly caramelized and golden. If you want more caramelization, you can switch the oven to broil for the last 1-2 minutes, but watch it carefully—it can go from golden to burnt in seconds. I learned this the hard way.
- Rest before serving. Remove the dish from the oven and let it rest for about 5 minutes. This allows the juices to settle and thicken slightly. The pears will continue to soften as they cool.
A quick note: The pears will release a lot of liquid as they bake. This is a good thing! That liquid, combined with the honey and butter, creates a wonderful syrup that you’ll want to spoon over everything.
Cooking Tips & Techniques
After making this recipe more times than I can count—including a memorable disaster where I forgot the honey entirely—I’ve picked up a few tricks that make a real difference.
Choosing the right pears is half the battle. I cannot stress this enough. If your pears are rock-hard, they won’t soften enough during baking. If they’re too soft, they’ll turn into pear soup. You want that sweet spot where the pear yields slightly to gentle pressure near the stem. Bosc pears are my go-to because they hold their shape beautifully and have a naturally honeyed flavor that complements the added honey.
Don’t skip the lemon juice. I know it seems like a small thing, but that little bit of acidity brightens the whole dish. It prevents the pears from tasting flat or overly sweet. Plus, it keeps them from turning an unappetizing brown color.
Watch your oven like a hawk. Ovens vary wildly. My old oven ran hot, and I burned the first batch I made. Now I always start checking at the 15-minute mark. The pears should be tender but not falling apart. If the tops are browning too quickly, tent the dish loosely with foil for the remaining baking time.
Make extra syrup if you want. If you’re someone who loves sauce (I am), you can double the butter and honey mixture. Just be aware that the pears will be swimming in liquid, and the baking time might increase slightly. It’s a delicious problem to have.
Let the dish rest. I know it’s tempting to dig in right away, but those 5 minutes of resting time are crucial. The syrup thickens slightly, the flavors meld together, and the pears set just enough. Trust me on this one.
Variations & Adaptations
This recipe is incredibly forgiving and adaptable. Here are some variations I’ve tried and loved:
- Spice it up: Add a pinch of nutmeg, cardamom, or ginger to the cinnamon sugar mixture. I sometimes add a tiny pinch of cloves for a more complex, wintery flavor. Just be careful—cloves are potent and can easily overpower the dish.
- Make it vegan: Substitute the butter with coconut oil or a plant-based butter alternative. Use maple syrup instead of honey for a vegan-friendly version. The flavor profile changes slightly, but it’s still absolutely delicious.
- Add some crunch: Sprinkle chopped pecans, walnuts, or slivered almonds over the pears before baking. They toast up beautifully in the oven and add a lovely textural contrast to the soft pears. I’ve done this for holiday gatherings, and it’s always a hit.
- Go boozy: Add a tablespoon of bourbon, dark rum, or brandy to the butter-honey mixture. The alcohol mostly cooks off, leaving behind a warm, complex flavor that pairs beautifully with the pears. This is my go-to for adult dinner parties.
- Try different fruits: This method works beautifully with apples, peaches, or nectarines. Adjust the baking time based on the fruit’s firmness. Apples will need a few extra minutes, while peaches will need slightly less.
- Top with something creamy: A dollop of Greek yogurt, crème fraîche, or mascarpone cheese balances the sweetness beautifully. A scoop of vanilla bean ice cream is never a bad idea either.
Serving & Storage Suggestions
These baked pear slices are incredibly versatile when it comes to serving. Here’s how I like to enjoy them:
Serving: Serve warm, straight from the oven. Spoon the pears and their syrupy juices into bowls or onto plates. They’re wonderful on their own, but a scoop of vanilla ice cream or a dollop of whipped cream takes them over the top. For breakfast, I love them spooned over thick Greek yogurt or oatmeal with a drizzle of extra honey. They also make a fantastic topping for pancakes, waffles, or French toast.
Storage: Store any leftovers in an airtight container in the refrigerator for up to 4 days. The pears will continue to soften and release more liquid as they sit, but the flavor actually gets better after a day or two. The spices meld together, and the honey flavor becomes more pronounced.
Reheating: To reheat, place the pears in a small saucepan over low heat, stirring gently, until warmed through. You can also microwave them in 30-second bursts. If the syrup has thickened too much in the fridge, add a splash of water or apple juice to loosen it up.
Freezing: This dish freezes surprisingly well. Place the cooled pears and syrup in a freezer-safe container and freeze for up to 3 months. Thaw overnight in the refrigerator and reheat gently. The texture of the pears will be slightly softer after freezing, but the flavor remains excellent.
One thing I’ve noticed: the flavors develop and deepen over time. The second day, the pears taste even more honeyed and spiced. So if you can resist eating them all at once, you’re in for a treat.
Nutritional Information & Benefits
While this is definitely a treat, it’s one that comes with some nutritional perks. Here’s a general breakdown per serving (about 1/4 of the recipe):
| Nutrient | Amount per Serving |
|---|---|
| Calories | 185 |
| Total Fat | 6g |
| Saturated Fat | 3.5g |
| Carbohydrates | 34g |
| Fiber | 5g |
| Sugar | 25g |
| Protein | 1g |
| Vitamin C | 8% DV |
| Potassium | 6% DV |
Health benefits: Pears are an excellent source of dietary fiber, which aids digestion and helps you feel full longer. They also contain vitamin C, vitamin K, and copper. Honey is a natural sweetener with antioxidant and antibacterial properties, though it should be used in moderation. Cinnamon has been studied for its potential to help regulate blood sugar levels, making this a smarter choice than many other desserts.
Dietary considerations: This recipe is naturally gluten-free and can be made dairy-free by using coconut oil instead of butter. As written, it contains dairy (butter). It is not suitable for a low-sugar or keto diet due to the honey and sugar content, though you could experiment with sugar substitutes.
Conclusion
This cinnamon sugar baked pear slices with honey recipe is one of those rare dishes that manages to be both simple and spectacular. It’s the kind of recipe you’ll make when you need a quick dessert, when you want to impress someone without breaking a sweat, or when you just need a little warmth and sweetness in your day. The pears become tender and luscious, the honey and cinnamon create a syrup that’s pure comfort, and the whole thing comes together in under half an hour.
I love this recipe because it reminds me that you don’t need a dozen fancy ingredients or complicated techniques to make something truly memorable. Sometimes the best dishes are the ones you stumble upon—like I did at Marta’s house—that turn out to be exactly what you didn’t know you were looking for.
I’d love to hear how yours turn out! Did you try any of the variations? Did you serve it with something unexpected? Drop a comment below and let me know. And if you loved this recipe, share it with a friend who needs a little comfort food in their life. Happy baking!
Frequently Asked Questions
Can I use canned pears for this recipe?
I wouldn’t recommend it. Canned pears are already cooked and much softer than fresh pears. They’ll turn into mush during baking. Fresh pears give you that lovely tender-but-not-falling-apart texture that makes this dish special.
What if I don’t have honey? Can I use maple syrup instead?
Absolutely! Maple syrup works beautifully as a substitute. It will change the flavor profile slightly—giving it a more woodsy, caramel-like sweetness—but it’s still delicious. Use the same amount as you would honey.
How do I know when the pears are done baking?
The pears should be tender when pierced with a fork or the tip of a knife. The edges should be slightly caramelized, and the juices should be bubbling around the sides of the dish. Start checking at the 15-minute mark to avoid overbaking.
Can I make this recipe ahead of time for a party?
Yes! You can prepare the dish up to the point of baking, cover it, and refrigerate it for up to 24 hours. When you’re ready to bake, add about 5-10 minutes to the baking time since you’re starting from a cold dish. Alternatively, you can bake it fully and reheat it just before serving.
Should I peel the pears before baking?
That’s entirely up to you. I prefer leaving the skin on for the texture, color, and extra fiber. The skin softens during baking and becomes pleasant to eat. If you prefer a more uniform, delicate texture, feel free to peel them. Just be aware that peeled pears may become slightly softer during baking.
Pin This Recipe!
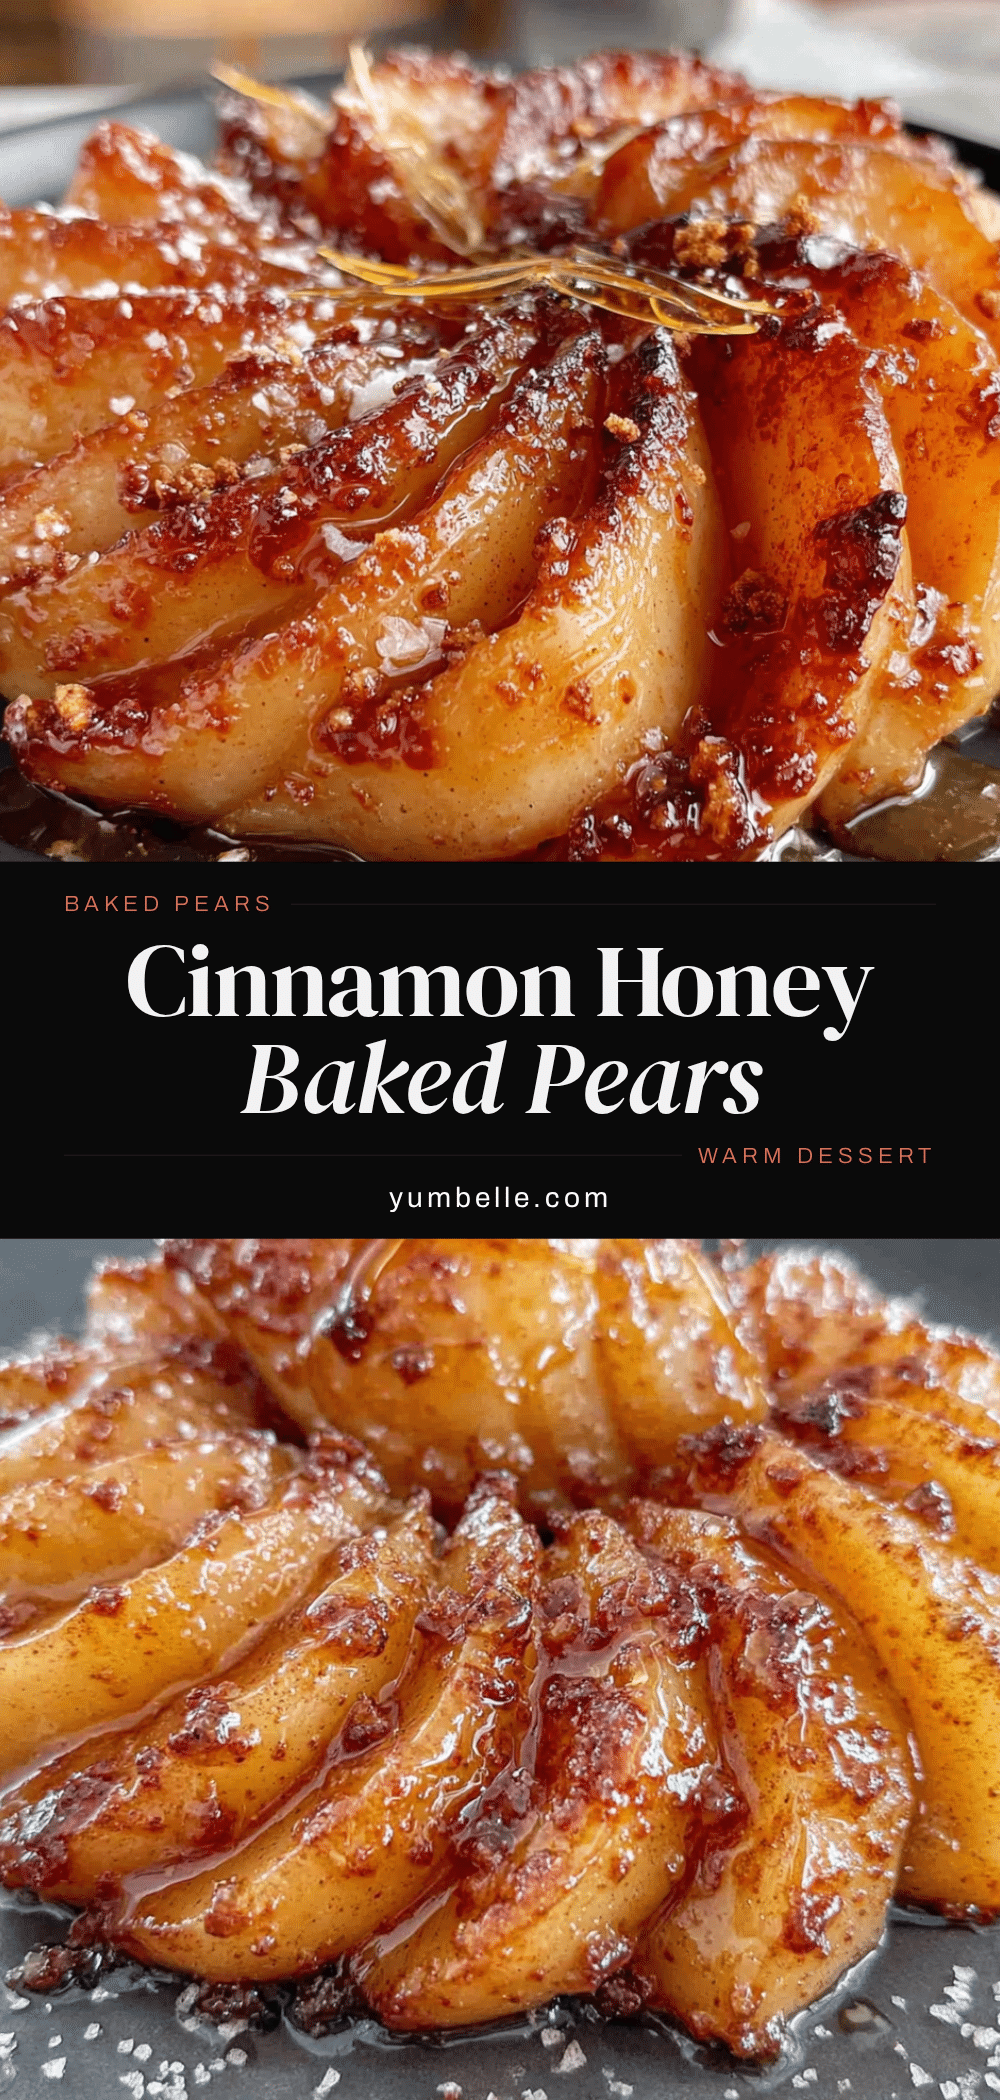
Best Easy Cinnamon Sugar Baked Pear Slices with Honey Recipe
Tender baked pear slices glazed with honey and cinnamon, creating a caramelized crust and syrupy sauce. A quick, comforting dessert or topping that’s perfect for any occasion.
- Prep Time: 10 minutes
- Cook Time: 20-25 minutes
- Total Time: 30-35 minutes
- Yield: 4 servings 1x
- Category: Dessert
- Cuisine: American
Ingredients
- 4 medium firm but ripe pears (Bosc or Anjou)
- 2 tablespoons unsalted butter, melted
- 3 tablespoons honey
- 1 teaspoon ground cinnamon
- 2 tablespoons granulated sugar
- 1 tablespoon freshly squeezed lemon juice
- 1 pinch fine sea salt
- 1/2 teaspoon vanilla extract (optional)
Instructions
- Preheat your oven to 375°F (190°C).
- Wash the pears. Cut each pear in half lengthwise, remove the core and seeds, then slice each half into 1/4-inch thick slices lengthwise.
- Arrange the sliced pears in a single layer in an 8×8 or 9×9 inch baking dish, slightly overlapping if needed.
- In a small bowl, mix together the ground cinnamon, granulated sugar, and a pinch of salt.
- In another small bowl, whisk together the melted butter, honey, lemon juice, and vanilla extract (if using).
- Drizzle the butter-honey mixture evenly over the pears, using a pastry brush or spoon to coat each slice. Sprinkle the cinnamon sugar mixture evenly over the top.
- Bake for 20-25 minutes, checking at 15 minutes. Pears should be tender when pierced with a fork and juices bubbling. For extra caramelization, broil for 1-2 minutes at the end, watching carefully.
- Remove from oven and let rest for 5 minutes before serving. The syrup will thicken slightly.
Notes
Choose pears that are ripe but firm. Bosc pears hold their shape well. Don’t skip the lemon juice—it balances sweetness and prevents browning. Let the dish rest for 5 minutes before serving to allow the syrup to thicken. For a vegan version, substitute butter with coconut oil and honey with maple syrup.
Nutrition
- Serving Size: 1/4 of recipe
- Calories: 185
- Sugar: 25
- Fat: 6
- Saturated Fat: 3.5
- Carbohydrates: 34
- Fiber: 5
- Protein: 1
Keywords: baked pears, cinnamon pears, honey pears, easy dessert, healthy dessert, pear recipe, fall dessert


