Love this? Save it for later!
Share the inspiration with your friends
This was supposed to be a batch of simple butter cookies for a neighbor’s holiday swap. I had the butter softening on the counter, the vanilla measured out, and my mind already on the next task. Then the phone rang, I got distracted by a delivery at the door, and when I came back to the kitchen, I grabbed the almond extract instead of the vanilla. By the time I realized what I’d done, the dough was already mixed. I stood there, staring at the bowl, convinced I’d just ruined two sticks of good butter. But I was stubborn. I shaped the dough into little logs anyway, tossed them in the fridge out of pure spite, and figured I’d deal with the consequences later.
Later turned into the next morning, when I pulled that chilled dough out and decided to have a little fun with it. I rolled each piece into a thin, knobby finger shape, pressed an almond slice into one end for a nail, and scored the knuckles with the back of a knife. Honestly, I was just killing time before starting over with the right recipe. But when they came out of the oven—golden, slightly cracked at the joints, and looking genuinely creepy—I took one bite and stopped dead. The almond extract had turned a boring sugar cookie into something almost marzipan-like. It was perfect. I mean, completely, unexpectedly perfect.
Maybe you’ve been there, where a mistake in the kitchen turns into your new favorite thing. That’s exactly how these spooky witch finger cookies for Halloween were born. They weren’t planned. They weren’t tested. They just happened because I grabbed the wrong bottle. And now I make them every October without fail. They’re the cookies that started as a failure and ended up being the one thing everyone asks for at every Halloween party. I keep making them because they remind me that sometimes the best recipes come from the moments when you think you’ve messed up completely.
Why You’ll Love This Recipe
These spooky witch finger cookies for Halloween are the kind of recipe that does double duty. They look genuinely creepy enough to impress at a party, but they taste like a buttery, almond-scented dream. I’ve tested this dough at least a dozen times to get the texture just right—firm enough to hold its shape while baking, but tender enough to melt in your mouth. Here’s why this recipe has become my Halloween non-negotiable.
- Quick & Easy: From start to finish, you’re looking at about 45 minutes. The dough comes together in one bowl, and the shaping is actually fun. No rolling pins, no cutters, no fuss.
- Simple Ingredients: Butter, sugar, flour, an egg, and almond extract. That’s it. You probably have everything except maybe the almond extract, which is worth grabbing for this alone.
- Perfect for Halloween Parties: These things get attention. Every time I set a platter of these on a table, people stop mid-conversation to look. They’re creepy without being over-the-top gory.
- Crowd-Pleaser: Kids love the gross factor. Adults love the flavor. It’s a weird combo that somehow works perfectly. I’ve never brought a plate of these home with leftovers.
- Unbelievably Delicious: The almond extract is the secret weapon here. It gives the cookies a subtle, almost nutty sweetness that makes them taste way more sophisticated than a basic sugar cookie. The texture is crisp on the outside and slightly soft in the center.
What makes these different from every other witch finger cookie recipe out there is the texture. I spent a long time figuring out the right ratio of butter to flour so the fingers don’t puff up and lose their shape in the oven. They stay thin and knobby, just like real fingers. Plus, the almond extract isn’t overpowering—it’s just enough to make you wonder what that flavor is. It’s the kind of cookie that makes people close their eyes after the first bite, even while they’re pretending to be grossed out by how it looks.
What Ingredients You Will Need
This recipe keeps things simple. You don’t need any specialty baking ingredients or weird food coloring. The magic comes from how these basic pantry staples come together. I’ve tested this with a few different brands, and I can tell you that the quality of your butter and your almond extract makes the biggest difference here.
- 1 cup (226g) unsalted butter, softened to room temperature (I prefer Kerrygold or Plugrà for the best flavor, but any good unsalted butter works)
- 1 cup (200g) granulated sugar (regular white sugar is perfect—no need for anything fancy)
- 1 large egg, at room temperature (cold egg will seize the butter, so let it sit out for 20 minutes)
- 1 teaspoon almond extract (this is non-negotiable—do not substitute vanilla here, the almond is what makes these taste so good)
- 2 ½ cups (312g) all-purpose flour, spooned and leveled (don’t scoop directly from the bag or you’ll pack too much flour in)
- ½ teaspoon salt (fine sea salt or table salt, not coarse kosher)
- ½ teaspoon baking powder (helps them spread just a tiny bit without puffing up)
- Whole almonds or sliced almonds (one per cookie for the fingernail—about 24 to 30 pieces)
- Red food coloring or raspberry jam (optional, for a bloody effect at the base of the nail or the broken end of a finger)
A quick note on the almond extract: I’ve tried this with imitation almond extract and it’s just not the same. The real stuff has a deeper, almost cherry-like undertone that makes these cookies taste bakery-quality. McCormick makes a solid one, but if you can find Nielsen-Massey, that’s my go-to. Also, if you’re making these for a party where someone has a nut allergy, you can skip the almond fingernails and just score the end of the finger with a knife to create a nail bed indent. It still looks creepy without the actual nut.
Equipment Needed
You don’t need anything fancy for these cookies. I’ve made them in a tiny apartment kitchen and in a full bakery setup. The tools are the same either way.
- Electric hand mixer or stand mixer (a hand mixer works perfectly—I actually prefer it because there’s less cleanup)
- Large mixing bowl
- Baking sheets (two if you have them, so you can rotate batches)
- Parchment paper or silicone baking mats (parchment is cheaper and works just as well)
- Sharp knife (for scoring the knuckles)
- Small offset spatula (helpful for moving the delicate cookies, but not essential)
- Cooling rack
- Measuring cups and spoons
- Plastic wrap (for chilling the dough)
If you don’t have a mixer, you can absolutely cream the butter and sugar by hand with a wooden spoon. It takes a little elbow grease, but the dough comes together. Just make sure your butter is really soft. I’ve also used a food processor in a pinch, pulsing the dry ingredients first and then adding the butter in chunks. It works, but you have to be careful not to overmix. Honestly, the hand mixer is your best bet here.
Preparation Method
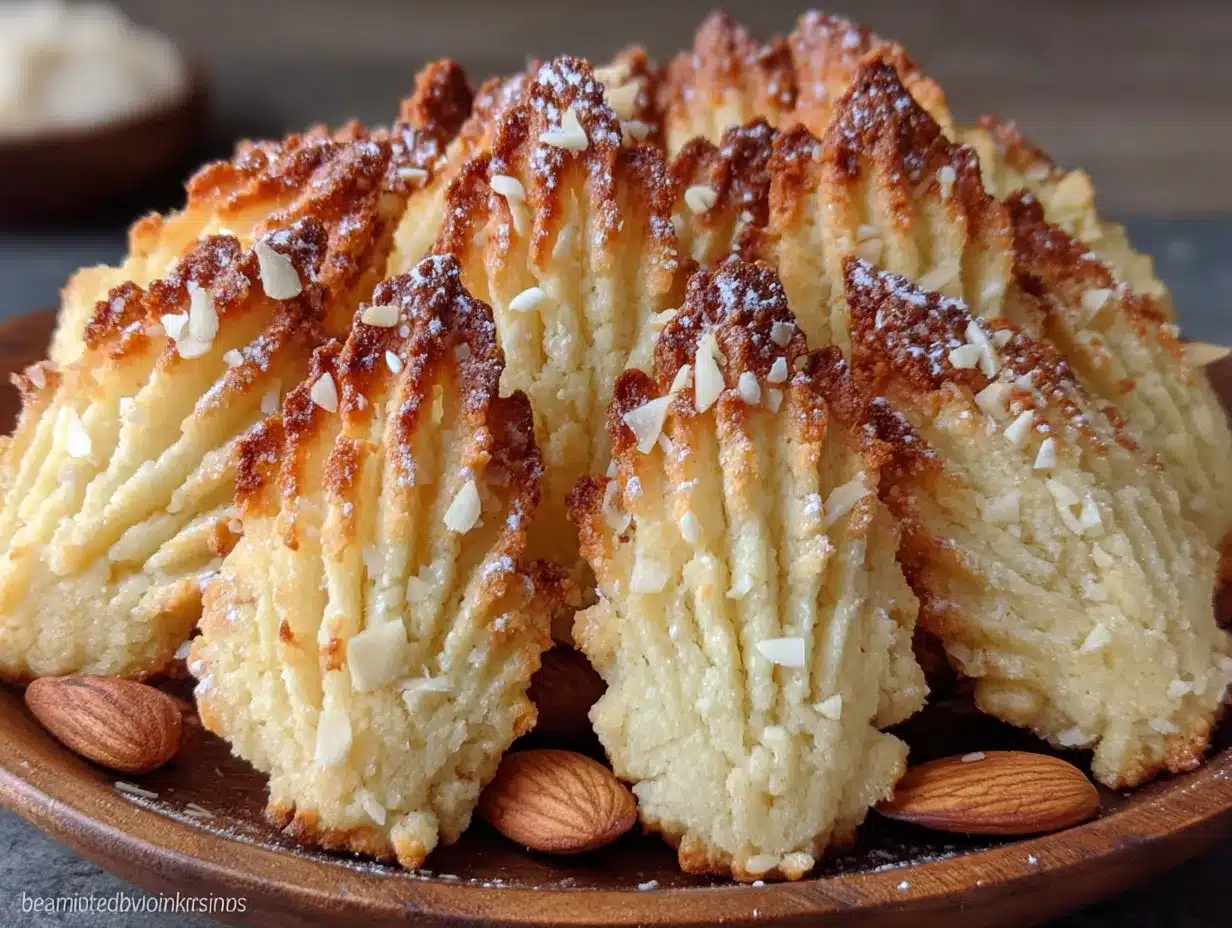
This is where the fun begins. The dough comes together fast, but the chilling and shaping are where these cookies get their creepy character. Take your time with the shaping—it’s the most satisfying part.
- Cream the butter and sugar. In a large mixing bowl, beat the softened butter and granulated sugar together on medium speed until light and fluffy, about 2 to 3 minutes. You want it to look pale and almost doubled in volume. Scrape down the sides of the bowl once during this process. If you’re using a hand mixer, this is the point where you might get a little splatter on your counter. It happens. Just wipe it up and keep going.
- Add the egg and almond extract. Crack the egg into the butter mixture and add the almond extract. Beat on low speed until just combined. Don’t overmix here or the dough can get tough later. The mixture might look a little curdled for a second, but it will come together once the flour goes in. I’ve had this happen plenty of times and it always works out fine.
- Mix the dry ingredients. In a separate bowl, whisk together the flour, salt, and baking powder. Add this to the wet mixture in two additions, mixing on low speed after each addition. Stop mixing as soon as the flour disappears. The dough will be soft and slightly sticky, but it should pull away from the sides of the bowl. If it feels too sticky to handle, add one more tablespoon of flour.
- Chill the dough. Divide the dough in half, flatten each half into a disc, wrap tightly in plastic wrap, and refrigerate for at least 30 minutes. This step is crucial. I once skipped it because I was in a hurry, and the fingers spread into blobs in the oven. They still tasted good, but they looked like sad little potatoes instead of witch fingers. Chilling firms up the butter and makes the dough easy to shape.
- Preheat the oven. While the dough chills, preheat your oven to 350°F (175°C). Line two baking sheets with parchment paper.
- Shape the fingers. Take one disc of dough out of the fridge. Pinch off a piece about the size of a walnut. Roll it between your palms into a thin log, about 3 to 4 inches long. It should be slightly thicker at one end (that’s the base of the finger) and tapered at the other end (the fingertip). Place it on the prepared baking sheet. Use the back of a knife to score 2 to 3 lines across the finger where the knuckles would be. Don’t cut all the way through—just press firmly enough to leave an indent. You can also gently squeeze the sides of the finger between your thumb and forefinger to make it look slightly flattened and more realistic. Repeat with the remaining dough, spacing the fingers about 2 inches apart on the baking sheet.
- Add the fingernails. Press a whole almond or a large sliced almond firmly into the tapered end of each finger. The almond should stick out slightly past the dough. If it doesn’t want to stay, dab a tiny bit of water on the back of the almond before pressing it in. For extra creepiness, you can add a tiny dab of red food coloring or raspberry jam at the base of the almond to look like blood.
- Bake. Bake for 10 to 12 minutes, or until the cookies are just barely golden brown on the edges. The centers will still look slightly pale. They will continue to set as they cool. If you overbake them, they’ll be too crunchy and lose that tender texture. I usually check at the 10-minute mark and go from there.
- Cool completely. Let the cookies cool on the baking sheet for 5 minutes, then transfer them to a cooling rack. They will be fragile when warm, so use a spatula to move them gently. Once completely cool, they firm up nicely.
- Add the finishing touch. If you want to go full horror, break a few of the cookies in half before serving and add a dab of red jam to the broken end to look like a severed finger. It’s a guaranteed crowd reaction. I usually do this with three or four cookies on the platter just to get people talking.
Cooking Tips & Techniques
I’ve made these spooky witch finger cookies for Halloween more times than I can count, and I’ve learned a few things the hard way. Here are the tricks that make the difference between okay cookies and show-stopping ones.
The biggest mistake I see is overworking the dough. When you’re shaping the fingers, handle the dough as little as possible. If you roll it too much, the butter warms up and the cookies spread in the oven. Your fingers should be shaped in about 10 seconds each. If the dough starts feeling greasy or sticky, pop it back in the fridge for 10 minutes before continuing.
Chill the shaped cookies too. This is a game-changer I discovered after a batch of flat fingers. Once you’ve shaped all the fingers on the baking sheet, slide the whole sheet into the fridge for 15 minutes before baking. This re-chills the butter and guarantees that the fingers hold their shape. I do this every single time now.
Watch the almond placement. If you press the almond too deep into the dough, it can sink during baking and disappear into the cookie. You want it sticking out by about a quarter inch. Also, if you’re using sliced almonds, they can curl up during baking. Press them down flat against the dough before baking to prevent this.
For realistic knuckles, use the back of a knife, not the blade. The rounded edge of the knife creates a crease without cutting into the dough. If you cut too deep, the finger can break apart at the knuckle during baking. I learned this after my first batch came out looking like disconnected finger segments. Still creepy, but not what I was going for.
Multitasking tip: While one batch is baking, keep the remaining dough in the fridge. This prevents the butter from softening and keeps the shaping easy. I usually work in batches of 10 to 12 fingers at a time.
Variations & Adaptations
One of the best things about this recipe is how easy it is to change up. I’ve experimented with different flavors and looks over the years, and here are some of my favorites.
Chocolate Witch Fingers: Replace ¼ cup of the flour with ¼ cup of unsweetened cocoa powder. The chocolate version looks even more realistic because the color is closer to skin tones. Plus, chocolate and almond is a classic combination. I made these for a friend’s Halloween party last year and they disappeared faster than the original.
Gluten-Free Version: Substitute the all-purpose flour with a 1:1 gluten-free baking flour blend. I’ve used Bob’s Red Mill and King Arthur Measure for Measure with great results. The dough is a little more fragile, so be extra gentle when shaping. Add an extra tablespoon of flour if the dough feels too sticky.
Vegan Adaptation: Use vegan butter (I like Earth Balance) and replace the egg with a flax egg (1 tablespoon ground flaxseed mixed with 3 tablespoons water, let sit for 5 minutes). The texture is slightly less tender, but the flavor is still fantastic. The cookies might spread a tiny bit more, so definitely do that extra chill step before baking.
Spiced Zombie Fingers: Add 1 teaspoon of pumpkin pie spice or cinnamon to the flour mixture. This gives the cookies a warm, fall flavor that pairs beautifully with the almond extract. I call these zombie fingers because the spice blend gives them an earthy, undead vibe. My family actually prefers this version over the original.
Different Nail Colors: Instead of almonds, use pistachios for green nails, or candy corn for a more playful Halloween look. I tried candy corn once and it melted into a sugary mess in the oven, so stick with nuts or non-melting decorations. Pretzel sticks also work for a witchy, gnarled nail look.
Serving & Storage Suggestions
These cookies are best served at room temperature, and they actually look creepier when they’ve been sitting out for a bit. The slight softening makes them look more like real flesh—I know that sounds weird, but it’s true. Arrange them on a dark platter or a black cake stand for maximum visual impact. I like to scatter a few broken almond pieces around the plate to look like fallen nails.
For drinks, these pair perfectly with a glass of cold milk, a warm apple cider, or a pumpkin spice latte. If you’re serving them at a Halloween party, set them next to a bowl of punch or a tray of caramel apples. The sweet, buttery cookies balance out the heavier flavors of traditional Halloween treats.
Storage: Keep the cookies in an airtight container at room temperature for up to 5 days. Layer them between sheets of parchment paper so the almonds don’t get knocked off. Do not refrigerate them—the fridge will make them stale faster. If you need to store them longer, freeze them.
Freezing instructions: You can freeze the baked cookies for up to 3 months. Place them in a single layer on a baking sheet and freeze until solid, then transfer to a freezer-safe bag or container. To serve, let them thaw at room temperature for about 30 minutes. You can also freeze the unbaked shaped dough. Arrange the shaped fingers on a baking sheet, freeze until solid, then transfer to a freezer bag. Bake from frozen, adding 2 to 3 minutes to the baking time.
The flavor actually gets a little better after a day or two. The almond extract mellows out and blends with the butter, creating a more rounded taste. I’ve definitely hidden a few cookies in the back of the cabinet for myself after a party.
Nutritional Information & Benefits
Let’s be honest—these are Halloween cookies, not health food. But here’s the breakdown if you’re curious. Per cookie (based on 30 cookies), you’re looking at approximately 120 calories, 7g of fat, 14g of carbohydrates, and 1.5g of protein. The almonds add a small amount of healthy fats and vitamin E, which is a nice bonus.
The almond extract is a fun ingredient because it contains traces of benzaldehyde, which is the compound that gives almonds their distinctive flavor. It’s also what makes these cookies smell absolutely incredible while they’re baking. Your whole kitchen will smell like a marzipan factory.
For dietary considerations: This recipe contains gluten, dairy, eggs, and tree nuts (almonds). If you’re serving these at a party, I recommend labeling them clearly or keeping them separate from any nut-free treats. The gluten-free and vegan variations above work well for most dietary restrictions.
I personally love that these cookies use real, simple ingredients. No artificial colors, no preservatives, nothing weird. Even the red jam for the bloody effect is just fruit. It feels good to serve something that looks scary but is made with honest ingredients.
Conclusion
These spooky witch finger cookies for Halloween are proof that the best recipes often come from the most unexpected places. What started as a distracted mistake in my kitchen has become the one Halloween tradition I refuse to skip. They’re creepy enough to impress, delicious enough to disappear, and simple enough that you can make them with kids or while watching a horror movie.
I love these cookies because they capture the spirit of Halloween without being over-the-top. They’re playful, a little gross, and genuinely tasty. Every time I make them, I think back to that moment of panic when I thought I’d ruined a batch of dough, and I smile. Sometimes the kitchen has a way of working things out.
I’d love to hear how yours turn out. Did you add any creepy touches? Did your kids help shape the fingers? Drop a comment below and let me know—I read every single one. And if you’re looking for another spooky treat to round out your Halloween spread, you’ve got to try these cookies. They’re the ones everyone will be talking about long after the candy bowl is empty.
Frequently Asked Questions
Can I make the dough ahead of time?
Absolutely. You can make the dough up to 3 days in advance and keep it wrapped tightly in the refrigerator. When you’re ready to bake, let it sit at room temperature for about 10 minutes to soften slightly before shaping. You can also freeze the dough for up to 3 months.
Why did my cookies spread and lose their shape?
This usually happens when the dough isn’t chilled enough or the butter was too soft when you mixed it. Make sure you chill the dough for at least 30 minutes before shaping, and chill the shaped cookies on the baking sheet for 15 minutes before baking. If your kitchen is warm, pop the baking sheet in the fridge while the oven preheats.
Can I use vanilla extract instead of almond extract?
You can, but the cookies won’t have that distinctive marzipan flavor that makes these so special. Vanilla will give you a more traditional sugar cookie taste. If you only have vanilla, consider adding a teaspoon of almond extract along with it for a hint of that nutty flavor.
How do I get the fingernails to stay on?
Press the almond firmly into the dough before baking. If the almond still falls off after baking, use a tiny dab of royal icing or melted white chocolate as glue. I’ve done this plenty of times and it works perfectly. Just let the glue set before serving.
Can I make these cookies with kids?
Yes, and it’s so much fun. Kids love shaping the fingers and adding the almond nails. Just supervise the knife work for the knuckle scores—I usually do that part myself and let the kids handle the rolling and decorating. It’s a great Halloween activity that ends with a tasty treat.
Pin This Recipe!

Best Easy Spooky Witch Finger Cookies for Halloween Treats

These spooky witch finger cookies for Halloween are the kind of recipe that does double duty. They look genuinely creepy enough to impress at a party, but they taste like a buttery, almond-scented dream.
- Prep Time: 15 minutes
- Cook Time: 12 minutes
- Total Time: 45 minutes
- Yield: 24 to 30 cookies 1x
- Category: Dessert
- Cuisine: American
Ingredients
- 1 cup (226g) unsalted butter, softened to room temperature
- 1 cup (200g) granulated sugar
- 1 large egg, at room temperature
- 1 teaspoon almond extract
- 2 ½ cups (312g) all-purpose flour, spooned and leveled
- ½ teaspoon salt
- ½ teaspoon baking powder
- Whole almonds or sliced almonds (one per cookie, about 24 to 30 pieces)
- Red food coloring or raspberry jam (optional, for a bloody effect)
Instructions
- Cream the butter and sugar. In a large mixing bowl, beat the softened butter and granulated sugar together on medium speed until light and fluffy, about 2 to 3 minutes. Scrape down the sides of the bowl once during this process.
- Add the egg and almond extract. Crack the egg into the butter mixture and add the almond extract. Beat on low speed until just combined.
- Mix the dry ingredients. In a separate bowl, whisk together the flour, salt, and baking powder. Add this to the wet mixture in two additions, mixing on low speed after each addition. Stop mixing as soon as the flour disappears.
- Chill the dough. Divide the dough in half, flatten each half into a disc, wrap tightly in plastic wrap, and refrigerate for at least 30 minutes.
- Preheat the oven. While the dough chills, preheat your oven to 350°F (175°C). Line two baking sheets with parchment paper.
- Shape the fingers. Take one disc of dough out of the fridge. Pinch off a piece about the size of a walnut. Roll it between your palms into a thin log, about 3 to 4 inches long, slightly thicker at one end and tapered at the other. Place on the prepared baking sheet. Use the back of a knife to score 2 to 3 lines across the finger where the knuckles would be. Repeat with remaining dough, spacing fingers about 2 inches apart.
- Add the fingernails. Press a whole almond or a large sliced almond firmly into the tapered end of each finger. For extra creepiness, add a tiny dab of red food coloring or raspberry jam at the base of the almond.
- Bake. Bake for 10 to 12 minutes, or until the cookies are just barely golden brown on the edges. The centers will still look slightly pale.
- Cool completely. Let the cookies cool on the baking sheet for 5 minutes, then transfer them to a cooling rack.
- Add the finishing touch. If desired, break a few cookies in half before serving and add a dab of red jam to the broken end to look like a severed finger.
Notes
Chill the shaped cookies on the baking sheet for 15 minutes before baking to help them hold their shape. Use the back of a knife for knuckle scores, not the blade. If almonds fall off after baking, use a tiny dab of royal icing or melted white chocolate as glue. The flavor improves after a day or two.
Nutrition
- Serving Size: 1 cookie
- Calories: 120
- Sugar: 7
- Sodium: 55
- Fat: 7
- Saturated Fat: 4
- Carbohydrates: 14
- Fiber: 0.5
- Protein: 1.5
Keywords: witch finger cookies, Halloween cookies, spooky cookies, almond cookies, butter cookies, Halloween treats, creepy cookies


