Love this? Save it for later!
Share the inspiration with your friends
There used to be a tiny bakery tucked behind a used bookstore in Portland that made these maple bourbon pecan pie bars that I still dream about. When they closed their doors three years ago—just a handwritten sign on the door saying “Thanks for the sweet years”—I honestly felt a little lost. That first bite of their bars had this unexpected warmth, like someone had figured out exactly how to make a classic taste brand new. After eleven tries—some burnt, some too runny, one that my neighbor politely called “aggressively sweet”—I finally got it. These bars are that exact memory, recreated in my own kitchen.
Let me tell you, the journey was messy. I mean, I once confused bourbon extract for actual bourbon and ended up with something that tasted like a chemistry experiment. But that’s the thing about chasing a recipe—you learn something every single time. The key was balancing the maple syrup’s sweetness with just enough bourbon to warm things up without overwhelming the pecans. Maybe you’ve been there, trying to recreate a dish that feels impossible to nail. Honestly, I think that’s why this recipe stuck with me. It wasn’t just about the taste—it was about proving I could get it right. And now, every time I make these bars, I remember that little bakery and the way the smell of toasted pecans and maple would drift through the bookstore next door.
These maple bourbon pecan pie bars are the kind of dessert that makes people close their eyes after the first bite. They’ve got that buttery shortbread crust, that gooey filling, and that perfect crunch on top. Whether you’re bringing them to a holiday party or just treating yourself on a Tuesday, they deliver exactly what you’re hoping for. I keep making them because they remind me that some flavors are worth the effort—and honestly, they’re just that good.
Why You’ll Love This Recipe
These maple bourbon pecan pie bars aren’t just another dessert recipe—they’re the one you’ll reach for every holiday season. I’ve tested this recipe more times than I care to admit, tweaking the bourbon ratio and the baking time until everything lined up perfectly. Here’s why they stand out:
- Quick & Easy: Comes together in under an hour, with most of that time being hands-off baking. Perfect for when you need a showstopper without spending all day in the kitchen.
- Simple Ingredients: No fancy grocery trips needed. You likely already have butter, flour, eggs, and maple syrup in your pantry. The bourbon is the only special guest, and it’s totally worth the splurge.
- Perfect for Holidays: Great for Thanksgiving, Christmas, or any gathering where you want to impress without stress. These bars travel well and look gorgeous on a dessert table.
- Crowd-Pleaser: Always gets rave reviews from kids and adults alike. The bourbon bakes off, so even non-drinkers can enjoy the warm flavor without the buzz.
- Unbelievably Delicious: The texture combo—buttery shortbread, gooey filling, crunchy pecans—is next-level comfort food. It’s like a pecan pie but way easier to serve and eat.
What makes these different from every other pecan bar recipe out there is the maple-bourbon combo. Most recipes use corn syrup and vanilla, which is fine, but the maple syrup adds this deep, almost caramel-like sweetness while the bourbon brings a subtle warmth that cuts through the richness. It’s not just another version—it’s my best version after all those failed attempts. This recipe is comfort food reimagined—richer, more complex, but with the same soul-soothing satisfaction you expect from a classic pecan pie.
What Ingredients You Will Need
This recipe uses simple, wholesome ingredients to deliver bold flavor and satisfying texture without the fuss. Most of these are pantry staples, but a few deserve a little extra attention.
For the Shortbread Crust
- All-purpose flour: 1 ¾ cups (220g) – provides structure for that sturdy, buttery base
- Unsalted butter, cold and cubed: ½ cup (113g) – use good quality butter here; it makes a difference (I prefer Kerrygold for the richness)
- Powdered sugar: ¼ cup (30g) – dissolves easily into the crust for a tender texture
- Salt: ¼ teaspoon – balances the sweetness
For the Maple Bourbon Filling
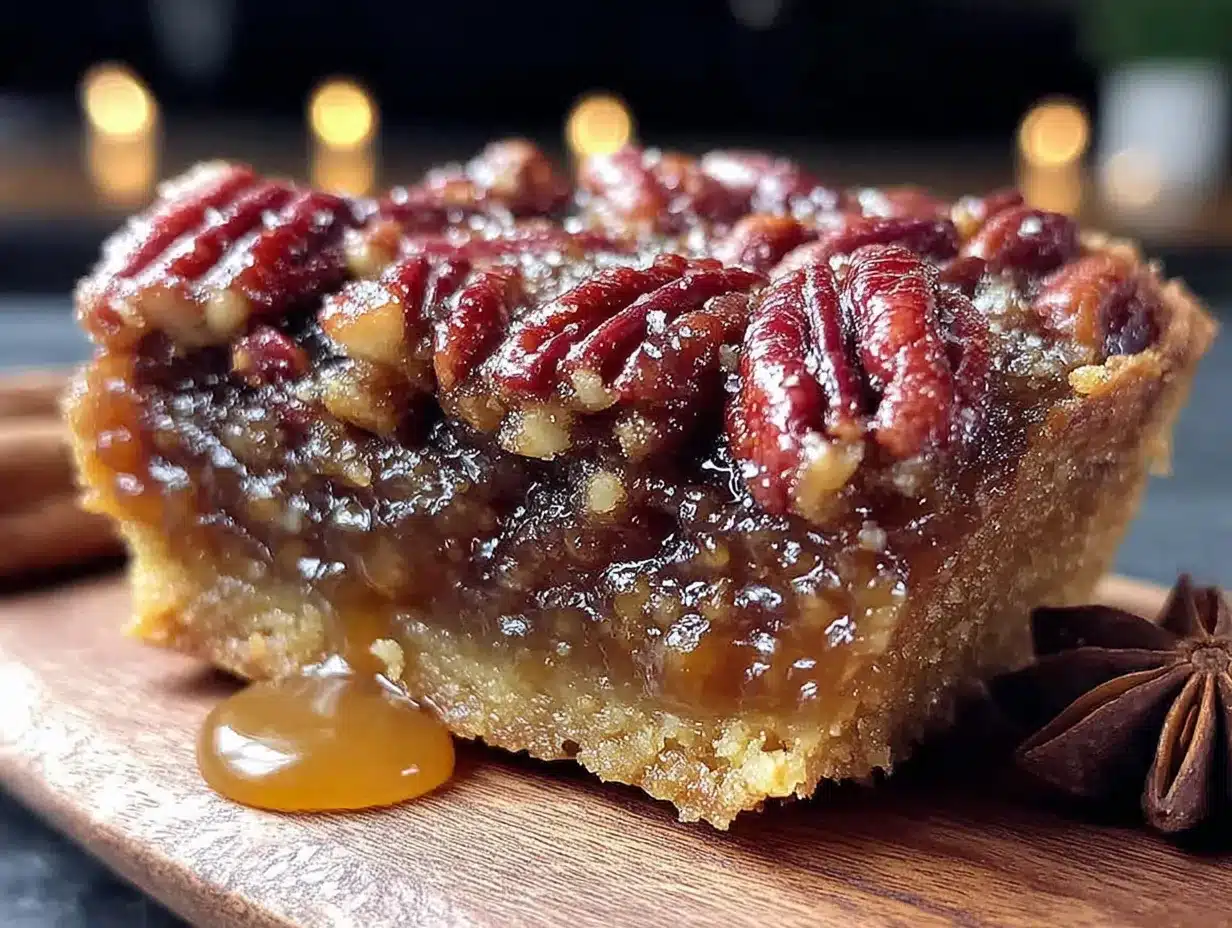
- Pure maple syrup: 1 cup (240ml) – not pancake syrup! Use the real stuff for that authentic flavor. Grade A dark amber works beautifully
- Brown sugar, packed: ½ cup (100g) – adds depth and helps the filling set properly
- Large eggs: 3, at room temperature – room temperature eggs blend more smoothly into the filling
- Unsalted butter, melted: ¼ cup (57g) – adds richness and helps the filling stay creamy
- Bourbon: 3 tablespoons (45ml) – I recommend Bulleit or Maker’s Mark for their smooth, slightly sweet profiles. Don’t skimp here—the flavor matters
- Vanilla extract: 1 teaspoon – rounds out the flavors
- Salt: ¼ teaspoon – enhances everything
For the Topping
- Pecan halves: 2 cups (200g) – look for fresh, not stale pecans. Give them a sniff—they should smell nutty and sweet, not musty
- Optional flaky sea salt: for finishing – that little sprinkle right before serving makes a world of difference
If you need to make substitutions, here are a few options that work well. For a gluten-free version, swap the all-purpose flour with a 1:1 gluten-free baking blend. You can use maple extract instead of bourbon for an alcohol-free version, though the flavor will be slightly different. And if you’re out of brown sugar, dark brown sugar works even better—it adds more molasses notes that complement the maple beautifully.
Equipment Needed
You don’t need a fancy kitchen to pull these off, but having the right tools makes everything smoother. Here’s what you’ll need:
- 9×13-inch baking pan: This is non-negotiable for the right thickness. A metal pan works best for even baking
- Parchment paper: Line your pan with it, leaving overhang on two sides. This makes lifting the bars out so much easier—trust me, I learned this after a sticky disaster
- Food processor or pastry cutter: For cutting the butter into the flour. A pastry cutter works fine, but a food processor is faster and gives you that perfect crumbly texture
- Mixing bowls: One large, one medium
- Whisk: For the filling
- Spatula: For spreading and scraping every last bit of filling
- Cooling rack: Essential for letting the bars set properly
If you don’t have a food processor, you can use your fingertips to rub the butter into the flour—just work quickly so the butter stays cold. And if you’re using a glass baking dish, reduce the oven temperature by 25°F to prevent over-browning. I’ve used both, and honestly, metal pans give you that golden crust that glass just can’t replicate.
Preparation Method
Let’s walk through this step by step. I’ve included all the little details I wish someone had told me the first time I made these.
- Preheat your oven to 350°F (175°C). Line your 9×13-inch baking pan with parchment paper, leaving about 2 inches of overhang on the long sides. This will be your lifeline later when you’re trying to lift out the finished bars.
- Make the shortbread crust. In a food processor, combine the flour, powdered sugar, and salt. Pulse a few times to mix. Add the cold, cubed butter and pulse until the mixture looks like coarse meal with some pea-sized butter pieces remaining. Don’t overdo it—you want those little butter chunks for a tender crust. If you’re doing this by hand, use a pastry cutter or your fingertips to work the butter into the flour until it resembles coarse crumbs.
- Press the crust into the pan. Dump the mixture into your prepared pan and press it evenly into the bottom. Use the bottom of a measuring cup to really pack it down—this prevents the filling from seeping underneath during baking. Bake for 18-20 minutes, until the edges are just starting to turn golden. The center should look dry but not browned. Set it aside to cool slightly while you make the filling.
- Prepare the maple bourbon filling. In a medium bowl, whisk together the maple syrup, brown sugar, eggs, melted butter, bourbon, vanilla extract, and salt. Whisk until everything is smooth and well combined. Don’t over-whisk—you don’t want to incorporate too much air. Just mix until the brown sugar dissolves and the mixture looks glossy.
- Toast the pecans. Spread the pecan halves on a baking sheet and toast them in the oven for 5-7 minutes, until they smell fragrant. Watch them carefully—they go from toasted to burnt in seconds. Let them cool slightly, then roughly chop them. Leave some halves whole for a prettier top.
- Assemble the bars. Sprinkle the toasted pecans evenly over the warm shortbread crust. Pour the maple bourbon filling over the pecans, making sure it spreads evenly. The filling will look thin, but that’s okay—it thickens as it bakes.
- Bake. Place the pan back in the oven and bake for 25-30 minutes. The filling should be set around the edges but still slightly jiggly in the center. Don’t over-bake—the bars will continue to set as they cool. You’ll know they’re done when the top is golden brown and a toothpick inserted near the center comes out with just a few moist crumbs.
- Cool completely. This is the hardest part, but don’t skip it. Let the bars cool in the pan on a wire rack for at least 2 hours. The filling needs time to firm up, or you’ll end up with a delicious but messy puddle. Once cool, use the parchment overhang to lift the bars out of the pan. Transfer to a cutting board.
- Slice and serve. Use a sharp knife to cut into squares. Wipe the knife clean between cuts for neat edges. Sprinkle with flaky sea salt right before serving—that little crunch of salt against the sweet, gooey filling is magic.
Cooking Tips & Techniques
After those eleven attempts, I learned a few things the hard way. Here’s what I wish I’d known from the start.
Keep your butter cold for the crust. This is non-negotiable. Warm butter will make the crust tough instead of tender. I pop my cubed butter in the freezer for 10 minutes before I start. It sounds fussy, but it makes a real difference.
Don’t over-bake the filling. I ruined my first three batches by leaving them in the oven too long. The filling should be slightly jiggly in the center when you pull it out—it will continue to set as it cools. Over-baked bars turn into hard, candy-like discs that are more jawbreaker than dessert.
Let them cool completely. I know, I know. The smell is intoxicating and you want to dig in immediately. But cutting these bars while they’re warm is a recipe for disaster. The filling needs time to set, so exercise some patience. I usually make these the night before I need them and let them cool overnight. They’re even better the next day.
Use good bourbon. This isn’t the place for the cheap stuff. You want a bourbon you’d actually drink—something smooth with notes of vanilla and caramel. The alcohol bakes off, but the flavor remains, so quality matters. I’ve tried this with a budget bourbon and the result was harsh and a little medicinal. Stick with something mid-range and you’ll be happy.
Toast your pecans. This step adds so much depth of flavor. Raw pecans are fine, but toasted pecans bring out that nutty, buttery quality that makes these bars unforgettable. Just watch them closely—pecans burn in the blink of an eye.
One more thing—if your filling leaks under the crust, don’t panic. It happens to everyone at least once. Make sure your crust is pressed firmly and evenly into the pan, and that you aren’t overfilling. If it still happens, just let the bars cool, cut around the sticky parts, and enjoy the rest. Nobody will know but you.
Variations & Adaptations
These bars are pretty perfect as written, but I love playing around with variations. Here are a few of my favorites.
Chocolate Maple Bourbon Pecan Bars: Sprinkle ½ cup of dark chocolate chips over the warm crust before adding the pecans. The chocolate melts into the filling and creates these little pockets of richness that are absolutely divine. I tried this on a whim one Christmas and it’s been a repeat request ever since.
Gluten-Free Version: Swap the all-purpose flour with a 1:1 gluten-free baking blend that contains xanthan gum. I’ve tested this with Bob’s Red Mill and King Arthur’s blends, and both work beautifully. The crust will be slightly more crumbly, but the flavor is spot on.
Bourbon-Free Version: Use 3 tablespoons of maple extract or bourbon vanilla extract instead of the bourbon. You’ll lose the boozy warmth, but the maple flavor comes through even stronger. This is a great option if you’re serving kids or folks who avoid alcohol.
Spiced Variation: Add 1 teaspoon of cinnamon and ¼ teaspoon of nutmeg to the filling. The warm spices complement the maple and bourbon beautifully, making these bars feel even cozier. I do this version for fall gatherings and it always gets compliments.
Nut-Free Option: Replace the pecans with toasted pumpkin seeds or sunflower seeds for a nut-free version. The texture is different, but the crunch is still satisfying. Just make sure your seeds are unsalted and toasted for the best flavor.
My personal favorite variation is the chocolate one. I stumbled on it by accident when I was out of pecans and had a bag of chocolate chips staring at me from the pantry. Now I make both versions side by side and let people fight over which one is better. Spoiler: the chocolate one usually wins.
Serving & Storage Suggestions
These bars are incredibly versatile when it comes to serving. Here’s how I like to enjoy them.
Serving temperature: Room temperature is ideal—the filling is soft and gooey without being runny. If you’ve refrigerated them, let them sit out for about 20 minutes before serving. You can also serve them slightly warm if you reheat individual bars in the microwave for about 10 seconds. Just be careful not to overheat or the filling will get too soft.
Presentation: Arrange the bars on a nice platter and sprinkle with flaky sea salt right before serving. A dusting of powdered sugar looks beautiful too, especially for holiday gatherings. For an extra touch, drizzle a little extra maple syrup over the top.
Complementary dishes: These bars pair beautifully with a dollop of whipped cream or a scoop of vanilla ice cream. The cold creaminess balances the rich, gooey filling perfectly. For drinks, try serving them with coffee, espresso, or a glass of cold milk. If you’re feeling fancy, a bourbon-spiked hot chocolate on the side is a match made in heaven.
Storage: Store the bars in an airtight container at room temperature for up to 3 days. If your kitchen is warm, refrigerate them—they’ll last up to a week. Layer them between sheets of parchment paper to prevent sticking. I’ve also frozen these bars with great success. Wrap individual bars tightly in plastic wrap, then place them in a freezer bag. They’ll keep for up to 3 months. Thaw at room temperature for about an hour before serving.
Flavor development: Here’s a little secret—these bars actually taste better the next day. The flavors meld together overnight, and the filling sets up perfectly. So if you can, make them a day ahead. Your future self will thank you.
Nutritional Information & Benefits
Let’s be real—these are a treat, not a health food. But knowing what’s in them helps you enjoy them mindfully. Here’s the estimated nutrition per bar (based on 16 servings):
- Calories: 320
- Fat: 18g
- Carbohydrates: 36g
- Protein: 4g
- Sugar: 24g
- Sodium: 95mg
Now for the good news—the ingredients actually offer some benefits. Pecans are packed with healthy fats, fiber, and antioxidants. They’re one of the best nuts for heart health, believe it or not. Maple syrup contains minerals like zinc and manganese, and it has a lower glycemic index than regular sugar. And bourbon? Well, in moderation, it’s been linked to some heart health benefits. But honestly, I’m not here to sell you on the health angle. These bars are about joy, not nutrition.
That said, if you’re watching your sugar intake, you can reduce the brown sugar to ¼ cup and add an extra tablespoon of maple syrup. The texture will be slightly less firm, but the flavor is still fantastic. And if you’re dairy-free, use vegan butter in both the crust and the filling—it works surprisingly well.
Potential allergens: This recipe contains dairy (butter), eggs, and tree nuts (pecans). For gluten-free, nut-free, and dairy-free options, check the variations section above.
Conclusion
These maple bourbon pecan pie bars are everything I hoped they’d be when I started that obsessive quest to recreate a memory. They’re buttery, gooey, crunchy, and just the right amount of boozy. They’re the kind of dessert that makes people close their eyes and sigh with happiness—and honestly, that’s the best compliment a recipe can get.
I hope you give these a try, whether for a holiday gathering, a potluck, or just because you deserve something special. Don’t be afraid to make them your own—swap in chocolate, add some spice, or go nuts with the variations. That’s the beauty of baking. And if you do make them, I’d love to hear how they turn out. Drop a comment below and let me know if you added your own twist, or just tell me how many you ate in one sitting (no judgment here).
Happy baking, friends. May your crust be buttery, your filling be gooey, and your kitchen smell like heaven.
Frequently Asked Questions
Can I use pancake syrup instead of maple syrup?
I wouldn’t recommend it. Pancake syrup is usually corn syrup with artificial maple flavoring, and it will make the bars overly sweet with a fake taste. Stick with real maple syrup for the best results. Grade A dark amber is my go-to.
Do I have to use bourbon?
Not at all. You can substitute with maple extract or bourbon vanilla extract for an alcohol-free version. The flavor will be slightly different, but still delicious. Just use 3 tablespoons of extract instead of the bourbon.
Can I make these bars ahead of time?
Absolutely. In fact, they taste even better the next day. Make them up to 2 days ahead and store them in an airtight container at room temperature. You can also freeze them for up to 3 months—just wrap individual bars tightly in plastic wrap and store in a freezer bag.
Why did my filling leak under the crust?
This usually happens when the crust isn’t pressed firmly enough into the pan. Make sure to pack it down well with the bottom of a measuring cup. Also, don’t overfill the pan—leave a little room at the edges. If it still happens, don’t worry. Just let the bars cool completely and cut around the sticky parts.
How do I know when the bars are done baking?
The edges should be set and golden brown, but the center should still be slightly jiggly. A toothpick inserted near the center should come out with a few moist crumbs, not wet batter. Remember, the bars will continue to set as they cool, so don’t over-bake them.
Pin This Recipe!
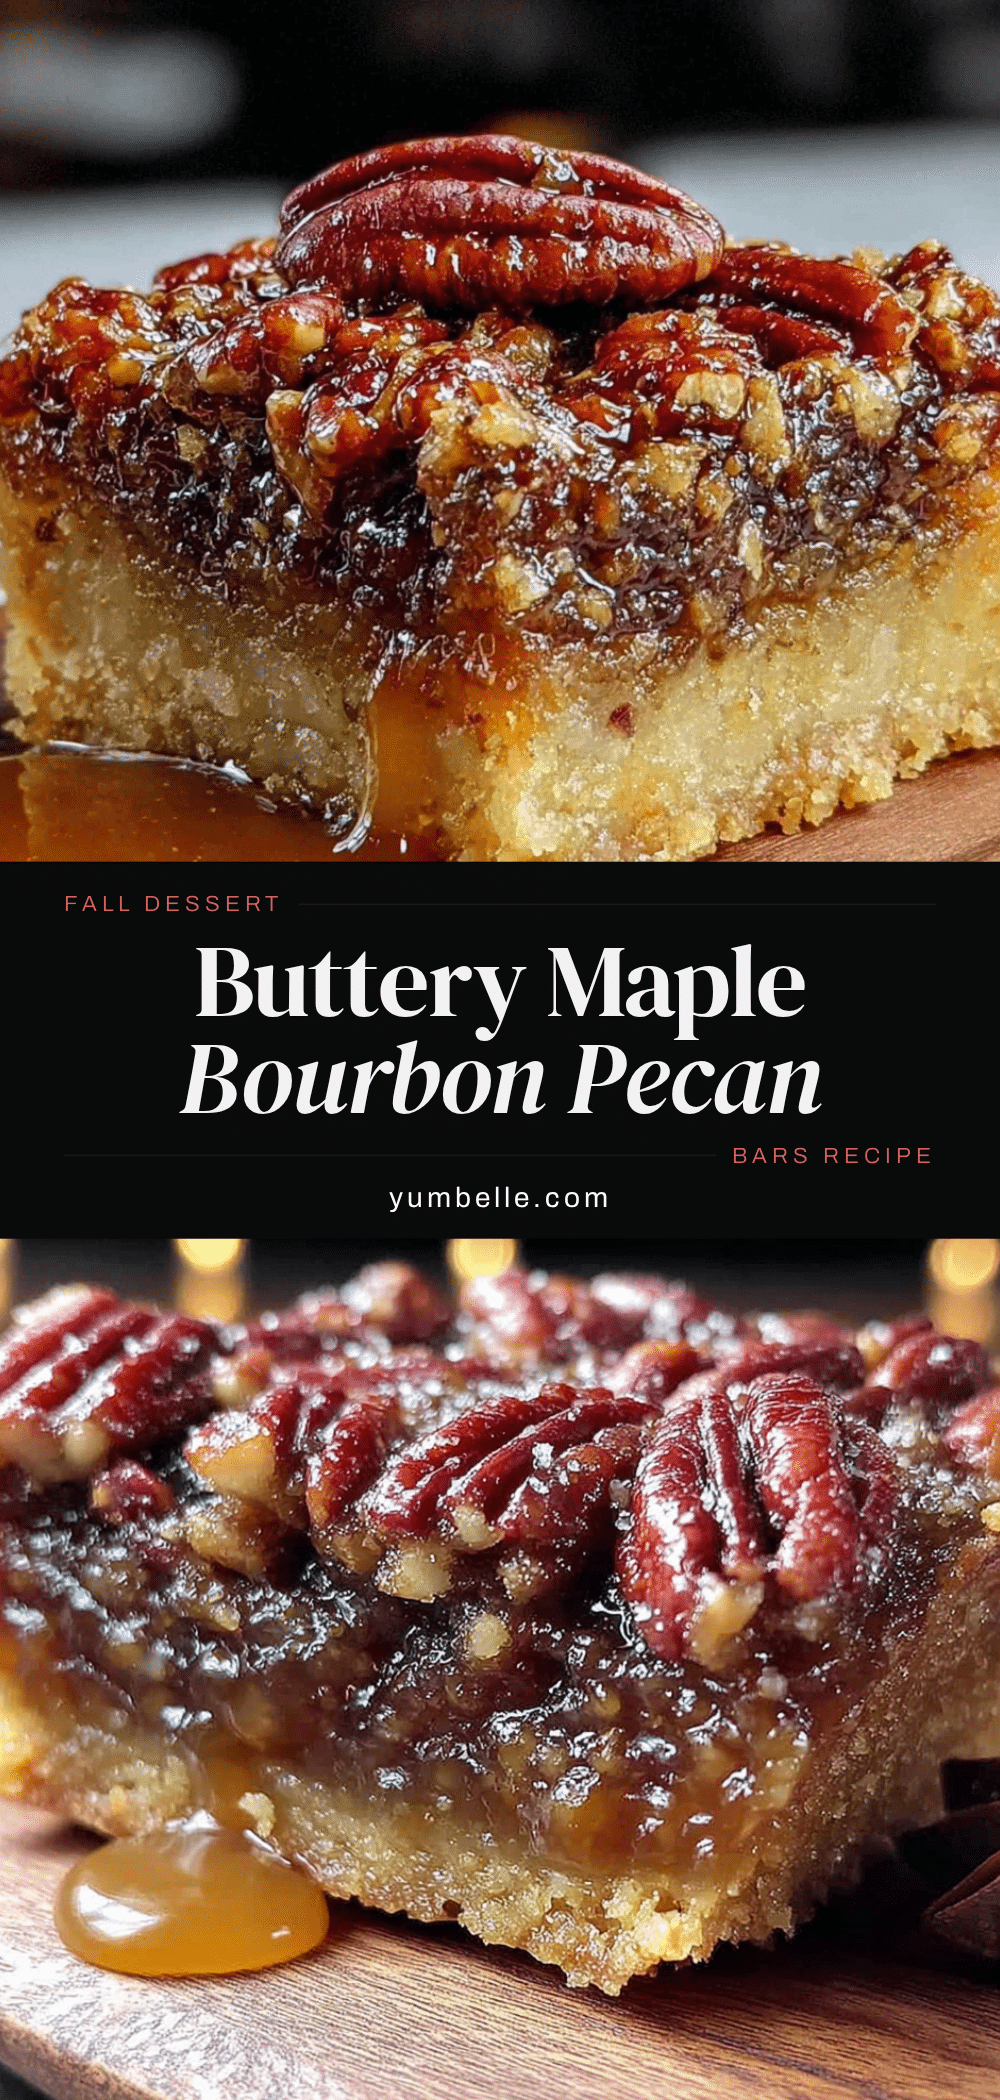
Best Maple Bourbon Pecan Pie Bars: Easy Holiday Dessert
These maple bourbon pecan pie bars feature a buttery shortbread crust, a gooey maple-bourbon filling, and crunchy pecans. They’re the perfect easy holiday dessert that tastes even better the next day.
- Prep Time: 15 minutes
- Cook Time: 45 minutes
- Total Time: 1 hour
- Yield: 16 servings 1x
- Category: Dessert
- Cuisine: American
Ingredients
- 1 ¾ cups (220g) all-purpose flour
- ½ cup (113g) unsalted butter, cold and cubed
- ¼ cup (30g) powdered sugar
- ¼ teaspoon salt
- 1 cup (240ml) pure maple syrup
- ½ cup (100g) brown sugar, packed
- 3 large eggs, at room temperature
- ¼ cup (57g) unsalted butter, melted
- 3 tablespoons (45ml) bourbon
- 1 teaspoon vanilla extract
- ¼ teaspoon salt
- 2 cups (200g) pecan halves
- Optional: flaky sea salt for finishing
Instructions
- Preheat your oven to 350°F (175°C). Line a 9×13-inch baking pan with parchment paper, leaving about 2 inches of overhang on the long sides.
- Make the shortbread crust: In a food processor, combine flour, powdered sugar, and salt. Pulse to mix. Add cold, cubed butter and pulse until the mixture looks like coarse meal with some pea-sized butter pieces remaining.
- Press the crust into the pan: Dump the mixture into the prepared pan and press it evenly into the bottom. Use the bottom of a measuring cup to pack it down. Bake for 18-20 minutes, until the edges are just starting to turn golden. Set aside to cool slightly.
- Prepare the maple bourbon filling: In a medium bowl, whisk together maple syrup, brown sugar, eggs, melted butter, bourbon, vanilla extract, and salt until smooth and well combined.
- Toast the pecans: Spread pecan halves on a baking sheet and toast in the oven for 5-7 minutes, until fragrant. Let cool slightly, then roughly chop, leaving some halves whole.
- Assemble the bars: Sprinkle toasted pecans evenly over the warm shortbread crust. Pour the maple bourbon filling over the pecans, spreading evenly.
- Bake: Place the pan back in the oven and bake for 25-30 minutes. The filling should be set around the edges but still slightly jiggly in the center.
- Cool completely: Let the bars cool in the pan on a wire rack for at least 2 hours. Once cool, use the parchment overhang to lift the bars out of the pan.
- Slice and serve: Use a sharp knife to cut into squares. Sprinkle with flaky sea salt right before serving.
Notes
Keep butter cold for the crust. Don’t over-bake the filling—it should be slightly jiggly in the center. Let bars cool completely before cutting. Use good quality bourbon for best flavor. Toast pecans for added depth. Bars taste even better the next day.
Nutrition
- Serving Size: 1 bar
- Calories: 320
- Sugar: 24
- Sodium: 95
- Fat: 18
- Saturated Fat: 8
- Carbohydrates: 36
- Fiber: 2
- Protein: 4
Keywords: maple bourbon pecan pie bars, pecan pie bars, holiday dessert, easy pecan bars, maple bourbon dessert


