Love this? Save it for later!
Share the inspiration with your friends
Introduction
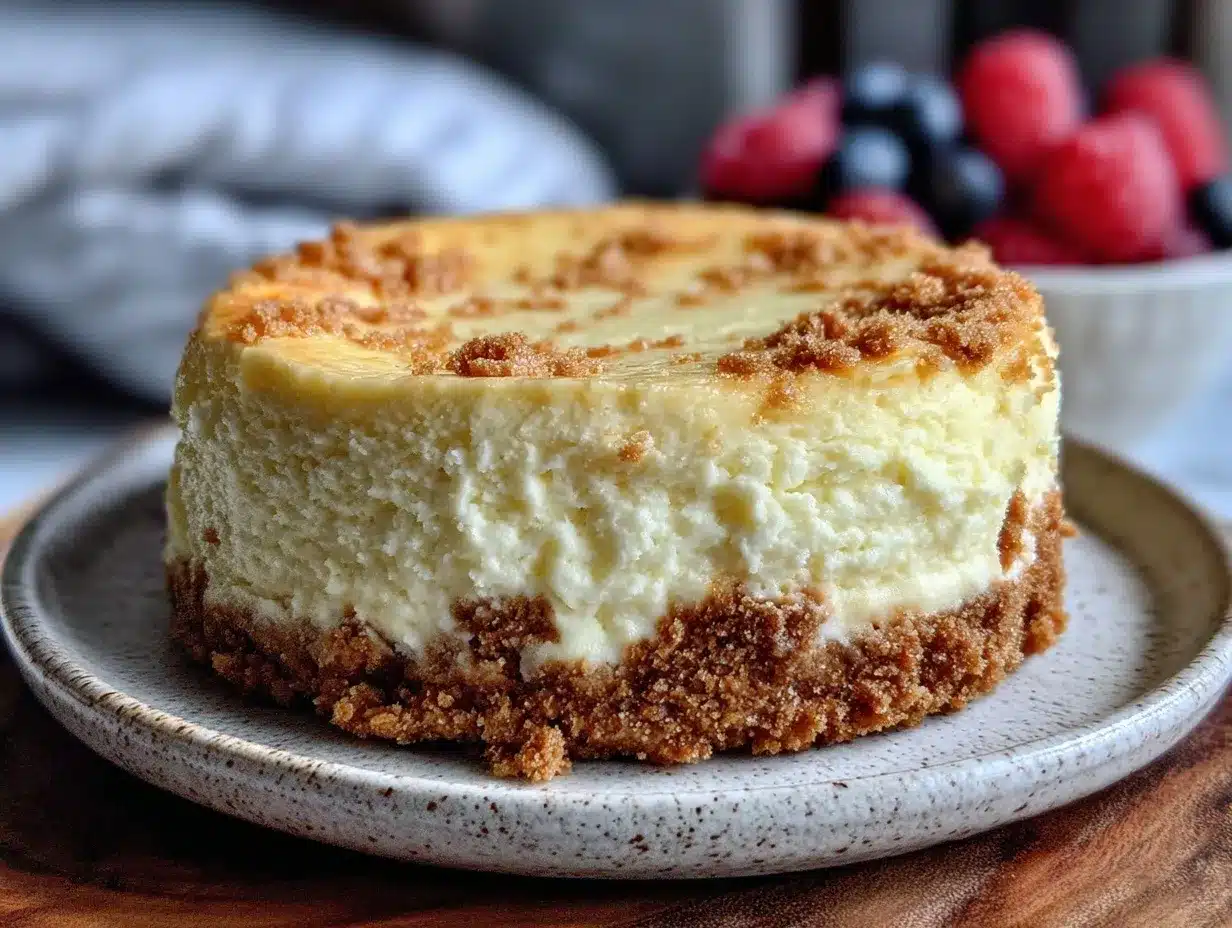
“You won’t believe this cheesecake took just 30 minutes,” I remember telling my friend as we sat down with forks in hand, the creamy slice melting in our mouths. It all started on a rainy Saturday afternoon when I was rummaging through my kitchen, craving something sweet but not wanting to spend hours baking. The idea of using my Instant Pot for cheesecake seemed a little wild at first—I mean, cheesecake from a pressure cooker? But honestly, that’s when the magic happened.
I stumbled upon the recipe scribbled on a crumpled piece of paper tucked inside an old cookbook I’d borrowed from a quirky little library downtown. The instructions promised a “no-fail creamy cheesecake in a flash,” and I thought, why not? The Instant Pot beeped softly as it worked its wonders, and despite a few kitchen mishaps (I accidentally grabbed the wrong pan at first—classic), the result was nothing short of heavenly.
Maybe you’ve been there too—wanting to impress last-minute guests or simply treat yourself without the fuss. This creamy Instant Pot cheesecake recipe isn’t just quick; it’s comforting and surprisingly foolproof. Let me tell you, since that day, it’s become my go-to dessert when I want something rich, velvety, and utterly satisfying without turning the oven on for hours.
Why You’ll Love This Recipe
From my many trials and tastes, this cheesecake recipe stands out as a winner for so many reasons. Here’s why I keep coming back to it:
- Quick & Easy: Ready in under 30 minutes, making it perfect for busy weeknights or unexpected guests.
- Simple Ingredients: No need for fancy or hard-to-find items—just pantry staples you probably have on hand.
- Perfect for Any Occasion: Whether it’s a cozy dinner, a holiday treat, or a casual get-together, this cheesecake fits right in.
- Crowd-Pleaser: The smooth, creamy texture and balanced sweetness always get rave reviews from both kids and adults.
- Unbelievably Delicious: This isn’t your average cheesecake. The Instant Pot method locks in moisture, resulting in an ultra-creamy, silky texture that tastes like it took hours to perfect.
What sets this cheesecake apart is the clever use of the Instant Pot’s gentle steam pressure to bake without drying out the cake. I’ve experimented with various crusts and toppings, but this basic recipe remains a favorite because it’s versatile and forgiving. Honestly, it’s the kind of dessert that makes you close your eyes and savor every bite, no matter how rushed your day was.
What Ingredients You Will Need
This recipe uses simple, wholesome ingredients to deliver bold flavor and that satisfyingly creamy texture without the fuss. Most are pantry staples or easy to find at any grocery store.
- Cream Cheese, 16 oz (450 g), softened – I like Philadelphia for its classic smoothness
- Granulated Sugar, 3/4 cup (150 g) – balances the tang of the cream cheese
- Eggs, 2 large, room temperature – helps set the cheesecake just right
- Sour Cream, 1/2 cup (120 g) – adds that signature tang and creaminess
- Vanilla Extract, 1 teaspoon – pure vanilla is best for flavor depth
- All-Purpose Flour, 1 tablespoon – optional, for a slight firmness and structure
- Graham Cracker Crumbs, 1 cup (100 g) – for the crust (you can substitute with digestive biscuits or gluten-free cookies)
- Unsalted Butter, 4 tablespoons (55 g), melted – binds the crust
For variations, you can swap sour cream with Greek yogurt for a lighter tang or use almond flour in the crust for a gluten-free option. If you want to get fancy, adding a touch of lemon zest brings a fresh zing. I recommend using fresh eggs and softened cream cheese to avoid lumps and get that ultra-smooth batter.
Equipment Needed
- Instant Pot or any electric pressure cooker with a 6-quart capacity – the star of the show. If you don’t have one, this recipe won’t quite work the same way.
- 6-inch Springform Pan – fits perfectly inside the Instant Pot. I’ve tried smaller pans, but this size gives the best thickness and even cooking.
- Mixing Bowls – for combining ingredients comfortably.
- Electric Hand Mixer or Stand Mixer – to beat the cream cheese until smooth without lumps.
- Aluminum Foil – to cover the pan tightly and prevent condensation from dripping on the cheesecake.
- Trivet – comes with the Instant Pot, needed to keep the pan elevated above the water.
If you don’t have a springform pan, a silicone cake pan with a removable bottom can work, but be mindful of cooking times and sealing well with foil. For budget-friendly options, many stores offer affordable mixer alternatives, but I find a hand mixer makes the texture so much creamier without overworking the batter.
Preparation Method
- Prepare the crust: In a small bowl, mix the graham cracker crumbs and melted butter until the texture resembles wet sand. Press this mixture firmly into the bottom of the 6-inch springform pan. Set aside while you prepare the filling. (About 5 minutes)
- Make the filling: Using a hand or stand mixer, beat the softened cream cheese on medium speed until smooth and creamy, about 2-3 minutes. Scrape down the sides to avoid lumps.
- Add sugar: Gradually add the granulated sugar and continue beating until fully incorporated and silky.
- Incorporate eggs one at a time: Beat in the eggs one by one, mixing well after each addition. Don’t overmix; just blend until smooth.
- Mix in sour cream and vanilla: Add the sour cream and vanilla extract, mixing until everything is combined and the batter looks glossy.
- Optional flour: Sprinkle in the tablespoon of flour and gently fold it in to help the cheesecake hold its shape better during cooking.
- Pour filling: Pour the cheesecake batter over the crust in the springform pan, smoothing the top with a spatula.
- Seal the pan: Cover the pan tightly with two layers of aluminum foil to prevent water from leaking into the cheesecake.
- Prepare Instant Pot: Pour 1 cup (240 ml) of water into the Instant Pot. Place the trivet inside, then carefully set the covered springform pan on top.
- Pressure cook: Close the lid, set the valve to sealing, and select Manual/Pressure Cook on high pressure for 35 minutes.
- Natural release: When the cooking time ends, allow the pressure to release naturally for 15 minutes—this step is key to avoid cracks.
- Remove and cool: Carefully take out the pan using tongs or oven mitts. Remove the foil and let the cheesecake cool at room temperature for about an hour.
- Chill: Refrigerate for at least 4 hours or overnight to fully set and develop flavor.
Pro tip: If you notice a little jiggle in the center after chilling, that’s perfectly normal—it will firm up more with time. If cracks appear, don’t worry; a dollop of whipped cream or fresh berries hides them beautifully.
Cooking Tips & Techniques
Cooking cheesecake in an Instant Pot is a slightly different beast than the traditional oven method. Here are some tips I’ve learned along the way:
- Softened Cream Cheese is a Must: If your cream cheese is cold, lumps will form and ruin the texture. Let it sit out for at least 30 minutes or microwave briefly in 10-second bursts.
- Don’t Overmix Eggs: Mix just until combined to prevent too much air from entering, which can cause cracks or a spongy texture.
- Seal the Pan Well: Water seeping in will mess up the cheesecake’s surface. Use two layers of heavy-duty foil, and crimp tightly.
- Natural Pressure Release: Resist the urge to quick release; it can cause the cheesecake to crack or sink.
- Use a Trivet: Always keep the pan elevated above water to prevent soggy crusts.
- Let it Cool Gradually: Sudden temperature changes can crack the cheesecake, so patience is key.
- Multitasking: While the Instant Pot does its thing, use the time to prepare a simple fruit compote or set the table.
- Experiment with Toppings: Fresh berries, chocolate ganache, or caramel sauce all pair wonderfully with this creamy base.
Honestly, the first time I tried this, I was so worried it’d be a flop, but the Instant Pot did all the heavy lifting. The texture was silky without being dense, and the crust stayed crisp underneath. I learned that this method requires a bit of finesse, but once you get the hang of it, it’s a total game-changer for quick desserts.
Variations & Adaptations
One of the best parts about this creamy Instant Pot cheesecake recipe is how easy it is to tweak based on your tastes or dietary needs:
- Low-Carb/Keto Version: Swap graham cracker crumbs for almond flour or crushed pecans and use a sugar substitute like erythritol.
- Dairy-Free Alternative: Use vegan cream cheese and coconut yogurt instead of sour cream, and substitute butter with coconut oil.
- Flavor Twists: Add a swirl of pumpkin puree and pumpkin spice for a fall-inspired treat or mix in lemon zest and a blueberry compote for a fresh summer vibe.
- Crust-Free: Skip the crust entirely for a crustless cheesecake that’s ultra creamy and easier to prepare.
- Chocolate Cheesecake: Fold in 1/2 cup (45 g) melted dark chocolate into the batter for a rich chocolate version.
I once made a salted caramel version for a family potluck, drizzling homemade caramel sauce on top after chilling. It was an absolute hit and super simple to make. The Instant Pot is very forgiving, so don’t hesitate to experiment.
Serving & Storage Suggestions
This cheesecake is best served chilled, around 45 minutes after coming out of the fridge, so the texture softens slightly and the flavors shine through. For presentation, topping with fresh berries, a sprinkle of powdered sugar, or a dollop of whipped cream never fails.
Pair it with a bold cup of coffee or a glass of dessert wine to round out the experience. For a lighter touch, a citrusy herbal tea complements the richness well.
To store, cover the cheesecake tightly with plastic wrap or keep it in an airtight container in the refrigerator for up to 5 days. It also freezes beautifully—just slice into portions, wrap individually, and freeze for up to 2 months.
When reheating frozen slices, let them thaw overnight in the fridge and bring to room temperature before serving. The flavors actually deepen after a day or two, so leftovers are a treat in their own right.
Nutritional Information & Benefits
An average slice (1/12th of the cheesecake) contains approximately 320 calories, 25 grams of fat, 20 grams of protein, and 10 grams of carbohydrates. The cream cheese and sour cream provide a good dose of calcium and protein, making this dessert more satisfying than your typical sweet treat.
This recipe can be adapted for gluten-free diets by swapping the crust and is naturally low in added sugars compared to store-bought cheesecakes. Using quality ingredients like real vanilla and fresh dairy makes a difference in both flavor and nutrition.
From my personal wellness perspective, I appreciate that this cheesecake can be enjoyed in moderation as part of a balanced diet—it hits the sweet spot between indulgence and simplicity without unnecessary additives.
Conclusion
If you’re looking for a creamy, dreamy cheesecake that comes together quickly and with minimal fuss, this Instant Pot cheesecake recipe is your new best friend. It’s flexible, forgiving, and delivers that rich, comforting flavor you expect from a traditional cheesecake without the long baking time.
Feel free to customize with your favorite toppings or tweaks to suit your mood. I love this recipe because it feels like a little celebration whenever I make it—easy enough for weeknights but impressive enough for company.
Give it a try, and I’d love to hear how you made it your own! Drop a comment below sharing your favorite variations or any tips you picked up along the way. Let’s keep the creamy cheesecake love going!
FAQs
Can I use a different size pan in the Instant Pot?
A 6-inch springform pan fits best for even cooking and texture. Larger pans may require longer cooking times and might not fit properly inside most Instant Pots.
How do I prevent cracks on my cheesecake?
Make sure to use softened ingredients, don’t overmix, cover the pan tightly with foil, and use natural pressure release to avoid sudden temperature changes.
Can I make this cheesecake ahead of time?
Absolutely! It tastes even better after chilling overnight. Just keep it refrigerated and covered until serving.
Is it possible to make a crustless version?
Yes, simply omit the crust ingredients and pour the batter directly into a greased pan. The texture will be extra creamy.
What can I use instead of sour cream?
Greek yogurt is a great substitute for sour cream, offering similar tang and creaminess with a bit less fat.
For those who want to try more no-fuss creamy desserts, you might enjoy my Instant Pot Chocolate Mousse or the comforting Classic Vanilla Pudding recipes, both perfect companions to this cheesecake delight.
Pin This Recipe!
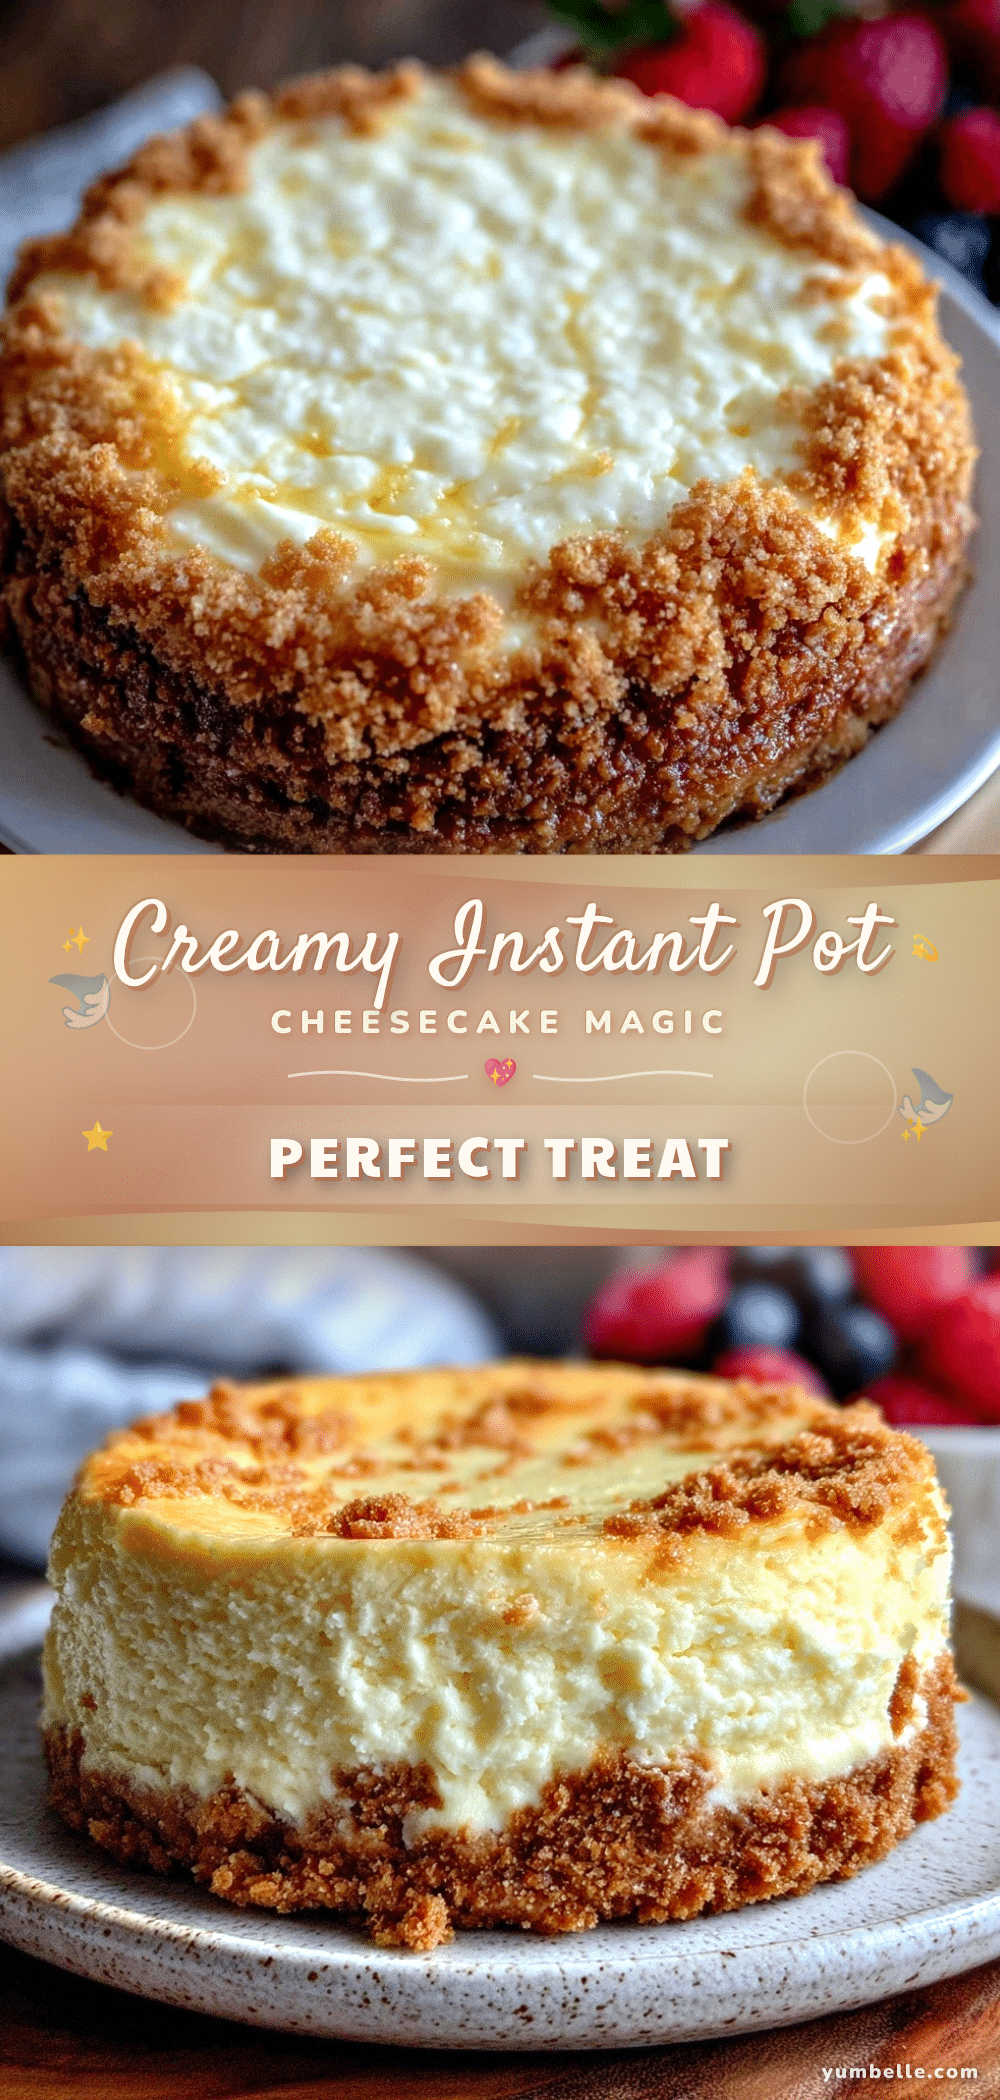
Creamy Instant Pot Cheesecake

A quick and easy creamy cheesecake made in the Instant Pot in just 30 minutes, delivering a rich, velvety texture without the long baking time.
- Prep Time: 10 minutes
- Cook Time: 35 minutes
- Total Time: 5 hours 45 minutes
- Yield: 12 servings 1x
- Category: Dessert
- Cuisine: American
Ingredients
- 16 oz (450 g) cream cheese, softened
- 3/4 cup (150 g) granulated sugar
- 2 large eggs, room temperature
- 1/2 cup (120 g) sour cream
- 1 teaspoon vanilla extract
- 1 tablespoon all-purpose flour (optional)
- 1 cup (100 g) graham cracker crumbs
- 4 tablespoons (55 g) unsalted butter, melted
Instructions
- Prepare the crust: In a small bowl, mix the graham cracker crumbs and melted butter until the texture resembles wet sand. Press this mixture firmly into the bottom of the 6-inch springform pan. Set aside.
- Make the filling: Using a hand or stand mixer, beat the softened cream cheese on medium speed until smooth and creamy, about 2-3 minutes. Scrape down the sides to avoid lumps.
- Gradually add the granulated sugar and continue beating until fully incorporated and silky.
- Beat in the eggs one by one, mixing well after each addition. Do not overmix; blend until smooth.
- Add the sour cream and vanilla extract, mixing until combined and the batter looks glossy.
- Sprinkle in the tablespoon of flour and gently fold it in (optional).
- Pour the cheesecake batter over the crust in the springform pan, smoothing the top with a spatula.
- Cover the pan tightly with two layers of aluminum foil to prevent water from leaking into the cheesecake.
- Pour 1 cup (240 ml) of water into the Instant Pot. Place the trivet inside, then carefully set the covered springform pan on top.
- Close the lid, set the valve to sealing, and select Manual/Pressure Cook on high pressure for 35 minutes.
- Allow the pressure to release naturally for 15 minutes after cooking ends.
- Carefully remove the pan using tongs or oven mitts. Remove the foil and let the cheesecake cool at room temperature for about an hour.
- Refrigerate for at least 4 hours or overnight to fully set and develop flavor.
Notes
Use softened cream cheese to avoid lumps. Do not overmix eggs to prevent cracks. Seal the pan tightly with two layers of foil to prevent water leakage. Use natural pressure release to avoid cracks. Let cheesecake cool gradually and chill for best texture. Variations include gluten-free crust, dairy-free alternatives, and flavor twists like pumpkin or chocolate.
Nutrition
- Serving Size: 1 slice (1/12th of c
- Calories: 320
- Fat: 25
- Carbohydrates: 10
- Protein: 20
Keywords: Instant Pot cheesecake, creamy cheesecake, quick cheesecake, pressure cooker dessert, easy cheesecake recipe