Love this? Save it for later!
Share the inspiration with your friends
This was supposed to be a proper antipasto platter. I had visions of artisan salami roses, perfectly cubed provolone, and those adorable little cornichons arranged on a wooden board for a Saturday afternoon get-together. But then my toddler decided 2 PM was the perfect time to practice his throwing arm with a bag of flour, and the deli counter was out of the fancy prosciutto I wanted. So I grabbed what they had—a stick of hard salami, a block of cheddar, and some crackers—and figured I’d make it work. What came out was nothing like the plan, and better. Honestly, I looked down at the little compartments I was filling on a whim and realized I had basically made a grown-up version of those lunchables I loved as a kid. It was a total accident. I was already annoyed about the flour situation, but then I took a bite of that salty salami with the sharp cheddar and a plain cracker, and something clicked. It was just so satisfying.
Maybe you’ve been there—you’re trying to be fancy, but the universe (or a three-year-old) has other plans. I ended up packing these little snack box lunches for my son’s lunch the next day, and he devoured it. Then I made one for myself for work, and I realized I was actually looking forward to lunch. I mean, who knew that a little bit of intentional arranging could make a simple snack feel like a treat? The best part is, you can make these in about five minutes, and they’re way cheaper than the store-bought versions. No weird preservatives, no plastic waste, just good, real food that tastes better because you put it together yourself. I’ve been making these for months now, and they’ve become my go-to for road trips, park days, and those afternoons when I need a little something to keep me going without a full meal. It’s simple, but sometimes the simplest things are the ones that stick.
Why You’ll Love This Recipe
I’ve tested this concept more times than I care to admit—with different cheeses, various meats, and a whole lot of cracker varieties. What I’ve landed on is the perfect formula for a snack box that feels both special and effortless. This isn’t just throwing food in a container; it’s a little system that makes lunch feel like an event, even on a Tuesday.
- Quick & Easy : This comes together in under five minutes. Seriously, it’s faster than waiting in line at a deli counter.
- Simple Ingredients : You likely already have salami, cheese, and crackers in your fridge. No fancy grocery trips needed.
- Perfect for Lunchboxes & Road Trips : Great for school lunches, work lunches, picnics, or a quick snack before soccer practice.
- Crowd-Pleaser : Kids love the interactive nature of building their own bites, and adults appreciate the balanced, satisfying flavors.
- Unbelievably Delicious : The combination of salty, savory salami with creamy, sharp cheese and a crunchy cracker is pure comfort food magic.
What makes this different from just a plate of snacks? It’s the thoughtfulness. I cube the cheese into perfect little squares, fold the salami into neat quarters, and arrange everything so it looks as good as it tastes. It’s that little extra effort that turns a snack into an experience. This recipe isn’t just good—it is the kind that makes you close your eyes after the first bite, appreciating the perfect salty-creamy-crunchy trifecta. It’s comfort food reimagined—simpler, faster, but with the same soul-soothing satisfaction. Perfect for impressing your kids (or yourself) without any stress.
What Ingredients You Will Need
This recipe uses simple, wholesome ingredients to deliver bold flavor and satisfying texture without the fuss. The beauty is in the quality of what you choose, not the quantity of ingredients.
- Hard Salami (4 ounces, sliced): Look for a good quality hard salami from the deli counter. I prefer the Boar’s Head brand for its consistent flavor and firm texture. You can also use pepperoni or soppressata for a spicier kick. (Sliced from the deli is best for easy folding.)
- Sharp Cheddar Cheese (4 ounces, block): A block of sharp cheddar gives you the best texture for cubing. Pre-shredded cheese won’t work here. I love the Cabot brand for its extra sharp flavor. You can also use Colby Jack, Gouda, or Provolone. (Cube it yourself for perfect little squares.)
- Mini Crackers (1 cup): Use any small, sturdy cracker. I recommend Ritz Minis or Wheat Thins Minis for their buttery flavor and crunch. You can also use pretzel crisps or even small rice cakes.
- Optional Add-ins:
- Grapes (1/2 cup): Red or green, halved for little ones. They add a pop of sweetness.
- Cherry Tomatoes (1/2 cup): Halved, for a burst of acidity.
- Olives (1/4 cup): Pitted kalamata or green olives for a briny touch.
- Almonds (1/4 cup): For extra crunch and healthy fats.
For the best results, use room temperature cheese—it cubes more cleanly and tastes creamier. If you are packing this for later, keep the crackers separate until you are ready to eat so they stay crunchy.
Equipment Needed
You don’t need much for this, which is part of the charm. A sharp knife and a cutting board are your best friends here. I use a classic 8-inch chef’s knife for cubing the cheese—it makes clean, even cuts without smashing the block. For the salami, a smaller paring knife works well if you are trimming edges.
A bento-style lunch box with compartments is ideal for keeping everything separate and pretty. I found a great set on Amazon for under $15, but you can also use a standard meal prep container or even a small plate. If you don’t have a bento box, just use small silicone muffin cups inside a regular container to separate the components.
One tip: use a cutting board that won’t slide around. I learned that the hard way when my board slipped and I nearly sent a block of cheddar flying across the kitchen. A damp paper towel under the board fixes that instantly.
Preparation Method
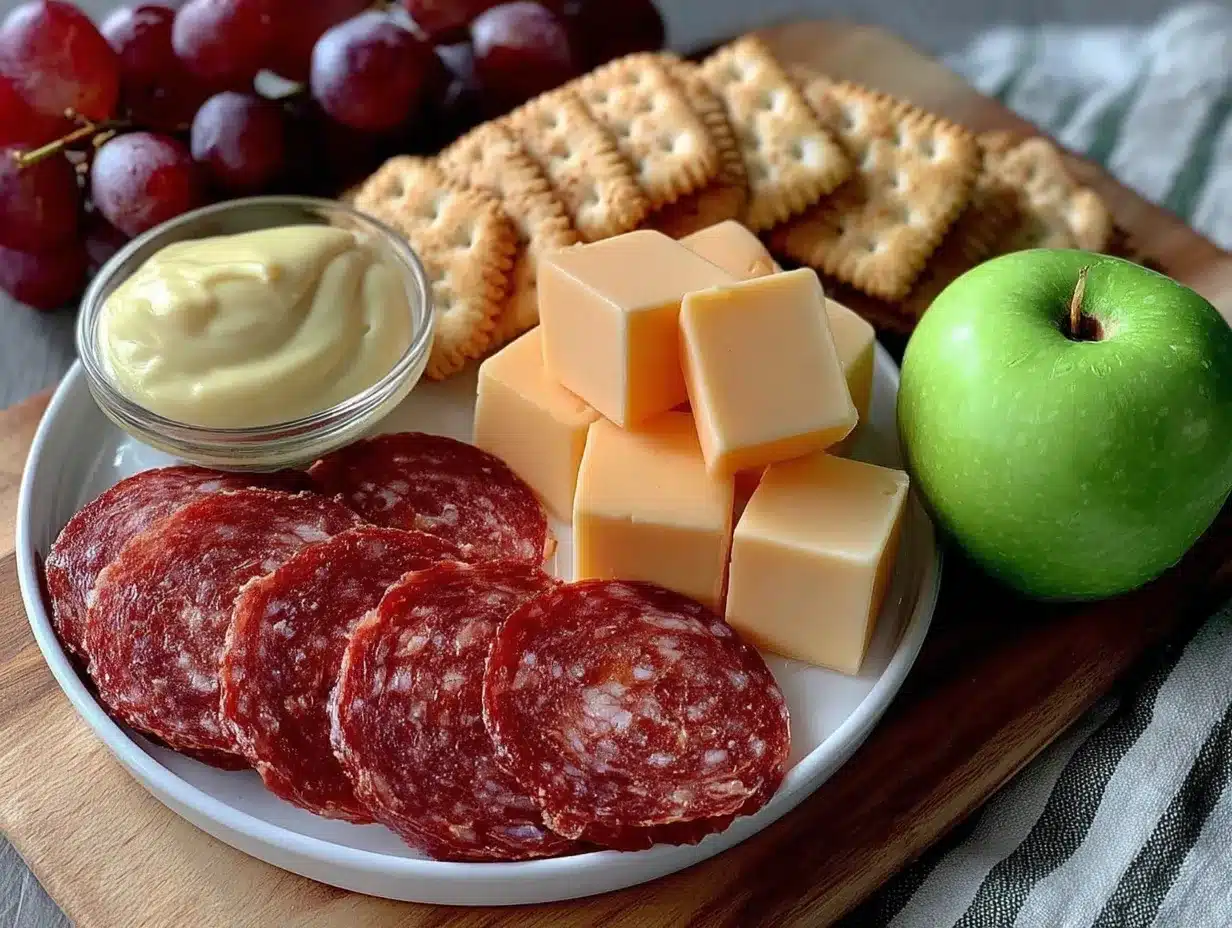
This is so simple, you’ll wonder why you ever bought the store-bought version. Follow these steps, and you’ll have a beautiful snack box in under five minutes.
- Prepare the Cheese: Take your 4-ounce block of sharp cheddar and cut it into 1/2-inch cubes. Aim for even squares—they look nicer and are easier for little hands to pick up. You should get about 20-24 cubes. (If the cheese is too soft, pop it in the fridge for 10 minutes first.)
- Prepare the Salami: Lay your salami slices flat on the cutting board. If they are large, cut them in half. Fold each slice in half, then in half again to form a neat little triangle. Alternatively, you can roll them into small cylinders. (I prefer the quarter-fold method because it creates little pockets that are fun to eat.)
- Prepare the Crackers: Count out about 15-20 mini crackers. If you are using larger crackers, 8-10 should be plenty. Keep them in a separate compartment so they don’t get soggy.
- Assemble the Box: Arrange your cheese cubes, folded salami, and crackers in separate compartments of your bento box or container. If you are using a single container, place the crackers on top of a small piece of parchment paper to keep them dry.
- Add Extras (Optional): If using grapes, halve them and add to a small compartment. Cherry tomatoes can be added whole or halved. Olives and almonds can go in any remaining space.
- Serve or Store: Serve immediately for a fresh snack, or close the lid and refrigerate for up to 3 days. If storing, keep the crackers in a separate bag or container and add them just before eating.
One thing I learned the hard way: don’t overfill the box. If you cram too much in, the cheese can get squished and the crackers break. Leave a little breathing room—it looks more appetizing too.
Cooking Tips & Techniques
Even with something this simple, a few tricks can make a big difference. First, always cube your cheese from a block. Pre-shredded or pre-sliced cheese has added starches that prevent it from melting, and it just doesn’t taste as fresh. Taking the extra two minutes to cube it yourself is worth it.
Second, let your salami and cheese sit at room temperature for about 10 minutes before serving. Cold cheese can taste bland, and salami loses some of its rich flavor when it’s straight from the fridge. This little step makes the whole snack taste more vibrant.
I once made the mistake of using a very soft cheese like brie for this. It was a mess—the cubes didn’t hold their shape, and everything got smeared. Stick with firm cheeses like cheddar, Gouda, or even a firm mozzarella if you want a milder flavor.
For the best texture, use crackers that are sturdy enough to hold a piece of salami and cheese without breaking. I’ve found that buttery crackers like Ritz Minis or whole wheat crackers like Triscuit Minis work best. Avoid thin, fragile crackers that crumble at the first bite.
Finally, if you are packing this for a school lunch, consider using a thermos or a small insulated container for the crackers to keep them extra crunchy. A little silicone muffin cup can also work as a divider to keep everything in its place.
Variations & Adaptations
This recipe is endlessly customizable. Here are a few variations I’ve tried and loved:
- Italian-Inspired: Swap the cheddar for fresh mozzarella pearls and the salami for prosciutto. Add a few basil leaves and a drizzle of balsamic glaze for a caprese-inspired snack box.
- Spicy Southwest: Use pepper jack cheese and spicy chorizo or jalapeño salami. Add some tortilla chips and a small container of salsa or guacamole for dipping.
- Sweet & Savory: Pair sharp cheddar with apple slices or pear slices instead of crackers. Add a few almonds and a drizzle of honey for a delightful sweet-savory combo.
- Dairy-Free: Use your favorite plant-based cheese (I like Violife’s cheddar style) and ensure your crackers are dairy-free. The rest of the recipe works perfectly.
- Gluten-Free: Use gluten-free crackers or swap the crackers for cucumber slices or bell pepper strips for a low-carb, gluten-free option.
I once tried a version with smoked Gouda and a spicy salami, and it was incredible—the smokiness of the cheese paired beautifully with the heat of the meat. Don’t be afraid to experiment based on what you have in your fridge.
Serving & Storage Suggestions
Serve this snack box at room temperature for the best flavor. If you are packing it for later, refrigerate it for up to 3 days, but always add the crackers just before serving to keep them crunchy. The flavors actually meld together nicely after a few hours in the fridge—the salami’s spices infuse the cheese slightly, creating a more cohesive bite.
For a fun presentation, arrange the components on a small wooden board or a slate platter if you are serving guests. Add some fresh fruit like grapes or berries on the side for a pop of color. This also makes a fantastic addition to a brunch spread or a charcuterie board for kids.
If you are making these for a week of lunches, prep the cheese and salami on Sunday and store them in separate airtight containers. Then each morning, just grab a handful of crackers, some cheese cubes, and a few slices of salami, and you have a lunch ready in 30 seconds. The cheese and salami will stay fresh for 4-5 days in the fridge.
One thing I love about these boxes is that they are perfect for road trips. The individual components are easy to eat with your hands, and there’s no mess. Just pack everything in a cooler bag with an ice pack, and you have a satisfying snack that beats any gas station option.
Nutritional Information & Benefits
This snack box is a balanced mini-meal that provides protein, healthy fats, and carbohydrates to keep you energized. Here’s an approximate breakdown for one serving (using cheddar cheese, salami, and 15 mini crackers):
- Calories: 350-400
- Protein: 18-22 grams
- Fat: 24-28 grams
- Carbohydrates: 18-22 grams
- Fiber: 1-2 grams
The salami provides a good source of iron and B vitamins, while the cheese offers calcium and protein for strong bones and muscles. The crackers give you quick energy, making this a great pre- or post-workout snack. If you add grapes or cherry tomatoes, you’ll also get a dose of antioxidants and vitamin C.
For a lower-sodium option, look for reduced-sodium salami or turkey-based salami. You can also use a low-fat cheese if you are watching your fat intake, though the full-fat version is more satisfying and keeps you fuller longer.
From a wellness perspective, I love that this snack box feels indulgent but is actually quite balanced. It’s a great way to avoid the afternoon slump without reaching for something sugary. The protein and fat combo stabilizes blood sugar, so you get steady energy instead of a crash.
Conclusion
This easy copycat lunchable snack box is proof that you don’t need fancy ingredients or complicated techniques to make something wonderful. It’s simple, satisfying, and endlessly adaptable—just the way real food should be. I love that I can make it in five minutes, and it always makes me feel like I’ve treated myself, even on the busiest days.
I encourage you to make this your own. Swap the cheese, try a different meat, or add your favorite fruit. The possibilities are endless, and that’s the beauty of it. If you make this, I’d love to hear about your favorite combinations. Leave a comment below and share your creation—I’m always looking for new ideas! And if you enjoyed this, please share it with a friend who could use a little lunchbox inspiration. Happy snacking!
Frequently Asked Questions
Can I use pre-sliced cheese from a bag?
I wouldn’t recommend it. Pre-sliced cheese has added starches to prevent sticking, and it doesn’t cube as cleanly. A block of cheese gives you better texture and flavor, and it’s actually more cost-effective.
How long will these snack boxes last in the fridge?
They will stay fresh for up to 3 days if stored in an airtight container. However, I recommend adding the crackers just before serving to keep them crunchy. The cheese and salami can be prepped up to 4-5 days in advance.
Can I freeze the cheese and salami?
You can freeze the salami, but I don’t recommend freezing the cheese. Freezing changes the texture of cheese, making it crumbly and less creamy. The salami freezes well for up to 2 months—just thaw it in the fridge overnight before using.
What if my child has a nut allergy?
This recipe is naturally nut-free if you skip the almonds. Just be sure to check the labels on your crackers and salami to ensure they are processed in a nut-free facility. Many brands clearly label this on the package.
Can I make this for a party?
Absolutely! This is a fantastic option for parties. Simply scale up the ingredients and arrange them on a large platter or in individual cups for guests. It’s a fun, interactive way to serve appetizers without a lot of fuss.
Pin This Recipe!
Easy Copycat Lunchable: Salami & Cheese Snack Box

A quick and easy snack box featuring hard salami, sharp cheddar cheese, and mini crackers, perfect for lunchboxes, road trips, or a satisfying snack. This grown-up version of a classic lunchable comes together in under five minutes with simple ingredients.
- Prep Time: 5 minutes
- Cook Time: 0 minutes
- Total Time: 5 minutes
- Yield: 1 serving 1x
- Category: Snack
- Cuisine: American
Ingredients
- 4 ounces hard salami, sliced
- 4 ounces sharp cheddar cheese, block
- 1 cup mini crackers (such as Ritz Minis or Wheat Thins Minis)
- 1/2 cup grapes (optional)
- 1/2 cup cherry tomatoes (optional)
- 1/4 cup pitted kalamata or green olives (optional)
- 1/4 cup almonds (optional)
Instructions
- Prepare the Cheese: Cut the 4-ounce block of sharp cheddar into 1/2-inch cubes. Aim for even squares, about 20-24 cubes. If the cheese is too soft, refrigerate for 10 minutes first.
- Prepare the Salami: Lay salami slices flat on a cutting board. If large, cut in half. Fold each slice in half, then in half again to form a neat triangle, or roll into small cylinders.
- Prepare the Crackers: Count out about 15-20 mini crackers (or 8-10 larger crackers). Keep them separate to avoid sogginess.
- Assemble the Box: Arrange cheese cubes, folded salami, and crackers in separate compartments of a bento box or container. If using a single container, place crackers on a small piece of parchment paper.
- Add Extras (Optional): Add halved grapes, cherry tomatoes, olives, or almonds to remaining compartments.
- Serve or Store: Serve immediately, or refrigerate for up to 3 days. Add crackers just before eating to maintain crunch.
Notes
For best results, use room temperature cheese for cleaner cubing and creamier taste. Keep crackers separate until serving to maintain crunch. The cheese and salami can be prepped up to 4-5 days in advance and stored in airtight containers. For a lower-sodium option, use reduced-sodium salami or turkey-based salami.
Nutrition
- Serving Size: 1 snack box
- Calories: 375
- Sugar: 2
- Sodium: 800
- Fat: 26
- Saturated Fat: 12
- Carbohydrates: 20
- Fiber: 1.5
- Protein: 20
Keywords: lunchable, snack box, salami, cheese, crackers, lunchbox, easy snack, kid-friendly, no-cook


