Love this? Save it for later!
Share the inspiration with your friends
My neighbor, Sarah, wasn’t trying to impress anyone. I’d stopped by to borrow a drill on a random Tuesday in October, and the smell of pumpkin and warm spice hit me before I even got past her front door. It was that cozy, fall aroma that makes you instantly relax. She was in the kitchen, barefoot, casually scraping something into a pan while her toddler played with measuring cups on the floor. I asked what she was making, and she just shrugged and said, “Oh, just a quick no-bake thing for a potluck tomorrow.”
Honestly, “just a quick no-bake thing” turned out to be the most ridiculous understatement I’ve ever heard. She handed me a spoon to lick clean, and I swear, I almost asked to keep the whole pan. The texture was this perfect cross between a creamy cheesecake and a light mousse, and the crust had that buttery, snappy bite you only get from a really good graham cracker base. It was genius. And she acted like it was nothing.
I went home that night, drill in hand, completely obsessed with recreating those easy no-bake pumpkin cheesecake bars. Maybe you’ve been there—you taste something at a friend’s house and you can’t stop thinking about it. I’ve made them at least a dozen times since that Tuesday, tweaking the spice ratio and the crust texture until I got it exactly right. This recipe is the result of that obsession. It’s the dessert that makes people close their eyes when they take a bite, and the best part? You don’t even have to turn on the oven.
Why You’ll Love This Recipe
Listen, I’ve tested a lot of pumpkin desserts over the years. Some are too wet, some are too dense, and some just taste like a sad compromise between healthy and delicious. These bars are none of those things. They are the real deal. Here is why they will become your new fall favorite:
- No Oven Required: This is seriously the easiest fall dessert you will ever make. No baking, no worrying about cracks, no heating up the kitchen. It’s a total win.
- Simple, Trusted Ingredients: You don’t need a specialty grocery store. Cream cheese, pumpkin puree, graham crackers, butter, and a few pantry spices. That’s it.
- Perfect for Fall Gatherings: Whether it is Thanksgiving, a Friendsgiving potluck, or just a cozy night in, these bars travel well and look beautiful on a plate.
- Crowd-Pleaser Guarantee: I have brought these to three different events this fall, and I have yet to bring a single crumb home. Kids love them, adults love them, and even folks who “don’t like pumpkin” have asked for the recipe.
- Unbelievably Creamy Texture: The secret is in the technique—whipping the cream cheese until it is super fluffy before adding the pumpkin. It creates a filling that is light, airy, and melts in your mouth.
This isn’t just another pumpkin bar recipe. It is the one that makes you look like a hero with almost zero effort. The kind of dessert that makes people ask, “Wait, you didn’t bake this?” with genuine surprise. It’s comfort food, reimagined for the busy season—faster, easier, but with the same soul-soothing satisfaction of a classic pumpkin cheesecake.
What Ingredients You Will Need
This recipe keeps things wonderfully simple. Most of these ingredients are probably in your kitchen right now, which is exactly why I love it. We are using standard pantry staples to create a dessert that tastes anything but ordinary. Let’s break down what you need and why each one matters.
For the Graham Cracker Crust
- 2 cups graham cracker crumbs (about 14-16 full sheets, crushed finely. I prefer the Honey Maid brand for consistent texture).
- 1/2 cup unsalted butter, melted (Salted butter works too, just skip the added salt. The butter binds the crumbs and gives that rich, toasty flavor).
- 1/4 cup granulated sugar (Adds just enough sweetness to balance the salty butter).
- 1/4 teaspoon salt (Only if using unsalted butter. It makes the crust pop).
For the Pumpkin Cheesecake Filling
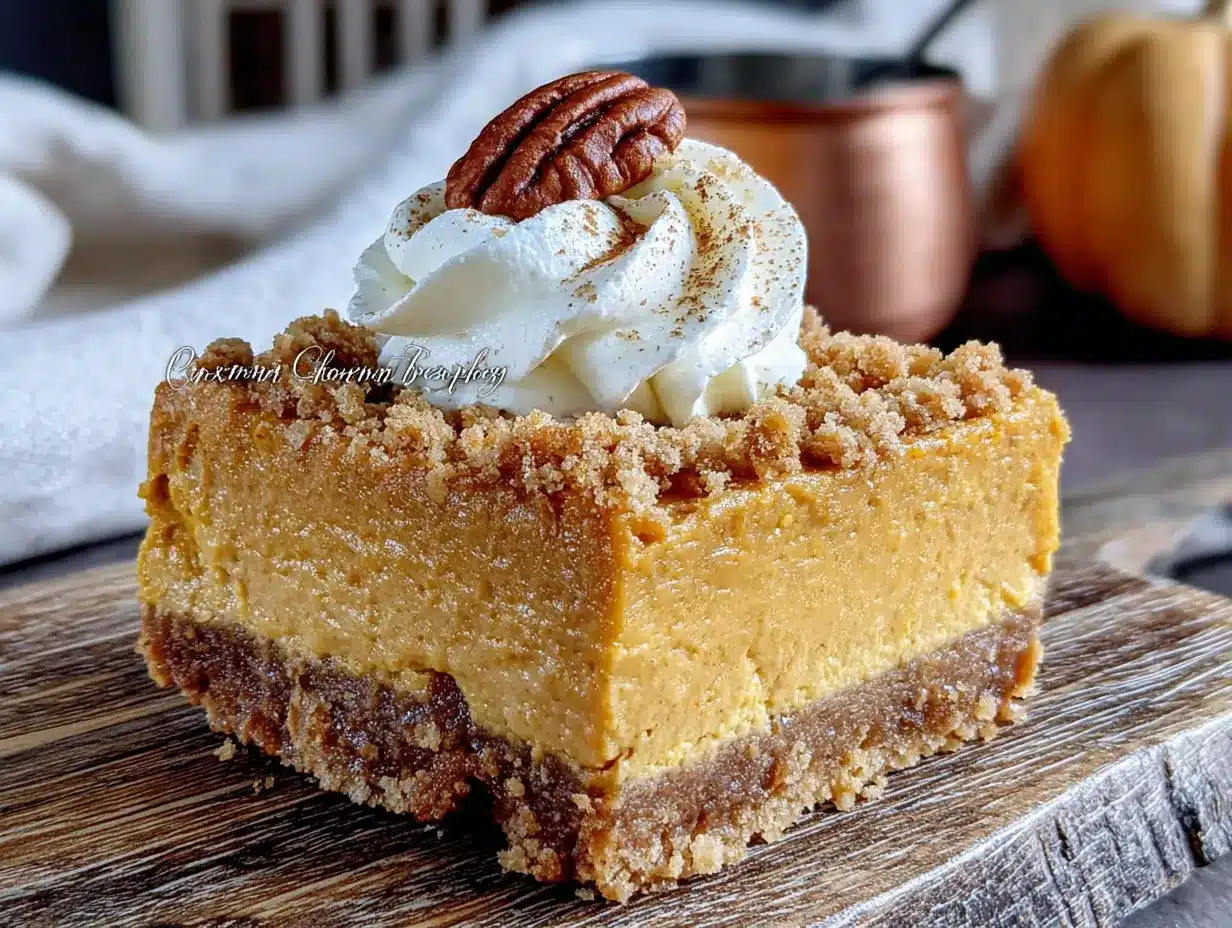
- 16 oz (two blocks) full-fat cream cheese, softened (This is non-negotiable for that ultra-creamy texture. Low-fat versions contain more water and can make the filling runny. Let it sit on the counter for at least 30 minutes).
- 1 cup pumpkin puree (Not pumpkin pie filling. Look for 100% pure pumpkin. I like Libby’s for its consistent thickness and flavor).
- 1/2 cup granulated sugar (For sweetness and structure).
- 1/4 cup packed light brown sugar (Adds a touch of molasses depth that pairs perfectly with the spices).
- 1 teaspoon vanilla extract (Enhances all the other flavors).
- 1 1/2 teaspoons pumpkin pie spice (Or make your own: 1 teaspoon cinnamon, 1/2 teaspoon ginger, 1/4 teaspoon nutmeg, 1/4 teaspoon cloves).
- 1/2 teaspoon ground cinnamon (Because you can never have too much cinnamon).
- 1 cup heavy whipping cream, cold (This is whipped and folded in to make the filling light and mousse-like. Do not substitute with milk or half-and-half).
- 2 tablespoons powdered sugar (For stabilizing the whipped cream).
Optional Toppings
- Whipped cream (Homemade is best, but store-bought works in a pinch).
- Caramel sauce (A drizzle of salted caramel takes these over the top).
- Crushed pecans or graham crackers (For a little crunch).
Equipment Needed
You don’t need a fancy kitchen to pull this off. Here is the gear that makes the job easy:
- 9×9-inch baking pan (An 8×8 works too, but your bars will be slightly thicker. Line it with parchment paper for easy lifting).
- Electric hand mixer or stand mixer (A whisk and strong arm works for the cream cheese, but a mixer makes the whipped cream much easier and faster).
- Large mixing bowls (One for the crust, one for the cream cheese mixture, one for the whipped cream).
- Food processor or zip-top bag and rolling pin (For crushing graham crackers. I used the bag-and-rolling-pin method for years—it’s a great arm workout!).
- Rubber spatula (For folding the whipped cream gently).
- Plastic wrap (To cover the pan while it chills).
If you do not have a 9×9 pan, a 9-inch springform pan works beautifully for a more “cheesecake” presentation. Just make sure the crust goes up the sides a bit.
Preparation Method
Alright, let’s get to the fun part. This recipe moves fast once you start, so I like to have all my ingredients measured and ready to go. It takes about 20 minutes of active prep, then the fridge does all the hard work.
Step 1: Make the Crust
In a medium bowl, combine the graham cracker crumbs, sugar, and salt. Pour the melted butter over the top and stir with a fork until every crumb is moistened. It should look like wet sand. Press this mixture firmly into the bottom of your parchment-lined 9×9 pan. I use the bottom of a flat measuring cup to really pack it down. A loose crust will fall apart when you cut the bars. Pop the pan in the fridge to set while you make the filling.
Step 2: Whip the Cream
In a clean, chilled bowl, pour the cold heavy cream and add the powdered sugar. Using your hand mixer, whip on medium-high speed until stiff peaks form. This takes about 3-4 minutes. You want the cream to hold its shape when you lift the beaters. Set this bowl in the fridge for now. Cold cream whips better, so do not let it sit out too long.
Step 3: Make the Cream Cheese Base
In a large bowl, beat the softened cream cheese with the hand mixer (no need to wash the beaters from the cream) until it is completely smooth and fluffy—about 2 minutes. Scrape the bowl well. Add the granulated sugar and brown sugar and beat for another minute until incorporated and grainy-free. Add the pumpkin puree, vanilla, pumpkin pie spice, and cinnamon. Beat on low until just combined. Do not overmix here, or the pumpkin can make the mixture a bit watery. Scrape the bowl one more time.
Step 4: Fold Everything Together
This is the most important step. Take your bowl of whipped cream out of the fridge. Using a rubber spatula, gently fold about one-third of the whipped cream into the pumpkin mixture. This lightens it up. Then, add the rest of the whipped cream and fold gently. I use a cutting motion through the center and then scrape around the bowl. You want to see no more white streaks, but do not stir vigorously. If you deflate the whipped cream, the bars will be dense instead of airy.
Step 5: Assemble and Chill
Take the crust out of the fridge. Spoon the pumpkin cheesecake filling over the crust and spread it evenly with an offset spatula or the back of a spoon. Give the pan a few gentle taps on the counter to release any air bubbles. Cover the pan tightly with plastic wrap and refrigerate for at least 6 hours, but overnight is best. I know it is hard to wait, but this is where the magic happens. The filling needs that time to set up firmly so you can slice clean bars.
Step 6: Slice and Serve
When you are ready to serve, lift the bars out of the pan using the parchment paper overhang. Use a sharp, clean knife to slice into 9 or 16 squares. Wipe the knife clean between cuts for the prettiest edges. Serve cold with a dollop of whipped cream and a drizzle of caramel sauce if you are feeling fancy.
Cooking Tips & Techniques
I have learned a few things the hard way so you do not have to. Here are my best tips for perfect bars every single time:
- Soft Cream Cheese is Key: Do not microwave it to soften it quickly unless you are very careful. Microwaved cream cheese can melt and create a grainy texture. Set it out on the counter for 30-45 minutes. It should be room temperature and give slightly when you press it.
- Don’t Skip the Chilling Time: I made the mistake of cutting into these after only 4 hours once. They were delicious, but they were more like a mousse than a sliceable bar. The overnight chill is what gives them that firm, clean cheesecake texture.
- Pumpkin Puree vs. Pie Filling: This is the most common mistake. Pumpkin pie filling is pre-sweetened and spiced with different proportions. It will make your bars too sweet and the texture will be off. Always grab the 100% pure pumpkin.
- Folding, Not Stirring: When you add the whipped cream, think of it like you are handling a cloud. Use a gentle hand and a spatula. If you use a mixer on this step, you will deflate all that air and end up with a flat, heavy bar.
- Line Your Pan: I cannot stress this enough. Leaving an overhang of parchment paper on two sides makes lifting the entire block of cheesecake out of the pan effortless. No digging around with a spatula and ruining your perfect edges.
Variations & Adaptations
One of the best things about this recipe is how flexible it is. Here are a few ways I have changed it up depending on what I have on hand or who I am feeding:
- Gluten-Free Version: Swap the graham crackers for gluten-free graham crackers or use crushed gluten-free shortbread cookies. The rest of the recipe is naturally gluten-free, so it is an easy switch.
- Dairy-Free Adaptation: Use dairy-free cream cheese (like Kite Hill or Tofutti) and a dairy-free heavy cream alternative (coconut cream from a can of full-fat coconut milk works wonderfully). The texture will be slightly different, but still deliciously creamy.
- Spiced-Up Crust: Add 1/2 teaspoon of cinnamon and a pinch of nutmeg to the graham cracker crust mixture. It gives the whole bar a warm, cohesive spice profile from top to bottom.
- Chocolate Drizzle: Melt 1/2 cup of semi-sweet chocolate chips with a teaspoon of coconut oil and drizzle it over the set bars. The pumpkin and chocolate combo is seriously underrated.
- Pumpkin Gingersnap Crust: For a more intense fall flavor, replace the graham crackers with crushed gingersnap cookies. The molasses and ginger in the cookies pair beautifully with the creamy pumpkin filling. I tried this for a Thanksgiving potluck last year and it was gone in ten minutes.
Serving & Storage Suggestions
These bars are best served cold, straight from the fridge. The texture is firm and creamy, almost like a frozen mousse. I like to let them sit out for about 5 minutes after slicing just to take the chill off, but that is totally personal preference.
For presentation, a light dusting of cinnamon or pumpkin pie spice on the plate looks beautiful. A dollop of lightly sweetened whipped cream and a drizzle of salted caramel sauce turns these into a showstopper dessert. They pair wonderfully with a hot cup of coffee or a spiced chai latte.
Storage: Keep the bars in an airtight container in the refrigerator for up to 5 days. They actually get better on day two as the flavors meld together. To freeze, wrap the entire pan (or individual slices) tightly in plastic wrap, then a layer of foil. Freeze for up to 3 months. Thaw overnight in the refrigerator before serving. Do not thaw at room temperature, or the texture can become watery.
Nutritional Information & Benefits
Please note that these values are estimates and will vary based on specific brands and any substitutions you make. Based on 9 servings:
- Calories: ~380 per bar
- Fat: 28g
- Carbohydrates: 30g
- Protein: 5g
- Sugar: 22g
While this is definitely a treat, it does have some redeeming qualities. Pumpkin is packed with Vitamin A (great for eye health) and fiber. The cream cheese and heavy cream provide a good amount of calcium and protein. Is it health food? No. But is it a dessert made with real ingredients that feels nourishing and satisfying? Absolutely. I love that I know exactly what is in these bars—no weird preservatives or mystery oils.
Conclusion
If you are looking for the easiest, most impressive fall dessert that requires zero oven time, these easy no-bake pumpkin cheesecake bars are it. They are creamy, spiced perfectly, and have that buttery graham cracker crust that just works. I still think about that Tuesday at Sarah’s house every time I make them, and I hope they become a happy memory in your kitchen too.
I would love to hear how they turn out for you! Did you add a caramel drizzle? Try the gingersnap crust? Let me know in the comments below. And if you share a photo on Pinterest or Instagram, tag me—I love seeing your creations. Happy fall baking (or, you know, no-baking)!
Frequently Asked Questions
Can I use a 9×13 pan instead?
Yes, you can. The bars will be thinner. I recommend doubling the crust recipe but keeping the filling as written. You will have a thinner layer of cheesecake, which some people actually prefer. Reduce the chilling time slightly to about 4-5 hours.
Why is my filling runny?
This usually happens for two reasons. One, your cream cheese was not fully softened, creating lumps that didn’t set properly. Two, you might have overmixed after adding the pumpkin, which can break down the structure. Make sure your cream cheese is at room temperature and fold gently.
Can I make these sugar-free?
Absolutely. Use a granulated sugar substitute like monk fruit or erythritol in both the crust and the filling. For the whipped cream, use powdered monk fruit sweetener. The texture will be slightly less firm, but the flavor will still be fantastic.
How far in advance can I make these?
You can make these up to 2 days in advance. In fact, I prefer them on day two. Just keep them tightly covered in the fridge. For longer storage, freeze them as directed above.
Can I use a store-bought graham cracker crust?
Technically, yes, but I really do not recommend it. The store-bought crusts are usually too thin and have a different texture. Homemade crust takes 5 minutes and makes the bars taste so much fresher and more buttery. It is worth the tiny bit of effort.
Pin This Recipe!
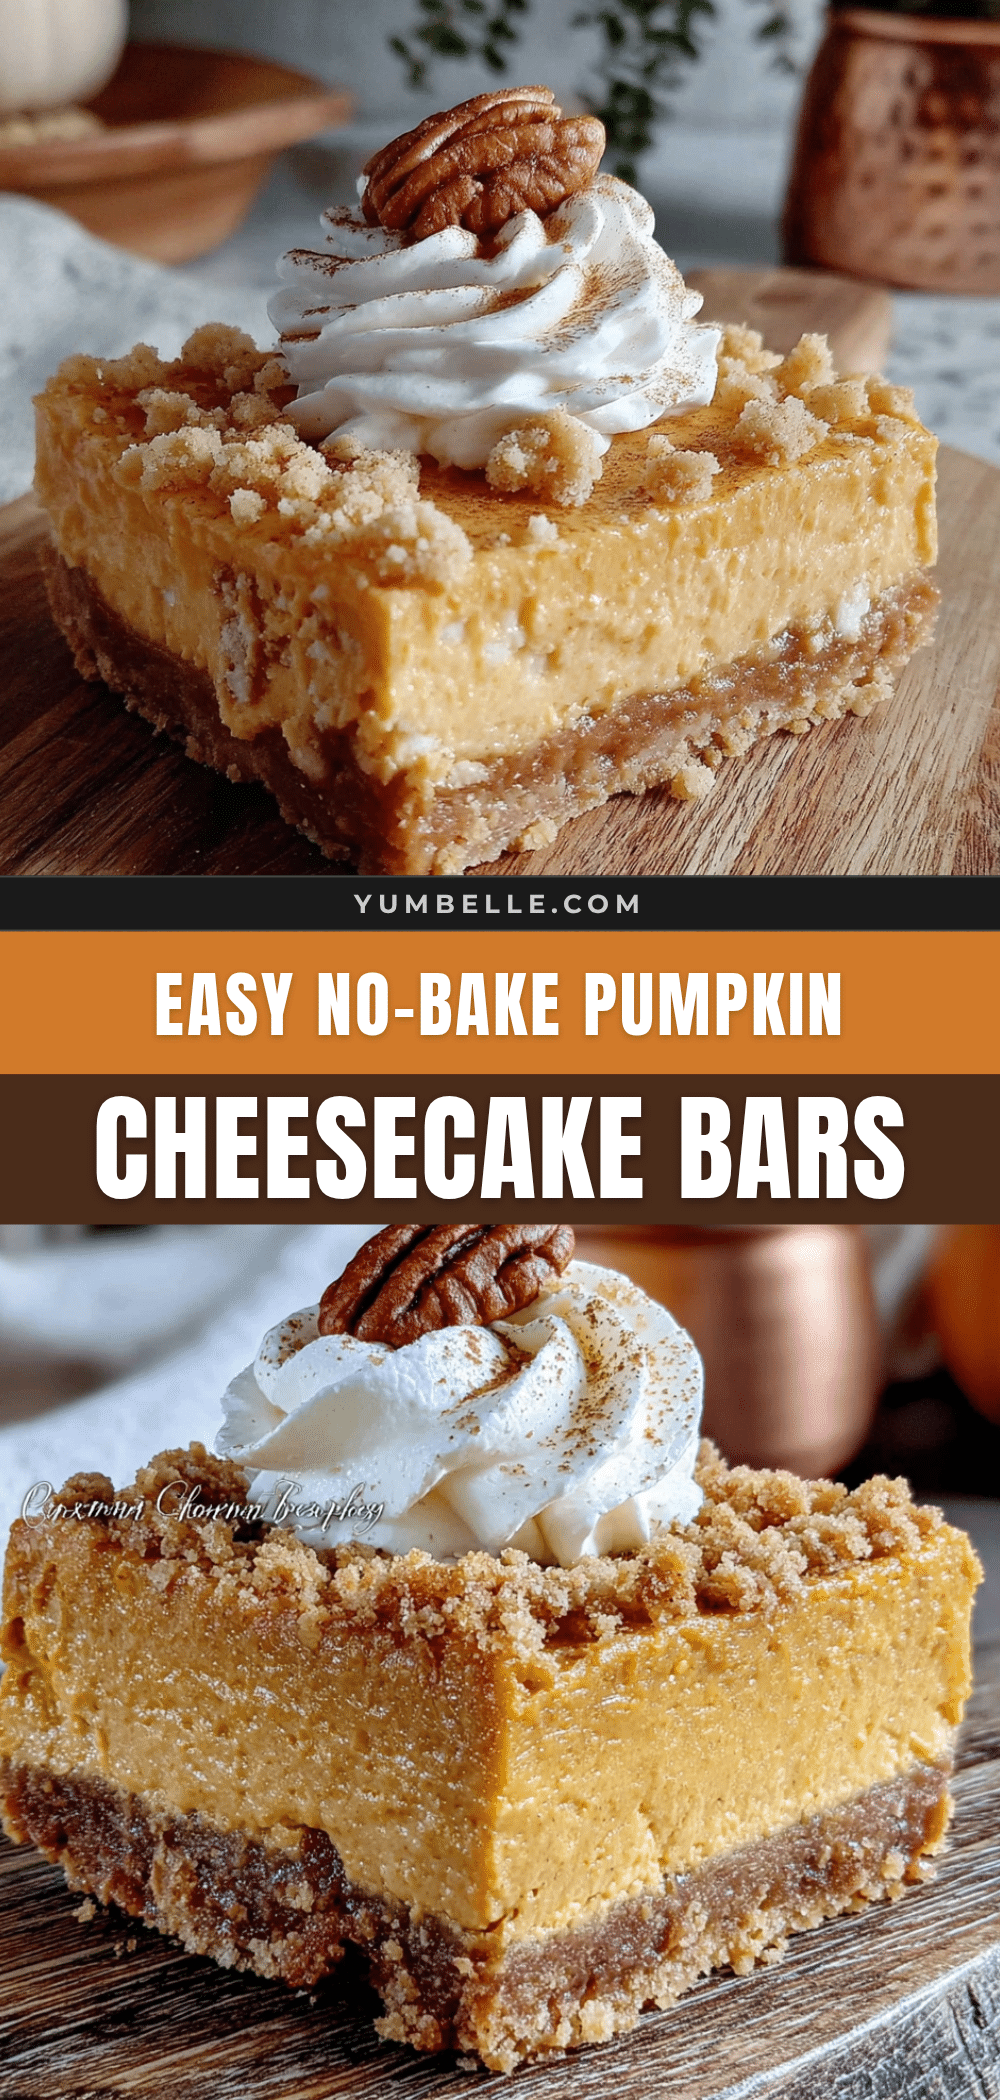
Easy No-Bake Pumpkin Cheesecake Bars: The Best Fall Dessert
These no-bake pumpkin cheesecake bars are the ultimate fall dessert—creamy, spiced perfectly, and with a buttery graham cracker crust. No oven required, they are easy to make and perfect for Thanksgiving, potlucks, or cozy nights in.
- Prep Time: 20 minutes
- Cook Time: 0 minutes
- Total Time: 6 hours 20 minutes (includes chilling)
- Yield: 9 servings 1x
- Category: Dessert
- Cuisine: American
Ingredients
- 2 cups graham cracker crumbs (about 14–16 full sheets)
- 1/2 cup unsalted butter, melted
- 1/4 cup granulated sugar
- 1/4 teaspoon salt (only if using unsalted butter)
- 16 oz (two blocks) full-fat cream cheese, softened
- 1 cup pumpkin puree (100% pure, not pie filling)
- 1/2 cup granulated sugar
- 1/4 cup packed light brown sugar
- 1 teaspoon vanilla extract
- 1 1/2 teaspoons pumpkin pie spice
- 1/2 teaspoon ground cinnamon
- 1 cup heavy whipping cream, cold
- 2 tablespoons powdered sugar
- Optional toppings: whipped cream, caramel sauce, crushed pecans or graham crackers
Instructions
- Make the crust: In a medium bowl, combine graham cracker crumbs, sugar, and salt. Pour melted butter over and stir until every crumb is moistened (like wet sand). Press firmly into the bottom of a parchment-lined 9×9-inch pan. Refrigerate while making the filling.
- Whip the cream: In a clean, chilled bowl, beat cold heavy cream and powdered sugar on medium-high speed until stiff peaks form (about 3-4 minutes). Refrigerate.
- Make the cream cheese base: In a large bowl, beat softened cream cheese until smooth and fluffy (about 2 minutes). Add granulated sugar and brown sugar; beat 1 minute. Add pumpkin puree, vanilla, pumpkin pie spice, and cinnamon; beat on low until just combined.
- Fold everything together: Gently fold one-third of the whipped cream into the pumpkin mixture to lighten it. Then fold in the remaining whipped cream until no white streaks remain. Do not overmix.
- Assemble and chill: Spread the filling evenly over the crust. Tap the pan gently to release air bubbles. Cover tightly with plastic wrap and refrigerate for at least 6 hours, preferably overnight.
- Slice and serve: Lift bars out using parchment overhang. Slice into 9 or 16 squares with a clean knife. Serve cold with optional toppings.
Notes
Soft cream cheese is key—let it sit out for 30-45 minutes. Do not skip the overnight chill for clean slices. Use 100% pure pumpkin, not pie filling. Fold whipped cream gently to keep bars light and airy. Line pan with parchment for easy removal.
Nutrition
- Serving Size: 1 bar
- Calories: 380
- Sugar: 22
- Fat: 28
- Carbohydrates: 30
- Protein: 5
Keywords: no-bake pumpkin cheesecake bars, easy fall dessert, pumpkin cheesecake, no-bake dessert, Thanksgiving dessert, pumpkin bars


