Love this? Save it for later!
Share the inspiration with your friends
It was 9:47 PM on a rainy Wednesday last March, and I had a very specific, almost embarrassing craving for something warm, cheesy, and ranch-flavored. I didn’t have any fancy Hawaiian rolls or shredded rotisserie chicken, but I had a pack of sad-looking chicken thighs in the fridge, a half-empty bottle of ranch seasoning from a bulk bin, and the stubborn idea that I could make something that didn’t taste like a sad afterthought.
Honestly, I was supposed to be meal-prepping for the week, but the rain had other plans for my motivation. I just stood there, staring into the fridge like it owed me dinner, and started pulling things out. I had some provolone slices that were about to hit their expiration date, a lonely onion, and a questionable container of sour cream. Let me tell you, the first batch was a mess. The chicken was dry, the cheese slid off in one sad sheet, and I used way too much ranch. But something about that late-night experiment stuck with me.
Maybe you’ve been there—you want that gooey, savory, crowd-pleasing slider, but you don’t want to spend two hours in the kitchen. You want the flavor that makes people close their eyes and go “mmm” without having to follow a complicated chef’s recipe. That’s what these Perfect Cheesy Ranch Chicken Sliders are about. They’re the result of a rainy night, a stubborn cook, and a few happy accidents. I keep making them because they never fail to turn a regular weeknight into something that feels like a little celebration, and honestly, that’s the kind of magic we all need in our kitchens.
Why You’ll Love This Recipe
I’ve tested this recipe about seven times now—yes, seven—to get it just right. I am not a professional chef, but I am a professional eater and a stubborn home cook, and I can tell you with full confidence that this version is the one. These sliders have been approved by my picky neighbor, my toddler nephew (who usually only eats plain pasta), and a group of friends who showed up unannounced during a game night.
- Quick & Easy: From start to finish, these sliders come together in under 30 minutes. Perfect for those days when you forget to thaw the chicken or when you just need dinner on the table fast.
- Simple Ingredients: You probably have most of these in your pantry and fridge right now. No hunting for obscure spices or expensive cuts of meat.
- Perfect for Game Day or Weeknight Dinner: These sliders are versatile enough for a Super Bowl party, a casual family dinner, or even a potluck where you want to be the hero.
- Crowd-Pleaser: Kids love the cheesy, buttery top, and adults appreciate the savory ranch flavor. It’s a rare recipe that makes everyone happy.
- Unbelievably Delicious: The texture is what gets me every time—soft, slightly sweet Hawaiian rolls, tender shredded chicken, and a layer of melted cheese that stretches with every bite. It’s comfort food at its finest.
What makes this recipe different from the rest is the method. Instead of just throwing everything together, I use a quick pan-sear on the chicken to build flavor, then shred it and let it soak up a creamy ranch sauce. The rolls get brushed with a garlic butter topping that makes the tops golden and slightly crisp while the insides stay pillowy soft. It’s not just another slider recipe—it’s the one you’ll bookmark and make on repeat.
What Ingredients You Will Need
This recipe uses simple, everyday ingredients to deliver big, bold flavor. Most of these are pantry staples or fridge basics, so you likely won’t need a special trip to the grocery store.
- For the Chicken Filling:
- 1 ½ lbs boneless, skinless chicken breasts (about 2-3 breasts) – You can also use chicken thighs for extra juiciness.
- 1 tablespoon olive oil – For searing the chicken and adding flavor.
- ½ cup sour cream – Adds creaminess and tang. I prefer full-fat for best texture.
- ¼ cup mayonnaise – Helps bind the filling and adds richness. Duke’s is my go-to.
- 1 packet (1 oz) dry ranch seasoning mix – This is the flavor backbone. I like Hidden Valley, but any brand works.
- 1 cup shredded cheddar cheese – Sharp cheddar gives the best flavor, but a Mexican blend works too.
- ¼ cup chopped green onions – For freshness and a little bite. Reserve some for garnish.
- For the Sliders:
- 12-count package Hawaiian sweet rolls – These are non-negotiable for that perfect sweet-savory balance. King’s Hawaiian is the classic choice.
- 6 slices provolone cheese – Melts beautifully and doesn’t overpower the ranch flavor. You can use mozzarella or Monterey Jack instead.
- 3 tablespoons salted butter, melted – For brushing the tops.
- 1 teaspoon garlic powder – Mixed into the butter for that golden, aromatic top.
- 1 teaspoon dried parsley – Optional, for color.
Ingredient Selection Tips: For the best texture, look for chicken breasts that are similar in size so they cook evenly. If you’re using pre-cooked rotisserie chicken, skip the searing step and just shred the meat. For the ranch seasoning, I’ve tried homemade blends, and while they’re good, the packet version gives that unmistakable flavor we all crave. If you’re dairy-sensitive, use dairy-free sour cream and cheese alternatives—the recipe still works great.
Equipment Needed
You don’t need a fancy kitchen to pull these off. Here’s what you’ll need:
- Large skillet or frying pan – For searing the chicken. A cast-iron skillet works beautifully here.
- Cutting board and sharp knife – For shredding the chicken and chopping green onions.
- Two forks or a hand mixer – For shredding the cooked chicken. A hand mixer on low speed makes quick work of it.
- Mixing bowl – To combine the chicken filling.
- 9×13-inch baking dish – For assembling and baking the sliders. A casserole dish works too.
- Pastry brush or spoon – For brushing the garlic butter on top.
- Aluminum foil – For covering the sliders during the first part of baking.
If you don’t have a 9×13 dish, you can use a large cast-iron skillet or even a rimmed baking sheet. Just make sure the rolls fit snugly together so they don’t dry out. I’ve used a cheap baking dish from the dollar store before, and it worked fine—no need to invest in expensive equipment for this recipe.
Preparation Method
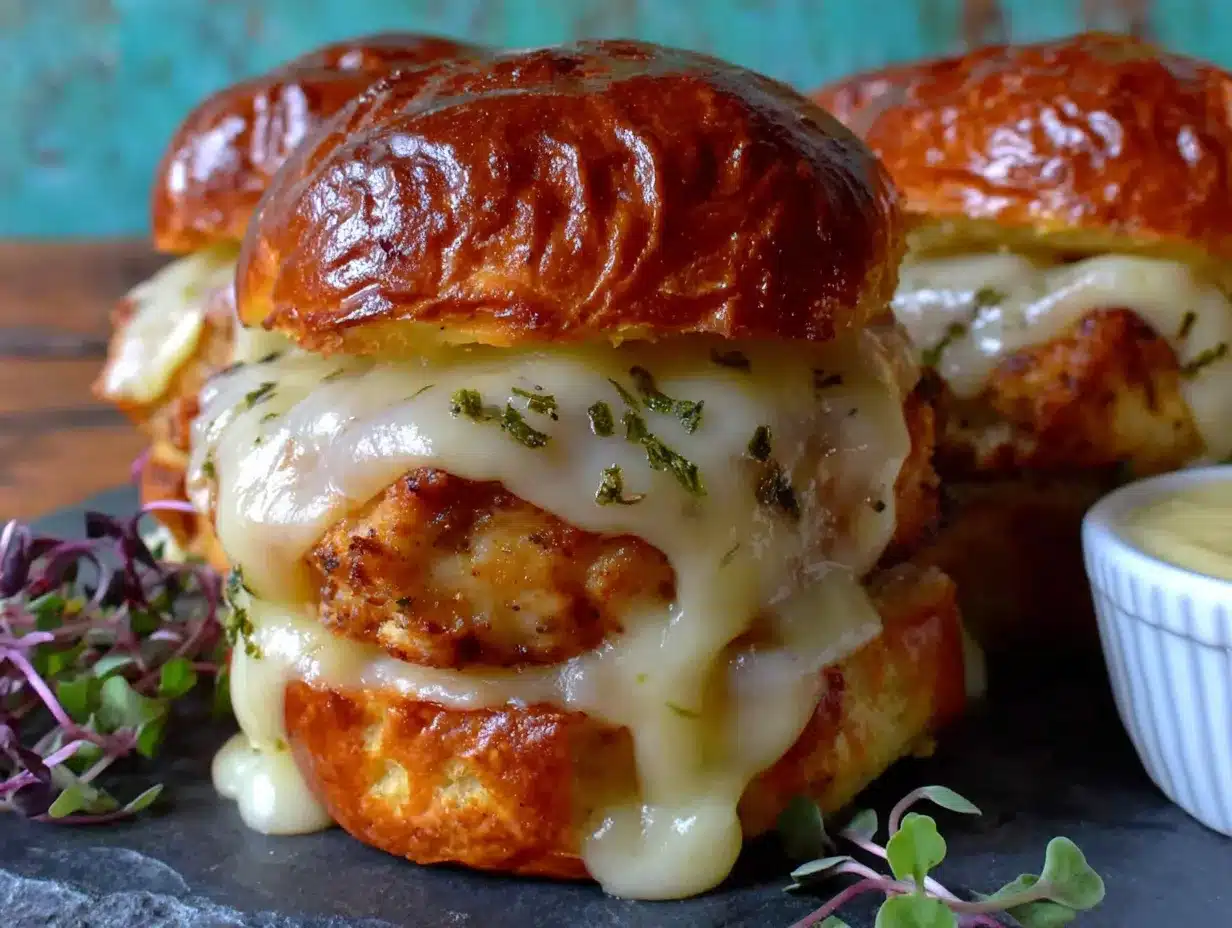
Follow these steps carefully, and you’ll have perfect sliders every time. I’ve included sensory cues and timing estimates so you know exactly what to look for.
- Preheat and Prep (5 minutes): Preheat your oven to 350°F (175°C). Lightly grease your 9×13 baking dish with cooking spray or a little butter. This prevents sticking and makes cleanup easier.
- Sear the Chicken (10 minutes): Season the chicken breasts with a pinch of salt and pepper. Heat 1 tablespoon olive oil in a large skillet over medium-high heat until it shimmers. Add the chicken and cook for 5-6 minutes per side, until golden brown and cooked through. The internal temperature should reach 165°F (74°C). Don’t overcrowd the pan—cook in batches if needed. The chicken should sizzle when it hits the pan; if it doesn’t, the pan isn’t hot enough.
- Shred the Chicken (5 minutes): Transfer the cooked chicken to a cutting board and let it rest for 2-3 minutes. Using two forks, shred the chicken into bite-sized pieces. Alternatively, use a hand mixer on low speed in a bowl—it’s faster and gives you consistent shreds. Be careful not to over-shred into mush.
- Make the Ranch Filling (5 minutes): In a large mixing bowl, combine the shredded chicken, sour cream, mayonnaise, dry ranch seasoning, shredded cheddar cheese, and chopped green onions. Stir until everything is well coated. Taste and adjust seasoning if needed—sometimes I add a pinch of black pepper. The mixture should be creamy and cohesive, not dry. If it seems dry, add another tablespoon of sour cream.
- Prepare the Rolls (5 minutes): Without separating them, slice the entire pack of Hawaiian rolls in half horizontally using a serrated knife. Place the bottom half of the rolls in the prepared baking dish, cut side up. Arrange the provolone cheese slices over the bottom half, overlapping slightly to cover evenly.
- Assemble the Sliders (5 minutes): Spoon the chicken mixture evenly over the provolone cheese. Spread it out gently with a spatula so every roll gets some filling. Place the top half of the rolls over the filling, cut side down. Press down lightly to set everything together.
- Garlic Butter Topping (2 minutes): In a small bowl, mix the melted butter with the garlic powder and dried parsley. Brush this mixture generously over the tops of the rolls. Make sure every roll gets some butter—this is what creates that golden, slightly crispy top.
- Bake (15-18 minutes): Cover the baking dish loosely with aluminum foil and bake for 10 minutes. Remove the foil and bake for another 5-8 minutes, until the tops are golden brown and the cheese is bubbly. The rolls should feel soft but slightly firm to the touch. Let them rest for 5 minutes before slicing—this helps the filling set so it doesn’t fall apart when you cut them.
Cooking Tips & Techniques
I’ve made every mistake in the book so you don’t have to. Here are my hard-earned tips:
- Don’t skip the sear: I know it’s tempting to just use pre-cooked chicken, but searing adds a depth of flavor that you can’t get from boiling or baking. That golden-brown crust is pure flavor.
- Watch the moisture: The first time I made these, I used too much sour cream, and the filling was soupy. The rolls got soggy, and it was a sad, messy situation. Stick to the measurements, and if your chicken is very moist, pat it dry with paper towels before shredding.
- Use room temperature ingredients: If your sour cream and mayonnaise are cold, they won’t mix as smoothly. Let them sit on the counter for 10-15 minutes before mixing. It makes a difference in the texture.
- Slice before baking?: Some recipes say to slice the sliders before baking. I don’t recommend it—the filling can leak out and make a mess. Bake them whole, then slice with a sharp knife after resting.
- Multitasking tip: While the chicken is searing, you can mix the ranch filling ingredients (minus the chicken) and slice the rolls. This cuts down your active time significantly.
Variations & Adaptations
One of the best things about this recipe is how flexible it is. Here are some ways to make it your own:
- Spicy Ranch Sliders: Add 1-2 tablespoons of chopped pickled jalapeños to the chicken mixture, or mix in a teaspoon of cayenne pepper with the ranch seasoning. The heat pairs beautifully with the cool ranch flavor.
- BBQ Ranch Sliders: Swap the sour cream and mayonnaise for ½ cup of your favorite BBQ sauce. Omit the ranch seasoning and add a teaspoon of smoked paprika. You get a sweet, smoky, tangy slider that’s completely different but just as good.
- Vegetarian Version: Replace the chicken with two cans of drained and rinsed black beans, mashed slightly, or use shredded jackfruit. The ranch filling works beautifully with these alternatives. Add a cup of corn kernels for texture.
- Low-Carb Option: Skip the Hawaiian rolls and serve the chicken filling over lettuce cups or in bell pepper halves. Bake as directed, but reduce the time to 10-12 minutes since there are no rolls to heat through.
Serving & Storage Suggestions
These sliders are best served warm, right out of the oven, when the cheese is still stretchy and the tops are slightly crisp. I like to serve them with a side of extra ranch dressing for dipping—yes, more ranch—and some crunchy pickle spears on the side. They also pair beautifully with a simple coleslaw or a fresh green salad to balance the richness.
For storage, let the sliders cool completely, then wrap them tightly in aluminum foil or place them in an airtight container. They’ll keep in the refrigerator for up to 3 days. The flavors actually meld together overnight, making leftovers taste even better—if you can resist eating them all right away.
To reheat, place the sliders in a 350°F (175°C) oven for 10-12 minutes, covered with foil to prevent drying out. You can also microwave individual sliders for 30-45 seconds, but the tops won’t be as crisp. I don’t recommend freezing these, as the dairy-based filling can become grainy and the rolls can get soggy upon thawing.
Nutritional Information & Benefits
Here’s an approximate nutritional breakdown per slider (based on 12 sliders):
- Calories: 320
- Protein: 22g
- Fat: 16g
- Carbohydrates: 22g
- Fiber: 1g
- Sugar: 6g
These sliders are a good source of protein from the chicken and cheese, which helps keep you full and satisfied. The ranch seasoning adds flavor without a ton of extra calories. If you’re watching your sodium, you can use a low-sodium ranch seasoning mix or make your own with dried herbs. The Hawaiian rolls do contain some sugar, but swapping them for whole wheat slider buns can increase the fiber content. For a lighter version, use reduced-fat cheese and Greek yogurt instead of sour cream and mayonnaise.
Conclusion
These Perfect Cheesy Ranch Chicken Sliders are the kind of recipe that becomes a staple—the one you make for game day, busy weeknights, or just because you need a little comfort food in your life. They’re forgiving, flexible, and always, always delicious. I love how they bring people together, how the smell of garlic butter and melted cheese fills the kitchen, and how the first bite always gets a happy sigh.
Now I want to hear from you! Have you tried these sliders? Did you add your own twist? Drop a comment below and let me know how they turned out. Don’t forget to share this recipe with a friend who needs a little cheesy goodness in their life. Happy cooking, friend—you’ve got this!
Frequently Asked Questions
Can I use rotisserie chicken instead of cooking my own?
Absolutely! Using rotisserie chicken is a great time-saver. Just shred the meat and skip the searing step. The flavor will still be fantastic, though you’ll miss out on the depth from the sear. If you have time, I still recommend searing, but rotisserie chicken works in a pinch.
Can I make these sliders ahead of time?
Yes, you can assemble the sliders up to a day in advance. Cover the baking dish tightly with plastic wrap and refrigerate. When you’re ready to bake, let them sit at room temperature for 15-20 minutes while the oven preheats, then bake as directed. You may need to add 2-3 minutes to the baking time since they’ll be cold.
What can I use instead of Hawaiian rolls?
If you can’t find Hawaiian rolls, you can use regular dinner rolls or slider buns. The flavor will be less sweet, but still delicious. For a gluten-free option, use gluten-free slider buns. Just be aware that gluten-free rolls can dry out faster, so keep an eye on them during baking.
How do I prevent the sliders from getting soggy?
Soggy sliders usually happen when the filling is too wet. Make sure you’re not adding extra sour cream or mayonnaise beyond the recipe amounts. Also, let the chicken cool slightly before mixing, as hot chicken can release steam and make the filling watery. Finally, don’t skip the foil cover during the first part of baking—it helps the rolls steam and stay soft without getting mushy.
Can I freeze these sliders?
I don’t recommend freezing these sliders because the dairy-based filling and the rolls don’t thaw well. The texture can become grainy and the rolls can turn soggy. If you have leftovers, store them in the fridge and enjoy within 3 days. If you want to meal prep, you can freeze the chicken filling separately (without the rolls) for up to 2 months, then assemble and bake fresh rolls when you’re ready.
Pin This Recipe!

Perfect Easy Cheesy Ranch Chicken Sliders Recipe

These Perfect Cheesy Ranch Chicken Sliders are the ultimate comfort food—tender shredded chicken in a creamy ranch sauce, layered with melted provolone and cheddar on soft Hawaiian rolls, all topped with a golden garlic butter crust. Ready in under 30 minutes, they’re perfect for game day, weeknight dinners, or any gathering.
- Prep Time: 15 minutes
- Cook Time: 18 minutes
- Total Time: 33 minutes
- Yield: 12 sliders 1x
- Category: Main Course
- Cuisine: American
Ingredients
- 1 ½ lbs boneless, skinless chicken breasts (about 2–3 breasts)
- 1 tablespoon olive oil
- ½ cup sour cream
- ¼ cup mayonnaise
- 1 packet (1 oz) dry ranch seasoning mix
- 1 cup shredded cheddar cheese
- ¼ cup chopped green onions
- 12-count package Hawaiian sweet rolls
- 6 slices provolone cheese
- 3 tablespoons salted butter, melted
- 1 teaspoon garlic powder
- 1 teaspoon dried parsley (optional)
- Salt and pepper to taste
Instructions
- Preheat oven to 350°F (175°C). Lightly grease a 9×13-inch baking dish.
- Season chicken breasts with salt and pepper. Heat olive oil in a large skillet over medium-high heat. Sear chicken for 5-6 minutes per side until golden brown and cooked through (internal temperature 165°F/74°C).
- Transfer chicken to a cutting board, rest 2-3 minutes, then shred with two forks or a hand mixer.
- In a large bowl, combine shredded chicken, sour cream, mayonnaise, ranch seasoning, cheddar cheese, and green onions. Mix until well coated.
- Slice the entire pack of Hawaiian rolls in half horizontally. Place bottom halves in the prepared dish, cut side up. Layer provolone slices over the bottom.
- Spoon chicken mixture evenly over the cheese. Place top halves of rolls over the filling, cut side down. Press lightly.
- Mix melted butter with garlic powder and parsley. Brush generously over the tops of the rolls.
- Cover loosely with foil and bake for 10 minutes. Remove foil and bake 5-8 more minutes until tops are golden and cheese is bubbly. Let rest 5 minutes before slicing.
Notes
For best results, use room temperature sour cream and mayonnaise. Don’t skip searing the chicken for extra flavor. If using rotisserie chicken, skip the sear. To prevent soggy sliders, avoid adding extra moisture and let chicken cool slightly before mixing. Sliders can be assembled a day ahead and refrigerated; add 2-3 minutes to baking time. Freezing is not recommended.
Nutrition
- Serving Size: 1 slider
- Calories: 320
- Sugar: 6
- Fat: 16
- Carbohydrates: 22
- Fiber: 1
- Protein: 22
Keywords: cheesy ranch chicken sliders, easy slider recipe, game day appetizer, weeknight dinner, Hawaiian roll sliders, chicken sliders


