Love this? Save it for later!
Share the inspiration with your friends
The summer I turned thirty, I found myself scrambling the night before the Fourth of July party with nothing but a vague idea and a desperate craving for something festive yet foolproof. Honestly, I wasn’t aiming for a masterpiece—just something that wouldn’t embarrass me among the neighborhood grill masters and pie bakers. I was rifling through my fridge when I spotted a container of cream cheese, a bag of frozen berries, and a box of store-bought cake mix. That’s when the idea hit: why not whip up some red white and blue cheesecake flag bars? You know that feeling when you half-expect disaster but end up with a surprise hit? That was exactly what happened.
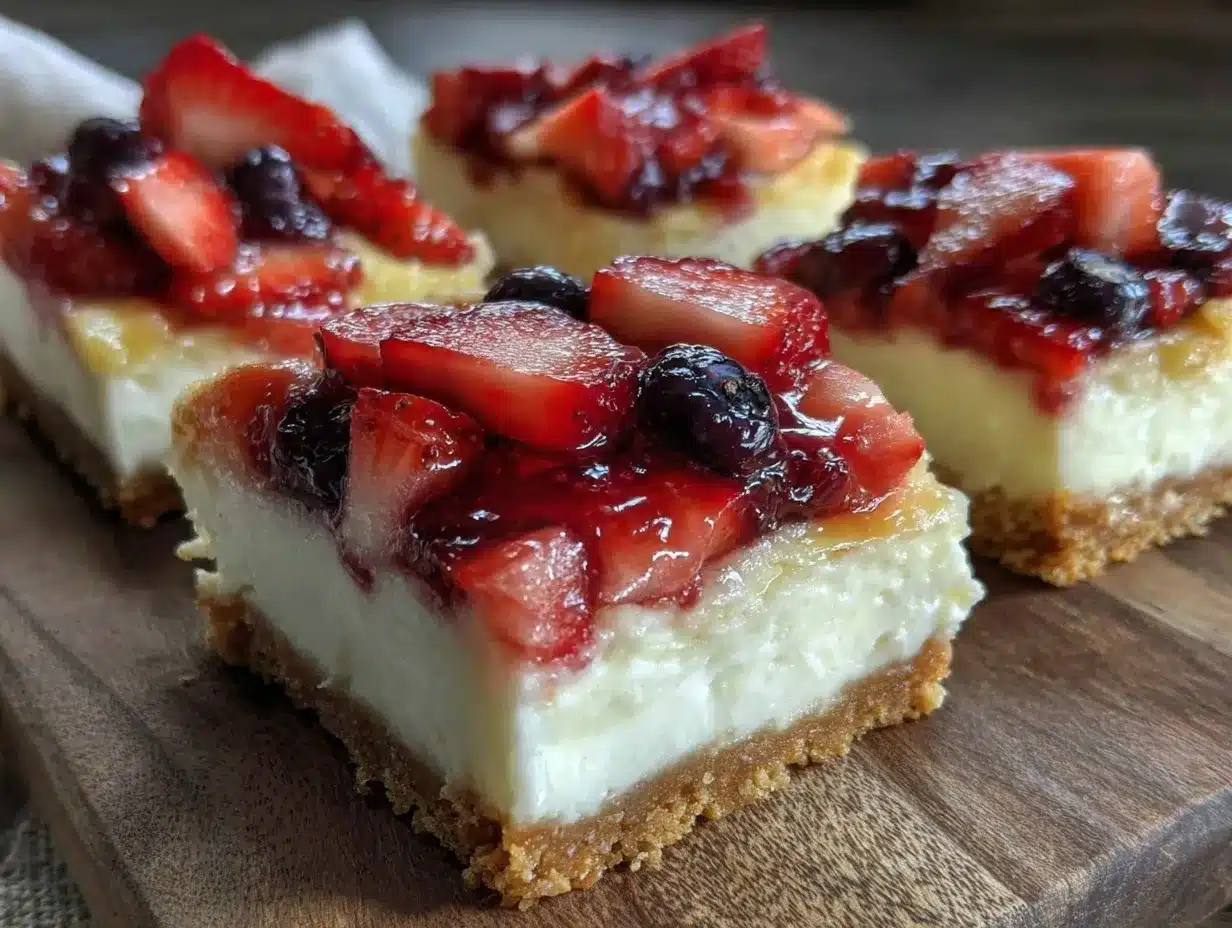
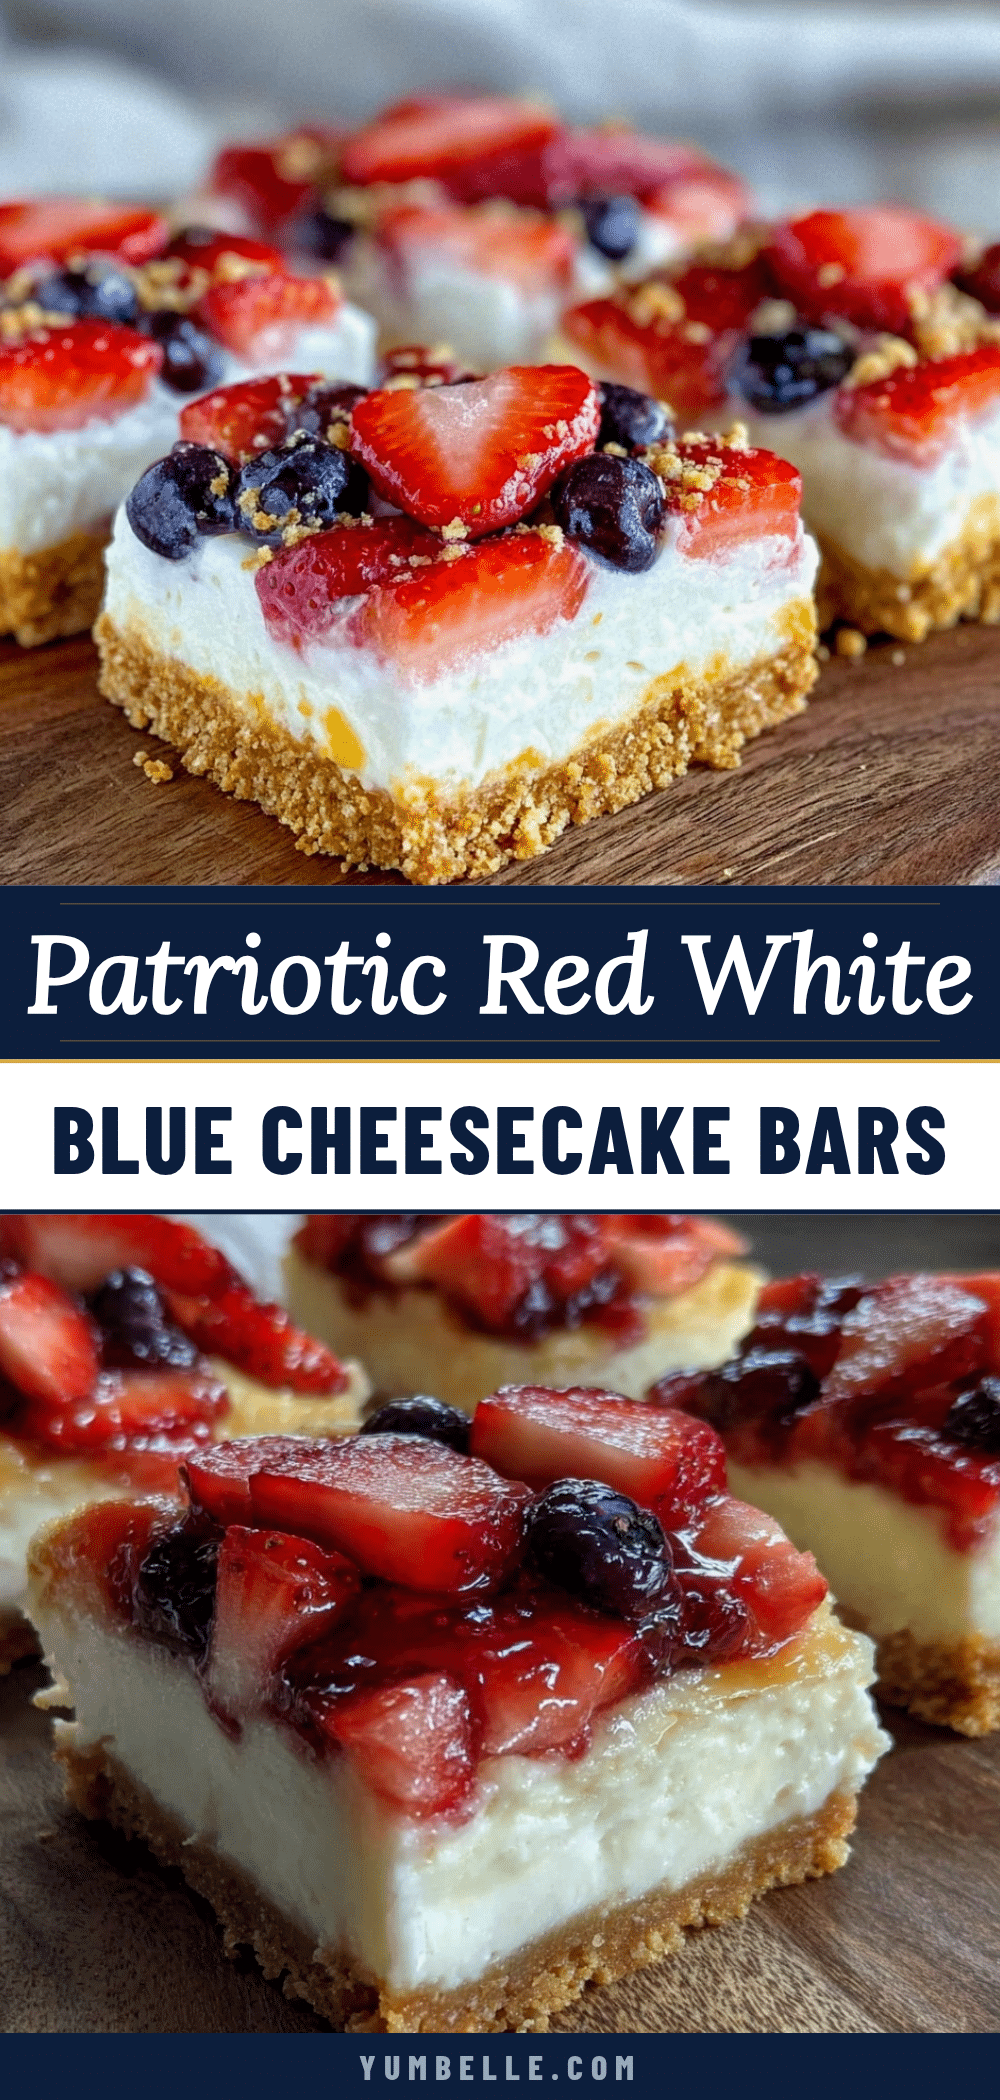
Between mixing, a minor spill that left a streak of batter on the counter, and juggling an unexpected phone call from my neighbor, I managed to pull these bars together. The vibrant layers—deep blue from blueberries, bright red from strawberries, and creamy white cheesecake—looked like a miniature flag that you’d want to parade around the dessert table. What stuck with me was how these bars weren’t just pretty; they had the perfect balance of creamy, fruity, and sweet without being over the top.
Maybe you’ve been there too—wanting to bring something special to a picnic or barbecue but feeling like you don’t have the time or skill to bake something complicated. Let me tell you, these red white and blue cheesecake flag bars became my go-to for every patriotic celebration after that night. The best part? They’re simple enough to pull off last minute but impressive enough to earn compliments from even the most serious dessert lovers.
Why You’ll Love This Recipe
This recipe has been tested more times than I can count, from casual family get-togethers to the annual neighborhood bake-off. Here’s why it stands out:
- Quick & Easy: Ready in under an hour, perfect for last-minute dessert plans or spontaneous celebrations.
- Simple Ingredients: No need for fancy or hard-to-find items—most are pantry staples or easy to grab at any grocery store.
- Perfect for Patriotic Occasions: Ideal for Fourth of July, Memorial Day, Labor Day, or any event where you want to show some red, white, and blue pride.
- Crowd-Pleaser: Kids and adults alike love the creamy texture paired with fresh berries—always a hit at potlucks and barbecues.
- Unbelievably Delicious: The combination of cheesecake richness with light cake layers and juicy berries is truly next-level comfort food.
This isn’t just another berry cheesecake bar. I’ve found that layering the berries in a way that mimics the American flag, along with a subtle vanilla cheesecake layer, makes all the difference. Plus, using a boxed cake mix keeps things easy without sacrificing flavor or texture. Seriously, the first time I made these bars, I closed my eyes after a bite because they just felt… right. If you’re looking to impress guests with a dessert that’s both festive and effortless, this recipe is your new best friend.
What Ingredients You Will Need
This recipe uses simple, wholesome ingredients to deliver bold flavor and satisfying texture without the fuss. Most of these items are pantry staples or easily found at your local grocery store, and you can swap a few things out depending on your dietary needs or what you have on hand.
- Boxed vanilla cake mix (I recommend Betty Crocker for consistent results)
- Large eggs, room temperature (about 3 for the batter plus 2 for the cheesecake layer)
- Unsalted butter, melted (about 1/2 cup or 115 grams; adds richness to the cake base)
- Cream cheese, softened (16 oz or 450 grams, full-fat for best texture)
- Sour cream (1/2 cup or 120 ml; gives the cheesecake layer a creamy tang)
- Granulated sugar (1/2 cup or 100 grams, for sweetening the cheesecake layer)
- Pure vanilla extract (1 teaspoon; enhances flavor depth)
- Fresh strawberries, hulled and sliced (about 1 1/2 cups or 225 grams; use ripe, sweet berries for best flavor)
- Fresh blueberries (1 1/2 cups or 225 grams; firm and plump berries hold up nicely)
- Fresh raspberries (optional, for extra red layer intensity or garnish)
- Powdered sugar (for dusting, optional)
Ingredient tips: If fresh berries aren’t in season, frozen can work—just thaw and drain well to avoid sogginess. For a lower-sugar version, try using a sugar substitute that measures cup-for-cup in the cheesecake layer. If you’re after a dairy-free spin, swap cream cheese and sour cream with coconut-based alternatives, though texture will be slightly different.
Equipment Needed
- 9×13-inch baking pan (metal or glass works fine—metal tends to bake more evenly)
- Mixing bowls: One large for the cake batter, another medium for the cheesecake layer
- Electric mixer: Handheld or stand mixer makes blending cream cheese and eggs effortless
- Measuring cups and spoons for precise ingredient amounts
- Spatula: Silicone preferred for scraping bowls and spreading layers evenly
- Knife and cutting board for prepping berries
If you don’t have an electric mixer, you can use a sturdy whisk, but cream cheese may take longer to soften and blend smoothly. A springform pan isn’t necessary here—just a sturdy baking pan to hold the layers. I’ve made these bars dozens of times in both glass and metal pans, and they turn out beautifully either way. Just be sure to grease the pan well or line it with parchment paper for easy removal.
Preparation Method
- Preheat your oven to 350°F (175°C) and grease your 9×13-inch pan thoroughly. This step ensures the bars come out cleanly without sticking.
- Prepare the cake batter: In a large bowl, combine the boxed vanilla cake mix with 3 large eggs and the melted butter. Stir gently with a spatula until the mixture is smooth but avoid overmixing—it should be thick and creamy, not runny. This usually takes about 2–3 minutes.
- Spread the batter evenly into the greased pan using the spatula. Take a moment to smooth the surface so the cheesecake layer sits nicely on top later.
- Make the cheesecake layer: In a separate bowl, beat the softened cream cheese with granulated sugar until creamy and lump-free (about 2 minutes with an electric mixer). Add 2 eggs, sour cream, and vanilla extract, mixing until fully combined and smooth. The texture should be silky but thick enough to spread.
- Layer the cheesecake over the cake batter. Carefully spoon the cheesecake mixture over the cake base and spread gently with a spatula to cover evenly without mixing the layers.
- Arrange the berries: Now comes the fun part—placing your red, white, and blue layers. Use sliced strawberries to form the red stripes, leaving space for the creamy white cheesecake layer to peek through as the white stripes. Then, cluster the blueberries in the top left corner to represent the blue field of the flag. This step takes around 10 minutes; take your time for a neat presentation.
- Bake the bars in the preheated oven for 40–45 minutes. The bars are done when the cheesecake layer is set and a toothpick inserted near the center comes out with just a few moist crumbs. The edges will be slightly golden.
- Cool completely: Remove from oven and let the bars cool in the pan at room temperature for at least 1 hour. Then, chill them in the fridge for 2 hours or overnight to firm up and make slicing easier.
- Slice and serve: Use a sharp knife to cut into rectangular bars, wiping the blade between cuts for clean edges. Dust with powdered sugar if desired just before serving.
Pro tip: If the berries release too much juice during baking, gently blot them with a paper towel before arranging. This helps keep the layers distinct and prevents sogginess. Also, don’t rush cooling—cutting warm bars tends to cause crumbling.
Cooking Tips & Techniques
When making these cheesecake flag bars, a few tricks can save you from common pitfalls. First, always use room temperature cream cheese; cold cream cheese leads to lumps and uneven baking. I learned this the hard way during one rushed July 4th when the bars came out patchy rather than smooth.
Mix the cake batter just until combined to avoid a dense final texture. Overmixing can make the bars tough. And when layering the cheesecake over the cake batter, spread gently—if you mix too vigorously, the layers will blur into a single color, which defeats the whole flag effect.
To keep your berries fresh and vibrant-looking, add them right before baking. Some folks like to toss berries with a little sugar and cornstarch to reduce bleeding, but I find that slicing strawberries thin and using firm blueberries works just as well.
Timing-wise, multitasking is key. While the bars bake, clean up your prep area and start chilling your serving platter. Once cooled, refrigerate overnight if possible—this not only improves slicing but really lets the flavors meld. I often prepare these bars the day before a party; they actually taste better the next day.
Variations & Adaptations
Want to switch things up? Here are a few ways I’ve played around with this recipe:
- Gluten-Free Version: Use a gluten-free vanilla cake mix—Pillsbury and King Arthur both make good options. The texture might be slightly different but still delicious.
- Berry Swaps: In summer, fresh raspberries or blackberries can replace strawberries or blueberries for a different flavor profile. I once made a triple-berry version that was a hit at a family reunion.
- Chocolate Cheesecake Bars: Add a tablespoon of cocoa powder to the cheesecake layer for a chocolate twist. You can also swap vanilla cake mix for chocolate cake mix for a richer dessert.
- Dairy-Free Alternative: Substitute cream cheese and sour cream with coconut-based vegan cream cheese and yogurt. The texture is a bit softer, but it works great for those avoiding dairy.
- Mini Bars: Use a muffin tin to create individual servings—perfect for picnics or kid’s parties. Just reduce baking time to about 20–25 minutes.
Personally, I’ve tried the mini version several times for neighborhood potlucks, and they disappear fast. It’s a fun way to serve this patriotic dessert without needing to cut anything.
Serving & Storage Suggestions
These cheesecake flag bars are best served chilled or at cool room temperature. I like to plate them on a simple white dish to let those red, white, and blue colors pop. They pair wonderfully with a scoop of vanilla ice cream or a dollop of freshly whipped cream, which adds an extra layer of indulgence.
For beverages, iced tea with lemon or a sparkling berry lemonade complement the fruity notes perfectly. At one summer picnic, I served these bars alongside a batch of crispy garlic chicken and it was a crowd-pleasing combo that got lots of compliments.
To store, cover the bars tightly with plastic wrap or transfer them to an airtight container. They keep well in the fridge for up to 4 days—though honestly, they rarely last that long in my house! You can freeze the bars for up to 2 months; thaw overnight in the fridge before serving.
When reheating, avoid microwaving, which can make the cheesecake layer grainy. Instead, let bars come to room temperature naturally or serve cold. The flavors actually deepen as they rest, so leftovers often taste even better the next day.
Nutritional Information & Benefits
Each cheesecake flag bar (based on 12 servings) contains approximately:
| Calories | 280 kcal |
|---|---|
| Fat | 15 g |
| Carbohydrates | 30 g |
| Protein | 5 g |
| Fiber | 2 g |
The fresh berries not only add vibrant color but bring antioxidants and vitamin C to the mix, making these bars a slightly healthier indulgence. Cream cheese provides calcium and protein, while the cake base adds energy-giving carbs. For gluten-free or dairy-free eaters, the substitutions mentioned earlier keep this treat accessible without losing the celebratory spirit.
From a wellness perspective, I appreciate that this dessert balances indulgence with fresh fruit, making it a nicer choice than many heavy, overly sweet options you often find at parties.
Conclusion
If you’re looking for a show-stopping yet easy dessert that screams patriotic fun, these red white and blue cheesecake flag bars are the answer. They combine simple ingredients, straightforward steps, and a festive look that’s sure to impress. Whether you’re hosting a casual backyard barbecue or bringing something to a community potluck, these bars fit right in and often become the star of the table.
Feel free to tweak the berry combination or try the mini bar variation to suit your taste and occasion. I love this recipe because it reminds me that sometimes, the best dishes come from moments of improvisation and a little kitchen chaos.
Give it a try, and let me know how your bars turn out! I’d love to hear about your own twists or any fun stories you have while making them. Happy baking and happy celebrating!
FAQs About Red White and Blue Cheesecake Flag Bars
Can I make these bars ahead of time?
Absolutely! These bars actually taste better after chilling overnight. Just cover and refrigerate, then slice before serving.
What if I don’t have fresh berries? Can I use frozen?
You can use frozen berries, but make sure to thaw and drain them well to avoid extra moisture that can make the bars soggy.
Can I substitute the boxed cake mix with homemade cake batter?
Yes, but keep in mind that boxed mixes are formulated for consistent texture and ease. If using homemade batter, choose a simple vanilla recipe with similar proportions.
How do I prevent the cheesecake layer from cracking?
Don’t overbake and avoid opening the oven door during baking. Also, gently spreading the cheesecake layer over the cake batter helps prevent cracks.
Are these bars gluten-free?
Not as written, but you can use a gluten-free vanilla cake mix to make them safe for gluten-sensitive diets.
Pin This Recipe!
Perfect Red White and Blue Cheesecake Flag Bars
These easy patriotic dessert bars combine creamy cheesecake, light vanilla cake, and fresh berries arranged to mimic the American flag. Perfect for Fourth of July and other celebrations, they are quick to make and crowd-pleasing.
- Prep Time: 15 minutes
- Cook Time: 45 minutes
- Total Time: 3 hours (including chilling time)
- Yield: 12 servings 1x
- Category: Dessert
- Cuisine: American
Ingredients
- 1 box vanilla cake mix (e.g., Betty Crocker)
- 3 large eggs (room temperature) for batter
- 1/2 cup unsalted butter, melted (115 grams)
- 16 oz cream cheese, softened (full-fat)
- 1/2 cup sour cream (120 ml)
- 1/2 cup granulated sugar (100 grams)
- 1 teaspoon pure vanilla extract
- 2 large eggs (for cheesecake layer)
- 1 1/2 cups fresh strawberries, hulled and sliced (225 grams)
- 1 1/2 cups fresh blueberries (225 grams)
- Fresh raspberries (optional, for extra red layer or garnish)
- Powdered sugar (optional, for dusting)
Instructions
- Preheat oven to 350°F (175°C) and grease a 9×13-inch baking pan thoroughly.
- In a large bowl, combine vanilla cake mix, 3 eggs, and melted butter. Stir gently until smooth but thick and creamy, about 2–3 minutes.
- Spread the cake batter evenly into the greased pan using a spatula, smoothing the surface.
- In a separate bowl, beat softened cream cheese with granulated sugar until creamy and lump-free (about 2 minutes). Add 2 eggs, sour cream, and vanilla extract; mix until smooth and combined.
- Carefully spoon the cheesecake mixture over the cake batter and spread gently to cover evenly without mixing layers.
- Arrange sliced strawberries to form red stripes, leaving space for the white cheesecake layer to show as white stripes. Cluster blueberries in the top left corner to represent the blue field of the flag.
- Bake bars for 40–45 minutes until cheesecake layer is set and a toothpick inserted near the center comes out with a few moist crumbs. Edges will be slightly golden.
- Cool bars completely in the pan at room temperature for at least 1 hour, then chill in the refrigerator for 2 hours or overnight to firm up.
- Slice into rectangular bars using a sharp knife, wiping the blade between cuts for clean edges. Dust with powdered sugar if desired before serving.
Notes
Use room temperature cream cheese to avoid lumps. Do not overmix cake batter to keep bars tender. Arrange berries carefully to maintain flag design. If berries release too much juice, blot with paper towel before arranging. Chill bars overnight for best slicing and flavor. Frozen berries can be used if thawed and drained well. For gluten-free, use gluten-free vanilla cake mix. For dairy-free, substitute cream cheese and sour cream with coconut-based alternatives.
Nutrition
- Serving Size: 1 bar (1/12th of the
- Calories: 280
- Fat: 15
- Carbohydrates: 30
- Fiber: 2
- Protein: 5
Keywords: patriotic dessert, cheesecake bars, red white and blue dessert, Fourth of July dessert, easy cheesecake bars, berry cheesecake bars