Love this? Save it for later!
Share the inspiration with your friends
My neighbor watched me trying to scoop cookie dough with a spoon that was clearly too small, and didn’t say anything at first. Then she just reached into her drawer, handed me a proper cookie scoop, and said, “That’ll save you twenty minutes of frustration.” I laughed and thanked her, but honestly, the real gift came later when she mentioned she only ever bakes six cookies at a time. Six. Not three dozen, not a massive batch that leaves you eating sad, stale cookies for a week. Just six perfect, warm, gooey cookies. I thought she was crazy at first. I mean, who bakes a small batch of cookies on purpose?
Turns out, she was onto something genius. That conversation on a random Tuesday afternoon changed how I think about baking entirely. Her name is Maria, and she bakes a small batch of chocolate chip cookies every single week without fail. She told me it’s her “Sunday reset” ritual. No giant mixing bowls, no standing over a hot oven for hours, no dealing with leftover dough that never tastes as good as fresh-baked. Just six cookies, a quiet kitchen, and a cup of coffee. I went home that day, tried her method, and honestly, I haven’t baked a full-sized batch since. The recipe I’m sharing today is my version of her approach, tweaked over the past year until it became exactly what I want in a cookie.
Maybe you’ve been there—you want a warm cookie, but you don’t want to commit to two dozen of them. You don’t want to haul out the stand mixer or deal with a mountain of dishes. You just want one perfectly chewy, slightly crispy, chocolate-studded cookie. Or maybe six. This recipe is for those moments. It’s for the quiet Wednesday afternoon, the late-night craving, or the morning when you just need something sweet to start the day right. Let me tell you, these cookies have gotten me through some long weeks. They’re the reason I keep coming back to my kitchen, even when I’m tired. And now, I’m passing them along to you.
Why You’ll Love This Recipe
Let’s be real for a second. There are about a million chocolate chip cookie recipes out there. Some are complicated, some require ingredients you’ve never heard of, and some just don’t deliver on that perfect texture. This one is different. I’ve tested it more times than I’d like to admit, and every single time, it works. Here’s what makes it stand out:
- Quick & Easy: From start to finish, you’re looking at about 25 minutes. No chilling the dough overnight, no complicated techniques. Just mix, scoop, bake, and eat.
- Simple Ingredients: You probably have everything in your kitchen right now. Butter, sugar, an egg, flour, chocolate chips—that’s it. No fancy extracts, no specialty flours, no trips to a gourmet store.
- Perfect for Small Cravings: This recipe makes exactly six cookies. That’s enough for a treat without having a plate of cookies staring at you for days. Perfect for when you’re baking just for yourself or a small household.
- Crowd-Pleaser: I’ve brought these to work, shared them with friends, and even mailed them to family. Every single person asks for the recipe. They can’t believe something this simple tastes this good.
- Unbelievably Delicious: The texture is the real star here. Crispy edges, soft and chewy centers, and melty pockets of chocolate in every bite. It’s the kind of cookie that makes you close your eyes after the first bite.
What makes this recipe different from the rest is the ratio. I spent months tweaking the butter-to-flour balance, the sugar blend, and the baking time until I got that perfect combination of crispy and chewy. It’s not just another chocolate chip cookie recipe—it’s the one I reach for every single time. Honestly, it’s comfort food at its finest. It’s the kind of cookie that makes a bad day better or a good day even sweeter. And you can have it in under half an hour. What’s not to love?
What Ingredients You Will Need
This recipe uses simple, everyday ingredients to create something truly special. You don’t need anything fancy here—just good-quality basics that work together perfectly. Here’s what you’ll need:
For the Cookie Dough
- Unsalted butter, softened: 4 tablespoons (56 grams). I always use unsalted butter so I can control the salt level. Let it sit out for about 30 minutes before you start—it should be soft but not melted.
- Granulated sugar: 3 tablespoons (37 grams). This gives the cookies that slight crispiness on the edges.
- Light brown sugar, packed: 3 tablespoons (42 grams). Brown sugar adds moisture and that deep, caramel-like flavor. Make sure you pack it firmly into the measuring spoon.
- Large egg yolk: 1 yolk (about 18 grams). Save the white for an omelet or breakfast scramble. The yolk adds richness and helps keep the cookies tender.
- Vanilla extract: ½ teaspoon. Pure vanilla extract makes a difference here. I prefer Nielsen-Massey, but any good-quality brand works.
- All-purpose flour: ½ cup plus 1 tablespoon (75 grams). Spoon the flour into your measuring cup and level it off—don’t scoop directly from the bag, or you’ll end up with too much flour.
- Baking soda: ¼ teaspoon. This helps the cookies spread just enough without turning into pancakes.
- Salt: ¼ teaspoon. I use fine sea salt. Don’t skip this—it balances the sweetness perfectly.
- Semi-sweet chocolate chips: ⅓ cup (60 grams). I’m partial to Ghirardelli, but use whatever you love. You can also chop a chocolate bar into chunks for bigger pockets of melted chocolate.
Ingredient Tips and Substitutions
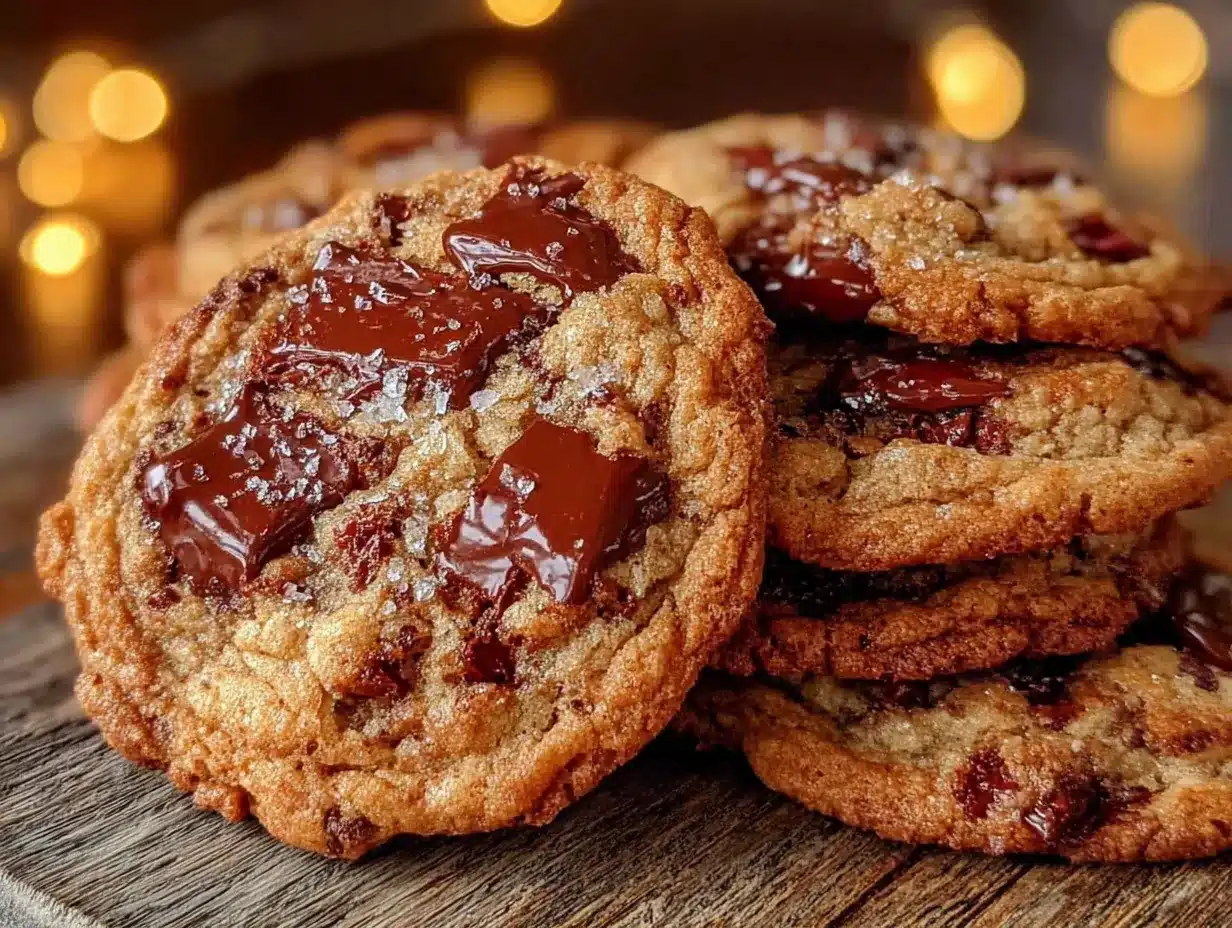
If you only have salted butter on hand, just reduce the added salt to ⅛ teaspoon. For a dairy-free version, use vegan butter sticks (not the spreadable kind in a tub)—I’ve had good results with Earth Balance. You can swap the all-purpose flour with a 1:1 gluten-free baking flour blend if needed, though the texture will be slightly more tender. And if you’re out of brown sugar, use all granulated sugar and add a teaspoon of molasses—it’s not quite the same, but it works in a pinch.
Equipment Needed
One of the best things about this recipe is how little equipment you need. You don’t need a stand mixer or any fancy gadgets. Here’s what I use:
- Medium mixing bowl: Any bowl works, but I prefer a ceramic or glass one because they don’t retain heat.
- Whisk or fork: For mixing the dry ingredients together. A fork works perfectly if you don’t have a whisk.
- Spatula or wooden spoon: For creaming the butter and sugar and folding in the chocolate chips.
- Cookie scoop or tablespoon: A 1.5-tablespoon cookie scoop makes perfectly uniform cookies. If you don’t have one, use a regular tablespoon and shape the dough into balls with your hands.
- Baking sheet: A light-colored baking sheet works best—dark ones can cause the bottoms to brown too quickly.
- Parchment paper or silicone baking mat: These prevent sticking and make cleanup a breeze.
- Cooling rack: Not strictly necessary, but it helps the cookies cool evenly and stay crispy on the bottom.
If you don’t have a cooling rack, just let the cookies rest on the baking sheet for a few minutes, then transfer them to a plate. It works fine. And honestly, I’ve baked these on a piece of foil in a pinch—it’s not ideal, but it gets the job done.
Preparation Method
Making these cookies is straightforward, but there are a few little tricks that make all the difference. Follow these steps, and you’ll have perfect cookies every time.
- Preheat your oven to 350°F (175°C). Line a baking sheet with parchment paper or a silicone mat. This is important—don’t skip the parchment, or your cookies might stick.
- Cream the butter and sugars together. In your medium mixing bowl, combine the softened butter, granulated sugar, and packed brown sugar. Use your spatula or wooden spoon to mix them together until they’re light and fluffy. This should take about 2 minutes. You’re looking for a smooth, pale mixture that looks almost like frosting. Don’t rush this step—proper creaming adds air to the dough, which helps the cookies rise just a little.
- Add the egg yolk and vanilla. Drop in the egg yolk and pour in the vanilla extract. Mix until everything is fully combined. The mixture might look a little separated at first, but keep stirring—it will come together into a smooth, glossy paste.
- Whisk the dry ingredients separately. In a small bowl, whisk together the flour, baking soda, and salt. This ensures the baking soda and salt are evenly distributed throughout the dough. If you skip this step, you might end up with a pocket of salt in one cookie—trust me, I’ve been there, and it’s not pleasant.
- Add the dry ingredients to the wet ingredients. Pour the flour mixture into the butter mixture. Stir gently with your spatula until just combined. You should still see a few streaks of flour—that’s perfect. Overmixing at this stage will make your cookies tough.
- Fold in the chocolate chips. Add the chocolate chips and fold them in with a few gentle strokes. Make sure they’re evenly distributed throughout the dough. If you want chocolate in every bite, press a few extra chips onto the tops of the dough balls before baking.
- Scoop the dough. Use your cookie scoop or a tablespoon to portion out six equal balls of dough. Place them on the prepared baking sheet, spacing them about 2 inches apart. They’ll spread a little, but not too much.
- Bake for 9 to 11 minutes. The exact time depends on your oven. At 9 minutes, the cookies will be very soft and gooey in the center—perfect if you love underbaked cookies. At 11 minutes, they’ll be slightly more set but still chewy. I usually go for 10 minutes. The edges should be lightly golden, and the centers should look slightly puffy and underdone.
- Cool on the baking sheet for 5 minutes. This is crucial. The cookies continue to bake from the residual heat of the pan, and they need this time to set up properly. If you try to move them too soon, they’ll fall apart.
- Transfer to a cooling rack. After 5 minutes, use a spatula to move the cookies to a cooling rack. Let them cool completely if you want a firmer texture, or eat them warm for that gooey, melty chocolate experience.
Cooking Tips & Techniques
After making this recipe dozens of times, I’ve learned a few things the hard way. Here are my best tips for perfect cookies every time:
Don’t overmix the dough. This is the number one mistake people make. Once you add the flour, stir just until you can’t see dry flour anymore. Overmixing develops gluten, which makes cookies tough and cakey instead of tender and chewy.
Use room temperature butter. Cold butter won’t cream properly, and melted butter will make the cookies spread too much. Let your butter sit out for 30 to 45 minutes before you start. It should be soft enough that you can press a finger into it easily, but not so soft that it’s greasy.
Weigh your ingredients if you can. I know not everyone has a kitchen scale, but it really does make a difference. Flour is especially tricky—scooping it can give you anywhere from 120 to 150 grams per cup. For this small batch, even a few extra grams of flour can throw off the texture.
Chill the dough if you have time. I know I said you don’t need to chill the dough, and you don’t. But if you have an extra 30 minutes, popping the dough balls in the fridge before baking will give you thicker, chewier cookies. The cold butter takes longer to melt, so the cookies spread less.
Watch your oven like a hawk. Ovens vary wildly. I’ve baked these in three different ovens, and the baking time has ranged from 8 to 12 minutes. Start checking at 8 minutes. The cookies are done when the edges are golden and the centers look slightly underdone—they’ll continue cooking on the hot pan.
One mistake I still make: I once forgot the salt entirely. The cookies were edible, but they tasted flat and one-dimensional. Salt isn’t just for seasoning—it enhances the sweetness and brings out the flavor of the chocolate. Don’t skip it.
Variations & Adaptations
This recipe is incredibly versatile. Here are some of my favorite ways to change it up:
- Double Chocolate Chip: Replace 1 tablespoon of the flour with unsweetened cocoa powder. Use white chocolate chips instead of semi-sweet for a beautiful contrast. The cookies will be darker, richer, and absolutely decadent.
- Nutty Crunch: Add 2 tablespoons of toasted, chopped walnuts or pecans along with the chocolate chips. Toast the nuts first in a dry pan over medium heat for about 3 minutes—it brings out their flavor and keeps them crunchy in the baked cookies.
- Sea Salt Finish: Just before baking, sprinkle a tiny pinch of flaky sea salt (like Maldon) on top of each dough ball. The salt crystals add a wonderful crunch and balance the sweetness. This is my go-to variation when I’m feeling fancy.
- Gluten-Free Version: Substitute the all-purpose flour with a 1:1 gluten-free baking blend that contains xanthan gum. I’ve used Bob’s Red Mill with great results. The cookies will be slightly more tender and delicate, but they’re still delicious.
- Vegan Adaptation: Use vegan butter sticks and replace the egg yolk with 1 tablespoon of aquafaba (the liquid from a can of chickpeas) mixed with 1 teaspoon of cornstarch. The texture won’t be exactly the same, but it’s surprisingly close. I’ve tested this for a friend with a dairy allergy, and she loved them.
Honestly, I think the sea salt version is my personal favorite. There’s something about that salty-sweet combination that just hits differently. But the double chocolate version is a close second—especially if you’re a chocolate lover like me.
Serving & Storage Suggestions
These cookies are best served warm, straight from the oven. That’s when the chocolate is still melty and the edges are perfectly crispy. But they’re also fantastic at room temperature—the texture softens slightly, and the flavors meld together beautifully.
For serving: I love pairing these with a cold glass of milk, a hot cup of coffee, or a scoop of vanilla ice cream for an indulgent dessert. If you’re feeling extra, sandwich two cookies with a layer of chocolate ganache or vanilla buttercream. It’s a simple treat that feels special.
For storage: Store any leftover cookies in an airtight container at room temperature. They’ll stay fresh for up to 3 days. After that, they start to dry out a bit, but they’re still good—especially if you warm them in the microwave for 10 seconds.
For freezing: You can freeze the baked cookies for up to 2 months. Wrap them individually in plastic wrap, then place them in a freezer bag. To reheat, pop one in the microwave for 15 seconds or in a 300°F oven for 5 minutes. The dough itself also freezes beautifully—scoop the dough balls onto a parchment-lined baking sheet, freeze until solid, then transfer to a freezer bag. Bake directly from frozen, adding 2 to 3 minutes to the baking time.
One thing I’ve noticed: these cookies actually taste even better the next day. The flavors have time to settle and deepen, and the texture becomes perfectly chewy. So don’t feel like you have to eat them all immediately—though I won’t judge you if you do.
Nutritional Information & Benefits
Let’s be honest—cookies are a treat, not a health food. But that doesn’t mean you can’t enjoy them mindfully. Here’s the approximate nutritional breakdown for one cookie (based on six cookies per batch):
- Calories: 220
- Total Fat: 12g
- Saturated Fat: 7g
- Carbohydrates: 27g
- Sugar: 17g
- Protein: 3g
- Fiber: 1g
- Sodium: 135mg
These numbers will vary depending on the exact ingredients you use. Dark chocolate chips have slightly less sugar and more antioxidants than milk chocolate. And if you use a high-quality butter, you’re getting a good dose of vitamin A. The small batch size is actually a built-in portion control feature—you’re less likely to overindulge when there are only six cookies instead of three dozen.
If you’re watching your sugar intake, you can reduce the granulated sugar to 2 tablespoons, though the texture will be slightly less crispy. For a lower-fat option, substitute half the butter with unsweetened applesauce—the cookies will be more cake-like, but they’re still satisfying.
Conclusion
These perfect small batch chocolate chip cookies have become a staple in my kitchen for a reason. They’re quick, they’re easy, and they deliver exactly what you want from a chocolate chip cookie—crispy edges, chewy centers, and plenty of melty chocolate. No fuss, no complicated techniques, no giant batches that leave you with leftovers for days. Just six perfect cookies, ready in under 30 minutes.
I hope you give this recipe a try and make it your own. Maybe you’ll add a pinch of sea salt, swap in white chocolate chips, or double the batch when you’re sharing with friends. That’s the beauty of a simple recipe—it leaves room for your creativity. And honestly, that’s what cooking is all about.
I’d love to hear how these turn out for you. Did you try a variation? Did you bake them for a special occasion? Drop a comment below and let me know. And if you share a photo on Pinterest or Instagram, tag me—I love seeing your baking adventures. Until next time, happy baking, and remember: sometimes the best things come in small batches.
Frequently Asked Questions
Can I double this recipe?
Absolutely. Just double all the ingredients, and use a whole egg instead of one yolk. The baking time stays the same.
Why did my cookies spread too much?
This usually happens if the butter was too soft or melted, or if the dough was too warm. Try chilling the dough for 15 minutes before baking next time.
Can I use margarine instead of butter?
You can, but the cookies won’t be as flavorful or have the same texture. Butter gives them that rich taste and perfect crispy-chewy balance.
How do I make the cookies chewier?
Use an extra tablespoon of brown sugar and reduce the granulated sugar by one tablespoon. Brown sugar adds moisture, which makes cookies chewier.
Can I bake these in a toaster oven?
Yes, but watch them closely. Toaster ovens run hotter than regular ovens, so start checking at 7 minutes and rotate the pan halfway through.
Pin This Recipe!
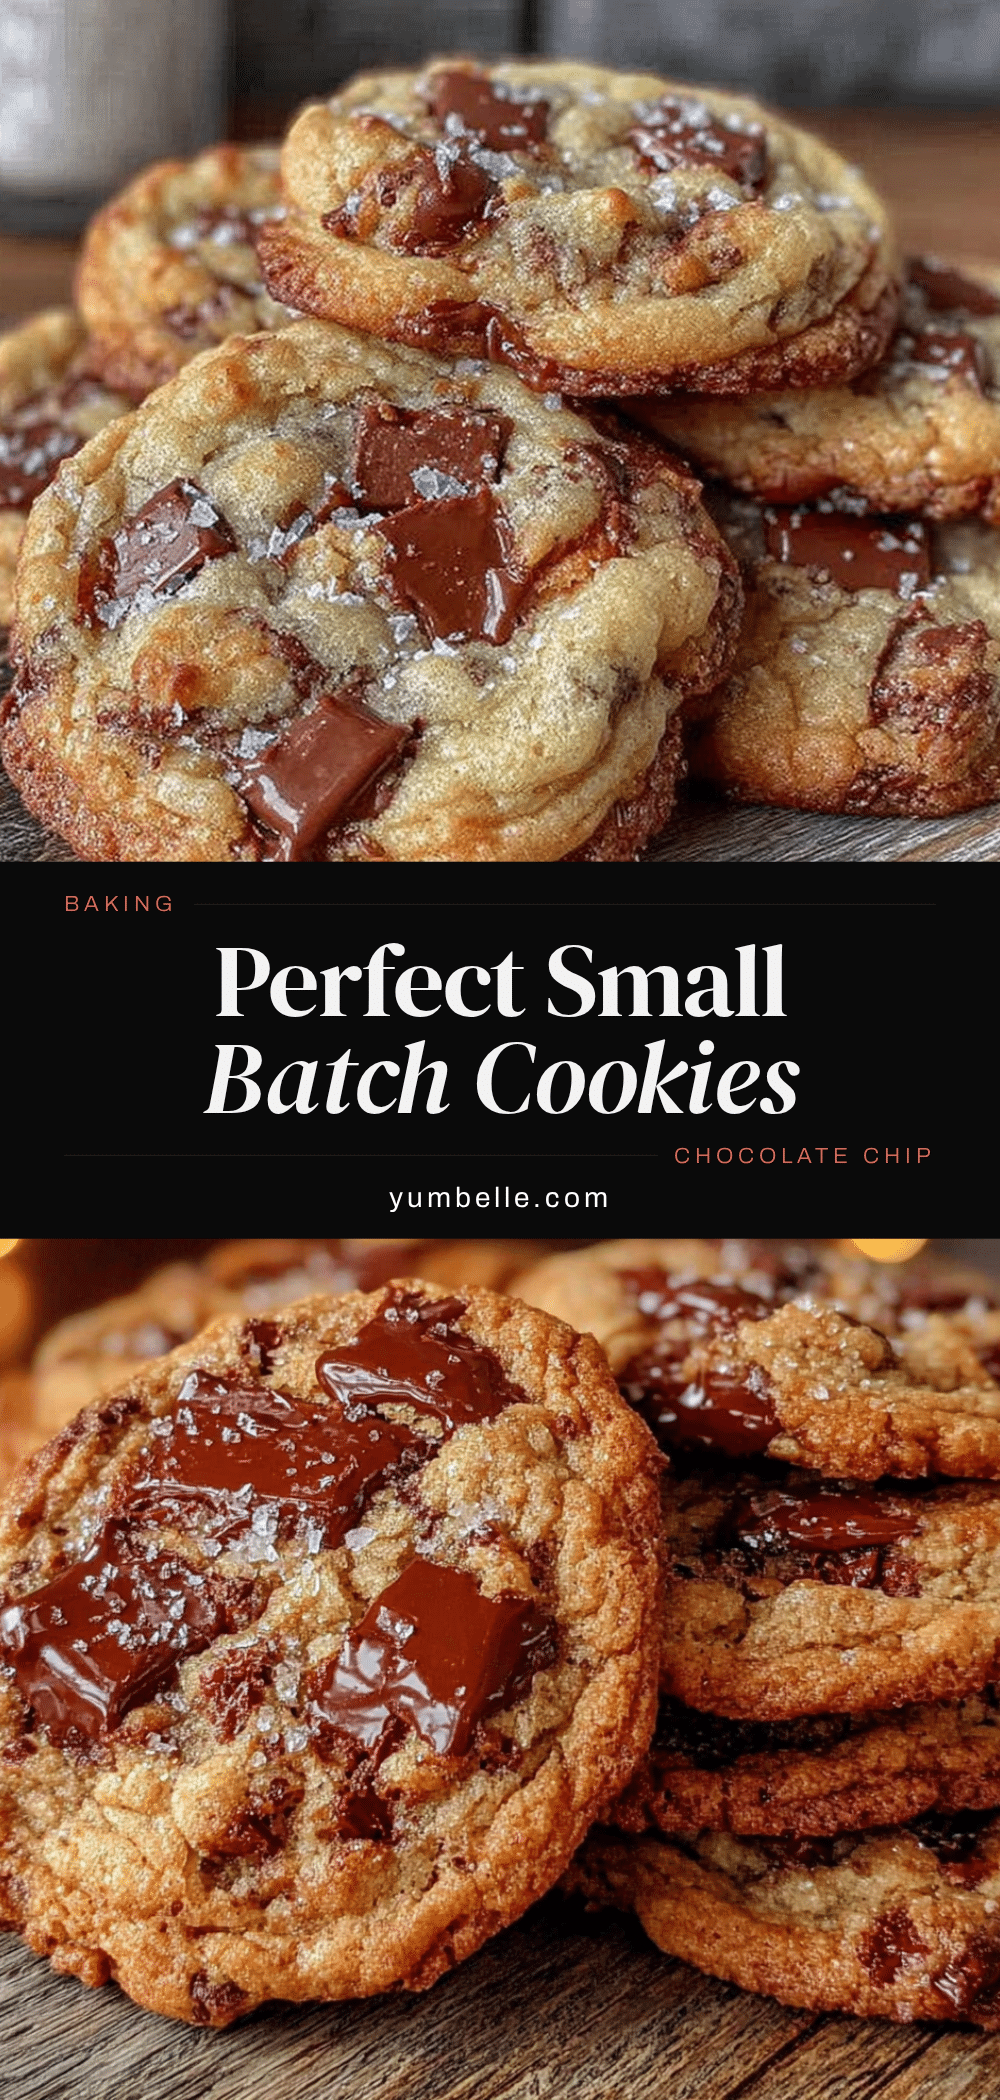
Perfect Small Batch Chocolate Chip Cookies – Easy Homemade Treat
These perfect small batch chocolate chip cookies are quick, easy, and deliver exactly what you want from a chocolate chip cookie—crispy edges, chewy centers, and plenty of melty chocolate. No fuss, no complicated techniques, no giant batches that leave you with leftovers for days. Just six perfect cookies, ready in under 30 minutes.
- Prep Time: 10 minutes
- Cook Time: 10 minutes
- Total Time: 25 minutes
- Yield: 6 cookies 1x
- Category: Dessert
- Cuisine: American
Ingredients
- 4 tablespoons (56 grams) unsalted butter, softened
- 3 tablespoons (37 grams) granulated sugar
- 3 tablespoons (42 grams) light brown sugar, packed
- 1 large egg yolk (about 18 grams)
- ½ teaspoon vanilla extract
- ½ cup plus 1 tablespoon (75 grams) all-purpose flour
- ¼ teaspoon baking soda
- ¼ teaspoon salt
- ⅓ cup (60 grams) semi-sweet chocolate chips
Instructions
- Preheat your oven to 350°F (175°C). Line a baking sheet with parchment paper or a silicone mat.
- In a medium mixing bowl, cream together the softened butter, granulated sugar, and packed brown sugar until light and fluffy, about 2 minutes.
- Add the egg yolk and vanilla extract. Mix until fully combined and smooth.
- In a small bowl, whisk together the flour, baking soda, and salt.
- Add the dry ingredients to the wet ingredients. Stir gently until just combined, with a few streaks of flour remaining.
- Fold in the chocolate chips until evenly distributed.
- Scoop the dough into six equal balls using a cookie scoop or tablespoon. Place them on the prepared baking sheet, spacing about 2 inches apart.
- Bake for 9 to 11 minutes, until edges are lightly golden and centers look slightly puffy and underdone.
- Cool on the baking sheet for 5 minutes.
- Transfer to a cooling rack to cool completely, or serve warm.
Notes
For thicker, chewier cookies, chill the dough balls for 30 minutes before baking. For a sea salt finish, sprinkle a tiny pinch of flaky sea salt on each dough ball before baking. Store leftover cookies in an airtight container at room temperature for up to 3 days. Freeze baked cookies for up to 2 months.
Nutrition
- Serving Size: 1 cookie
- Calories: 220
- Sugar: 17
- Sodium: 135
- Fat: 12
- Saturated Fat: 7
- Carbohydrates: 27
- Fiber: 1
- Protein: 3
Keywords: small batch chocolate chip cookies, easy chocolate chip cookies, homemade cookies, quick cookies, six cookies


