Love this? Save it for later!
Share the inspiration with your friends
I was standing in the baking aisle of our local grocery store last Tuesday, staring at a box of rainbow sprinkles like they held the secrets to the universe. A little kid ran past me, laughing, and for a split second, the fluorescent lights flickered. And just like that—I was seven years old again, sitting cross-legged on my Aunt Carol’s linoleum kitchen floor, watching her pull a giant sheet cake out of the oven. The smell hit me before she even set it down: vanilla, butter, and that faint, sugary promise of sprinkles waiting to be stirred in. She always let me pour them in. I was terrible at it—half the sprinkles ended up on the counter, and I’d lick them off when she wasn’t looking. She pretended not to notice. That cake wasn’t fancy. It wasn’t tall or layered or covered in perfectly piped rosettes. It was just a sheet cake. But honest to goodness, it was the happiest cake I’ve ever eaten.
I’ve spent years trying to recreate that exact feeling. Not just the flavor—the feeling. The way that cake made a random Tuesday feel like a party. The way the crumb was soft enough to sink your teeth into without a fight. The way the frosting wasn’t too sweet, just creamy and thick, with those little rainbow flecks peeking through. I’ve tested a dozen versions, messed up more batches than I care to admit, and finally landed on something that makes me close my eyes on that first bite. Maybe you’ve been there too—chasing a taste you can almost remember but can’t quite hold onto. This is my attempt to bottle that memory and share it with you.
The funny thing is, I almost gave up on this recipe. Last spring, I tried making it for a neighbor’s backyard barbecue, and I forgot the baking powder. The cake came out flat as a pancake. We ate it anyway with ice cream, and my neighbor said it was the best mistake she’d ever had. That’s the thing about this cake—it’s forgiving. It doesn’t need perfect technique or fancy equipment. It just needs a little patience and a whole lot of sprinkles. This is the cake I keep making, year after year, because it never fails to make people smile. And honestly, isn’t that the whole point of birthday cake in the first place?
Why You’ll Love This Recipe
Let me tell you—this isn’t just another confetti cake recipe you’ll find floating around the internet. I’ve tested this one until my family begged me to stop bringing cake home (they didn’t really mean it). It’s the kind of recipe that makes you look like a hero with very little effort. Here’s what makes it stand out:
- Quick & Easy: From start to finish, this cake comes together in under an hour. No complicated steps, no stressing over multi-tiered layers. Just mix, bake, frost, and celebrate.
- Simple Ingredients: You probably already have most of these in your pantry right now. No hunting down specialty flours or obscure extracts.
- Perfect for Any Occasion: Birthdays, potlucks, bake sales, or just a random Wednesday that needs a little sparkle. This cake fits right in.
- Crowd-Pleaser: Kids go wild for it. Adults sneak seconds. I’ve seen it disappear at parties faster than any fancy layered cake.
- Unbelievably Delicious: The texture is soft and tender, the frosting is silky without being cloying, and every bite has that little crunch of rainbow sprinkles. It’s pure comfort food.
What really sets this recipe apart is the technique. I use a simple trick—blending a little sour cream into the batter—that keeps the cake incredibly moist without making it heavy. It’s a small tweak, but it makes all the difference. Plus, the frosting is a classic American buttercream that’s whipped until it’s light and fluffy, not dense and greasy. I’ve had people tell me they don’t usually like birthday cake frosting, but they love this one. That’s the kind of feedback that keeps me testing recipes in my tiny kitchen.
This cake is the one I bring to every party, every family gathering, every time someone needs a little cheering up. It’s not just good—it’s the kind of cake that makes you forget your worries for a few minutes. It’s comfort food, reimagined. And it’s ready whenever you are.
What Ingredients You Will Need
This recipe uses simple, wholesome ingredients to deliver that classic birthday cake flavor with a homemade touch. Most of these are pantry staples, so you won’t need to make a special trip to the store. Let’s break down what you’ll need and why each ingredient matters.
For the Cake
- All-purpose flour (2 ½ cups / 315g): The backbone of the cake. I recommend using unbleached flour for the best texture. Spoon and level it into your measuring cup—don’t scoop directly or you’ll pack in too much.
- Granulated sugar (1 ¾ cups / 350g): Adds sweetness and helps create that tender crumb. I’ve tested this with organic cane sugar and it works beautifully.
- Unsalted butter (1 cup / 226g, softened): Use the real stuff here, not margarine. I prefer Kerrygold or Challenge brands for their rich flavor. Let it sit at room temperature for about an hour before you start.
- Large eggs (3, at room temperature): Eggs give structure and richness. If you’re in a hurry, place them in a bowl of warm water for 5 minutes to bring them to room temp quickly.
- Buttermilk (1 cup / 240ml): This is my secret weapon for a tender cake. The acidity reacts with the baking soda to create a soft, fluffy texture. No buttermilk? No problem—just add 1 tablespoon of lemon juice or white vinegar to regular milk and let it sit for 5 minutes.
- Sour cream (½ cup / 120g): This is the trick I mentioned earlier. It adds moisture and a subtle tang that balances the sweetness. Full-fat works best, but low-fat is okay in a pinch.
- Vanilla extract (2 teaspoons): Pure vanilla is worth the splurge here. Imitation works, but the flavor won’t be as rich.
- Rainbow sprinkles (½ cup / 85g): The star of the show! Use jimmies (the long, skinny kind), not nonpareils (the tiny round ones). Nonpareils tend to bleed their color into the batter and create a muddy look. I’ve learned this the hard way.
- Baking powder (2 ½ teaspoons): This is your leavening agent. Make sure it’s fresh—test it by dropping a little into hot water; if it fizzes, it’s good to go.
- Baking soda (½ teaspoon): Works with the buttermilk to give the cake extra lift.
- Salt (1 teaspoon): Don’t skip this. Salt enhances all the other flavors and keeps the cake from tasting flat.
For the Frosting
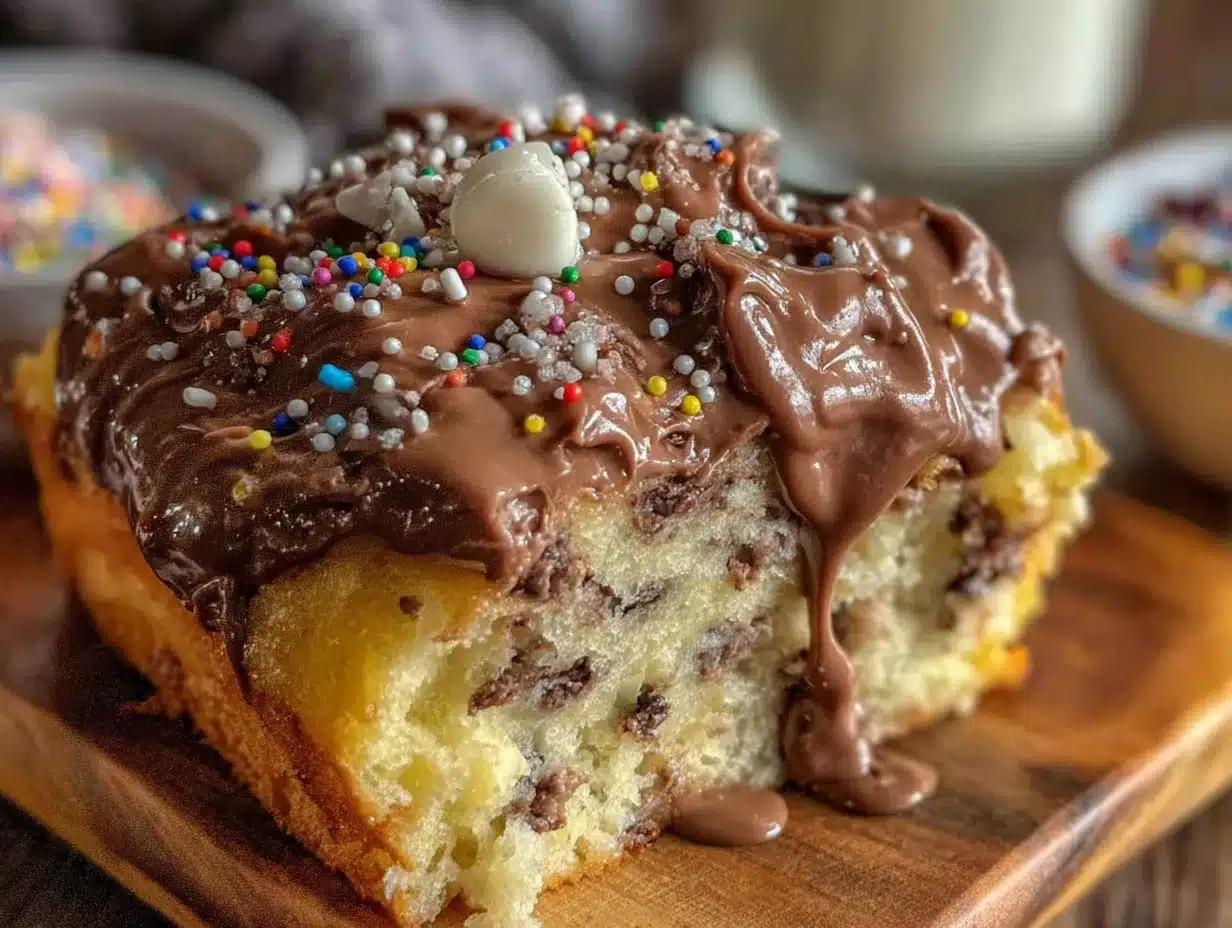
- Unsalted butter (1 cup / 226g, softened): Again, real butter is non-negotiable here. It gives the frosting that creamy, melt-in-your-mouth texture.
- Powdered sugar (4 cups / 480g): Sift it if you can—it prevents lumps and makes the frosting silky smooth. I use Domino brand and it works great.
- Heavy cream (3-4 tablespoons / 45-60ml): Adds richness and helps achieve the perfect spreading consistency. You can substitute whole milk, but the frosting won’t be as luxurious.
- Vanilla extract (1 ½ teaspoons): More vanilla goodness. This is where you can really taste the quality of your extract.
- Salt (¼ teaspoon): A tiny pinch balances the sweetness beautifully.
- Extra sprinkles for topping (about ¼ cup / 40g): For that festive finish. I like to pile them on generously.
One quick note on sprinkles: if you can find them, look for “confetti sprinkles” or “birthday mix” at your local baking supply store. They often have a mix of shapes and sizes that look gorgeous on the finished cake. But honestly, any rainbow sprinkle will do the job.
Equipment Needed
You don’t need a professional bakery setup to make this cake. Here’s what I use in my own kitchen:
- 13×9-inch baking pan: This is the standard sheet cake size. A metal pan works best for even baking. If you only have glass or ceramic, reduce the oven temperature by 25°F and expect a slightly longer bake time.
- Electric hand mixer or stand mixer: You can technically mix this by hand, but a mixer makes the process much easier and gives you a lighter, fluffier cake. I use my KitchenAid stand mixer for the frosting.
- Mixing bowls: You’ll need at least two—one for dry ingredients and one for wet.
- Whisk and rubber spatula: For combining ingredients and scraping down the sides of the bowl.
- Parchment paper: Line your pan with this for easy removal. I like to leave a little overhang on the long sides to use as handles.
- Cooling rack: Letting the cake cool completely is crucial before frosting. A wire rack allows air to circulate and prevents a soggy bottom.
- Offset spatula: This makes frosting the cake so much easier and gives you a smooth, professional finish. If you don’t have one, a butter knife will work—it just takes a little more patience.
- Measuring cups and spoons: For accuracy. I cannot stress this enough—baking is a science, and eyeballing measurements can lead to disaster. Trust me, I’ve been there.
If you’re on a budget, skip the stand mixer and use a hand mixer. I used one for years before upgrading, and my cakes turned out just fine. Also, parchment paper is cheap and worth every penny—it saves you from the nightmare of a cake that won’t come out of the pan.
Preparation Method
Alright, let’s get to the fun part. I’m going to walk you through this step by step, with all the little details I wish someone had told me when I first started making sheet cakes. Set aside about 45 minutes for prep and baking, plus another 20 minutes for cooling and frosting.
- Preheat your oven to 350°F (175°C). Position the rack in the center of the oven. While it’s heating, line your 13×9-inch pan with parchment paper, leaving a little overhang on the two long sides. Lightly grease the parchment and the exposed sides of the pan with butter or non-stick spray.
- Whisk the dry ingredients together. In a medium bowl, combine 2 ½ cups all-purpose flour, 2 ½ teaspoons baking powder, ½ teaspoon baking soda, and 1 teaspoon salt. Whisk until everything is evenly distributed. This step ensures your leavening agents are well incorporated, so you don’t end up with a lopsided cake.
- Cream the butter and sugar. In a large bowl, beat 1 cup softened unsalted butter with 1 ¾ cups granulated sugar using an electric mixer on medium speed. Beat for about 3-4 minutes, until the mixture is light, fluffy, and pale in color. Scrape down the sides of the bowl halfway through. This is where the air gets incorporated, so don’t rush it.
- Add the eggs one at a time. Crack in 3 large eggs, one at a time, beating well after each addition. The batter should look smooth and glossy. Add 2 teaspoons vanilla extract and beat until combined.
- Combine the wet ingredients. In a separate small bowl or liquid measuring cup, whisk together 1 cup buttermilk and ½ cup sour cream until smooth. This mixture will add incredible moisture to the cake.
- Alternate adding dry and wet ingredients. With the mixer on low speed, add about one-third of the flour mixture to the butter mixture, then half of the buttermilk mixture. Repeat, ending with the final third of the flour mixture. Mix just until combined—overmixing will make the cake tough. I usually stop the mixer and finish folding by hand with a rubber spatula.
- Fold in the sprinkles. Gently fold in ½ cup rainbow sprinkles using the spatula. Be careful not to overmix here, or the colors might bleed. You want distinct little flecks of color throughout the batter.
- Pour and spread the batter. Transfer the batter to your prepared pan. Use the spatula to spread it evenly into the corners. Give the pan a gentle tap on the counter to release any air bubbles.
- Bake for 25-30 minutes. The cake is done when a toothpick inserted into the center comes out clean or with a few moist crumbs. The top should be golden and spring back when lightly touched. My oven runs a little hot, so I start checking at 25 minutes. Every oven is different, so trust your senses more than the timer.
- Cool completely. Place the pan on a wire rack and let the cake cool for 15 minutes. Then, using the parchment overhang, lift the cake out of the pan and transfer it to the rack to cool completely. Do not frost until the cake is fully cool, or your frosting will melt into a sad, greasy mess. I usually wait at least an hour.
- Make the frosting. While the cake cools, beat 1 cup softened unsalted butter in a large bowl with an electric mixer on medium speed until creamy and smooth, about 2 minutes. Gradually add 4 cups sifted powdered sugar, one cup at a time, beating on low speed. Add 1 ½ teaspoons vanilla extract, ¼ teaspoon salt, and 3 tablespoons heavy cream. Increase speed to medium-high and beat for 3-4 minutes until the frosting is light, fluffy, and spreadable. If it’s too thick, add another tablespoon of cream. If it’s too thin, add a little more powdered sugar.
- Frost the cake. Place the cooled cake on a serving platter or cutting board. Use an offset spatula to spread a generous layer of frosting over the top and sides. Don’t worry about perfection—a rustic, homemade look is part of the charm. Sprinkle the extra ¼ cup of rainbow sprinkles over the top while the frosting is still soft, so they stick.
And there you have it—a beautiful, homemade confetti birthday sheet cake. Let it set for about 15 minutes before slicing to give the frosting a chance to firm up slightly. Then dig in!
Cooking Tips & Techniques
Over the years, I’ve made every mistake you can imagine with this cake. Here are the lessons I’ve learned so you don’t have to repeat them.
Room temperature ingredients matter. I know it’s tempting to use cold eggs and butter straight from the fridge, but trust me on this one. Room temperature ingredients emulsify better, creating a smoother batter and a more tender crumb. If you forget to take them out ahead of time, place the eggs in a bowl of warm water for 5 minutes and microwave the butter in 5-second bursts until it’s soft but not melted.
Don’t overmix the batter. This is probably the most common mistake I see. Once you add the flour, mix just until it disappears. Overmixing develops the gluten too much, and you’ll end up with a dense, tough cake instead of a light, fluffy one. I actually prefer to switch to a spatula for the final few folds—it gives me more control.
Use jimmies, not nonpareils. I mentioned this earlier, but it bears repeating. Nonpareils (the tiny round sprinkles) tend to bleed their color into the batter, turning your cake a sad shade of grayish-pink. Jimmies (the long skinny ones) hold their shape and color much better. I learned this the hard way when I made a batch for my nephew’s birthday and the cake came out looking like a science experiment gone wrong.
Let the cake cool completely. I know you’re excited, I get it. But if you frost a warm cake, the frosting will melt and slide right off. I’ve done this more times than I care to admit. If you’re short on time, pop the cake in the refrigerator for 20-30 minutes to speed up the cooling process.
Use a serrated knife to level the cake. If your cake domes a little in the center (which is totally normal), use a long serrated knife to gently slice off the top to make it flat. This gives you a nice, even surface for frosting. Save the scraps for snacking—chef’s privilege!
Chill the frosting if needed. If your kitchen is warm and your frosting seems too soft, pop the bowl in the refrigerator for 10-15 minutes before spreading. It will firm up and be much easier to work with.
One more thing—don’t stress about perfection. This is a sheet cake, not a wedding cake. The beauty of it is in its simplicity and homemade charm. Even if the frosting is a little uneven or the sprinkles are lopsided, it will taste amazing. And that’s what really matters.
Variations & Adaptations
One of the best things about this recipe is how versatile it is. Here are some ways to make it your own.
Chocolate Confetti Cake: Swap ½ cup of the all-purpose flour for ½ cup unsweetened cocoa powder. Reduce the vanilla extract to 1 teaspoon. The chocolate flavor pairs beautifully with the rainbow sprinkles, and it feels like a whole new dessert. I made this version for a friend’s birthday and she said it was the best cake she’d ever had.
Gluten-Free Option: Substitute the all-purpose flour with a good quality gluten-free flour blend that contains xanthan gum. I’ve had great results with King Arthur Measure for Measure flour. The texture will be slightly denser, but still delicious. Just be sure to check that your sprinkles are gluten-free too—some brands use wheat starch.
Dairy-Free Version: Replace the butter with a high-quality vegan butter stick (I like Miyoko’s or Earth Balance). Use unsweetened almond milk or oat milk mixed with 1 tablespoon lemon juice in place of buttermilk, and swap the sour cream for a dairy-free yogurt. The frosting works well with vegan butter too—just make sure it’s fully softened.
Lemon Confetti Cake: Add the zest of 2 lemons to the sugar and rub it in with your fingers before creaming with the butter. Replace 1 teaspoon of the vanilla extract with lemon extract. The bright, citrusy flavor is a lovely twist, especially in spring and summer.
Cupcake Version: This batter makes about 24 cupcakes. Line two muffin tins with paper liners and fill each about two-thirds full. Bake at 350°F for 18-20 minutes, or until a toothpick comes out clean. Frost as desired. I’ve brought these to school parties and they’re always the first thing to disappear.
Funfetti Layer Cake: Double the recipe and bake in two 9-inch round cake pans. Layer the cakes with frosting in between, then frost the outside. It’s a little more work, but the presentation is stunning for a special occasion.
Don’t be afraid to experiment. The base recipe is forgiving enough to handle most substitutions. Just keep in mind that changing the flour or fat content will affect the texture slightly, so adjust your expectations accordingly.
Serving & Storage Suggestions
This cake is best served at room temperature. If you’ve refrigerated it, let it sit out for about 30 minutes before serving to let the frosting soften and the flavors come alive. I like to cut it into generous squares—about 3×3 inches—and serve it on a simple white plate to let the colors pop.
For a truly indulgent experience, serve each slice with a scoop of vanilla bean ice cream or a dollop of freshly whipped cream. The cold creaminess pairs beautifully with the soft, tender cake. If you’re feeling extra festive, drizzle a little warm chocolate sauce over the top. My kids go crazy for this.
This cake also makes a great base for a birthday sundae bar. Set out bowls of hot fudge, caramel sauce, chopped nuts, maraschino cherries, and extra sprinkles, and let everyone build their own dessert. It’s a fun, interactive way to celebrate.
Storage: Leftover cake can be stored in an airtight container at room temperature for up to 3 days. If your kitchen is warm, refrigerate it instead to keep the frosting from getting too soft. I’ve found that the cake actually tastes even better on the second day—the flavors have time to meld together and the texture becomes even more moist.
Freezing: This cake freezes beautifully. Wrap the unfrosted cake tightly in plastic wrap, then in a layer of aluminum foil. Freeze for up to 3 months. When you’re ready to serve, thaw it overnight in the refrigerator, then bring to room temperature before frosting. You can also freeze the frosted cake—just place it in the freezer for an hour until the frosting is firm, then wrap it well. Thaw in the refrigerator overnight.
Reheating: If you prefer your cake slightly warm, pop individual slices in the microwave for about 10-15 seconds. Be careful not to overheat, or the frosting will melt. I actually love a slightly warm slice with a cold glass of milk—it’s pure comfort.
One final tip: if you’re making this cake ahead of time for a party, bake the cake and make the frosting separately. Store the cake wrapped tightly at room temperature and the frosting in the refrigerator. Assemble and frost the cake the day of the event for the freshest presentation.
Nutritional Information & Benefits
Let’s be real—this is a celebration cake, not a health food. But that doesn’t mean it can’t fit into a balanced lifestyle. Here’s the estimated nutritional breakdown per serving (based on 20 servings):
- Calories: 385
- Total Fat: 18g
- Saturated Fat: 11g
- Cholesterol: 75mg
- Sodium: 280mg
- Total Carbohydrates: 54g
- Dietary Fiber: 0.5g
- Sugars: 38g
- Protein: 4g
These values are estimates and will vary based on the specific brands and substitutions you use. If you’re looking to lighten things up, you can reduce the sugar by ¼ cup in the cake (though the texture may be slightly less tender) or use a lighter frosting option like a cream cheese frosting made with reduced-fat cream cheese.
On the bright side, this cake does contain some calcium from the dairy, and the eggs provide a small amount of protein. The sprinkles? Well, they bring joy, and that counts for something, right?
From a wellness perspective, I believe in the 80/20 rule—eat nourishing foods 80% of the time, and leave room for treats like this the other 20%. A slice of birthday cake shared with loved ones is good for the soul. And honestly, that’s a kind of nutrition too.
Conclusion
This Ultimate Confetti Birthday Sheet Cake is more than just a recipe—it’s a little piece of joy you can bake in your own kitchen. It’s the cake that brings people together, that makes ordinary days feel special, that reminds us of the simple pleasure of a slice of something sweet shared with the people we love.
I hope you’ll give it a try. Don’t be afraid to make it your own—add extra sprinkles, swap in your favorite extract, or pile on the frosting a little thicker than I do. That’s the beauty of homemade baking. You get to decide what perfect looks like.
When you make this cake, I’d love to hear about it. Drop a comment below and tell me how it turned out, or share a photo of your creation. Did you try one of the variations? Did your kids help pour in the sprinkles? Did you forget the baking powder like I did that one time? I want to hear it all. Your stories are what make this community so special.
Until next time, happy baking. And remember—every day is worth celebrating, even if it’s just with a slice of confetti cake and a cup of coffee.
Frequently Asked Questions
Can I make this cake in advance?
Absolutely. You can bake the cake up to 2 days ahead and store it tightly wrapped at room temperature. Make the frosting separately and refrigerate it. Assemble the cake the day you plan to serve it for the best texture and presentation.
Why did my sprinkles bleed into the batter?
This usually happens when you use nonpareils (the tiny round sprinkles) instead of jimmies (the long skinny ones). Nonpareils are more likely to dissolve and release their color. Stick with jimmies for the best results, and fold them in gently without overmixing.
Can I use this recipe to make cupcakes?
Yes! This batter makes about 24 standard cupcakes. Fill lined muffin tins about two-thirds full and bake at 350°F for 18-20 minutes. Let them cool completely before frosting. They’re perfect for birthday parties or bake sales.
How do I get clean slices without the frosting smearing?
Use a long, sharp knife and wipe it clean between each cut. For the cleanest slices, you can refrigerate the frosted cake for about 30 minutes before cutting. This firms up the frosting and makes it much easier to slice neatly.
Can I use a different size pan?
You can, but the baking time will change. For a 9×9-inch square pan, the cake will be thicker and will need about 35-40 minutes. For a 9×13-inch pan, stick with the times in the recipe. If you use a different size, keep an eye on it and test for doneness with a toothpick.
Pin This Recipe!
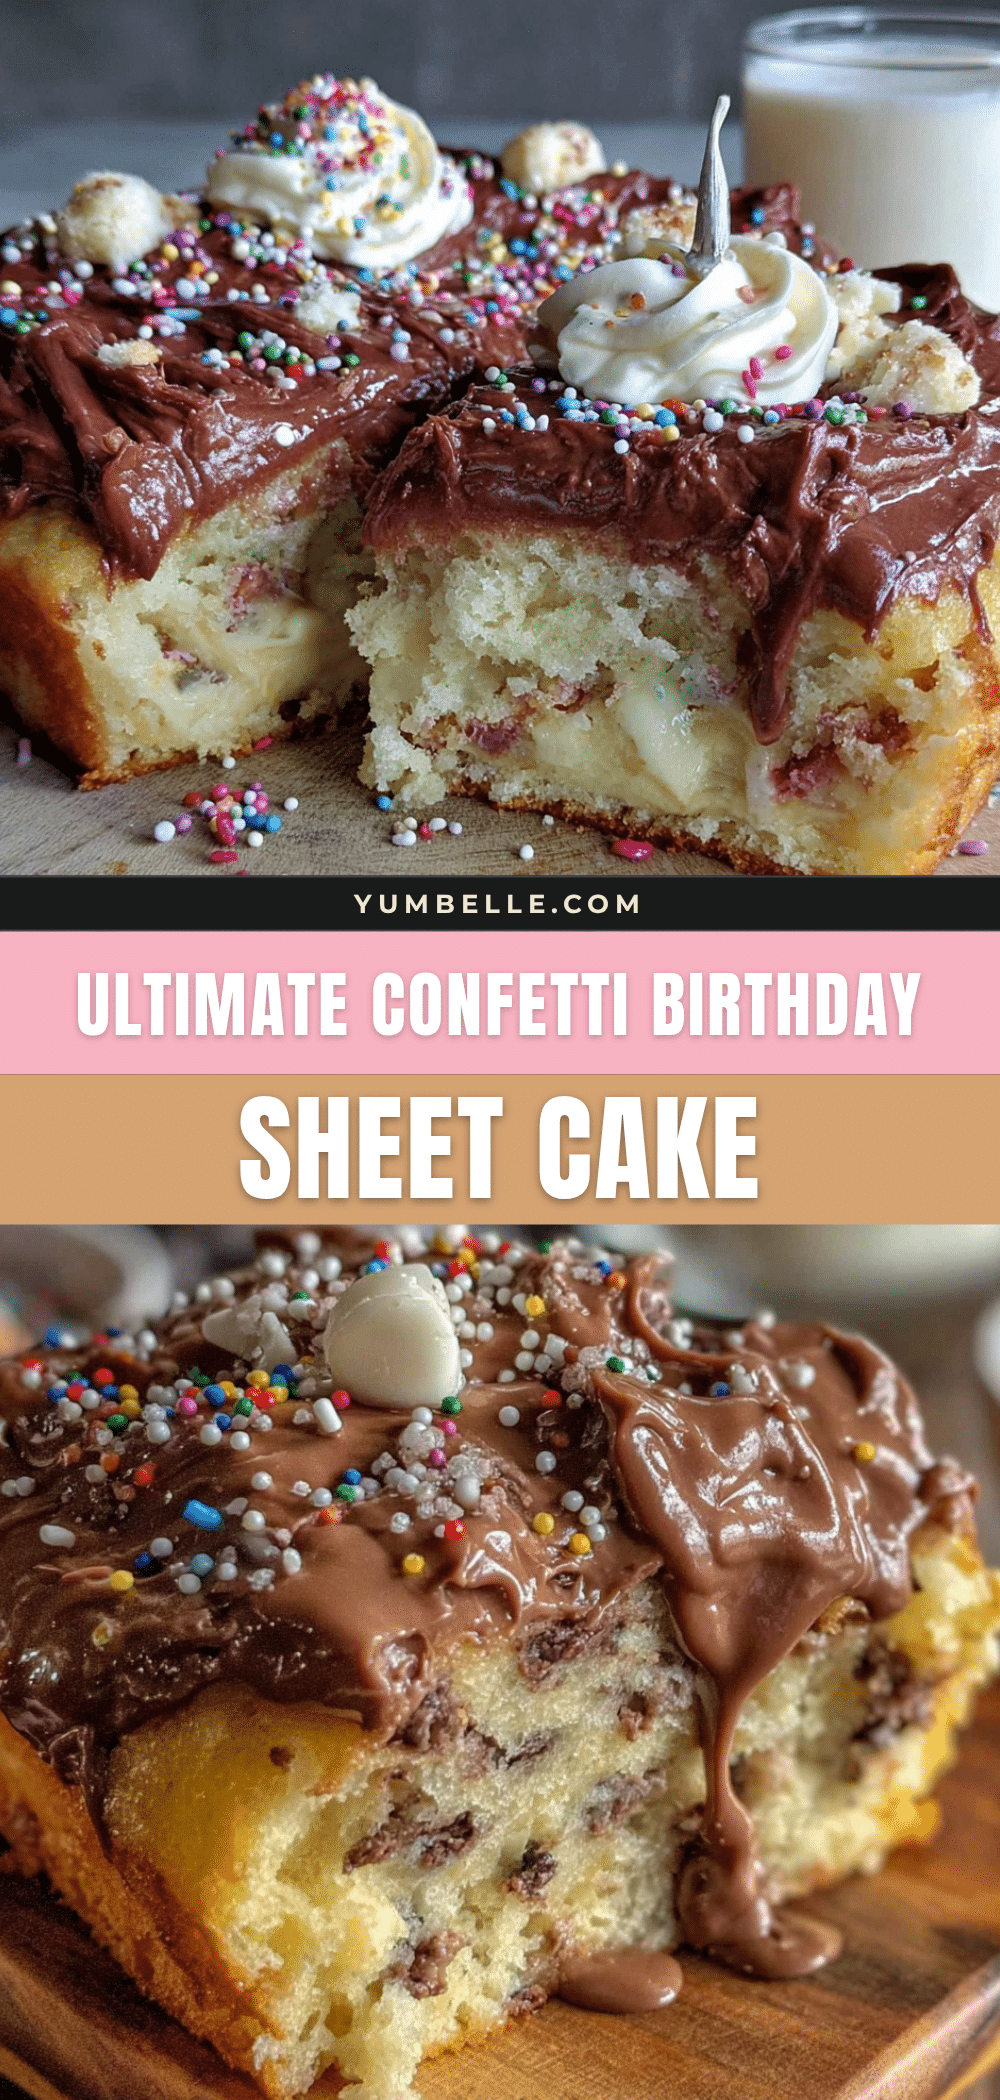
Ultimate Confetti Birthday Sheet Cake – Easy Homemade Recipe
This Ultimate Confetti Birthday Sheet Cake is a soft, tender, and incredibly moist cake studded with rainbow sprinkles and topped with a silky American buttercream. It’s the perfect easy-to-make celebration cake that brings joy to any occasion.
- Prep Time: 20 minutes
- Cook Time: 30 minutes
- Total Time: 50 minutes
- Yield: 20 servings 1x
- Category: Dessert
- Cuisine: American
Ingredients
- 2 ½ cups (315g) all-purpose flour
- 1 ¾ cups (350g) granulated sugar
- 1 cup (226g) unsalted butter, softened
- 3 large eggs, at room temperature
- 1 cup (240ml) buttermilk
- ½ cup (120g) sour cream
- 2 teaspoons vanilla extract
- ½ cup (85g) rainbow sprinkles (jimmies)
- 2 ½ teaspoons baking powder
- ½ teaspoon baking soda
- 1 teaspoon salt
- 1 cup (226g) unsalted butter, softened (for frosting)
- 4 cups (480g) powdered sugar, sifted
- 3–4 tablespoons (45-60ml) heavy cream
- 1 ½ teaspoons vanilla extract (for frosting)
- ¼ teaspoon salt (for frosting)
- ¼ cup (40g) extra rainbow sprinkles for topping
Instructions
- Preheat your oven to 350°F (175°C). Position the rack in the center of the oven. Line a 13×9-inch baking pan with parchment paper, leaving overhang on the two long sides. Lightly grease the parchment and exposed sides of the pan with butter or non-stick spray.
- In a medium bowl, whisk together 2 ½ cups all-purpose flour, 2 ½ teaspoons baking powder, ½ teaspoon baking soda, and 1 teaspoon salt until evenly distributed.
- In a large bowl, beat 1 cup softened unsalted butter with 1 ¾ cups granulated sugar using an electric mixer on medium speed for 3-4 minutes until light, fluffy, and pale. Scrape down the sides halfway through.
- Add 3 large eggs one at a time, beating well after each addition. Add 2 teaspoons vanilla extract and beat until combined.
- In a separate small bowl or liquid measuring cup, whisk together 1 cup buttermilk and ½ cup sour cream until smooth.
- With the mixer on low speed, add about one-third of the flour mixture to the butter mixture, then half of the buttermilk mixture. Repeat, ending with the final third of the flour mixture. Mix just until combined. Finish folding by hand with a rubber spatula if needed.
- Gently fold in ½ cup rainbow sprinkles using the spatula. Be careful not to overmix.
- Pour the batter into the prepared pan and spread evenly. Tap the pan gently on the counter to release air bubbles.
- Bake for 25-30 minutes, until a toothpick inserted into the center comes out clean or with a few moist crumbs. The top should be golden and spring back when lightly touched.
- Place the pan on a wire rack and let the cake cool for 15 minutes. Then, using the parchment overhang, lift the cake out of the pan and transfer it to the rack to cool completely (at least 1 hour).
- While the cake cools, make the frosting: In a large bowl, beat 1 cup softened unsalted butter with an electric mixer on medium speed until creamy, about 2 minutes. Gradually add 4 cups sifted powdered sugar, one cup at a time, beating on low speed. Add 1 ½ teaspoons vanilla extract, ¼ teaspoon salt, and 3 tablespoons heavy cream. Increase speed to medium-high and beat for 3-4 minutes until light, fluffy, and spreadable. Add another tablespoon of cream if too thick, or more powdered sugar if too …
- Place the cooled cake on a serving platter. Use an offset spatula to spread a generous layer of frosting over the top and sides. Sprinkle the extra ¼ cup of rainbow sprinkles over the top while the frosting is still soft. Let set for about 15 minutes before slicing.
Notes
Use jimmies (long skinny sprinkles) instead of nonpareils to prevent color bleeding. Ensure all ingredients are at room temperature for best results. Do not overmix the batter. Let the cake cool completely before frosting. For a chocolate version, swap ½ cup flour for ½ cup unsweetened cocoa powder. For gluten-free, use a gluten-free flour blend with xanthan gum. For dairy-free, use vegan butter, non-dairy milk with lemon juice, and dairy-free yogurt.
Nutrition
- Serving Size: 1 slice (1/20 of cak
- Calories: 385
- Sugar: 38
- Sodium: 280
- Fat: 18
- Saturated Fat: 11
- Carbohydrates: 54
- Fiber: 0.5
- Protein: 4
Keywords: confetti cake, birthday cake, sheet cake, rainbow sprinkles, easy cake, homemade cake, funfetti cake


