Love this? Save it for later!
Share the inspiration with your friends
I was at my local hardware store last October, of all places, picking up a new snow shovel—because apparently, I’m at that stage of life where that feels like a necessary purchase—when the woman behind me in line started talking about cream cheese. Not the weather, not the price of lumber, but cream cheese. She was maybe seventy, with gardening dirt under her nails and a flannel shirt that had seen better days. “You know,” she said, gesturing at my cart with her chin, “that cream cheese you’ve got there? It’s the secret to the best fall dessert you’ll ever make.” I honestly thought she was going to tell me about some kind of savory dip. But no. She proceeded to describe, in way too much detail for a checkout line, these pumpkin spice snickerdoodle cheesecake bars she’d been perfecting for thirty years. I stood there, snow shovel in hand, completely captivated. She told me the trick was to not overbake the cheesecake layer, and to use a specific brand of cinnamon she swore by. I nodded like I was taking notes for a final exam. By the time I paid, I had a mental recipe scribbled down, a new shovel, and a story I still tell people. These bars are the result of that hardware store encounter, plus maybe a dozen of my own trials because, let’s face it, I had to tweak the crust. You know that feeling when a recipe just clicks, and you immediately want to share it with everyone? That’s these bars. They’re the kind of dessert that makes you close your eyes after the first bite, and I’ve been making them every fall since that strange, wonderful day.
Why You’ll Love This Recipe
Let me be straight with you—I’ve tested a lot of fall dessert recipes over the years. Some were good, some were forgettable, and a few ended up in the trash. These pumpkin spice snickerdoodle cheesecake bars? They’re the ones I keep coming back to. Here’s why they stand out from the crowd:
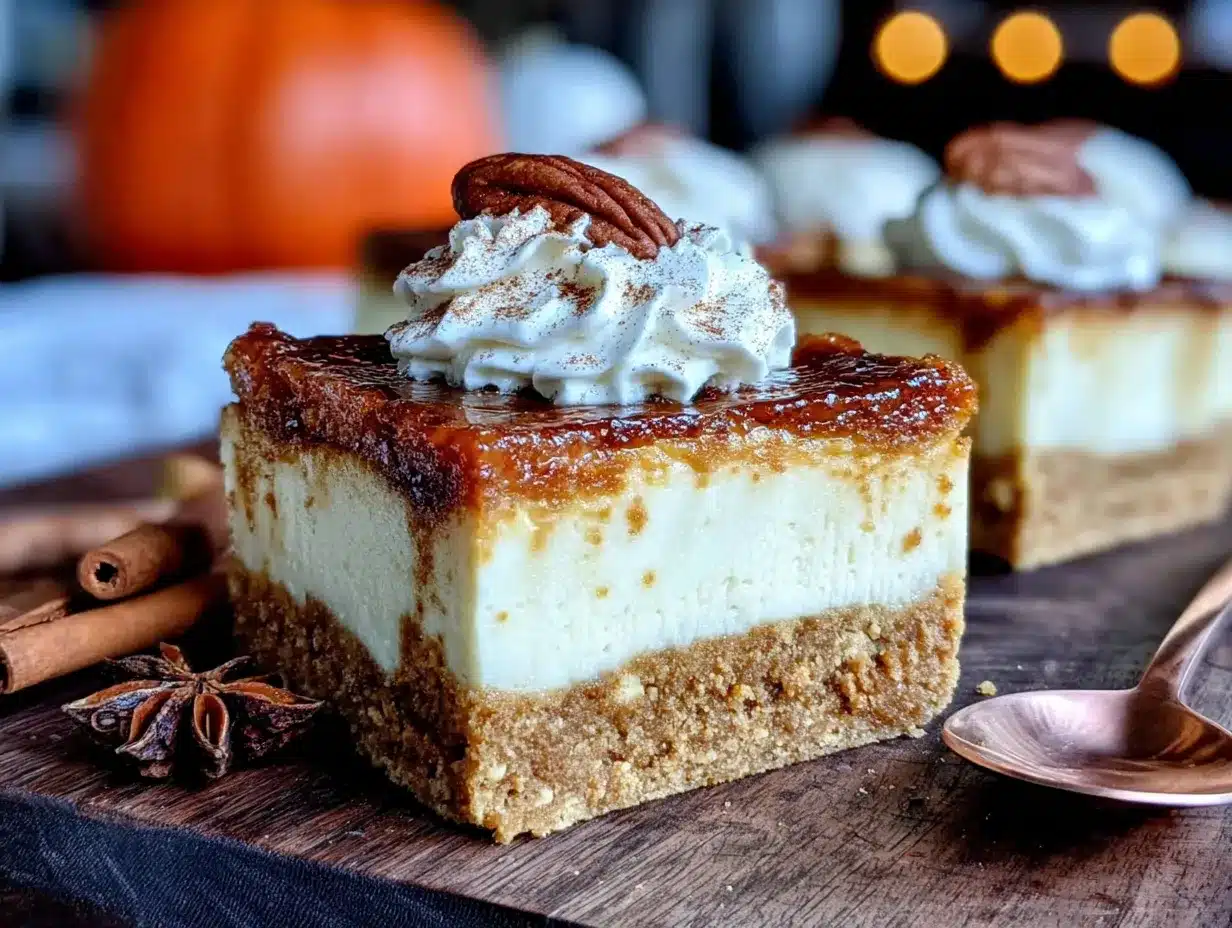
- Three Layers of Heaven: You get a soft, buttery snickerdoodle crust, a creamy pumpkin cheesecake center, and a cinnamon-sugar top that crackles when you bite into it. It’s like three desserts in one, and honestly, that’s the dream.
- Simple Ingredients: No trips to a specialty store needed. You probably have most of this stuff in your pantry right now—flour, sugar, eggs, cream cheese, pumpkin puree, and a good dose of pumpkin pie spice. I mean, that’s the whole point of a reliable fall recipe, right?
- Perfect for Fall Gatherings: Whether it’s a Thanksgiving potluck, a cozy Friendsgiving, or just a Tuesday night when you need a little comfort, these bars deliver. They’re portable, easy to slice, and everyone always asks for the recipe.
- Crowd-Pleaser: I’ve served these to kids, grandparents, and picky eaters who claim they don’t like pumpkin. They disappear. Every. Single. Time. The snickerdoodle element is the secret weapon—it’s familiar and beloved, so even pumpkin skeptics are won over.
- Unbelievably Delicious: The texture is what gets me. The crust is soft but sturdy, the cheesecake is silky and spiced just right, and the top has that signature snickerdoodle crackle. It’s the kind of dessert that feels fancy but is secretly easy to pull off.
What makes this recipe different from the dozens of other pumpkin cheesecake bars out there is the snickerdoodle base. Instead of a plain graham cracker or shortbread crust, you get a soft, cinnamon-laced cookie layer that complements the pumpkin perfectly. It’s not just another version—it’s the best version, and I say that with zero hesitation. These bars are comfort food reimagined: familiar, nostalgic, but with a twist that makes them unforgettable.
What Ingredients You Will Need
This recipe uses simple, wholesome ingredients to build layers of flavor without any fuss. Most of these are pantry staples, especially if you’re a regular baker during the fall season. Let me walk you through what you need and why each ingredient matters.
For the Snickerdoodle Crust
- All-purpose flour, 2 cups (240g): The foundation of the crust. I use Gold Medal or King Arthur for consistent results. Don’t swap in whole wheat here—it’ll make the crust too dense.
- Unsalted butter, 1 cup (2 sticks, 226g), softened: Adds richness and tenderness. Make sure it’s truly softened to room temperature, not melted. Cold butter won’t cream properly.
- Granulated sugar, 1 cup (200g): Sweetens the crust and helps create that soft, chewy texture.
- Egg, 1 large, room temperature: Binds the dough together. A cold egg can seize the butter, so let it sit out for 30 minutes first.
- Cream of tartar, 1 teaspoon: This is the secret to the snickerdoodle tang. It gives the crust that signature flavor and helps with texture. Don’t skip it—baking soda isn’t a substitute here.
- Baking soda, 1/2 teaspoon: Helps the crust rise just a tiny bit, keeping it from being too dense.
- Ground cinnamon, 1 teaspoon: Adds warmth to the crust layer. I prefer Saigon cinnamon for its bold, slightly sweet flavor.
- Salt, 1/2 teaspoon: Balances the sweetness and enhances all the other flavors.
For the Pumpkin Cheesecake Layer
- Full-fat cream cheese, 16 ounces (two 8-ounce blocks), softened: This is non-negotiable for a creamy, luscious cheesecake. Low-fat cream cheese has too much water and can make the filling grainy. I use Philadelphia brand—it’s reliable.
- Granulated sugar, 3/4 cup (150g): Sweetens the cheesecake without overpowering the pumpkin.
- Pumpkin puree, 1 cup (240ml): Make sure it’s 100% pure pumpkin, not pumpkin pie filling. The filling has added sugar and spices that will throw off the balance. Libby’s is my go-to.
- Eggs, 2 large, room temperature: Provide structure and richness to the cheesecake.
- Vanilla extract, 1 teaspoon: Adds depth and rounds out the spices.
- Pumpkin pie spice, 1 tablespoon: The star of the show. You can use store-bought or make your own with cinnamon, nutmeg, ginger, and cloves. I actually prefer homemade—I find it fresher and more aromatic.
- Ground cinnamon, 1/2 teaspoon: Extra warmth to complement the pumpkin pie spice.
- Salt, 1/4 teaspoon: Just a pinch to balance the sweetness.
For the Cinnamon-Sugar Topping
- Granulated sugar, 2 tablespoons (25g): Creates that signature snickerdoodle crackle on top.
- Ground cinnamon, 1 teaspoon: For that beautiful, fragrant swirl on top of the bars.
Ingredient Tips: When choosing cream cheese, look for blocks that are firm and not overly soft in the store. If you’re dairy-free, you can try a plant-based cream cheese, but I haven’t tested that myself, so results may vary. For the pumpkin puree, I recommend Libby’s because it’s consistently thick and not watery. If you use a different brand, you might need to drain off some excess liquid. And please, please use room temperature ingredients—it makes a huge difference in the smoothness of the cheesecake layer.
Equipment Needed
You don’t need a professional bakery setup for these bars, but having the right tools makes the process smoother. Here’s what I use:
- 9×13-inch baking pan: This is the perfect size for these bars. A metal pan works best for even baking. If you only have glass, reduce the oven temperature by 25°F to prevent over-browning.
- Electric hand mixer or stand mixer: You’ll need this to cream the butter and sugar for the crust and to beat the cheesecake filling until smooth. A stand mixer is easier, but a hand mixer works just fine. I’ve used both, and honestly, the hand mixer is less cleanup.
- Parchment paper: Lining the pan is crucial for easy removal. I learned this the hard way after a stuck-bar disaster. Leave some overhang on the sides to use as handles.
- Mixing bowls: You’ll need at least two—one for the crust dough and one for the cheesecake filling. I prefer stainless steel or glass.
- Rubber spatula: For scraping down the sides of the bowl and spreading the dough evenly in the pan.
- Measuring cups and spoons: Accurate measurements matter in baking, so use proper measuring tools, not random kitchen spoons.
- Sharp knife: For clean slices. A chef’s knife works better than a serrated one here. Wipe it clean between cuts for neat edges.
Budget-Friendly Tip: If you don’t have a 9×13 pan, you can use two 8×8 square pans and adjust the baking time slightly. Just keep an eye on them—they’ll bake faster in smaller pans.
Preparation Method
Alright, let’s get to the fun part. I’ve broken this down into clear steps so you can follow along without any confusion. Trust me, if I can nail these bars after a hardware store conversation, you can too.
Step 1: Preheat and Prepare the Pan
Preheat your oven to 350°F (175°C). Line your 9×13-inch baking pan with parchment paper, leaving about 2 inches of overhang on the long sides. This will be your lifeline for lifting the bars out later. Lightly grease the parchment with a little butter or non-stick spray, just to be safe.
Step 2: Make the Snickerdoodle Crust Dough
In a large mixing bowl, beat the softened butter and 1 cup of granulated sugar together with an electric mixer on medium speed until light and fluffy—about 3 minutes. You want it pale and airy. Add the egg and beat until fully incorporated, scraping down the sides of the bowl as needed.
In a separate bowl, whisk together the flour, cream of tartar, baking soda, 1 teaspoon of cinnamon, and salt. Gradually add the dry ingredients to the butter mixture, mixing on low speed until just combined. Don’t overmix, or the crust will be tough. The dough will be soft and slightly sticky—that’s perfect.
Step 3: Press the Crust into the Pan
Reserve about 1 cup of the dough for the topping—just set it aside in the bowl for now. Transfer the remaining dough to your prepared pan. Using your hands or a rubber spatula, press it evenly into the bottom of the pan, making sure it reaches all the corners. I find that slightly wetting my fingers helps prevent sticking. Pop the pan in the refrigerator while you make the cheesecake filling—this helps the crust hold its shape.
Step 4: Make the Pumpkin Cheesecake Filling
In a clean mixing bowl, beat the softened cream cheese and 3/4 cup of sugar together until smooth and creamy—about 2 minutes. Scrape down the sides and bottom of the bowl. Add the pumpkin puree, vanilla extract, pumpkin pie spice, 1/2 teaspoon of cinnamon, and salt. Beat on medium speed until well combined and silky.
Add the eggs one at a time, beating on low speed after each addition just until incorporated. Overbeating at this stage can incorporate too much air, which leads to cracks in the cheesecake. You want a smooth, homogenous mixture. It should look like a thick, spiced custard.
Step 5: Assemble the Layers
Remove the pan with the crust from the refrigerator. Pour the pumpkin cheesecake filling over the crust and spread it evenly with a spatula. Take the reserved crust dough and crumble it into small pieces over the top of the cheesecake layer. Don’t worry about making it perfect—some bigger chunks, some smaller bits. That’s the charm.
Step 6: Add the Cinnamon-Sugar Topping
In a small bowl, mix together the 2 tablespoons of sugar and 1 teaspoon of cinnamon. Sprinkle this mixture evenly over the crumbled dough topping. This is what creates that beautiful, crackly snickerdoodle top.
Step 7: Bake to Perfection
Bake in the preheated oven for 35 to 40 minutes. The edges should be set and lightly golden, but the center will still have a slight jiggle—that’s okay. It will continue to set as it cools. If the top is browning too quickly after 25 minutes, tent the pan loosely with aluminum foil.
Here’s a sensory cue: your kitchen will smell like a fall candle factory exploded, but in the best way. The cinnamon and pumpkin spice will be intoxicating.
Step 8: Cool and Chill
Place the pan on a wire rack and let it cool completely at room temperature—this takes about 1 to 2 hours. Then, cover the pan with plastic wrap and refrigerate for at least 4 hours, or overnight. This is the hardest part, I know, but it’s essential. The bars need time to set properly for clean slices. I’ve rushed this step before, and let me tell you, it was a mess. Patience, my friend.
Step 9: Slice and Serve
Once fully chilled, use the parchment overhang to lift the entire block of bars out of the pan. Place it on a cutting board. Use a sharp knife to slice into squares—I usually get 12 to 16 bars, depending on how generous I’m feeling. Wipe the knife clean between cuts for neat edges. Serve cold or at room temperature. They’re amazing either way.
Cooking Tips & Techniques
I’ve made these bars more times than I care to count, and I’ve learned a few things along the way. Here are my best tips to ensure your bars turn out perfect every time.
- Room Temperature is Key: I cannot stress this enough. Your butter, cream cheese, and eggs should all be at room temperature. Cold ingredients don’t emulsify properly, leading to a lumpy cheesecake filling or a dense crust. Take them out of the fridge about an hour before you start baking.
- Don’t Overmix the Cheesecake Filling: Once you add the eggs, mix on low speed and stop as soon as the streaks disappear. Overmixing incorporates too much air, which can cause the cheesecake to puff up and then crack as it cools. We want a smooth, dense texture, not a soufflé.
- Use a Water Bath (Optional but Helpful): If you’re worried about cracks, you can place the baking pan inside a larger roasting pan and pour hot water into the outer pan until it reaches halfway up the sides of the baking pan. This creates a humid environment that helps the cheesecake bake evenly. I’ve done it both ways, and honestly, for these bars, it’s not strictly necessary because the crumble topping hides any imperfections.
- Check for Doneness: The center should still have a slight wobble when you gently shake the pan. If it’s completely firm, it’s overbaked. The residual heat will finish the cooking process as it cools.
- Chill Overnight for Best Results: I know it’s tempting to dig in after a few hours, but overnight chilling gives the flavors time to meld and the texture to become perfectly creamy. The bars slice much cleaner too. Trust me on this one.
- My Biggest Failure: The first time I made these, I used cold cream cheese straight from the fridge. The filling was lumpy, and I ended up with pockets of unmixed cream cheese in the baked bars. It was still edible, but not pretty. Now I always set my ingredients out ahead of time. Learn from my mistake!
Variations & Adaptations
One of the best things about this recipe is how adaptable it is. Here are some variations I’ve tried and loved.
- Gluten-Free Version: Swap the all-purpose flour with a 1:1 gluten-free baking flour blend. I’ve used Bob’s Red Mill with great success. The texture will be slightly more tender, but the flavor is spot on. Add 1/4 teaspoon of xanthan gum if your blend doesn’t already include it.
- Dairy-Free Version: Use a high-quality vegan butter (like Miyoko’s) and a plant-based cream cheese (like Kite Hill). The texture might be a tad softer, so chill the bars for a full 8 hours before slicing. I’ve tested this, and it works well for a dairy-free option.
- Spice It Up: If you love a stronger spice kick, add 1/4 teaspoon of ground ginger and a pinch of ground cloves to the cheesecake filling. You can also add a pinch of black pepper—it sounds weird, but it actually enhances the pumpkin flavor.
- Add a Crunch: Sprinkle 1/2 cup of chopped pecans or walnuts over the crumble topping before baking. The nuts add a lovely crunch and pair beautifully with the pumpkin and cinnamon. I did this for a Thanksgiving gathering, and it was a hit.
- Make It a Layer Cake: Double the recipe and bake it in two 9-inch round cake pans. Layer them with extra cream cheese frosting for an epic pumpkin snickerdoodle layer cake. It’s a showstopper for birthdays.
- Pumpkin-Free Option: Believe it or not, you can skip the pumpkin puree and use 1 cup of sweet potato puree instead. The flavor is different but equally delicious. Just make sure to drain any excess liquid from the sweet potato before using.
Serving & Storage Suggestions
These bars are incredibly versatile when it comes to serving. Here’s how I like to enjoy them.
Serving Temperature: I prefer them cold straight from the fridge—the cheesecake layer is firm and creamy, like a dreamy custard. But they’re also fantastic at room temperature, especially if you want the crust to be a bit softer. Try both and see which you prefer.
Presentation Ideas: For a pretty presentation, dust the tops with a little extra cinnamon or a light sprinkle of powdered sugar. Serve each bar on a small plate with a dollop of whipped cream and a drizzle of caramel sauce. It looks fancy but takes two seconds. For a fall party, arrange the bars on a wooden board with apple slices and cinnamon sticks for a rustic vibe.
Complementary Dishes: These bars pair beautifully with a hot cup of coffee, a spiced chai latte, or a glass of cold milk. If you’re serving them as part of a dessert spread, they go well with apple crisp, pecan pie, or a simple vanilla ice cream. Honestly, they’re the star of the show, so keep the sides simple.
Storage Instructions: Store leftover bars in an airtight container in the refrigerator for up to 5 days. I like to place a piece of parchment paper between layers to prevent sticking. The flavors actually deepen after a day or two—if you can wait that long.
Freezing Instructions: These bars freeze beautifully. Once they are fully chilled and sliced, arrange them in a single layer on a baking sheet and freeze for 1 hour. Then transfer the frozen bars to a freezer-safe container or zip-top bag, separating layers with parchment paper. They’ll keep for up to 3 months. To thaw, transfer to the refrigerator overnight or let them sit at room temperature for about 30 minutes.
Reheating: I don’t usually reheat these bars because I love them cold, but if you prefer a warm dessert, microwave a single bar for 15 to 20 seconds. The crust will soften, and the cheesecake will become slightly gooey. It’s a different experience, but still delicious.
Nutritional Information & Benefits
Let’s be real—these are a treat, not a health food. But that doesn’t mean they can’t have some redeeming qualities. Here’s a rough estimate of the nutritional values per bar (based on 12 servings):
- Calories: Approximately 380-420 per bar
- Fat: 24g (14g saturated)
- Carbohydrates: 40g (28g sugar)
- Protein: 6g
- Fiber: 2g
- Sodium: 280mg
Health Benefits to Note: Pumpkin is a fantastic source of vitamin A (in the form of beta-carotene), which is great for eye health and immune function. It’s also rich in fiber and antioxidants. The cinnamon in this recipe has anti-inflammatory properties and can help regulate blood sugar levels. And hey, cream cheese has calcium, right? I’m not saying these are a superfood, but they’re not a total nutritional wasteland either.
Dietary Considerations: These bars contain gluten, dairy, and eggs, so they’re not suitable for those with allergies to those ingredients. However, as I mentioned in the variations section, you can adapt them to be gluten-free and dairy-free with some simple swaps. They are vegetarian-friendly.
My Personal Take: I believe in balance. I eat these bars because they bring me joy, and that has its own nutritional value. I pair them with a healthy meal and don’t stress about the numbers. Food is about more than just fuel—it’s about comfort, connection, and happiness. And these bars deliver on all three.
Conclusion
These Ultimate Pumpkin Spice Snickerdoodle Cheesecake Bars are everything I love about fall baking wrapped into one incredible dessert. They have the nostalgic charm of a snickerdoodle cookie, the creamy indulgence of cheesecake, and the warm, spiced flavor of pumpkin that makes autumn so special. They’re the kind of recipe that feels impressive but is secretly simple enough for a weekday baking project.
I hope you give them a try and make them your own. Maybe you’ll add a little extra cinnamon, or swap in pecans, or serve them with a scoop of ice cream. That’s the beauty of this recipe—it’s a foundation for your creativity. I’d love to hear how they turn out for you. Did you make any changes? Did they disappear as fast as they do in my house? Drop a comment below and let me know. And if you share a photo on Pinterest, tag me—I want to see your beautiful bars!
Happy baking, friends. May your kitchen smell like cinnamon and your heart feel full of fall.
Frequently Asked Questions
Can I use a different pan size?
Yes, you can use two 8×8 square pans instead of one 9×13 pan. Just divide the dough and filling evenly between the two pans. The baking time will be slightly shorter—start checking at 25 minutes. Keep an eye on them so they don’t overbake.
Why did my cheesecake layer crack?
Cracks usually happen from overmixing the filling (which incorporates too much air) or overbaking. Make sure you mix on low speed once the eggs are added, and remove the bars from the oven when the center still has a slight jiggle. Also, cooling them gradually at room temperature before refrigerating helps prevent cracks.
Can I make these bars ahead of time?
Absolutely! In fact, I recommend it. These bars taste even better after a day or two in the fridge because the flavors have time to meld. You can make them up to 3 days in advance. Just keep them covered in the refrigerator until you’re ready to serve.
Can I use pumpkin pie filling instead of pumpkin puree?
I don’t recommend it. Pumpkin pie filling is pre-sweetened and pre-spiced, which will throw off the sugar and spice balance in this recipe. It also often contains thickeners that can change the texture of the cheesecake. Stick with 100% pure pumpkin puree for the best results.
How do I get clean slices?
The key is chilling the bars thoroughly—at least 4 hours, but overnight is better. Use a sharp knife and wipe it clean with a damp paper towel between each cut. For the cleanest slices, you can even run the knife under hot water and dry it off before cutting. This helps the knife glide through the cheesecake without dragging.
Pin This Recipe!
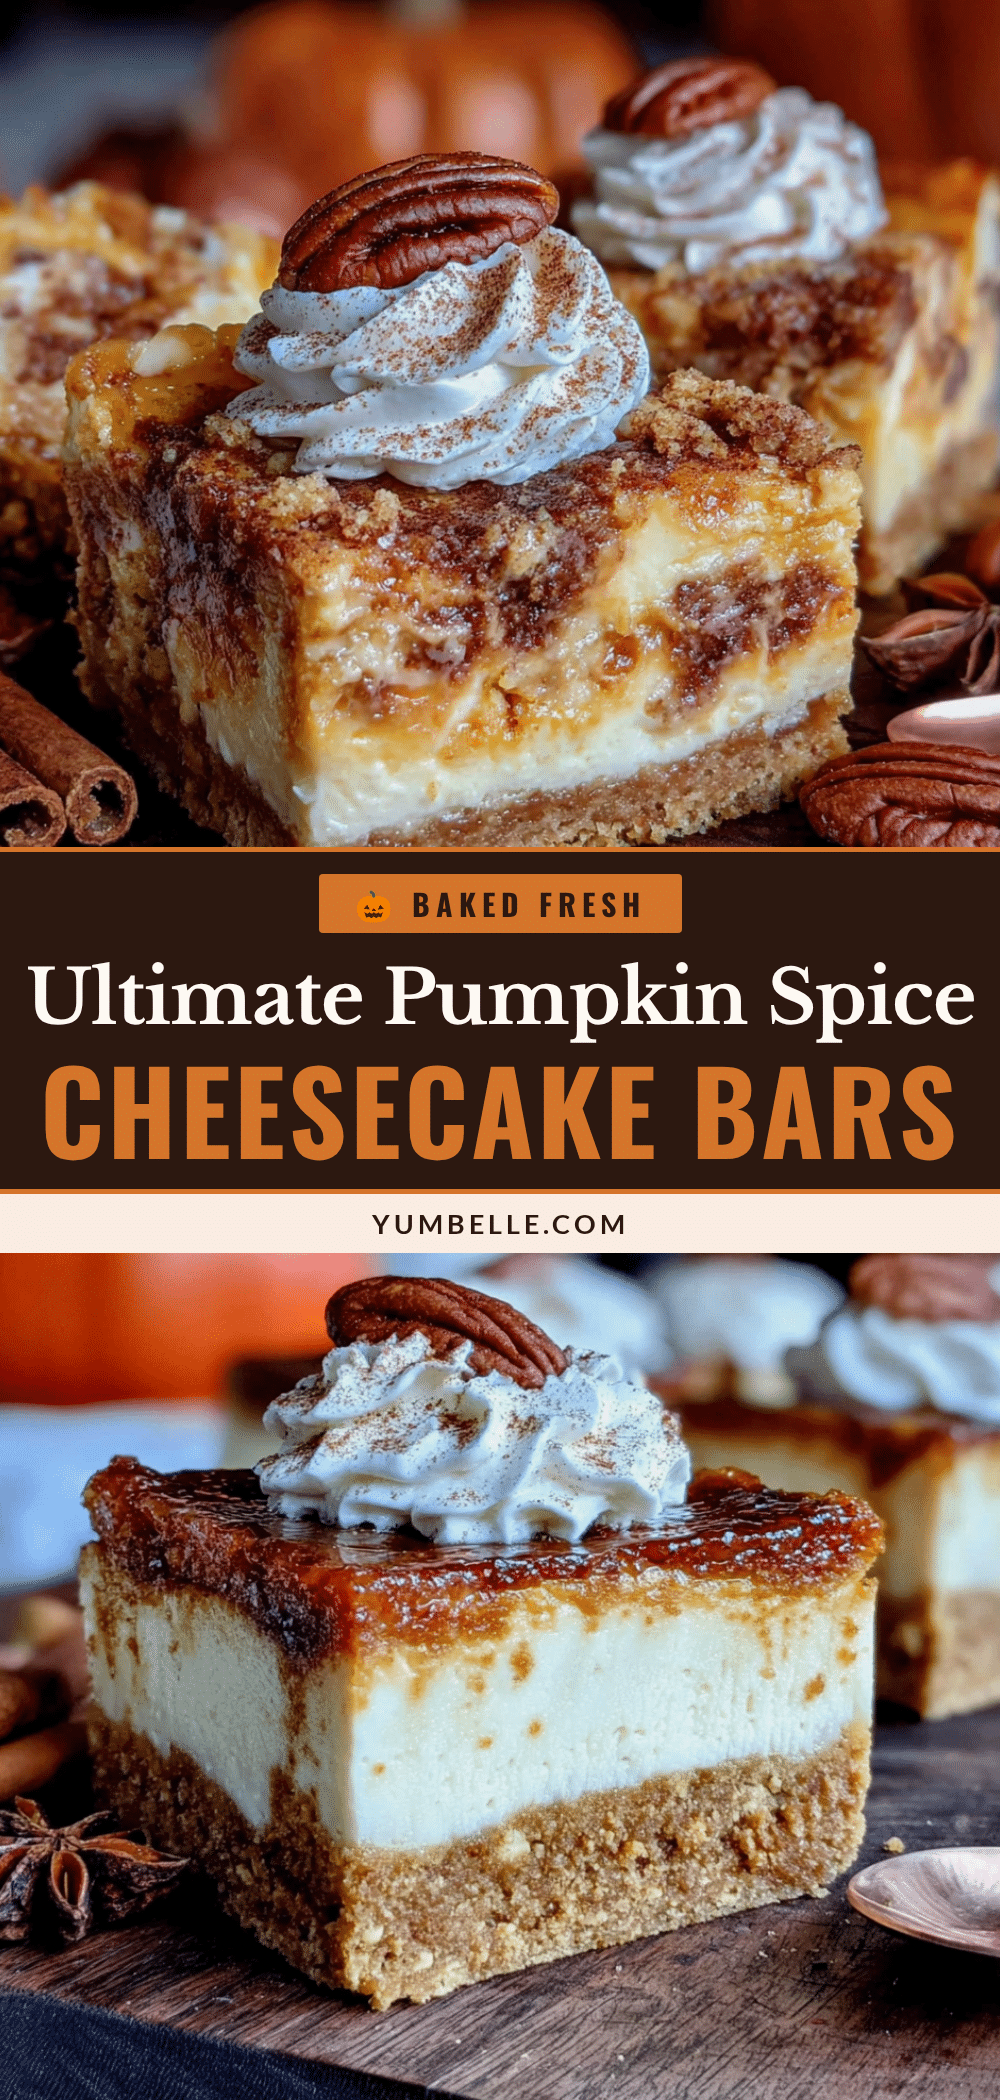
Ultimate Pumpkin Spice Snickerdoodle Cheesecake Bars: Easy Fall Dessert
These pumpkin spice snickerdoodle cheesecake bars feature a soft, buttery snickerdoodle crust, a creamy pumpkin cheesecake center, and a cinnamon-sugar top that crackles when you bite into it. They’re the perfect fall dessert for gatherings or a cozy night in.
- Prep Time: 30 minutes
- Cook Time: 35-40 minutes
- Total Time: 5 hours 10 minutes (including chilling)
- Yield: 12-16 bars 1x
- Category: Dessert
- Cuisine: American
Ingredients
- 2 cups (240g) all-purpose flour
- 1 cup (2 sticks, 226g) unsalted butter, softened
- 1 cup (200g) granulated sugar
- 1 large egg, room temperature
- 1 teaspoon cream of tartar
- 1/2 teaspoon baking soda
- 1 teaspoon ground cinnamon
- 1/2 teaspoon salt
- 16 ounces (two 8-ounce blocks) full-fat cream cheese, softened
- 3/4 cup (150g) granulated sugar
- 1 cup (240ml) pumpkin puree (100% pure pumpkin)
- 2 large eggs, room temperature
- 1 teaspoon vanilla extract
- 1 tablespoon pumpkin pie spice
- 1/2 teaspoon ground cinnamon
- 1/4 teaspoon salt
- 2 tablespoons (25g) granulated sugar
- 1 teaspoon ground cinnamon
Instructions
- Preheat oven to 350°F (175°C). Line a 9×13-inch baking pan with parchment paper, leaving about 2 inches of overhang on the long sides. Lightly grease the parchment.
- In a large mixing bowl, beat softened butter and 1 cup granulated sugar with an electric mixer on medium speed until light and fluffy, about 3 minutes. Add the egg and beat until fully incorporated, scraping down the sides as needed.
- In a separate bowl, whisk together flour, cream of tartar, baking soda, 1 teaspoon cinnamon, and salt. Gradually add dry ingredients to butter mixture, mixing on low speed until just combined. The dough will be soft and slightly sticky.
- Reserve about 1 cup of dough for the topping. Press remaining dough evenly into the bottom of the prepared pan. Refrigerate while making the filling.
- In a clean mixing bowl, beat softened cream cheese and 3/4 cup sugar until smooth and creamy, about 2 minutes. Add pumpkin puree, vanilla extract, pumpkin pie spice, 1/2 teaspoon cinnamon, and salt. Beat on medium speed until well combined and silky.
- Add eggs one at a time, beating on low speed after each addition just until incorporated. Do not overmix.
- Remove pan from refrigerator. Pour pumpkin cheesecake filling over crust and spread evenly. Crumble reserved dough over the top.
- In a small bowl, mix 2 tablespoons sugar and 1 teaspoon cinnamon. Sprinkle evenly over the crumbled dough.
- Bake for 35 to 40 minutes. Edges should be set and lightly golden; center will still have a slight jiggle. If top browns too quickly after 25 minutes, tent loosely with foil.
- Cool completely on a wire rack at room temperature (1 to 2 hours). Then cover with plastic wrap and refrigerate for at least 4 hours, or overnight.
- Use parchment overhang to lift bars out of pan. Place on cutting board and slice into squares with a sharp knife, wiping clean between cuts. Serve cold or at room temperature.
Notes
Room temperature ingredients are crucial for a smooth cheesecake. Do not overmix the cheesecake filling after adding eggs. Chill overnight for best texture and clean slices. For a water bath, place pan in a larger roasting pan with hot water halfway up the sides (optional).
Nutrition
- Serving Size: 1 bar
- Calories: 380420
- Sugar: 28
- Sodium: 280
- Fat: 24
- Saturated Fat: 14
- Carbohydrates: 40
- Fiber: 2
- Protein: 6
Keywords: pumpkin cheesecake bars, snickerdoodle cheesecake, fall dessert, pumpkin spice, easy dessert, cheesecake bars


