Love this? Save it for later!
Share the inspiration with your friends
This was supposed to be a layered peanut butter chocolate mousse cake. I had it all planned out—a fancy, multi-step dessert that would take up my entire Sunday afternoon. But the power flickered twice during a storm, my electric mixer gave up halfway through whipping the cream, and I was already running late for a friend’s Super Bowl party. So I grabbed a bag of chocolate chips, a jar of peanut butter, and whatever else was in my pantry, and I just started throwing things together. What came out was nothing like the plan—and better.
Honestly, I stood there staring at the pan, wondering if I had lost my mind. No oven. No mixer. No complicated layers. Just a few bowls, a spatula, and some serious determination. I pressed the mixture into the pan, crossed my fingers, and stuck it in the fridge. When I pulled it out an hour later, I almost didn’t believe it. These Easy No-Bake Peanut Butter Football Brownies were rich, fudgy, and ridiculously satisfying. My friend’s husband ate four of them before halftime.
Maybe you’ve been there too—staring down a kitchen disaster with a clock ticking and guests on the way. I mean, let’s face it, the best recipes often come from those moments when everything goes sideways. These no-bake brownies are proof that you don’t need fancy equipment or hours of prep to make something unforgettable. The peanut butter and chocolate combo is classic, but the texture is what gets you. It’s dense and creamy with just the right amount of crunch from the peanuts. And shaping them like footballs? That was a last-minute idea that turned into the whole reason I keep making them. Every game day, every potluck, every time I need a dessert that looks impressive but takes almost no effort—this is the one.
Why You’ll Love This Recipe
Let me tell you, after testing this recipe about six times (you know, for research purposes), I can confidently say these are the best no-bake brownies I’ve ever made. And I’ve made a lot of brownies in my day. Here’s why this one stands out:
- No Oven Required: This is a game-changer, especially during hot summer months or when your oven is otherwise occupied. Just mix, press, and chill. That’s it.
- Simple Ingredients: You probably have most of these in your pantry right now. Chocolate chips, peanut butter, butter, powdered sugar—no fancy grocery trips needed.
- Perfect for Game Day: The football shape makes them an instant hit at Super Bowl parties, tailgates, or any sports-themed gathering. They look like you tried way harder than you actually did.
- Crowd-Pleaser: Kids and adults alike go crazy for these. I’ve brought them to three different parties now, and they disappear faster than the wings.
- Unbelievably Delicious: The texture is pure magic—creamy peanut butter filling sandwiched between layers of rich, fudgy chocolate. It’s comfort food reimagined, faster and easier but with the same soul-soothing satisfaction.
What makes this recipe different from all the other no-bake brownies out there? It’s the ratio. I spent a lot of time getting the balance just right so the peanut butter layer is soft and melt-in-your-mouth, not crumbly or dry. The chocolate layer sets up firm but still has that fudgy bite. And the football shape? That’s the kind of creative twist that turns a simple dessert into something memorable. Perfect for impressing guests without stress, or turning a simple snack into something special.
What Ingredients You Will Need
This recipe uses simple, wholesome ingredients to deliver bold flavor and satisfying texture without the fuss. Most of these are pantry staples, which makes these brownies perfect for last-minute cravings or unexpected guests.
For the Chocolate Base Layer
- 2 cups semi-sweet chocolate chips (I prefer Ghirardelli for the best melt and flavor)
- 1/2 cup unsalted butter, cut into small cubes (adds richness and helps the chocolate set properly)
- 1/4 cup creamy peanut butter (use a natural brand without added sugar for best results)
- 1 teaspoon vanilla extract
- Pinch of salt (enhances the chocolate flavor)
For the Peanut Butter Filling
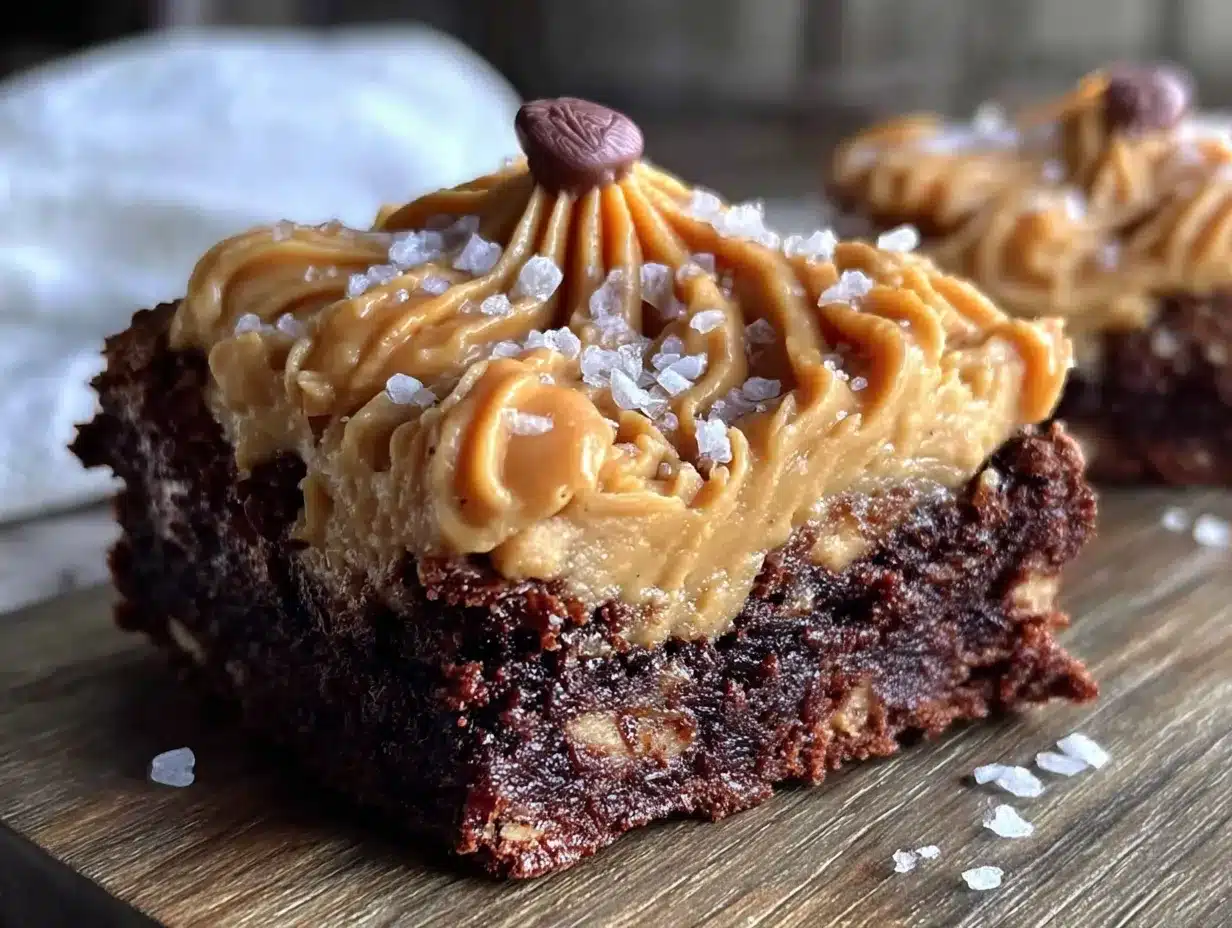
- 1 cup creamy peanut butter (I recommend Skippy or Jif for the right consistency)
- 1/2 cup unsalted butter, softened to room temperature
- 2 cups powdered sugar, sifted (sifting prevents lumps)
- 1 teaspoon vanilla extract
- 2-3 tablespoons milk (use dairy-free milk if needed, like almond or oat milk)
For the Chocolate Top Layer
- 1 1/2 cups semi-sweet chocolate chips
- 1/4 cup creamy peanut butter
- 1 tablespoon coconut oil (optional, but gives a beautiful shine)
For Decoration
- White chocolate melting wafers (about 1/4 cup, for the football laces)
- Crushed peanuts (optional, for garnish)
Ingredient Selection Tips: Look for creamy peanut butter that doesn’t have oil separation—it makes the filling much smoother. If you’re using natural peanut butter, stir it really well before measuring. For the chocolate, avoid chocolate chips with stabilizers if possible; they don’t melt as smoothly. I’ve found that Ghirardelli melting wafers work beautifully, but good-quality chocolate bars chopped into small pieces are even better.
Substitution Guidance: For a dairy-free version, use vegan butter or coconut oil in place of butter, and dairy-free chocolate chips. For a gluten-free option, these are naturally gluten-free as long as you check your chocolate chip labels. If you want a lower sugar version, you can use sugar-free chocolate chips and a sugar substitute like Swerve in the filling, but the texture will be slightly different.
Equipment Needed
You don’t need much for these brownies, which is honestly my favorite part about them. Here’s what you’ll need:
- 8×8-inch baking pan (a 9×9 works too, but the brownies will be slightly thinner)
- Parchment paper (for easy removal—trust me, don’t skip this)
- Medium microwave-safe bowls (at least two, for melting chocolate)
- Large mixing bowl (for the peanut butter filling)
- Hand mixer or stand mixer (you can do it by hand, but a mixer makes the filling fluffy)
- Spatula (for spreading and smoothing layers)
- Measuring cups and spoons
- Sharp knife (for cutting the brownies into football shapes)
- Small piping bag or zip-top bag (for the white chocolate laces)
Alternative Suggestions: No microwave? Use a double boiler on the stovetop for melting chocolate—just be careful not to get any water in the bowl. No hand mixer? A wooden spoon and some elbow grease work fine, though the filling won’t be quite as fluffy. For the piping bag, a small zip-top bag with the corner snipped off works perfectly. I’ve used that trick more times than I can count.
Budget-Friendly Options: You don’t need expensive equipment for this recipe. A basic 8×8 pan from the dollar store works just as well as a fancy one. Just make sure it’s metal or glass, not silicone, because silicone pans don’t conduct cold as well and the layers might not set evenly.
Preparation Method
- Prepare the pan: Line your 8×8-inch baking pan with parchment paper, leaving some overhang on two opposite sides. This will make lifting the brownies out so much easier later. Lightly spray the parchment with non-stick spray just to be safe.
- Make the chocolate base layer: In a medium microwave-safe bowl, combine 2 cups semi-sweet chocolate chips, 1/2 cup unsalted butter (cubed), and 1/4 cup creamy peanut butter. Microwave in 30-second intervals, stirring well after each, until completely smooth. This usually takes about 1.5 to 2 minutes total. Stir in 1 teaspoon vanilla extract and a pinch of salt. Pour this mixture into the prepared pan and spread it evenly. Pop it in the refrigerator to set while you make the filling—about 15 minutes should do it.
- Make the peanut butter filling: In a large mixing bowl, beat together 1 cup creamy peanut butter and 1/2 cup softened unsalted butter until smooth and creamy. Gradually add 2 cups sifted powdered sugar, beating on low speed to prevent a sugar cloud. Add 1 teaspoon vanilla extract and 2 tablespoons milk. Beat on medium-high speed until light and fluffy, about 2-3 minutes. If the mixture seems too thick, add the remaining tablespoon of milk. The texture should be spreadable but not runny—think thick frosting consistency.
- Assemble the middle layer: Remove the pan from the fridge. The chocolate base should be firm but not rock hard. Spoon the peanut butter filling over the chocolate layer and spread it evenly using an offset spatula or the back of a spoon. Don’t press too hard—you don’t want to disturb the chocolate layer underneath. Return the pan to the refrigerator for another 20 minutes.
- Make the chocolate top layer: In a clean microwave-safe bowl, combine 1 1/2 cups semi-sweet chocolate chips, 1/4 cup creamy peanut butter, and 1 tablespoon coconut oil (if using). Microwave in 30-second intervals, stirring after each, until smooth. Let it cool for 5 minutes—this is important because pouring hot chocolate over the cold peanut butter layer could cause it to melt and mix together.
- Add the top layer: Pour the slightly cooled chocolate mixture over the peanut butter layer. Tilt the pan gently to spread it evenly, or use a spatula. Don’t overwork it—just let it flow naturally. Tap the pan on the counter a few times to release any air bubbles.
- Chill completely: Refrigerate the assembled brownies for at least 2 hours, or until the top layer is firm to the touch. For best results, let them chill overnight. The longer they set, the cleaner your cuts will be.
- Cut into football shapes: Once fully set, lift the brownies out of the pan using the parchment overhang. Place on a cutting board. Use a sharp knife to cut the slab into rectangles, about 2 inches by 3 inches. Then, trim the corners of each rectangle to create an oval football shape. Don’t stress about perfection—footballs are naturally a little irregular. Save the scraps for snacking (chef’s privilege).
- Add the laces: Melt the white chocolate wafers according to package directions. Transfer to a small piping bag or zip-top bag with a tiny corner snipped off. Pipe two curved lines down the center of each football, then add small crosswise lines to mimic laces. Let the white chocolate set for about 10 minutes at room temperature, or pop them back in the fridge for 5 minutes.
- Optional garnish: Sprinkle crushed peanuts around the edges of the serving platter for a nice finishing touch. Or, if you’re feeling extra, drizzle a little more melted white chocolate over the top.
Sensory Cues: When melting the chocolate base, it should be glossy and smooth, with no streaks of unmelted butter. The peanut butter filling should look like soft frosting—pale, fluffy, and holding its shape when you lift the beater. When you press the top chocolate layer, it should feel firm but give slightly, like a chilled fudge.
Troubleshooting: If your chocolate seizes (gets grainy and stiff), you probably got a drop of water in it. Start over with fresh chocolate—it’s not salvageable. If the peanut butter filling is too crumbly, add milk a teaspoon at a time until it comes together. If the top chocolate layer won’t set, you might have used chocolate chips with too much stabilizer. Next time, use a good-quality chocolate bar.
Cooking Tips & Techniques
I learned a few things the hard way while perfecting these brownies. Here are the tips I wish someone had told me before my first attempt:
Patience is key with the layers. I know it’s tempting to rush, but each layer needs to be properly chilled before you add the next one. If the chocolate base isn’t firm enough, the peanut butter filling will sink into it and create a muddy mess. Trust me, I learned this when I tried to speed through the process for a party and ended up with a delicious but very ugly pan of swirled brownies. Still tasty, but not football-shaped.
Use a hot knife for clean cuts. Run your knife under hot water, dry it off, then make your cuts. The heat helps the knife glide through the chocolate layers without cracking them. Wipe the knife clean between cuts. This makes a huge difference in getting those football shapes looking sharp.
Don’t overheat the chocolate. Chocolate burns easily, and burnt chocolate is bitter and grainy. Always melt in short bursts and stir frequently. If you see any steam rising from the bowl, you’ve gone too far. Let it cool slightly before using.
Room temperature ingredients matter. The butter for the peanut butter filling needs to be properly softened—not melted, not cold from the fridge. If it’s too cold, the filling will be lumpy. If it’s melted, the filling will be greasy. Leave your butter out for about an hour before starting.
Multitasking strategy: While the chocolate base is chilling, make the peanut butter filling. While the filling is chilling, melt the top layer. This way, you’re always working ahead and the whole process takes less than 30 minutes of active time.
Variations & Adaptations
One of the best things about this recipe is how flexible it is. Here are some variations I’ve tried and loved:
Chocolate Peanut Butter Cup Version: Chop up 1 cup of Reese’s peanut butter cups and fold them into the peanut butter filling before spreading. It adds little pockets of extra chocolate and peanut butter that are absolutely divine. I did this for a birthday party once, and people lost their minds.
Gluten-Free Adaptation: These are naturally gluten-free, but double-check your chocolate chips. Some brands add wheat starch as a stabilizer. Enjoy Life Foods makes excellent dairy-free and gluten-free chocolate chips that work perfectly here.
Vegan Version: Use vegan butter sticks (like Earth Balance) in place of regular butter, and dairy-free chocolate chips. For the peanut butter filling, use a plant-based milk like oat milk. The texture comes out slightly softer but still delicious.
Spicy Mexican Chocolate Twist: Add 1/2 teaspoon cinnamon and a pinch of cayenne pepper to the chocolate base layer. The warmth of the spices pairs beautifully with the peanut butter. This is my personal favorite variation—it sounds weird, but trust me, it works.
Crunchy Peanut Butter Version: Use crunchy peanut butter in the filling instead of creamy. The little bits of peanut add texture and make the brownies even more satisfying. Just note that the filling won’t be as smooth for piping the laces, so you might want to stick with creamy for the top layer.
Different Shapes: Not into footballs? Use cookie cutters to make stars, hearts, or circles. The brownie slab is sturdy enough to hold its shape once chilled. These make great holiday treats—just change the shape and the sprinkle colors.
Serving & Storage Suggestions
Serving: These brownies are best served cold or at cool room temperature. Take them out of the fridge about 10 minutes before serving so they soften slightly—this makes the texture even more fudgy. Arrange them on a platter with the football laces facing up for maximum visual impact. For game day, I like to serve them on a wooden board with a few football-themed napkins and maybe some pretzel sticks on the side for dipping.
Complementary Dishes: These brownies pair beautifully with a cold glass of milk, a scoop of vanilla ice cream, or a hot cup of coffee. For a game day spread, serve them alongside spicy buffalo wings or salty pretzels—the contrast is perfect. I also love them with a drizzle of warm caramel sauce for an extra indulgent treat.
Storage: Store the brownies in an airtight container in the refrigerator for up to 1 week. Layer them between sheets of parchment paper to prevent sticking. They actually get better after a day or two as the flavors meld together. I’ve made these up to three days ahead for parties, and they were perfect.
Freezing: These freeze beautifully. Place the cut footballs on a baking sheet lined with parchment and freeze until solid (about 1 hour). Transfer to a freezer-safe container or zip-top bag, separating layers with parchment. They’ll keep for up to 3 months. To thaw, transfer to the refrigerator overnight. Don’t thaw at room temperature—the chocolate might sweat.
Reheating: These are meant to be served cold, but if you want a warm dessert, pop one in the microwave for about 10 seconds. The chocolate gets slightly melty while the peanut butter filling stays cool. It’s a whole different experience, and honestly, it’s worth trying at least once.
Nutritional Information & Benefits
Here’s the thing—these are a treat, not a health food. But that doesn’t mean they’re completely devoid of nutritional value. Let me break it down:
Estimated Nutritional Values (per brownie, based on 12 servings):
- Calories: 385
- Total Fat: 24g
- Saturated Fat: 11g
- Carbohydrates: 38g
- Fiber: 3g
- Sugar: 30g
- Protein: 8g
Health Benefits of Key Ingredients: Peanut butter is actually a decent source of protein and healthy monounsaturated fats. It also contains vitamin E, magnesium, and potassium. Dark chocolate (especially over 70% cocoa) is rich in antioxidants called flavonoids, which can support heart health. The coconut oil in the top layer contains medium-chain triglycerides, which are a quick source of energy.
Dietary Considerations: These brownies are naturally gluten-free and can be made dairy-free and vegan with simple substitutions. They are high in sugar and fat, so they’re best enjoyed in moderation—which, let’s be honest, is hard to do when they taste this good.
Allergen Note: This recipe contains peanuts, dairy (butter, milk), and soy (in chocolate chips). If you have allergies, use certified nut-free chocolate and a nut-free seed butter like sunflower seed butter in place of peanut butter. Just note that sunflower seed butter can turn green when combined with baking soda, so it might look a little funky—still tastes fine though.
My Personal Wellness Perspective: I believe in balance. These brownies are part of my life because they bring joy to special occasions. I don’t make them every week, but when I do, I enjoy every single bite without guilt. Food is about more than just nutrients—it’s about connection, celebration, and pleasure. These brownies deliver on all three fronts.
FAQs
Can I make these brownies without a microwave?
Absolutely! Use a double boiler on the stovetop to melt the chocolate. Just fill a small saucepan with an inch of water, bring it to a simmer, and place a heat-safe bowl on top (make sure the bottom doesn’t touch the water). Stir the chocolate until smooth. It takes a few extra minutes but works perfectly.
Why is my peanut butter filling crumbly?
This usually happens when the mixture is too dry. Add milk one teaspoon at a time until the filling comes together into a smooth, spreadable consistency. Also, make sure your butter is properly softened—cold butter won’t incorporate well and can lead to a crumbly texture.
How do I get clean football shapes?
Use a sharp knife and wipe it clean between cuts. For perfect ovals, you can use a football-shaped cookie cutter. Press it straight down and lift straight up—no twisting. If the cutter sticks, dip it in hot water and dry it off before each cut.
Can I use milk chocolate instead of semi-sweet?
You can, but the brownies will be much sweeter. Milk chocolate has more sugar and less cocoa butter, so the texture might be slightly softer. If you use milk chocolate, reduce the powdered sugar in the filling by about 1/4 cup to balance the sweetness.
How far in advance can I make these?
You can make these up to 3 days ahead and store them in the refrigerator. They actually taste better after a day because the flavors have time to meld. You can also freeze them for up to 3 months—just thaw in the refrigerator overnight before serving.
Conclusion
Look, I’m not going to tell you these Easy No-Bake Peanut Butter Football Brownies will change your life. But they might change your game day spread. They’re the kind of recipe that makes you look like a hero with almost zero effort. No oven, no complicated techniques, no fancy ingredients—just pure, unapologetic deliciousness in the shape of a football.
What I love most about this recipe is how it came from a moment of chaos. That failed mousse cake turned into something so much better, and now I can’t imagine game day without these brownies. They’re proof that sometimes the best things in life come from happy accidents. So go ahead, give them a try. Customize them with your favorite add-ins, shape them however you want, and don’t stress about perfection. The slightly imperfect ones always taste the best anyway.
I’d love to hear how yours turn out! Drop a comment below and let me know if you added any fun twists, or tag me in your photos on social media. And if you’re looking for more easy dessert ideas, check out my no-bake chocolate peanut butter bars—they’re basically cousins to these brownies and just as addictive. Happy cooking, friends!
Pin This Recipe!
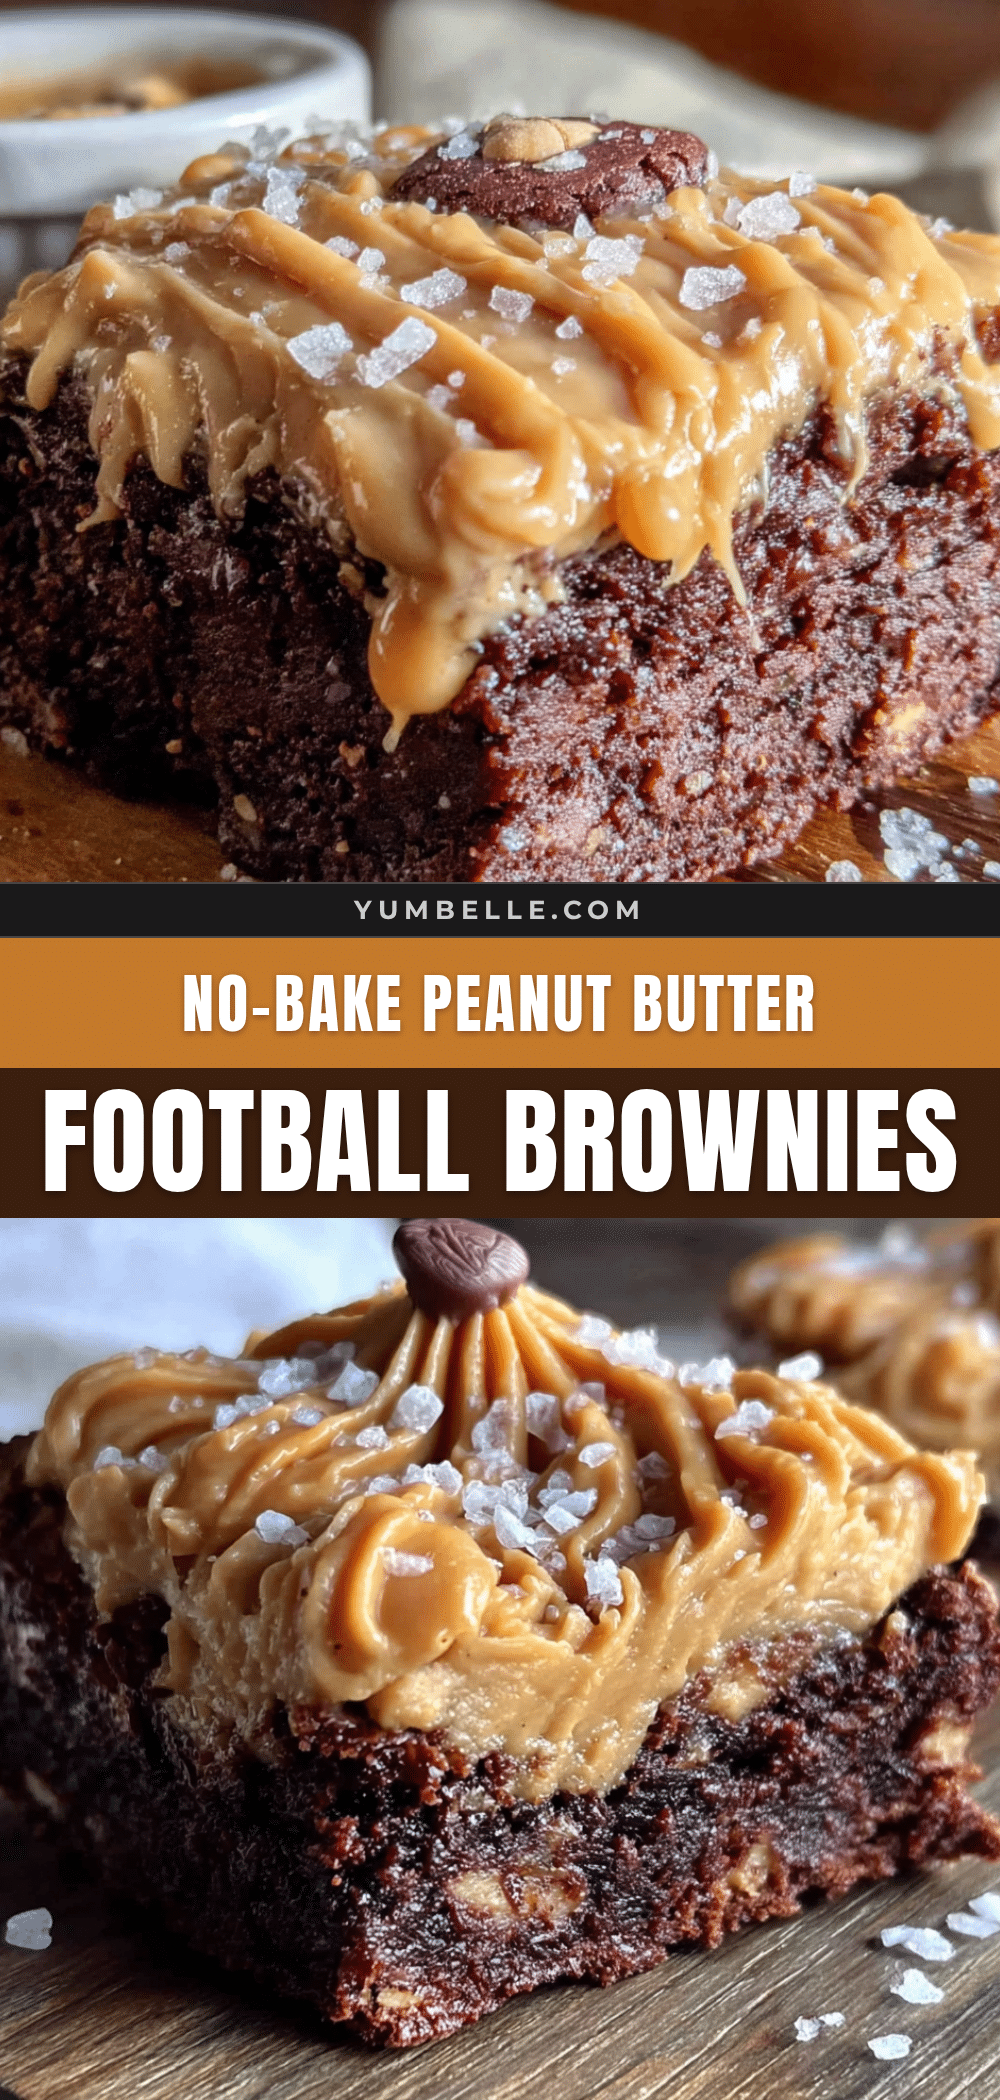
Easy No-Bake Peanut Butter Football Brownies: Best Game Day Dessert
Rich, fudgy no-bake brownies with a creamy peanut butter filling, shaped like footballs. Perfect for game day, potlucks, or any occasion where you want an impressive dessert with minimal effort.
- Prep Time: 30 minutes
- Cook Time: 0 minutes
- Total Time: 2 hours 30 minutes (includes chilling time)
- Yield: 12 servings 1x
- Category: Dessert
- Cuisine: American
Ingredients
- 2 cups semi-sweet chocolate chips
- 1/2 cup unsalted butter, cut into small cubes
- 1/4 cup creamy peanut butter
- 1 teaspoon vanilla extract
- Pinch of salt
- 1 cup creamy peanut butter
- 1/2 cup unsalted butter, softened to room temperature
- 2 cups powdered sugar, sifted
- 1 teaspoon vanilla extract
- 2–3 tablespoons milk
- 1 1/2 cups semi-sweet chocolate chips
- 1/4 cup creamy peanut butter
- 1 tablespoon coconut oil (optional)
- White chocolate melting wafers (about 1/4 cup)
- Crushed peanuts (optional, for garnish)
Instructions
- Prepare the pan: Line your 8×8-inch baking pan with parchment paper, leaving some overhang on two opposite sides. Lightly spray the parchment with non-stick spray.
- Make the chocolate base layer: In a medium microwave-safe bowl, combine 2 cups semi-sweet chocolate chips, 1/2 cup unsalted butter (cubed), and 1/4 cup creamy peanut butter. Microwave in 30-second intervals, stirring well after each, until completely smooth (about 1.5 to 2 minutes total). Stir in 1 teaspoon vanilla extract and a pinch of salt. Pour into the prepared pan and spread evenly. Refrigerate for about 15 minutes to set.
- Make the peanut butter filling: In a large mixing bowl, beat together 1 cup creamy peanut butter and 1/2 cup softened unsalted butter until smooth and creamy. Gradually add 2 cups sifted powdered sugar, beating on low speed. Add 1 teaspoon vanilla extract and 2 tablespoons milk. Beat on medium-high speed until light and fluffy, about 2-3 minutes. If too thick, add the remaining tablespoon of milk.
- Assemble the middle layer: Remove the pan from the fridge. Spoon the peanut butter filling over the chocolate layer and spread evenly. Return to the refrigerator for another 20 minutes.
- Make the chocolate top layer: In a clean microwave-safe bowl, combine 1 1/2 cups semi-sweet chocolate chips, 1/4 cup creamy peanut butter, and 1 tablespoon coconut oil (if using). Microwave in 30-second intervals, stirring after each, until smooth. Let cool for 5 minutes.
- Add the top layer: Pour the slightly cooled chocolate mixture over the peanut butter layer. Tilt the pan gently to spread evenly. Tap the pan on the counter a few times to release air bubbles.
- Chill completely: Refrigerate for at least 2 hours, or until the top layer is firm. For best results, chill overnight.
- Cut into football shapes: Lift the brownies out of the pan using the parchment overhang. Place on a cutting board. Cut into rectangles about 2 inches by 3 inches. Trim the corners of each rectangle to create an oval football shape.
- Add the laces: Melt white chocolate wafers according to package directions. Transfer to a small piping bag or zip-top bag with a tiny corner snipped off. Pipe two curved lines down the center of each football, then add small crosswise lines to mimic laces. Let set for about 10 minutes at room temperature, or refrigerate for 5 minutes.
- Optional garnish: Sprinkle crushed peanuts around the edges of the serving platter.
Notes
Patience is key with the layers—each layer needs to be properly chilled before adding the next. Use a hot knife for clean cuts. Don’t overheat the chocolate. Room temperature ingredients matter for the filling. These brownies are best served cold or at cool room temperature. Store in an airtight container in the refrigerator for up to 1 week. Freeze for up to 3 months.
Nutrition
- Serving Size: 1 brownie
- Calories: 385
- Sugar: 30
- Sodium: 150
- Fat: 24
- Saturated Fat: 11
- Carbohydrates: 38
- Fiber: 3
- Protein: 8
Keywords: no-bake brownies, peanut butter brownies, football brownies, game day dessert, Super Bowl dessert, easy dessert, no oven dessert


