Homemade Elderberry Gummies for Back-to-School Immune Support
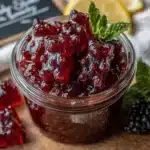
These homemade elderberry gummies are a quick and easy immune-boosting snack made with simple ingredients like dried elderberries, honey, and gelatin. Perfect for back-to-school season, they’re a delicious treat that kids love and parents can feel good about.
- Prep Time: 20 minutes
- Cook Time: 25 minutes
- Total Time: 45 minutes (plus 2-3 hours setting time)
- Yield: 40 gummies (about 20 servings of 2 gummies each) 1x
- Category: Snack
- Cuisine: American
Ingredients
Scale
- ½ cup (about 60g) dried elderberries
- 2 cups (480ml) water
- ¼ cup (85g) raw honey
- 3 tablespoons (about 28g) unflavored gelatin powder
- 2 tablespoons (30ml) fresh lemon juice
- 1 teaspoon vitamin C powder (optional)
- ½ teaspoon ginger powder (optional)
Instructions
- Make the elderberry concentrate: Combine the dried elderberries and water in a medium saucepan. Bring to a boil over medium-high heat, then reduce to a simmer. Cook for 20-25 minutes, or until the liquid has reduced by about half.
- Strain the berries: Place a fine-mesh strainer over a heat-safe bowl or large measuring cup. Carefully pour the mixture through the strainer, pressing gently on the berries with the back of a spoon to extract all the syrup. Discard the solids. You should have about 1 cup (240ml) of concentrated elderberry syrup. Let it cool for 5 minutes.
- Bloom the gelatin: While the syrup cools, pour ¼ cup (60ml) of the warm elderberry syrup into a small bowl. Sprinkle the gelatin powder evenly over the surface. Let it sit for 5 minutes without stirring.
- Combine everything: Pour the remaining ¾ cup (180ml) of warm elderberry syrup back into the saucepan. Add the honey, lemon juice, and any optional add-ins (vitamin C powder, ginger). Warm over low heat, stirring gently, until the honey dissolves completely. Do not let it boil.
- Incorporate the gelatin: Remove the saucepan from heat. Add the bloomed gelatin mixture and whisk until completely smooth, about 30 seconds.
- Fill the molds: Using a dropper or small measuring cup with a spout, carefully fill silicone gummy molds. Work quickly but steadily as the mixture will thicken as it cools. If it gets too thick, warm it gently over low heat.
- Set in the fridge: Place the filled molds on a flat tray or plate. Refrigerate for at least 2-3 hours, or until the gummies are firm to the touch.
- Pop them out: Once set, gently push the gummies out of the molds. Store in an airtight container in the refrigerator.
Notes
Don’t skip the blooming step for smooth gummies. Keep syrup warm but not hot (around 120°F) when adding gelatin. Gummies taste better after a day or two in the fridge. Store in an airtight container in the refrigerator for up to 2 weeks, or freeze for up to 3 months.
Nutrition
- Serving Size: 2 gummies
- Calories: 25
- Sugar: 5
- Sodium: 5
- Carbohydrates: 6
- Protein: 1
Keywords: elderberry gummies, immune support, homemade gummies, back-to-school, healthy snack, elderberry recipe, gelatin gummies