Love this? Save it for later!
Share the inspiration with your friends
I was replacing a leaky faucet—a job I had absolutely no business doing myself—when my plumber, a man named Earl who spoke mostly in grunts, took a break to eat his lunch out of a thermos. I wasn’t expecting cooking advice from a man who dealt with pipes all day, but there I was, covered in grime, listening to him describe exactly how to make one-pan garlic butter chicken thighs with vegetables. He said his wife made it every Tuesday, and it was the only reason he looked forward to the middle of the week. I laughed, but honestly, I was intrigued. He scribbled the gist of it on a scrap of paper towel, and I stuffed it in my pocket, fully expecting to lose it. I mean, the man fixed toilets for a living—what did he know about crispy chicken skin?
That night, exhausted and hungry, I found the crumpled paper towel in my laundry. The instructions were barely legible: “chicken, butter, garlic, any veg, one pan, 30 mins.” It was so simple it almost felt like a trick. But I had a pack of chicken thighs in the fridge and a sad bell pepper in the crisper drawer, so I figured, why not? Let me tell you, that first bite was a revelation. The chicken was unbelievably juicy, the garlic butter sauce was rich and savory, and the vegetables had soaked up all that flavor. It was the kind of dinner that makes you forget you spent two hours wrestling with a wrench. Maybe you’ve been there—exhausted, hungry, and just needing something good to happen. This recipe is that good thing.
It’s become my go-to for those nights when I need a win. No complicated steps, no sink full of dishes, just pure, comforting flavor that comes together in half an hour. Earl probably has no idea his lunchtime ramblings changed my cooking game, but they did. And now, every time I make these one-pan garlic butter chicken thighs, I think of that leaky faucet and the plumber who knew exactly what a tired person needed to eat.
Why You’ll Love This Recipe
Let’s face it—we all need recipes that work as hard as we do. This one-pan garlic butter chicken thighs recipe isn’t just another dinner idea. It’s the result of about twelve test runs in my own kitchen, tweaking the butter-to-garlic ratio and figuring out the perfect vegetable combination so you don’t have to. Here is why this recipe will become a staple in your home:
- Quick & Easy: From start to finish, this meal is on the table in under 30 minutes. Perfect for those weeknights when you walk in the door starving and need dinner now.
- Simple Ingredients: No fancy grocery trips needed. You likely have garlic, butter, and a few vegetables in your kitchen right this second. If you have chicken thighs, you are already halfway there.
- Perfect for Busy Weeknights: This is the definition of a stress-free dinner. One pan means minimal prep and even less cleanup. It is great for meal prep, too.
- Crowd-Pleaser: I have served this to picky kids, skeptical in-laws, and my neighbor who “doesn’t really like chicken.” Every single person has asked for the recipe. It is that good.
- Unbelievably Delicious: The magic is in the garlic butter sauce. It coats every single piece of chicken and every vegetable in a savory, rich glaze that feels indulgent but uses everyday ingredients. The chicken skin gets perfectly crispy, and the vegetables get tender and sweet.
What makes this different from every other sheet pan chicken recipe out there? It is the technique. Instead of just tossing everything together, you sear the chicken first to get that golden, crispy skin. Then, you build the garlic butter sauce right in the same pan, scraping up all those browned bits (that is pure flavor, my friend). The vegetables go in, the chicken goes back on top, and everything finishes together in the oven. It is comfort food reimagined—faster, easier, but with the same soul-soothing satisfaction. This is the kind of meal that makes you close your eyes after the first bite. It is perfect for impressing guests without any stress, or turning a simple Tuesday into something memorable.
What Ingredients You Will Need
This recipe is built on simple, wholesome ingredients that deliver bold flavor without any fuss. Most of these are pantry staples, which is exactly what you want on a busy night. Here is everything you need and a few notes on how to pick the best ones.
- Bone-in, skin-on chicken thighs (4-6 thighs, about 2 lbs): This is non-negotiable for the best results. The bone keeps the meat incredibly juicy, and the skin gets perfectly crispy in the pan and oven. I prefer chicken thighs over breasts here because they are much more forgiving and don’t dry out. If you can only find boneless, skinless thighs, reduce the cooking time by about 5-7 minutes.
- Unsalted butter (4 tablespoons, softened): Butter is the star of the sauce. Using unsalted butter lets you control the salt level. I use a good quality butter like Kerrygold for the richest flavor, but any unsalted butter works perfectly.
- Garlic (6-8 cloves, minced): Fresh garlic is a must here. Do not use the pre-minced stuff from a jar—it has a different, slightly bitter flavor. You want that pungent, aromatic garlic that mellows into sweetness as it cooks. I mince mine by hand, but a garlic press works in a pinch.
- Fresh thyme (4-5 sprigs) or 1 teaspoon dried thyme: Thyme and chicken are a classic pairing. The earthy, slightly floral notes of thyme cut through the richness of the butter beautifully. If you only have dried thyme, use about a teaspoon and add it with the garlic.
- Fresh rosemary (1-2 sprigs) or 1/2 teaspoon dried rosemary: Rosemary adds a lovely piney, almost lemony aroma. It pairs wonderfully with the garlic. If using dried, crush it between your fingers before adding to release the oils.
- Baby potatoes (1 lb, halved or quartered): I love using baby Yukon Gold or red potatoes. They have a creamy texture and hold their shape well. Halve or quarter them so they cook evenly with the chicken. No need to peel them—the skin is thin and gets deliciously crispy.
- Carrots (3-4 medium, peeled and cut into 2-inch chunks): Carrots add a touch of natural sweetness that balances the savory garlic butter. Cut them into uniform chunks so they cook at the same rate as the potatoes.
- Broccoli florets (2 cups): Broccoli is my go-to green vegetable here. It roasts beautifully and catches all that garlic butter sauce in its little florets. You could also use green beans or asparagus, but add those later in the cooking time so they don’t get mushy.
- Olive oil (2 tablespoons): Used for searing the chicken. It has a higher smoke point than butter, so it creates a great crust without burning.
- Salt and black pepper (to taste): Do not skimp on seasoning. I use kosher salt and freshly cracked black pepper. Season the chicken generously on both sides—it makes a huge difference.
- Chicken broth (1/4 cup): This deglazes the pan and helps create the sauce. It lifts all those flavorful browned bits from the bottom of the pan. You can use low-sodium broth to control the salt level.
- Lemon juice (1 tablespoon, optional): A squeeze of fresh lemon juice at the end brightens up the whole dish. It is optional, but I highly recommend it. It cuts through the richness and makes the flavors pop.
Equipment Needed
One of the best things about this recipe is that you don’t need a ton of fancy equipment. Here is what you will need to pull this together:
- Large oven-safe skillet or cast-iron pan (12-inch): This is your workhorse. A cast-iron skillet is ideal because it heats evenly and goes from stovetop to oven without a problem. If you don’t have cast iron, any heavy-bottomed, oven-safe skillet will work. Avoid non-stick pans if possible, as they don’t get as hot for searing.
- Sharp chef’s knife and cutting board: For prepping your vegetables and mincing the garlic. A dull knife makes prep work frustrating and dangerous—trust me, I have the band-aids to prove it.
- Tongs: Essential for flipping the chicken thighs without piercing the skin. Piercing the skin lets the juices escape, and we want to keep all that goodness inside.
- Measuring spoons: For measuring out the butter, oil, and broth. Eyeballing it can work, but for consistent results, measure it out.
- Small bowl: For mixing the garlic butter compound. You could also do this right on the cutting board if you are short on dishes.
- Aluminum foil (optional): For tenting the chicken if it browns too quickly in the oven. I rarely need it, but it is good to have on hand.
If you don’t have an oven-safe skillet, you can sear the chicken in a regular pan, then transfer everything to a baking sheet or casserole dish to finish in the oven. It is one extra step, but it works perfectly. I have done this many times when my cast iron was busy making cornbread.
Preparation Method
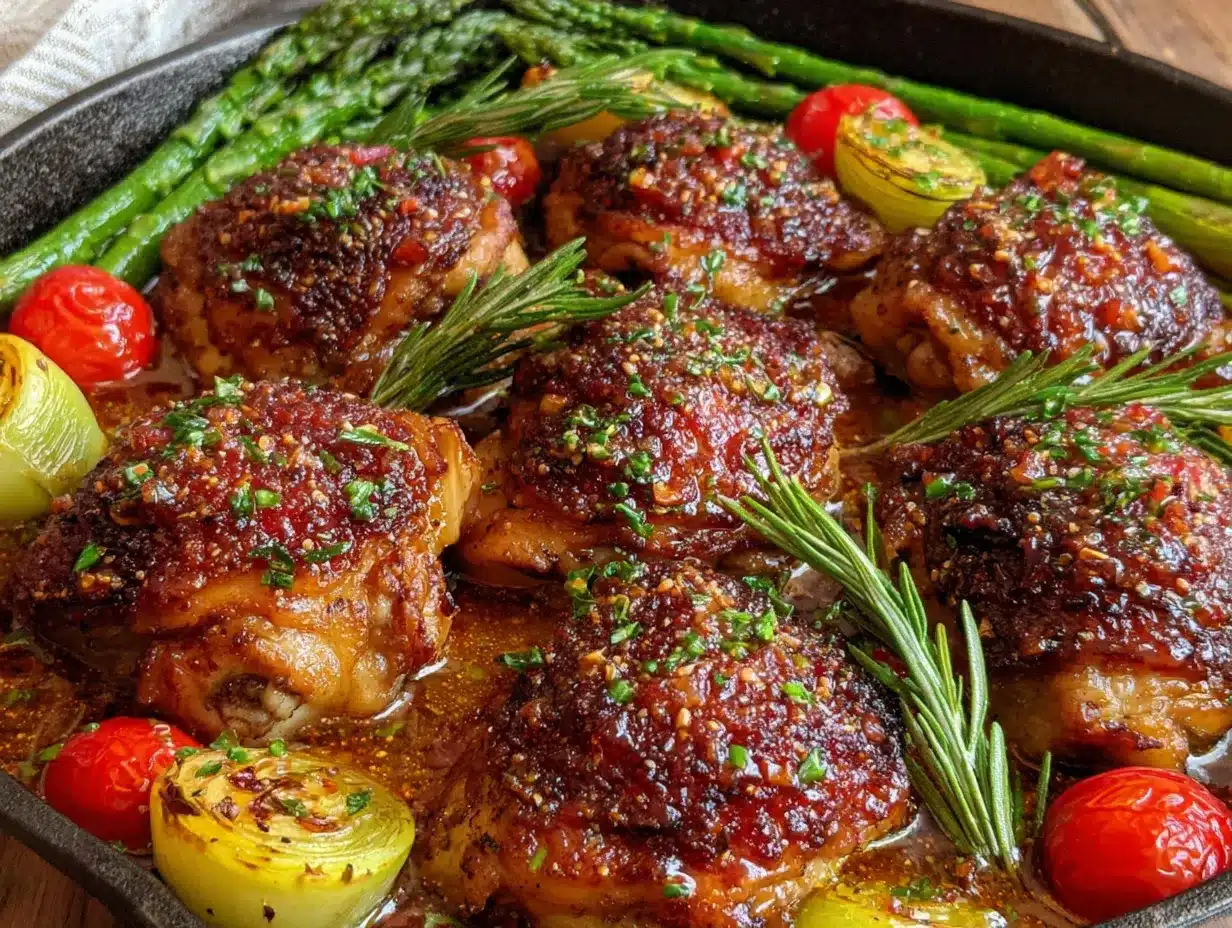
Alright, let’s get cooking. This whole process takes about 30 minutes from start to finish, and I am going to walk you through every step so you get perfect results on your first try.
- Preheat your oven to 400°F (200°C). Place your oven-safe skillet or cast-iron pan inside the oven while it preheats. This might sound weird, but getting the pan hot before you sear the chicken is a game-changer. It ensures that beautiful golden crust.
- Prepare the garlic butter compound. In a small bowl, combine the softened butter, minced garlic, chopped thyme leaves (from 2-3 sprigs), and chopped rosemary (from 1 sprig). Mix it all together with a fork until it is well combined. Set this aside at room temperature. The flavors will meld together while you prep everything else.
- Prep your vegetables. Wash and dry your potatoes, then halve or quarter them depending on size. You want them to be bite-sized. Peel the carrots and cut them into 2-inch chunks. Cut the broccoli into florets. Pat everything dry with a clean kitchen towel—dry vegetables roast better and don’t steam in the pan.
- Season the chicken. Pat the chicken thighs dry with paper towels. This is crucial for crispy skin. Season them generously on both sides with salt and black pepper. Do not be shy here—the seasoning is what builds the flavor base.
- Sear the chicken. Carefully remove the hot skillet from the oven (use oven mitts!). Place it on the stovetop over medium-high heat. Add the olive oil and swirl to coat the pan. Place the chicken thighs skin-side down in the hot pan. You should hear a loud sizzle. If you don’t, the pan isn’t hot enough. Let them cook undisturbed for 5-6 minutes, until the skin is deep golden brown and crispy. Do not move them around—let the crust form.
- Flip the chicken and add the garlic butter. Using your tongs, carefully flip each chicken thigh. Immediately add the garlic butter compound to the pan, dropping it in small pieces around the chicken. Let it melt and bubble. Add the fresh thyme and rosemary sprigs to the pan. Cook for 1-2 minutes, tilting the pan slightly and spooning the melted butter over the chicken. This is where the magic happens.
- Remove the chicken and build the sauce. Transfer the seared chicken thighs to a plate. They won’t be cooked through yet—that is fine. Now, add the chicken broth to the hot pan. Use a wooden spoon or spatula to scrape up all the browned bits from the bottom of the pan. This is called deglazing, and it is pure flavor. Let the broth simmer for about 1 minute, reducing slightly.
- Add the vegetables. Toss the potatoes and carrots into the pan first. They take a bit longer to cook. Stir them around to coat them in the garlic butter sauce. Spread them in an even layer. Nestle the chicken thighs back into the pan, skin-side up, on top of the vegetables.
- Roast in the oven. Place the skillet in the preheated oven. Roast for 15 minutes. After 15 minutes, remove the pan from the oven and add the broccoli florets. Tuck them in around the chicken and potatoes. Return the pan to the oven for another 10-12 minutes, or until the chicken reaches an internal temperature of 165°F (74°C) and the vegetables are tender and caramelized.
- Finish and serve. Remove the skillet from the oven. Squeeze the fresh lemon juice over everything if you are using it. Let the dish rest for 5 minutes before serving. This allows the juices to redistribute. Spoon the pan juices over the chicken and vegetables when you plate it.
A note on timing: Every oven runs a little differently. If your chicken is browning too quickly, tent the pan loosely with aluminum foil for the last 5-7 minutes of cooking. If your vegetables need more time, remove the chicken to a plate and return the vegetables to the oven for an extra 5 minutes.
Cooking Tips & Techniques
I have made this one-pan garlic butter chicken thighs recipe more times than I can count, and I have learned a few things the hard way. Here are my best tips to ensure your dinner is perfect every single time.
Don’t skip the searing step. I know it is tempting to just throw everything in the pan and let the oven do the work, but that initial sear is where the flavor lives. That golden, crispy skin is non-negotiable for the best texture. Plus, the browned bits left in the pan are the foundation of your sauce. If you skip the sear, you end up with pale, flabby chicken skin and a bland sauce. Trust me, I made that mistake once and never again.
Pat your chicken dry. This is the single most important step for crispy skin. Moisture is the enemy of browning. Take an extra minute to really dry those thighs with paper towels. I even let them sit uncovered in the fridge for 10 minutes if I have time. It makes a noticeable difference.
Cut your vegetables uniformly. This is a lesson I learned when I ended up with burnt potatoes and raw carrots. Cut everything into similar-sized pieces so they cook at the same rate. For the broccoli, I add it later in the cooking process because it cooks faster than root vegetables. If you add it at the beginning, you will get mushy, sad broccoli.
Use a meat thermometer. Chicken thighs are forgiving, but they are best at 165°F (74°C). Overcooking them can make them dry, even with the bone-in. I use an instant-read thermometer and check the thickest part of the thigh without touching the bone. It takes the guesswork out of dinner.
Let the pan rest. I know you are hungry, but letting the dish rest for 5 minutes off the heat makes a huge difference. The juices redistribute into the meat, and the sauce thickens slightly. If you serve it immediately, everything will be a bit watery. Patience pays off here.
One mistake I made: I once used salted butter and added extra salt to the dish. It was borderline inedible. Always use unsalted butter so you have full control over the sodium. You can always add more salt at the table, but you can’t take it out.
Variations & Adaptations
This recipe is incredibly flexible. Here are some of my favorite ways to change it up depending on what I have in the fridge or who I am cooking for.
Dairy-Free Version: Swap the butter for a good quality vegan butter or use olive oil. The flavor will be slightly different, but it is still delicious. I have used a garlic-infused olive oil before, and it was fantastic. Just reduce the amount slightly as oil is more liquid than butter.
Seasonal Vegetable Swap: In the summer, I swap the root vegetables for zucchini, yellow squash, and cherry tomatoes. Add these later in the cooking process—about 10 minutes before the chicken is done—because they cook much faster. In the fall, I use butternut squash and Brussels sprouts. The squash will need about the same cooking time as the potatoes.
Spicy Kick: Add 1/2 teaspoon of red pepper flakes to the garlic butter compound. It adds a subtle warmth without being overwhelming. I love this version on cold nights. It just feels cozy and a little bit fiery.
Herb Variations: Not a fan of thyme and rosemary? Use oregano and basil for a more Italian vibe, or use smoked paprika and cumin for a smoky, almost barbecue flavor. The garlic butter base is so versatile that it works with almost any herb or spice blend.
Lemon-Herb Version: Add the zest of one lemon to the garlic butter compound and increase the lemon juice at the end. It makes the dish much brighter and more vibrant. I do this version in the spring when I want something lighter.
One variation I tried: I once added a tablespoon of honey to the garlic butter before roasting. It created a sticky, sweet-and-savory glaze on the chicken that was absolutely incredible. Just keep an eye on it in the oven so the honey doesn’t burn. It is a keeper for when you want something a little different.
Serving & Storage Suggestions
This dish is a complete meal in one pan, but here is how to serve it up and store any leftovers (if you have any).
Serving: Serve the chicken and vegetables hot, straight from the pan. Spoon any remaining pan juices over the top—that is liquid gold right there. I like to garnish with a sprinkle of fresh parsley or a few extra thyme leaves for color. This dish is hearty enough to stand on its own, but it also pairs beautifully with a simple green salad dressed with lemon vinaigrette. If you want something to soak up all that sauce, a crusty baguette or some warm dinner rolls are perfect.
Storage: Let any leftovers cool completely to room temperature. Transfer the chicken and vegetables to an airtight container. Store in the refrigerator for up to 3-4 days. The flavors actually get better as they meld together overnight, so this is a great make-ahead meal.
Reheating: The best way to reheat this is in the oven or a skillet, not the microwave. The microwave will make the chicken skin soggy. Place the leftovers in a single layer on a baking sheet and reheat in a 350°F (175°C) oven for about 10-15 minutes, until warmed through. Alternatively, reheat in a skillet over medium heat with a splash of chicken broth to refresh the sauce. The chicken skin will crisp back up nicely this way.
Freezing: You can freeze this dish, but the texture of the vegetables will change slightly. Potatoes and carrots freeze reasonably well, but broccoli can get a bit mushy. To freeze, let everything cool completely, then transfer to a freezer-safe container. Freeze for up to 3 months. Thaw overnight in the refrigerator before reheating using the oven method above.
How flavors develop: Honestly, this dish is even better the next day. The garlic and herb flavors continue to meld, and the chicken absorbs more of the sauce. I often double the recipe just so I can have leftovers for lunch. It is that good.
Nutritional Information & Benefits
This one-pan garlic butter chicken thighs recipe is not just delicious—it also offers some solid nutritional benefits. Here is a rough estimate per serving (based on one chicken thigh and a generous portion of vegetables).
| Nutrient | Amount Per Serving |
|---|---|
| Calories | 480-520 |
| Protein | 35g |
| Fat | 28g |
| Saturated Fat | 12g |
| Carbohydrates | 30g |
| Fiber | 6g |
| Sugar | 8g |
| Sodium | 650mg |
Health Benefits: Chicken thighs are a great source of high-quality protein, which is essential for muscle repair and keeping you full. They also contain iron and zinc, which support your immune system. The vegetables provide a good dose of fiber, vitamins A and C, and antioxidants. Broccoli is packed with vitamin K and vitamin C, while carrots are loaded with beta-carotene, which is great for eye health. The garlic is not just for flavor—it has anti-inflammatory properties and may support heart health.
Dietary Considerations: This recipe is naturally gluten-free and can be made dairy-free with a simple swap. It is also relatively low in carbs for a hearty meal, especially if you reduce the amount of potatoes or swap them for cauliflower florets. If you are watching your sodium, use low-sodium chicken broth and go easy on the added salt. I personally love that this meal feels indulgent but is actually pretty balanced. It is comfort food that doesn’t weigh you down.
Potential Allergens: This recipe contains dairy (butter). It is free of nuts, eggs, soy, and shellfish. Always double-check your ingredient labels if you have specific allergies.
Conclusion
So there you have it—my plumber’s secret weapon for a perfect weeknight dinner. These one-pan garlic butter chicken thighs with vegetables are proof that you don’t need fancy techniques or a dozen pots and pans to create something truly memorable. It is simple, it is fast, and it is absolutely packed with flavor. The crispy chicken skin, the tender vegetables, that rich garlic butter sauce—it all comes together in one pan and in under 30 minutes.
I love this recipe because it reminds me that the best ideas often come from the most unexpected places. A leaky faucet and a grumpy plumber taught me more about efficient cooking than any cookbook ever did. And now, every time I make it, I feel a little bit of that Tuesday night magic. I hope you give it a try and make it your own. Swap in your favorite vegetables, add a pinch of heat, or keep it exactly as written—it is hard to go wrong.
When you make these garlic butter chicken thighs, I would love to hear about it. Drop a comment below and tell me how it turned out. Did you try a different vegetable? Did your family ask for seconds? Share your wins, your tweaks, and even your happy accidents. And if you loved it, please share this recipe with a friend who needs an easy win on a busy night. Happy cooking, my friend!
Frequently Asked Questions
Can I use chicken breasts instead of thighs?
You can, but I do not recommend it for this recipe. Chicken breasts cook faster and can dry out easily, especially with the oven roasting time. If you must use breasts, use boneless, skinless ones and reduce the oven time by about 5-7 minutes. Check the internal temperature early—165°F (74°C) is your target. The skin-on, bone-in thighs are really the star here for moisture and flavor.
How do I prevent the garlic from burning?
Garlic burns quickly, so the key is to add it at the right time. In this recipe, you add the garlic butter compound after you flip the chicken, and it only cooks for a minute or two on the stovetop before going into the oven. The oven temperature of 400°F (200°C) is moderate enough to caramelize the garlic without burning it. If your oven runs hot, you can tent the pan with foil for the last 10 minutes of cooking.
Can I make this in a slow cooker?
I would not recommend a slow cooker for this specific recipe. You will lose the crispy skin and the caramelized vegetables. The magic of this dish is the combination of stovetop searing and oven roasting. If you want a slow cooker version, you would need to sear the chicken first, then transfer everything to the slow cooker on low for 4-6 hours, but the texture will be completely different—much softer and less crispy.
What other vegetables can I use?
Almost any sturdy vegetable works well here. Try cauliflower florets, green beans (add them later), asparagus (add in the last 10 minutes), bell peppers, zucchini, or even fennel. Just remember to cut them into uniform sizes and add quicker-cooking vegetables later in the roasting time. Mushrooms are also fantastic—they soak up all that garlic butter sauce.
How do I get the skin extra crispy?
Three things: dry the chicken thoroughly, sear it skin-side down without moving it, and make sure the pan is hot. I also like to sprinkle a tiny pinch of baking powder on the skin before seasoning. It helps draw out moisture and creates an even crispier crust. Letting the chicken rest uncovered in the fridge for 10-15 minutes before cooking also works wonders.
Pin This Recipe!

One-Pan Garlic Butter Chicken Thighs with Vegetables: Easy 30-Minute Dinner

Juicy bone-in chicken thighs with crispy skin, roasted with tender vegetables in a rich garlic butter sauce. This one-pan meal comes together in under 30 minutes and is perfect for busy weeknights.
- Prep Time: 10 minutes
- Cook Time: 20 minutes
- Total Time: 30 minutes
- Yield: 4 servings 1x
- Category: Main Course
- Cuisine: American
Ingredients
- 4–6 bone-in, skin-on chicken thighs (about 2 lbs)
- 4 tablespoons unsalted butter, softened
- 6–8 cloves garlic, minced
- 4–5 sprigs fresh thyme (or 1 teaspoon dried thyme)
- 1–2 sprigs fresh rosemary (or 1/2 teaspoon dried rosemary)
- 1 lb baby potatoes (Yukon Gold or red), halved or quartered
- 3–4 medium carrots, peeled and cut into 2-inch chunks
- 2 cups broccoli florets
- 2 tablespoons olive oil
- Salt and black pepper to taste
- 1/4 cup chicken broth (low-sodium)
- 1 tablespoon lemon juice (optional)
Instructions
- Preheat oven to 400°F (200°C). Place an oven-safe skillet or cast-iron pan inside to heat.
- In a small bowl, combine softened butter, minced garlic, chopped thyme leaves (from 2-3 sprigs), and chopped rosemary (from 1 sprig). Set aside.
- Wash and dry potatoes, halve or quarter. Peel carrots and cut into 2-inch chunks. Cut broccoli into florets. Pat dry.
- Pat chicken thighs dry with paper towels. Season generously on both sides with salt and black pepper.
- Carefully remove hot skillet from oven and place over medium-high heat. Add olive oil and swirl to coat. Place chicken skin-side down in pan. Cook undisturbed for 5-6 minutes until skin is deep golden brown and crispy.
- Flip chicken using tongs. Immediately add garlic butter compound in small pieces around the chicken. Add fresh thyme and rosemary sprigs. Cook 1-2 minutes, spooning melted butter over chicken.
- Transfer seared chicken to a plate. Add chicken broth to hot pan, scraping up browned bits. Let simmer about 1 minute.
- Add potatoes and carrots to pan, stirring to coat in sauce. Spread in an even layer. Nestle chicken back in, skin-side up.
- Roast in oven for 15 minutes. Remove pan, add broccoli florets, tucking them around chicken and potatoes. Return to oven for 10-12 minutes, until chicken reaches 165°F (74°C) and vegetables are tender.
- Remove from oven. Squeeze lemon juice over top if using. Let rest 5 minutes before serving. Spoon pan juices over chicken and vegetables.
Notes
Pat chicken dry for crispy skin. Use unsalted butter to control salt. Add broccoli later to prevent mushiness. Let dish rest 5 minutes before serving. For extra crispy skin, sprinkle a tiny pinch of baking powder on skin before seasoning.
Nutrition
- Serving Size: 1 chicken thigh with
- Calories: 500
- Sugar: 8
- Sodium: 650
- Fat: 28
- Saturated Fat: 12
- Carbohydrates: 30
- Fiber: 6
- Protein: 35
Keywords: one-pan chicken, garlic butter chicken, chicken thighs, easy dinner, 30-minute meal, sheet pan dinner, weeknight dinner