Love this? Save it for later!
Share the inspiration with your friends
“You know that feeling when you’re halfway through shucking corn, and suddenly the power goes out? Yeah, that happened to me last summer.” I was halfway through prepping dinner on a bright Tuesday evening when my kitchen lights flickered and went dark. No chance to boil water or grill the corn the old-fashioned way. So, I grabbed my trusty Instant Pot, a gadget that’s saved me more times than I can count, and decided to give steaming corn on the cob a whirl. Honestly, I wasn’t expecting much—I mean, how could an electric pressure cooker replace the smoky, summer-fresh flavor of outdoor grilled corn?
But here’s the thing: what came out was nothing short of magical. The kernels were tender, juicy, and had this perfect pop of sweetness that made me forget all about the blackout. It was like the corn had been kissed by summer sunshine and a little pressure-cooked love. That night, my kitchen may have been dark, but my taste buds were definitely illuminated. Ever since, this Perfect Instant Pot Corn on the Cob recipe has become my go-to, especially when I want that fresh-corn goodness without the fuss or the grill.
Maybe you’ve been there too—craving fresh corn but short on time or equipment. Let me tell you, this method is a game-changer. Plus, it’s so simple that even if you get interrupted mid-prep (which I totally did when my dog decided to “help”), you’ll still end up with corn that’s tender, juicy, and downright delicious. Keep reading, and I’ll walk you through making the best corn on the cob you’ve ever tasted, right in your Instant Pot.
Why You’ll Love This Recipe
- Quick & Easy: Comes together in under 15 minutes, perfect for busy weeknights or last-minute side dishes.
- Simple Ingredients: No fancy additions needed — just fresh corn, water, and a pinch of salt for that classic flavor.
- Perfect for Any Occasion: Whether it’s a casual family dinner or a summer BBQ, this corn fits right in.
- Crowd-Pleaser: Kids and adults alike rave about how juicy and tender the kernels turn out.
- Unbelievably Delicious: The steaming process locks in moisture, giving you that fresh-picked sweetness without any sogginess.
This recipe isn’t your average corn on the cob. The Instant Pot method gently steams each ear to perfection — no boiling water splashing everywhere or guessing how long to cook. Plus, you can easily customize the timing for different corn sizes or textures you prefer. I’ve tried countless ways to make corn tender yet crisp, and this one nails the balance every time. It’s comfort food made effortless, which is exactly what you want when you’re juggling dinner and life’s little interruptions.
And if you’re like me, sometimes the simplest recipes become the most cherished. This Instant Pot Corn on the Cob recipe is exactly that — straightforward, reliable, and bursting with that sweet corn flavor we all crave.
What Ingredients You Will Need
This recipe uses simple, wholesome ingredients to deliver bold flavor and satisfying texture without the fuss. You probably have everything on hand already, which means no last-minute grocery runs. Here’s what you’ll need:
- Fresh corn on the cob: 4 ears, husked (look for ears with bright green husks and plump kernels for best results)
- Water: 1 cup (240 ml) — just enough to create steam without soaking the corn
- Salt: 1 teaspoon, plus extra for serving (kosher salt or sea salt works great)
- Butter: 2 tablespoons, melted (optional, but honestly, it makes the kernels sing)
- Black pepper: Freshly cracked, to taste (optional, for a little kick)
Ingredient tips:
- If you find your corn is a bit old or dry, soaking the ears in cold water for 15 minutes before cooking can help restore juiciness.
- For a dairy-free option, swap butter for olive oil or a plant-based spread.
- When choosing corn, smaller ears tend to cook faster and more evenly in the Instant Pot.
- I usually grab organic corn when it’s in season — it just tastes sweeter and fresher.
Equipment Needed
- Instant Pot or electric pressure cooker: This is key for the recipe. I use a 6-quart model, which fits four ears comfortably.
- Steaming rack or trivet: Included with most Instant Pots, it keeps the corn above the water.
- Tongs: For safely removing hot corn from the pot.
- Kitchen towel or oven mitts: To protect your hands when handling the hot pot and corn.
If you don’t have a steaming rack, a heatproof bowl or any metal trivet that fits inside your Instant Pot will do. I’ve even used a small metal cooling rack in a pinch. Just make sure the corn isn’t sitting directly in the water, or it’ll boil rather than steam.
For budget-friendly options, you can find basic steaming racks online for under $10 that will last for years. And honestly, investing in a good pair of tongs makes all the difference when you’re juggling hot food and kitchen tools.
Preparation Method
- Prepare the corn: Husk the corn by peeling back the green leaves and removing the silk threads. Give the ears a quick rinse under cold water to remove any remaining silk.
- Add water to the Instant Pot: Pour 1 cup (240 ml) of water into the bottom of the Instant Pot. The water creates the steam that cooks the corn evenly.
- Set up the steaming rack: Place the steaming rack or trivet inside the pot. Arrange the corn ears on the rack, stacking if necessary (I usually fit four ears comfortably by slightly overlapping).
- Seal and set: Close the Instant Pot lid and turn the valve to the sealing position. Set the pressure cooker to Manual or Pressure Cook on high for 2 minutes.
- Pressure cooking: Once the cooking cycle ends, do a quick release by carefully turning the valve to venting to release the steam. Be cautious of the hot steam!
- Remove the corn: Use tongs to lift the hot ears out of the pot. Place them on a plate or serving platter.
- Season and serve: Brush the corn with melted butter, sprinkle with salt and freshly cracked black pepper if you like. Serve immediately for best flavor and texture.
Preparation notes: The 2-minute cook time yields tender, juicy corn with a slight snap. If you prefer softer kernels, you can add an extra minute. Be careful not to overcook, or the kernels may become mushy.
The quick release step is important to stop the cooking process immediately. If you let the pressure release naturally, the corn will continue cooking and could get too soft.
Honestly, the first time I tried this, I forgot to set the valve to sealing and ended up steaming the corn on the outside of the pot—lesson learned! Now I triple-check before hitting start.
Cooking Tips & Techniques
Steaming corn in the Instant Pot is straightforward, but a few pro tips can make your results even better.
- Don’t skip the husking prep: Removing all silk ensures no pesky threads cling to the kernels after cooking.
- Use fresh corn: Freshness is key to juicy, sweet kernels. If you can, buy corn the same day or the day before.
- Stack carefully: If you’re stacking corn ears, arrange them so steam circulates well. I like to stagger them slightly rather than pile straight on top.
- Quick release for crispness: Always do a quick steam release to keep the kernels from overcooking and turning mushy.
- Don’t overdo the water: One cup is enough for steaming; too much water could cause boiling and dilute the flavor.
When I first started making corn in the Instant Pot, I experimented with longer cooking times, thinking more time meant better texture. Nope! The 2-minute mark is magic. Overcooked corn loses that satisfying bite.
One time, I tried adding sugar to the water (because, you know, corn is sweet), but honestly, it made no difference. Just a pinch of salt after cooking is all you really need.
Variations & Adaptations
If you want to switch things up, here are some ways to make this recipe your own:
- Garlic Herb Butter: Mix softened butter with minced garlic, chopped parsley, and a squeeze of lemon juice. Brush on the corn after cooking for a savory twist.
- Spicy Kick: Sprinkle corn with chili powder, smoked paprika, and a squeeze of lime for a zesty flavor. Perfect for summer parties.
- Cheesy Corn: After cooking, sprinkle grated Parmesan or Cotija cheese over the corn and add a dash of black pepper. It’s like a mini Mexican street corn experience without the mayo.
- Vegan Option: Use olive oil or vegan butter instead of dairy butter. Fresh herbs like basil or cilantro add a bright finish.
- Frozen Corn: No fresh corn on hand? You can use frozen corn-on-the-cob ears, adjusting the cooking time to 3 minutes to ensure they’re heated through.
Personally, I once tried adding a splash of apple cider vinegar to the water for a tangy undertone. It was interesting but not my favorite—stick to classic salt and butter for the pure corn flavor.
Serving & Storage Suggestions
Serve your Instant Pot Corn on the Cob hot and fresh, right off the pot. The butter will melt beautifully into the warm kernels, and the simple seasoning will shine.
This corn pairs wonderfully with grilled meats, fresh salads, or even alongside a creamy potato dish. For drinks, a crisp white wine or a cold lemonade complements the sweetness perfectly.
Leftovers can be stored in an airtight container in the refrigerator for up to 3 days. To reheat, wrap the corn in a damp paper towel and microwave for 30–45 seconds. Alternatively, you can re-steam the ears in the Instant Pot for 1 minute on high pressure.
Keep in mind, the corn’s sweetness and texture are best on day one, but reheating gently helps keep it juicy. Over time, the kernels may dry out slightly, so adding a bit of butter during reheating helps revive them.
Nutritional Information & Benefits
Each ear of corn contains approximately 90-110 calories, with the majority coming from carbohydrates—mostly natural sugars and fiber. Corn is a good source of vitamin C, B vitamins, and antioxidants like lutein and zeaxanthin, which support eye health.
This recipe is naturally gluten-free and low in fat (unless you add butter). It’s a wholesome side that complements a balanced meal without weighing you down.
From a personal wellness perspective, I appreciate how this simple dish provides comfort and nourishment without any complicated ingredients or processes. It’s a reminder that good food doesn’t have to be fancy to feel satisfying.
Conclusion
Whether you’re short on time, stuck indoors, or just craving perfectly tender corn on the cob, this Instant Pot method has your back. It’s quick, fuss-free, and yields juicy kernels every time—no grill required. I keep coming back to this recipe because it hits that sweet spot between simplicity and flavor, and honestly, it makes me feel like a kitchen ninja whenever I pull it off.
Feel free to customize the seasonings or toppings to match your mood or the occasion. And if you try it out, I’d love to hear how your Perfect Instant Pot Corn on the Cob turned out—drop a comment below or share your twists!
Remember, cooking should be fun, a little messy sometimes, and always rewarding. Happy eating!
FAQs
- How long does it take to cook corn on the cob in the Instant Pot? About 2 minutes at high pressure, plus the time for pressure build-up and quick release.
- Can I cook frozen corn on the cob in the Instant Pot? Yes! Increase the cooking time to 3 minutes to ensure they’re heated through.
- Do I need to add salt to the water when cooking corn in the Instant Pot? It’s not necessary. Adding salt after cooking enhances flavor better.
- How many ears of corn can I cook at once? A 6-quart Instant Pot can comfortably steam 4 ears stacked on the trivet.
- Can I add seasoning to the water for extra flavor? You can, but it generally doesn’t infuse much flavor. Season the corn directly after cooking for the best taste.
Pin This Recipe!

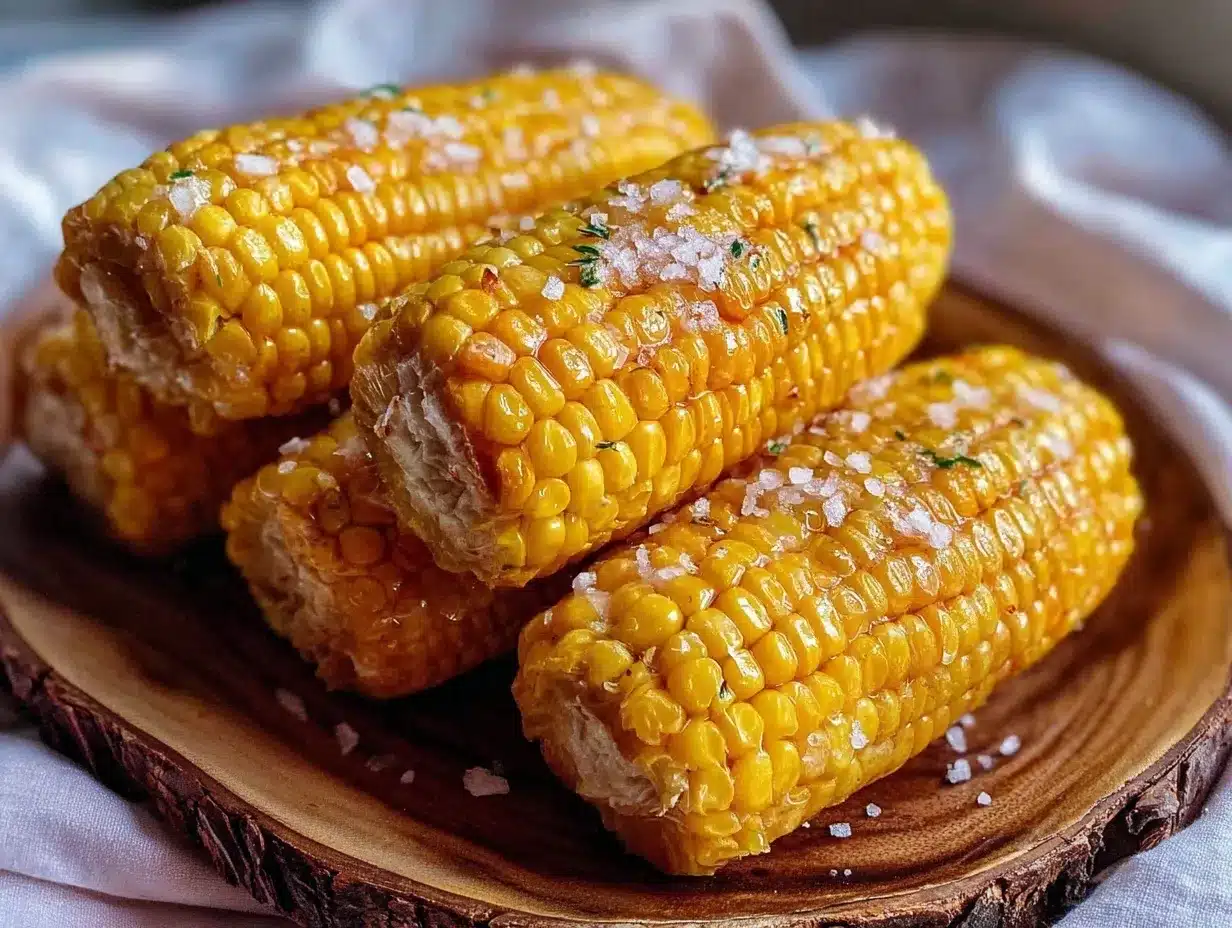
Perfect Instant Pot Corn on the Cob Recipe for Tender Juicy Kernels

This Instant Pot method yields tender, juicy corn on the cob with a perfect pop of sweetness, making it a quick and easy side dish for any occasion.
- Prep Time: 5 minutes
- Cook Time: 2 minutes
- Total Time: 15 minutes
- Yield: 4 servings 1x
- Category: Side Dish
- Cuisine: American
Ingredients
- 4 ears fresh corn on the cob, husked
- 1 cup (240 ml) water
- 1 teaspoon salt, plus extra for serving
- 2 tablespoons butter, melted (optional)
- Freshly cracked black pepper, to taste (optional)
Instructions
- Husk the corn by peeling back the green leaves and removing the silk threads. Rinse the ears under cold water to remove any remaining silk.
- Pour 1 cup (240 ml) of water into the bottom of the Instant Pot.
- Place the steaming rack or trivet inside the pot. Arrange the corn ears on the rack, stacking if necessary.
- Close the Instant Pot lid and turn the valve to the sealing position. Set the pressure cooker to Manual or Pressure Cook on high for 2 minutes.
- When the cooking cycle ends, do a quick release by carefully turning the valve to venting to release the steam.
- Use tongs to lift the hot ears out of the pot and place them on a plate or serving platter.
- Brush the corn with melted butter, sprinkle with salt and freshly cracked black pepper if desired. Serve immediately.
Notes
For softer kernels, increase cooking time to 3 minutes. Use quick release to prevent overcooking. Soak older corn in cold water for 15 minutes before cooking to restore juiciness. Butter is optional and can be substituted with olive oil or plant-based spread for a dairy-free option.
Nutrition
- Serving Size: 1 ear of corn
- Calories: 110
- Sugar: 6
- Sodium: 400
- Fat: 7
- Saturated Fat: 4
- Carbohydrates: 15
- Fiber: 2
- Protein: 3
Keywords: Instant Pot corn on the cob, pressure cooker corn, steamed corn, quick corn recipe, tender corn kernels